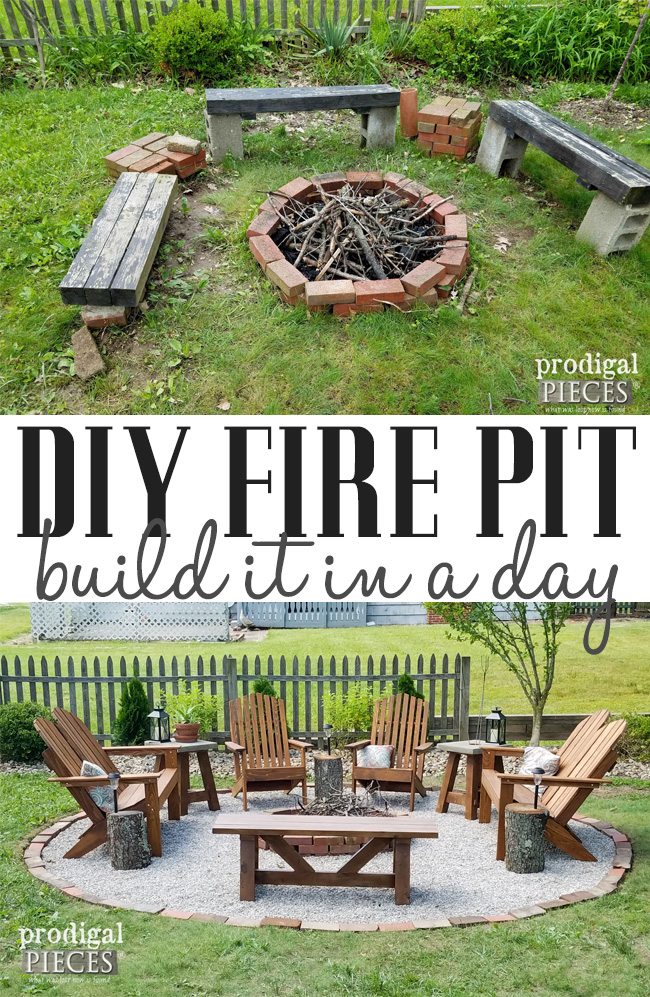
If you are just joining in, we have been working in our back yard this summer giving it a much needed facelift. First, was our DIY compost bin, then our DIY fire pit. Today we are sharing the next stage of our renovations – our DIY garden arbor with play area. It began like this…
A HOT MESS
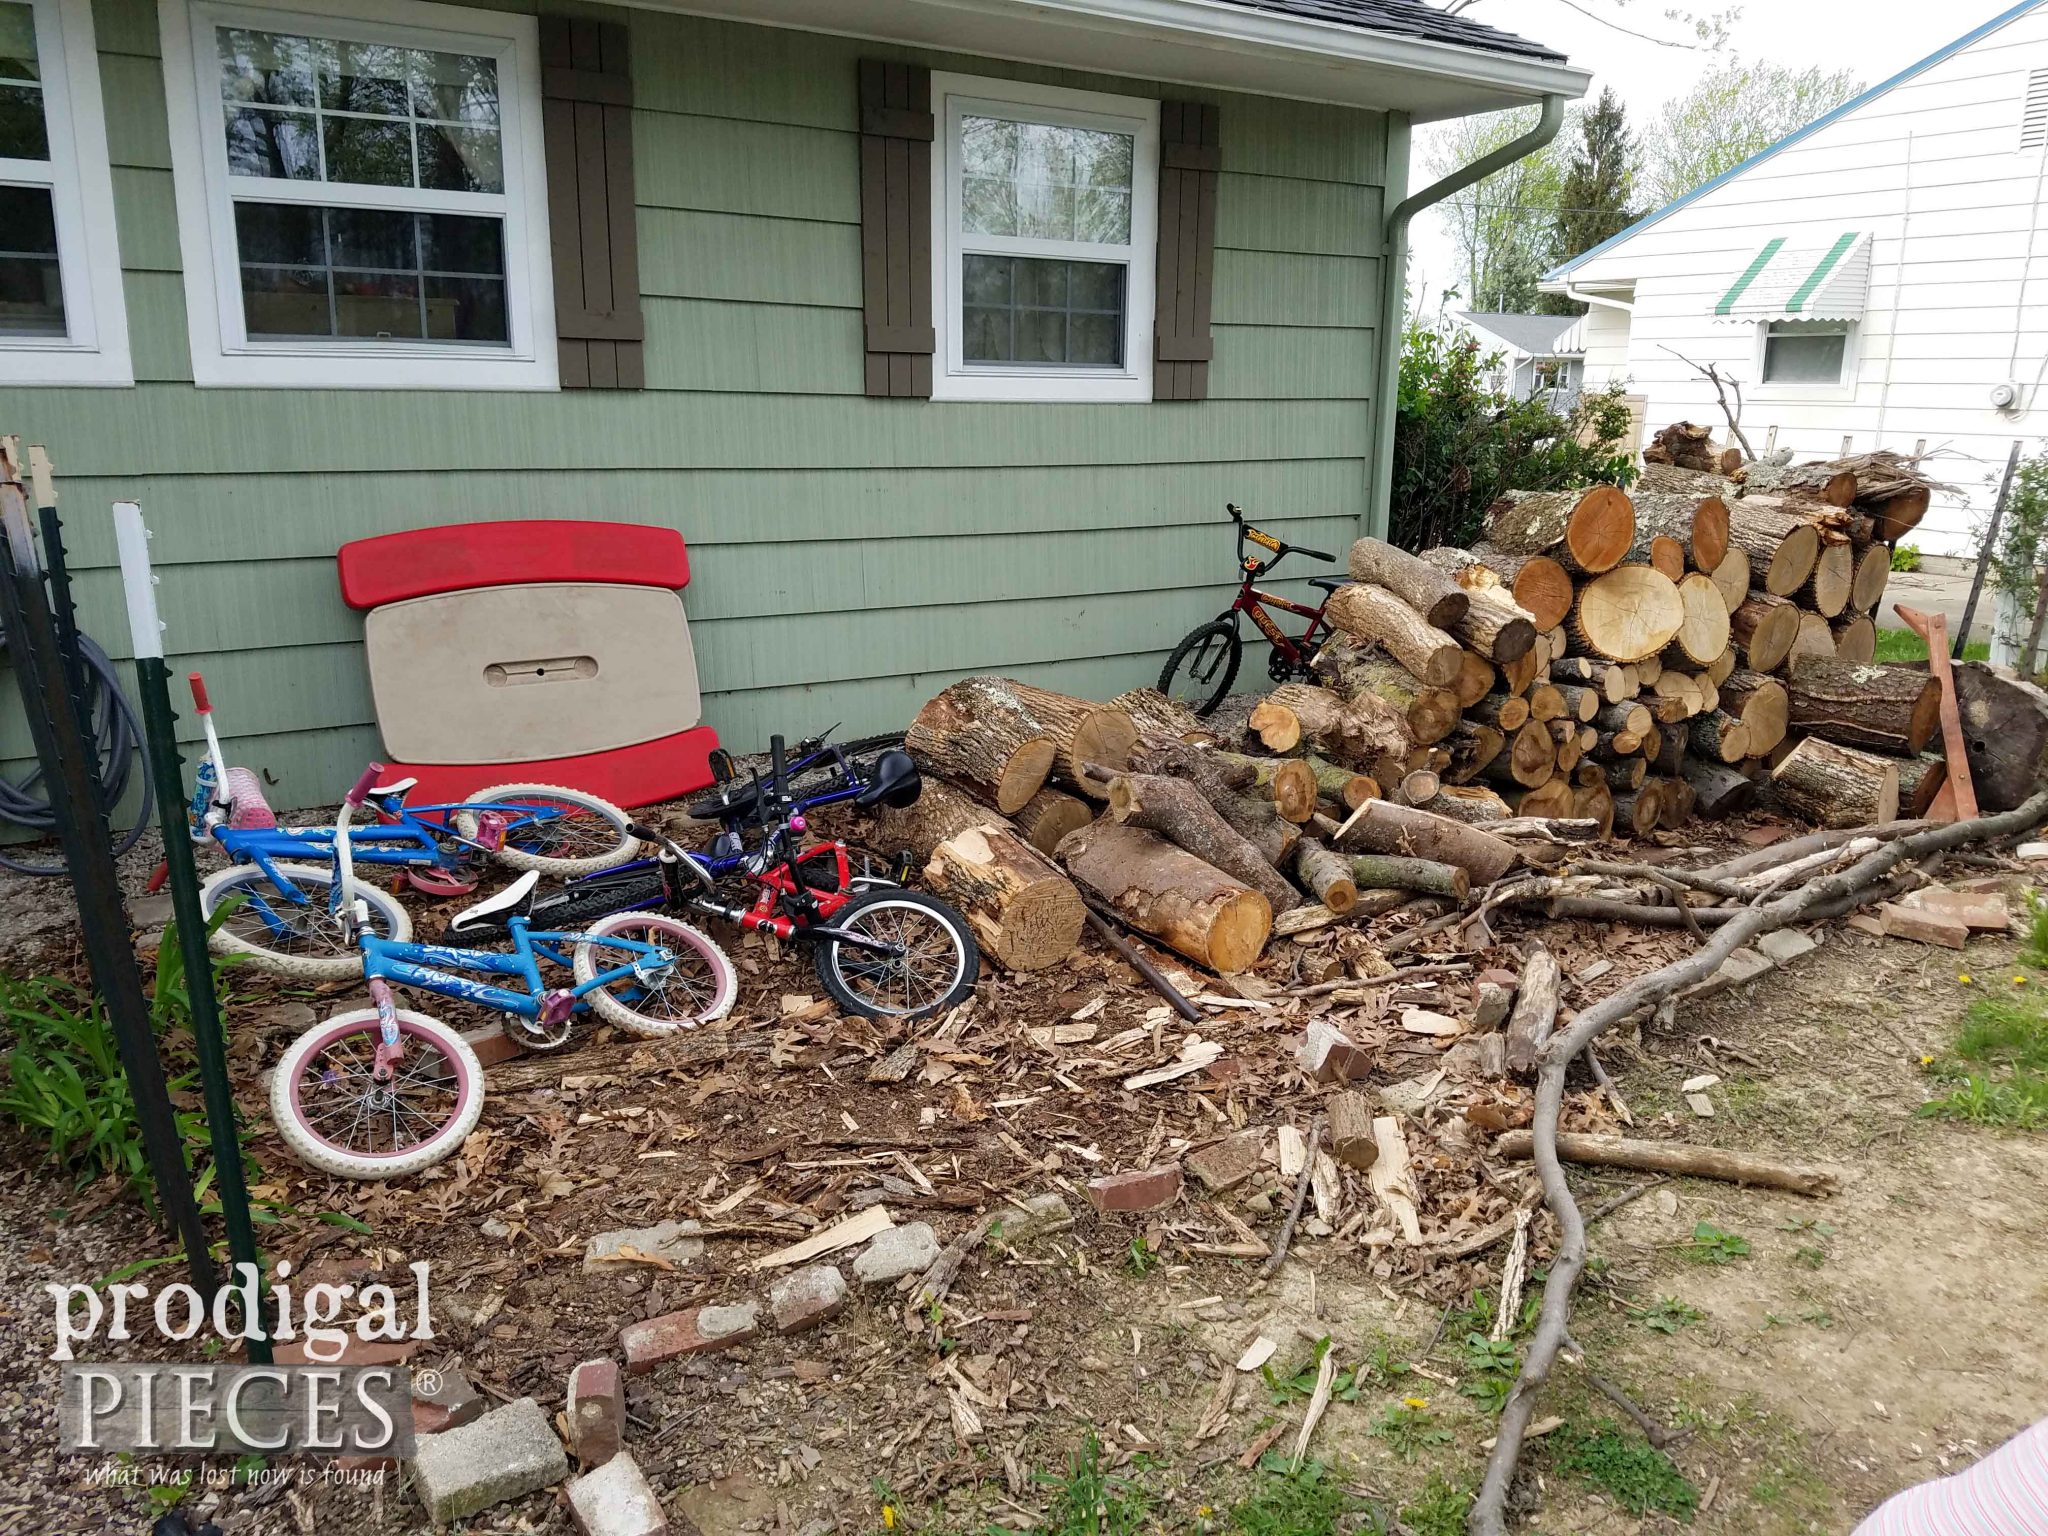
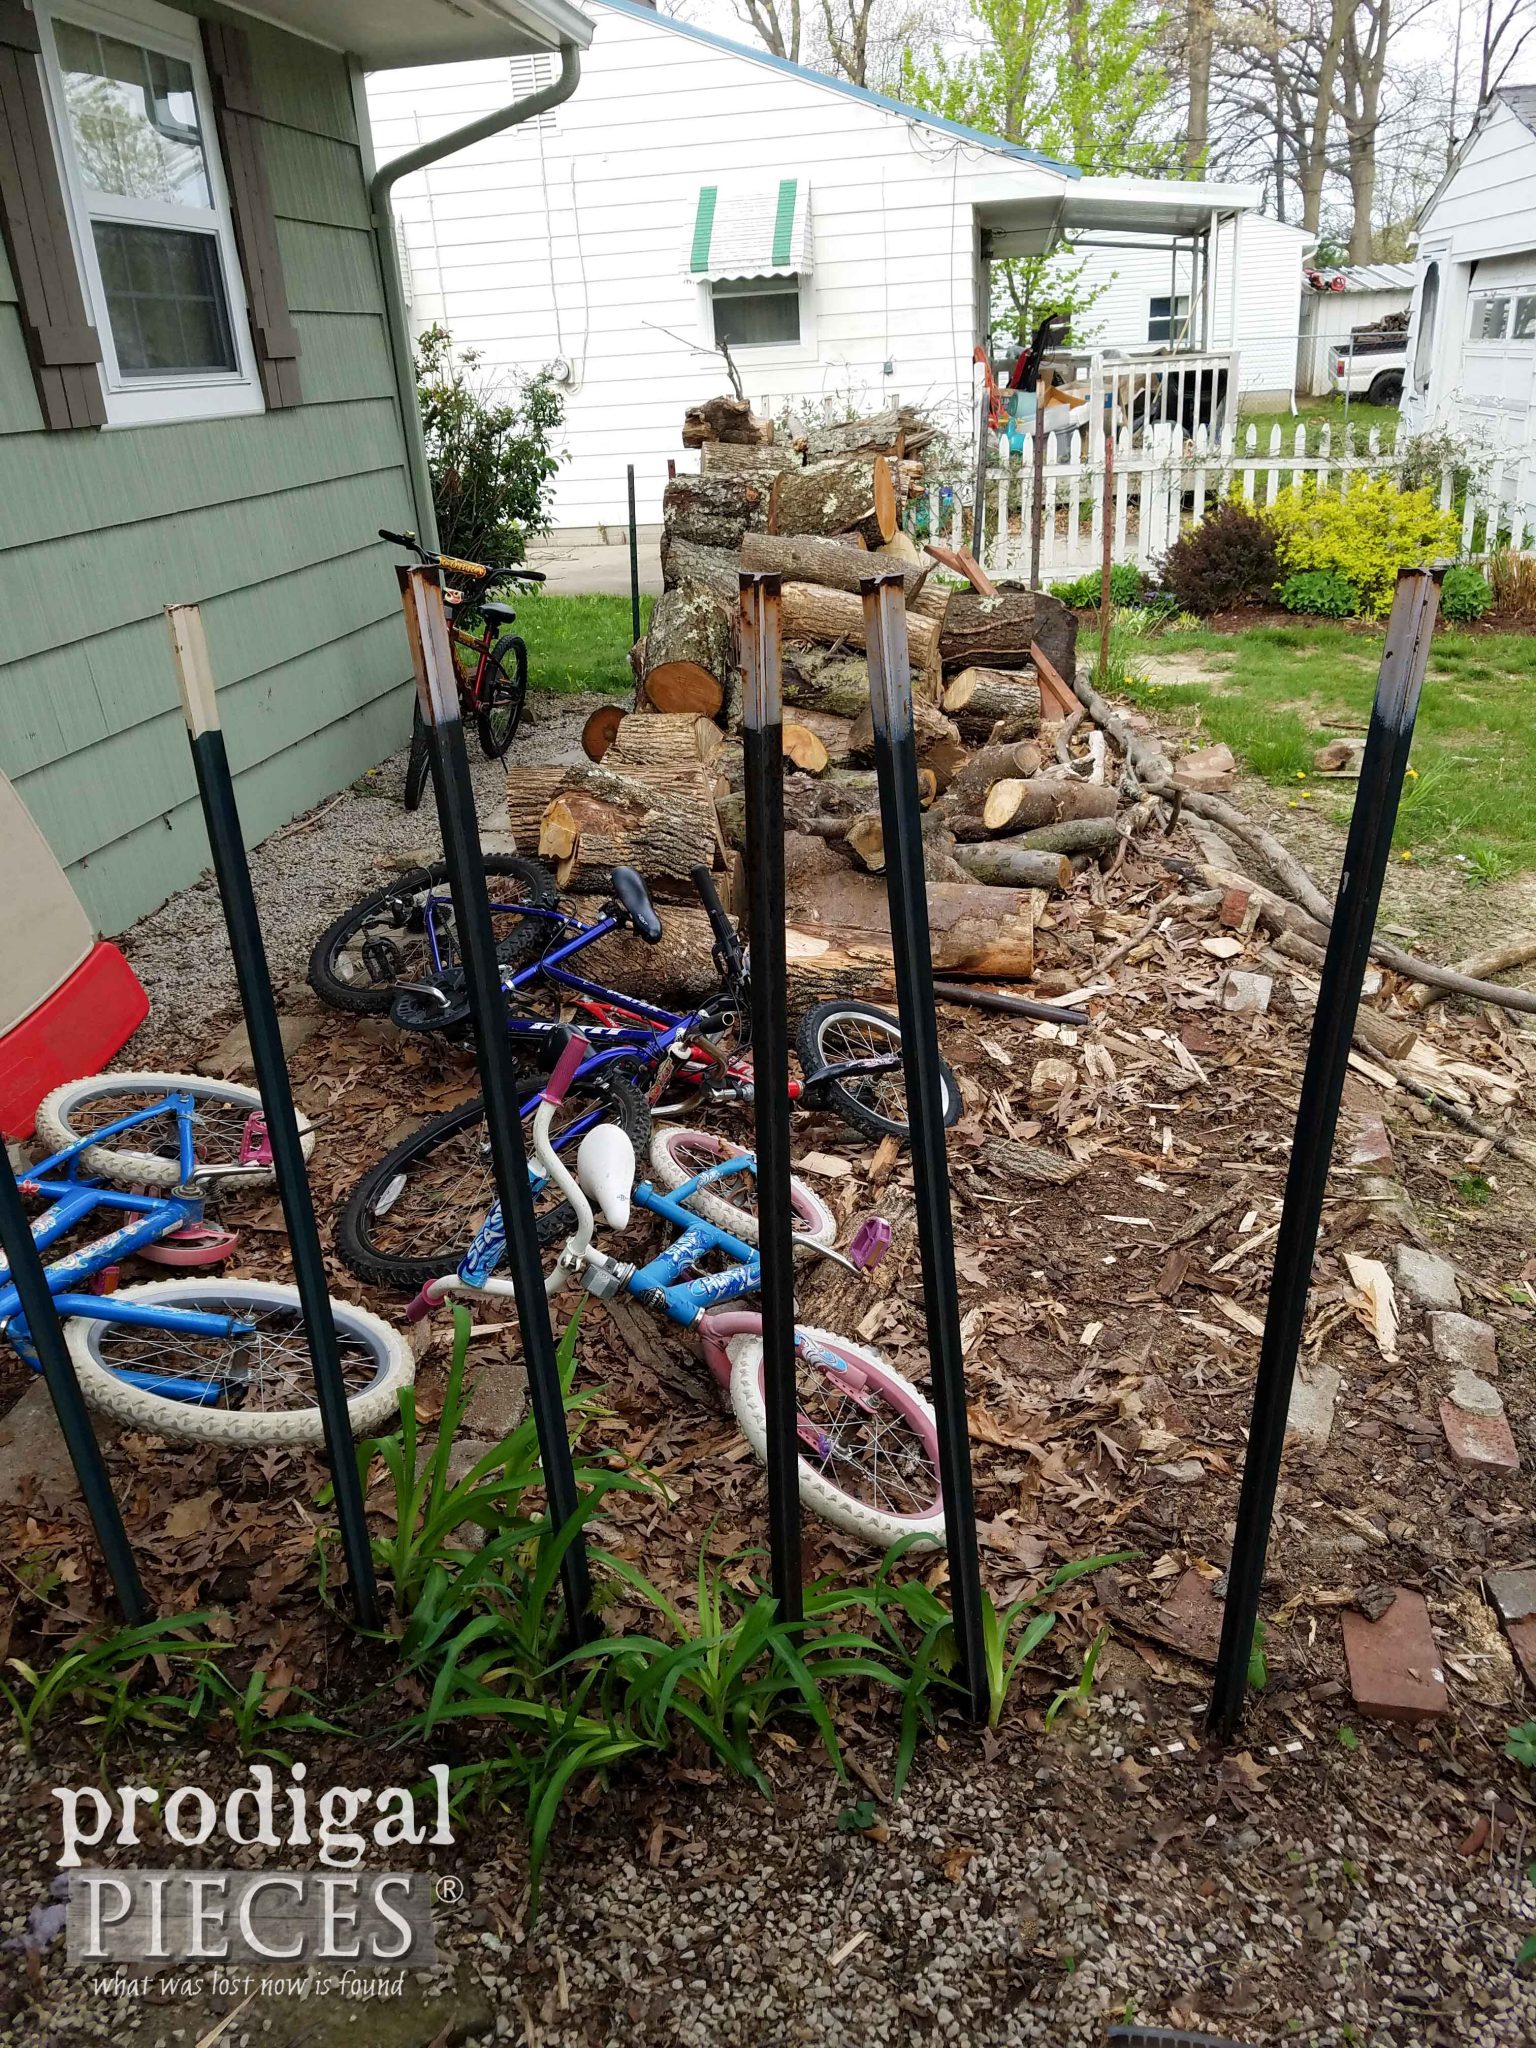
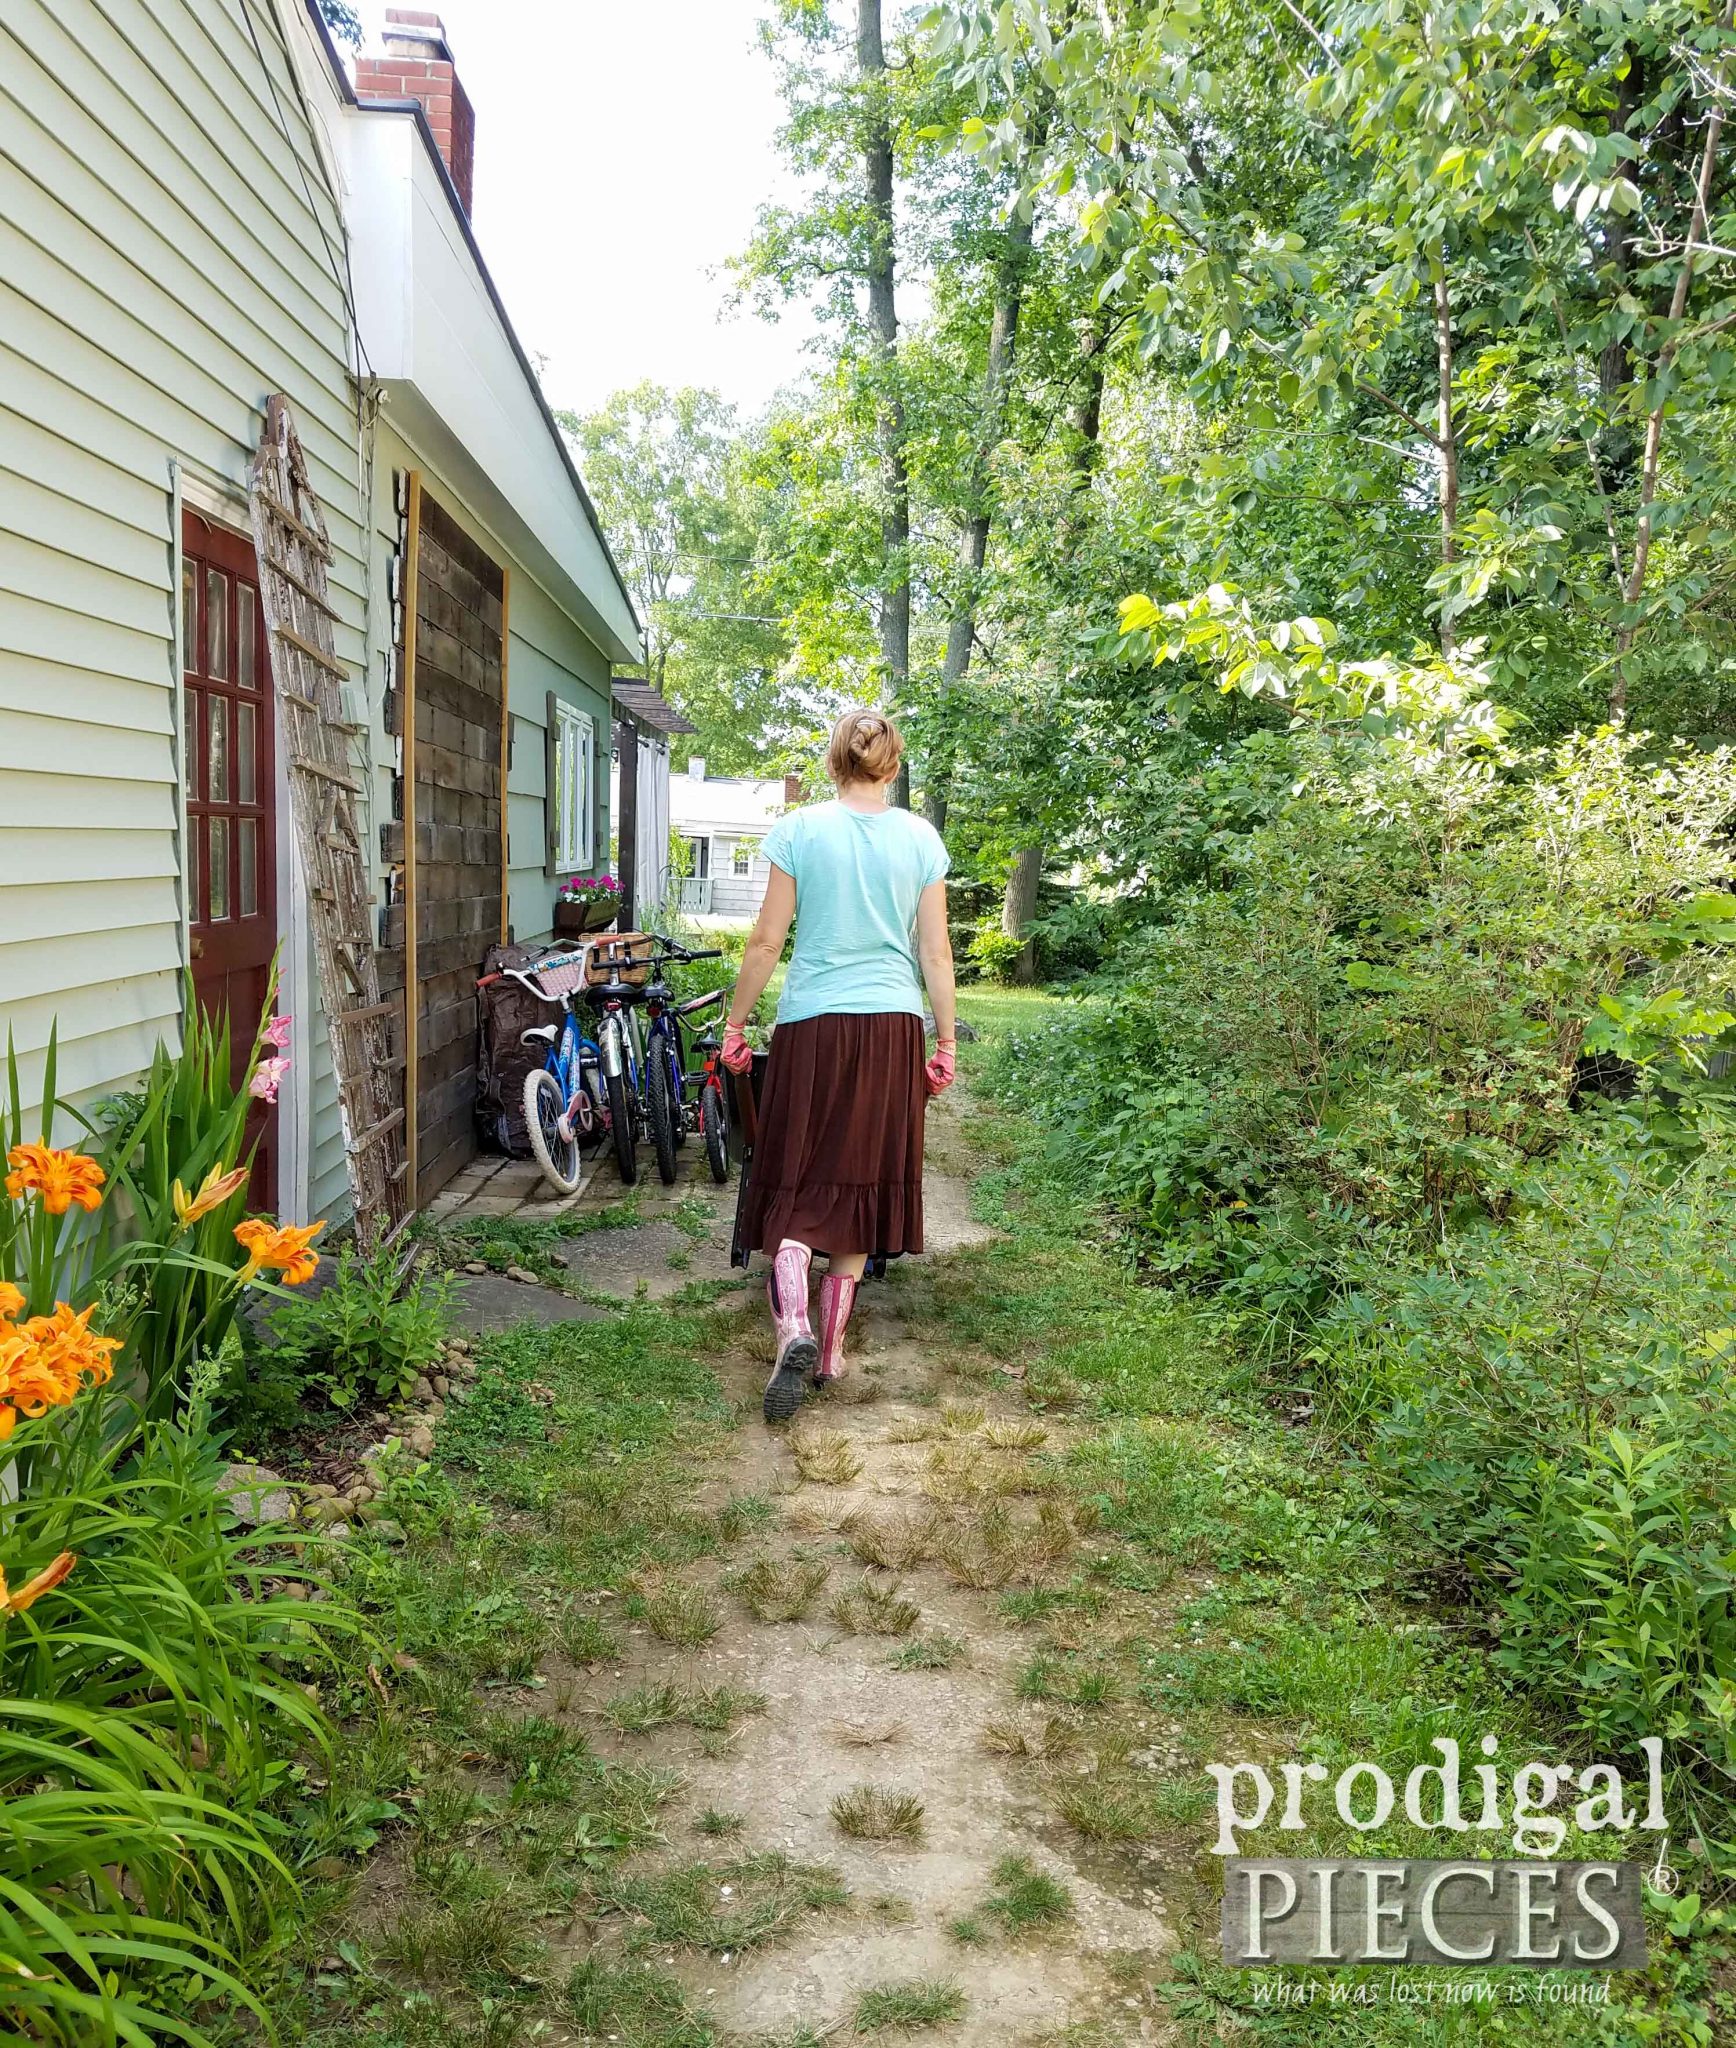
Yep, a hot mess. Each winter we run through a WHOLE LOTTA firewood. This is our wood pile that is normally full to the brim. However, I snapped this at the beginning of spring when we can break out of our cabin fever and get outside to clean up winter mess. Normally this is covered with a giant tarp, so my kids stick their bikes here to keep them out of the weather as our shed is full too. (next on my hit list)
Since 2003, I have had the pleasure of looking out our dining area and seeing this…
DETAILS
Mind you I consider it a full blessing to be able to have a full supply of wood to keep us warm. It makes a heart happy for sure. However, we do enormous amount of work each year to harvest, split, stack, and prepare our wood. So, when a storm blows through and takes that tarp off soaking all our hard work, I get upset…we all do. It gets old running out in the rain or blistering snow to cover it back up. I have been scheming for years how to make it less work and more profitable.
In the spring, I began to clean up our area as I always do, but began mulling ideas over on how to make this less stress for us in the coming winter. Plus, make it more desirable to look at as well as hide some things.
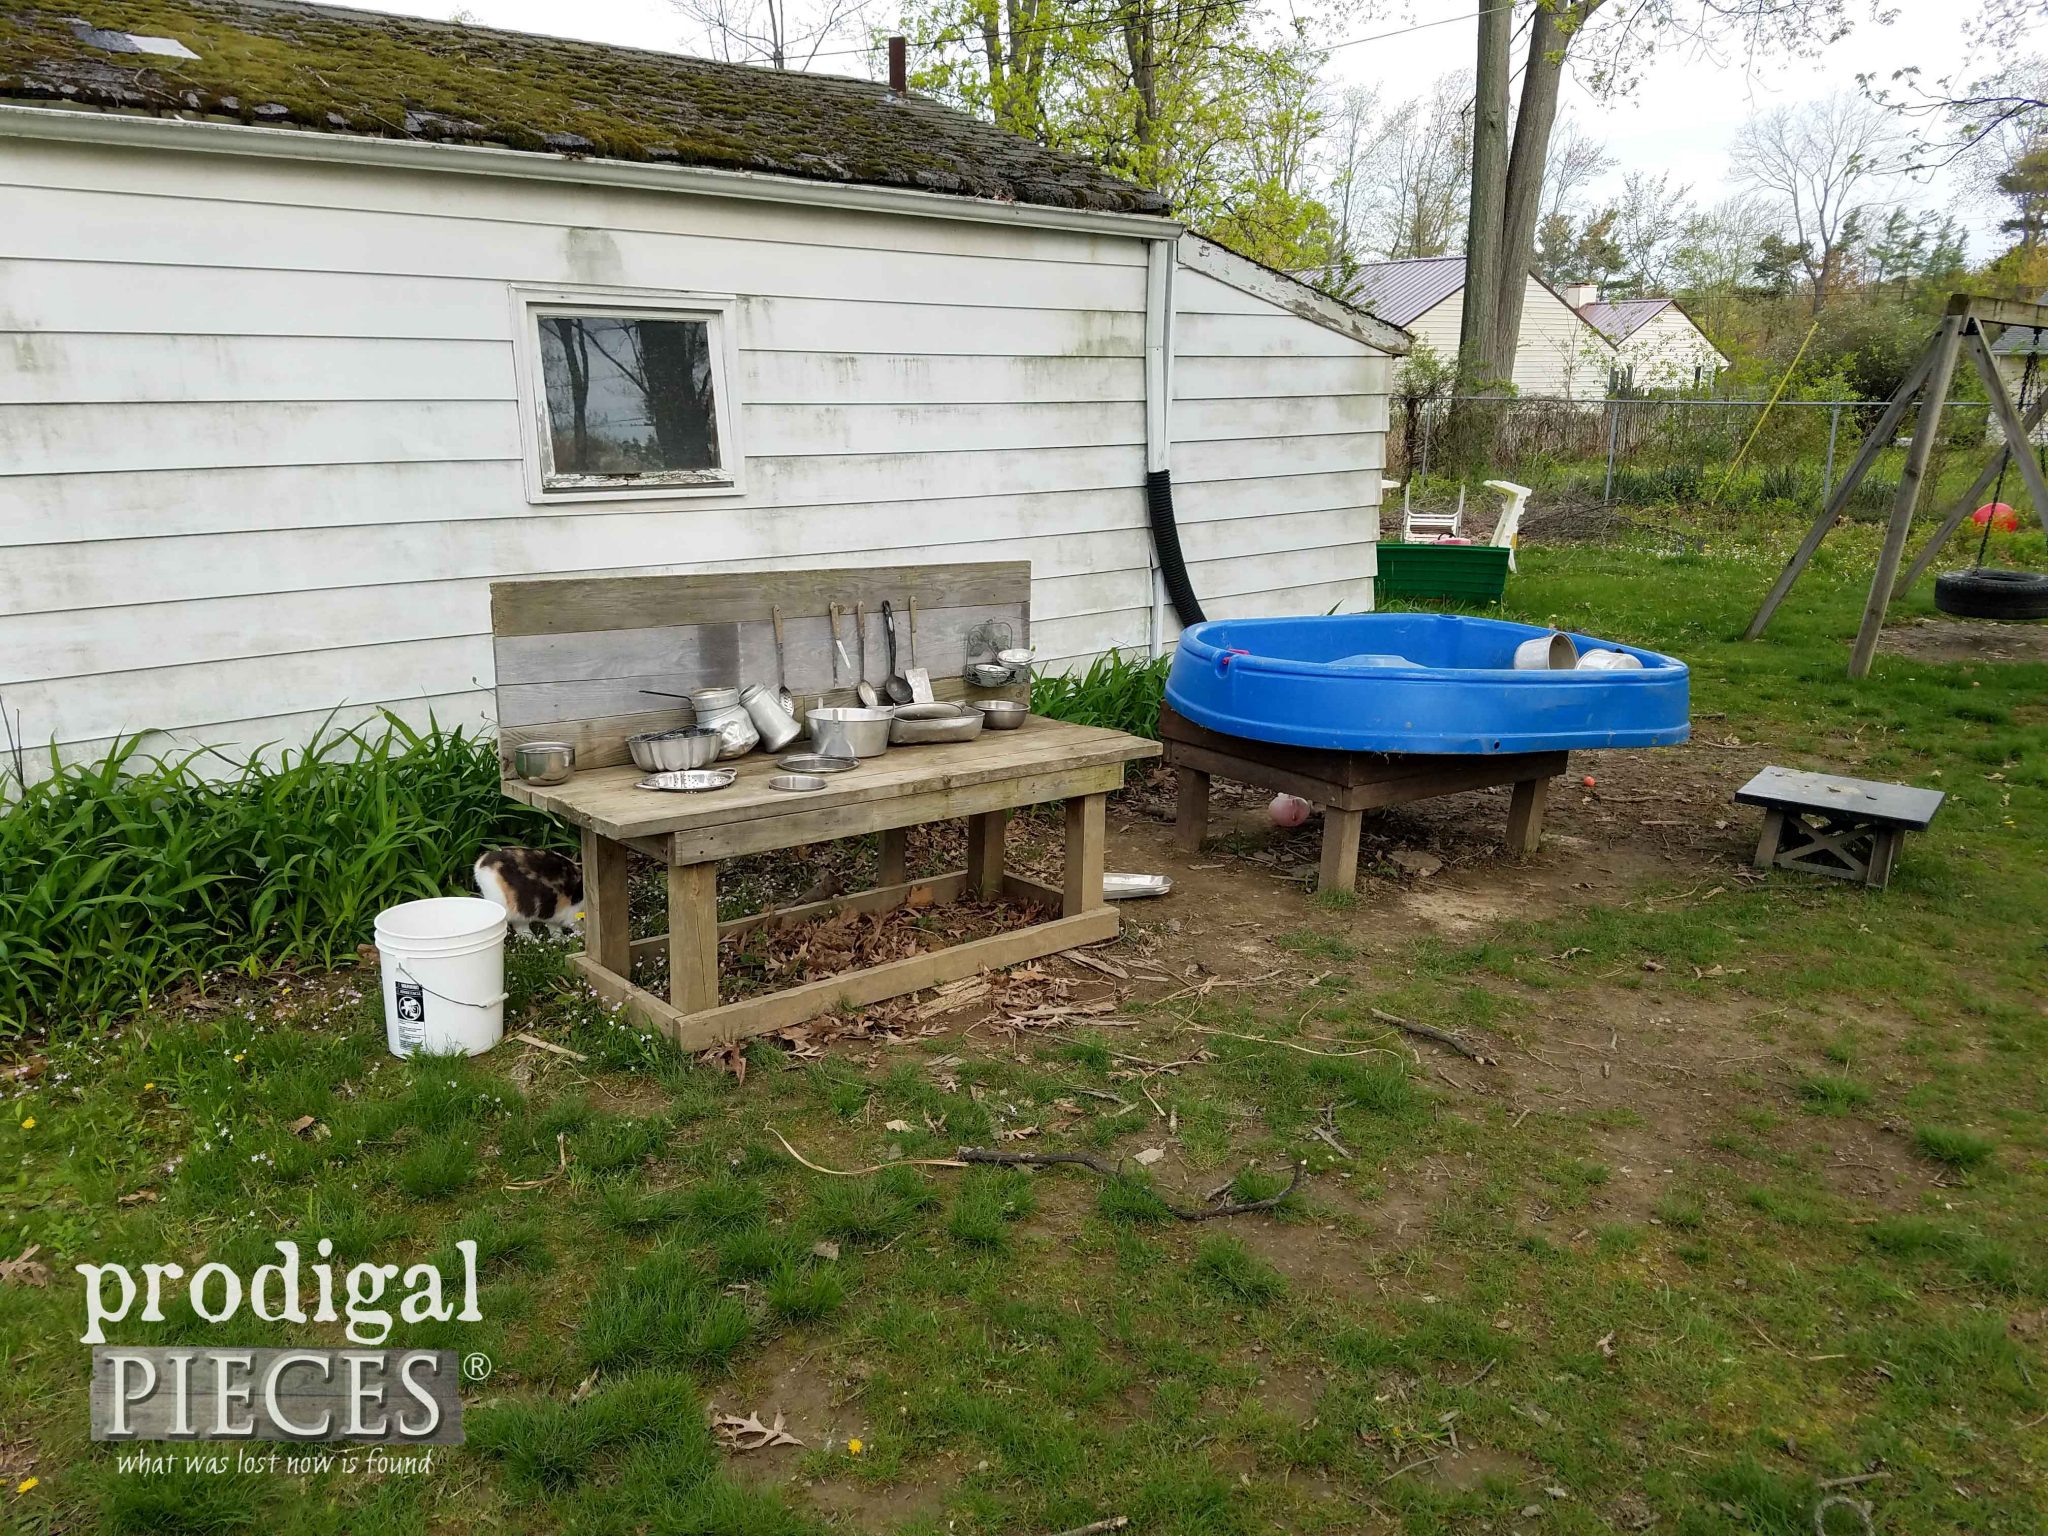
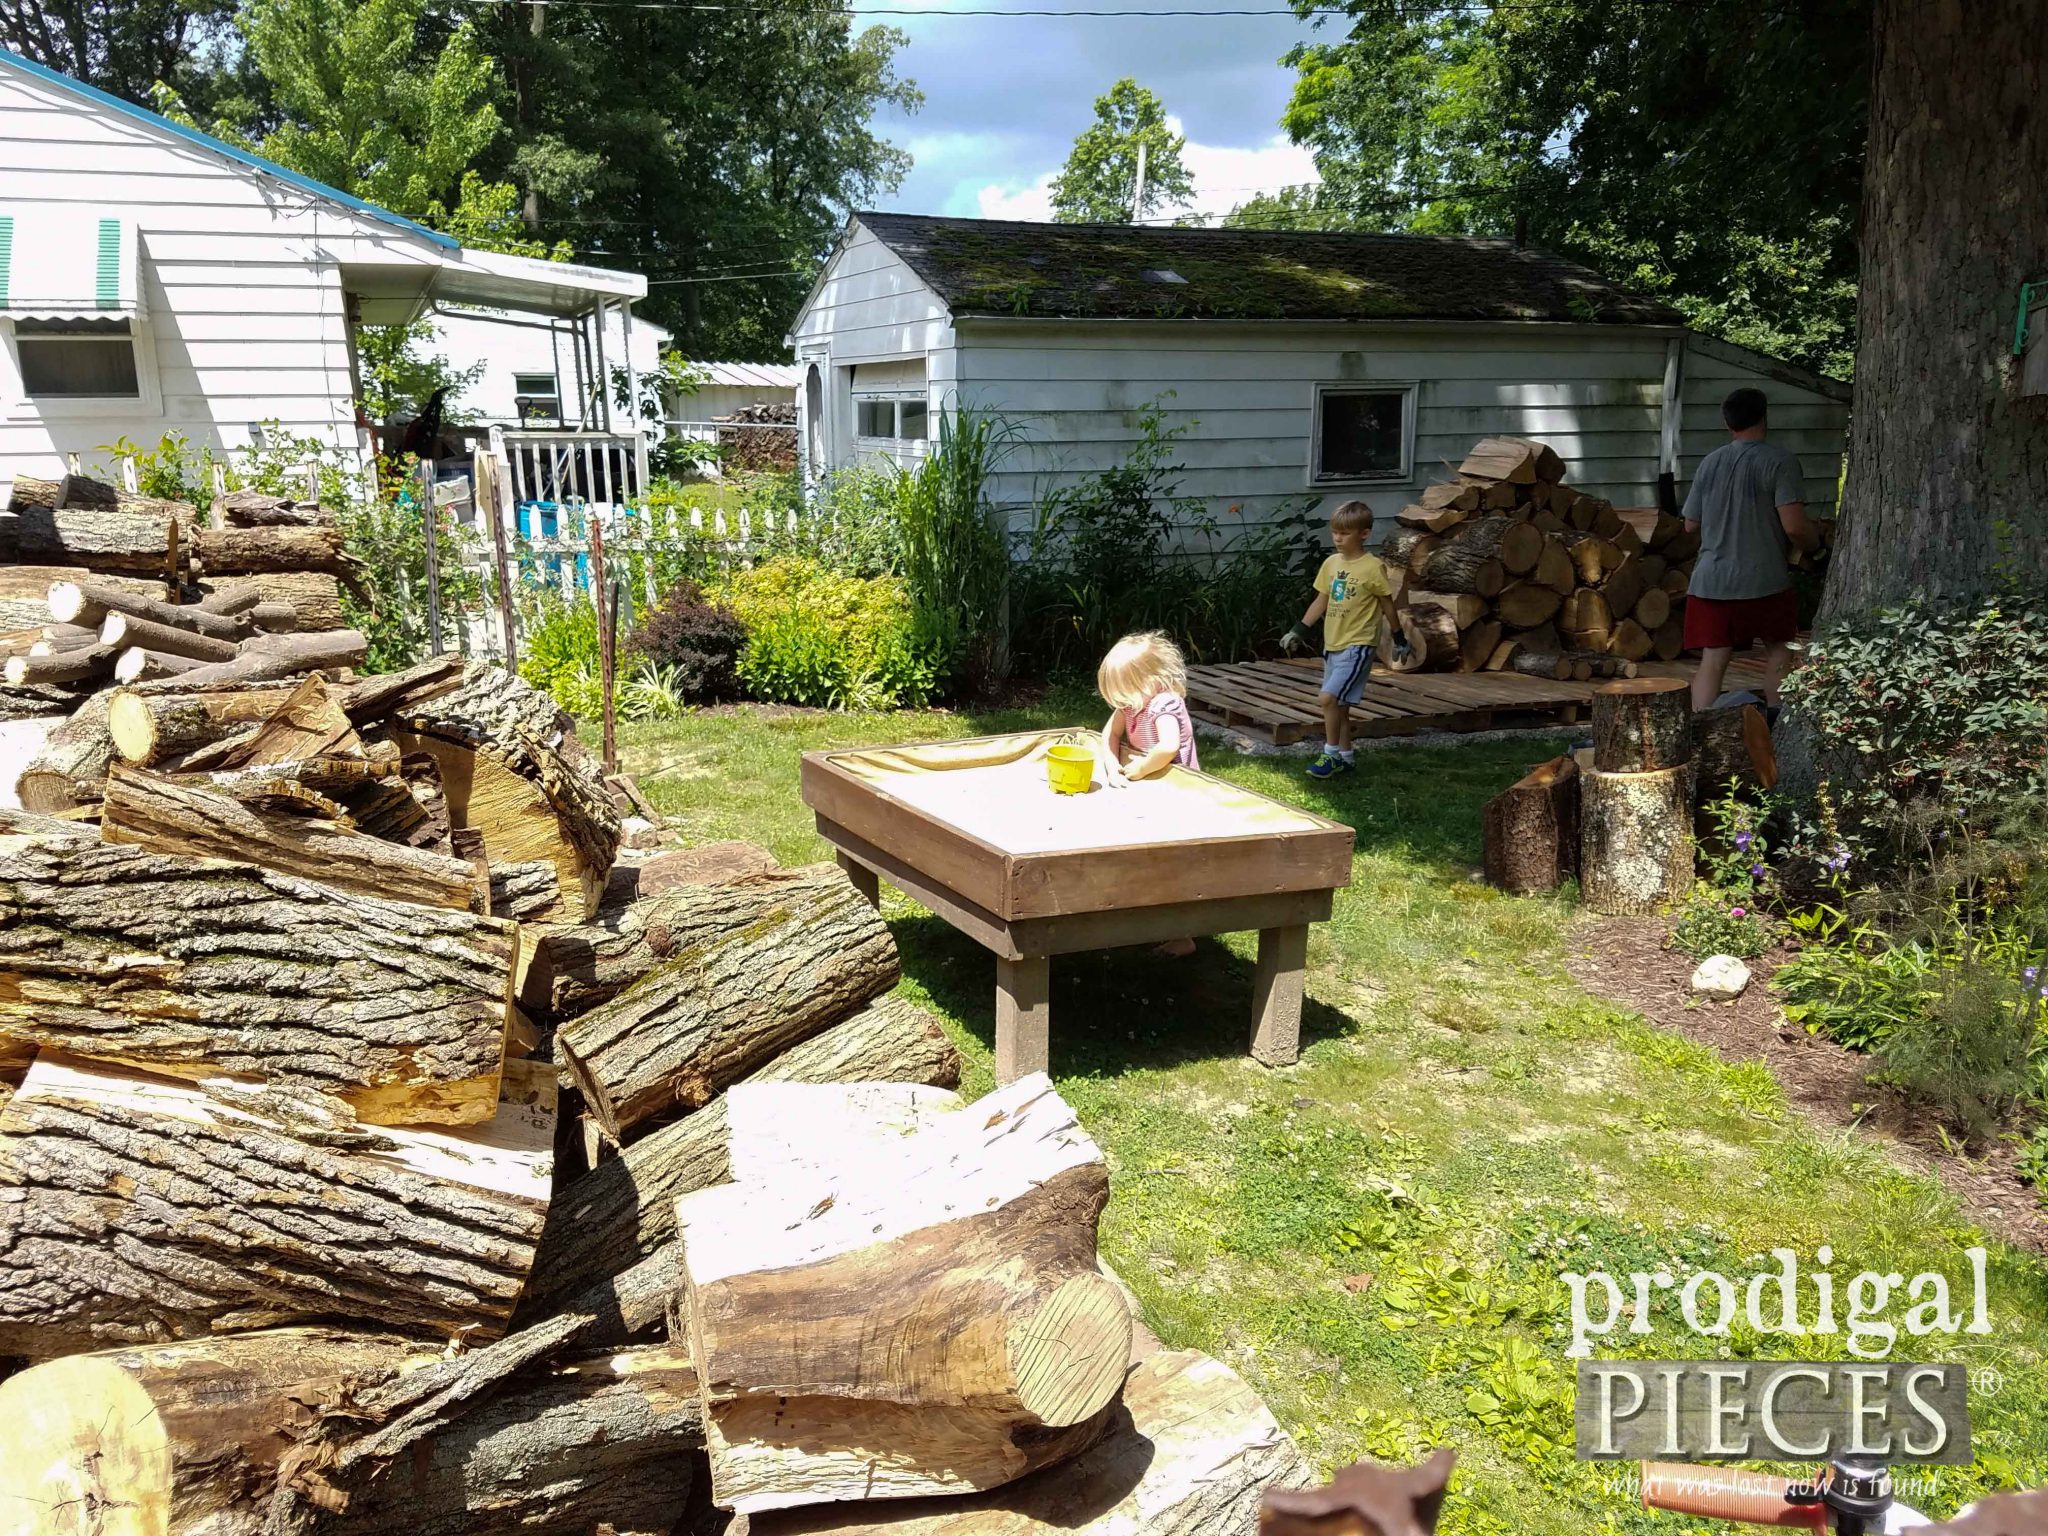
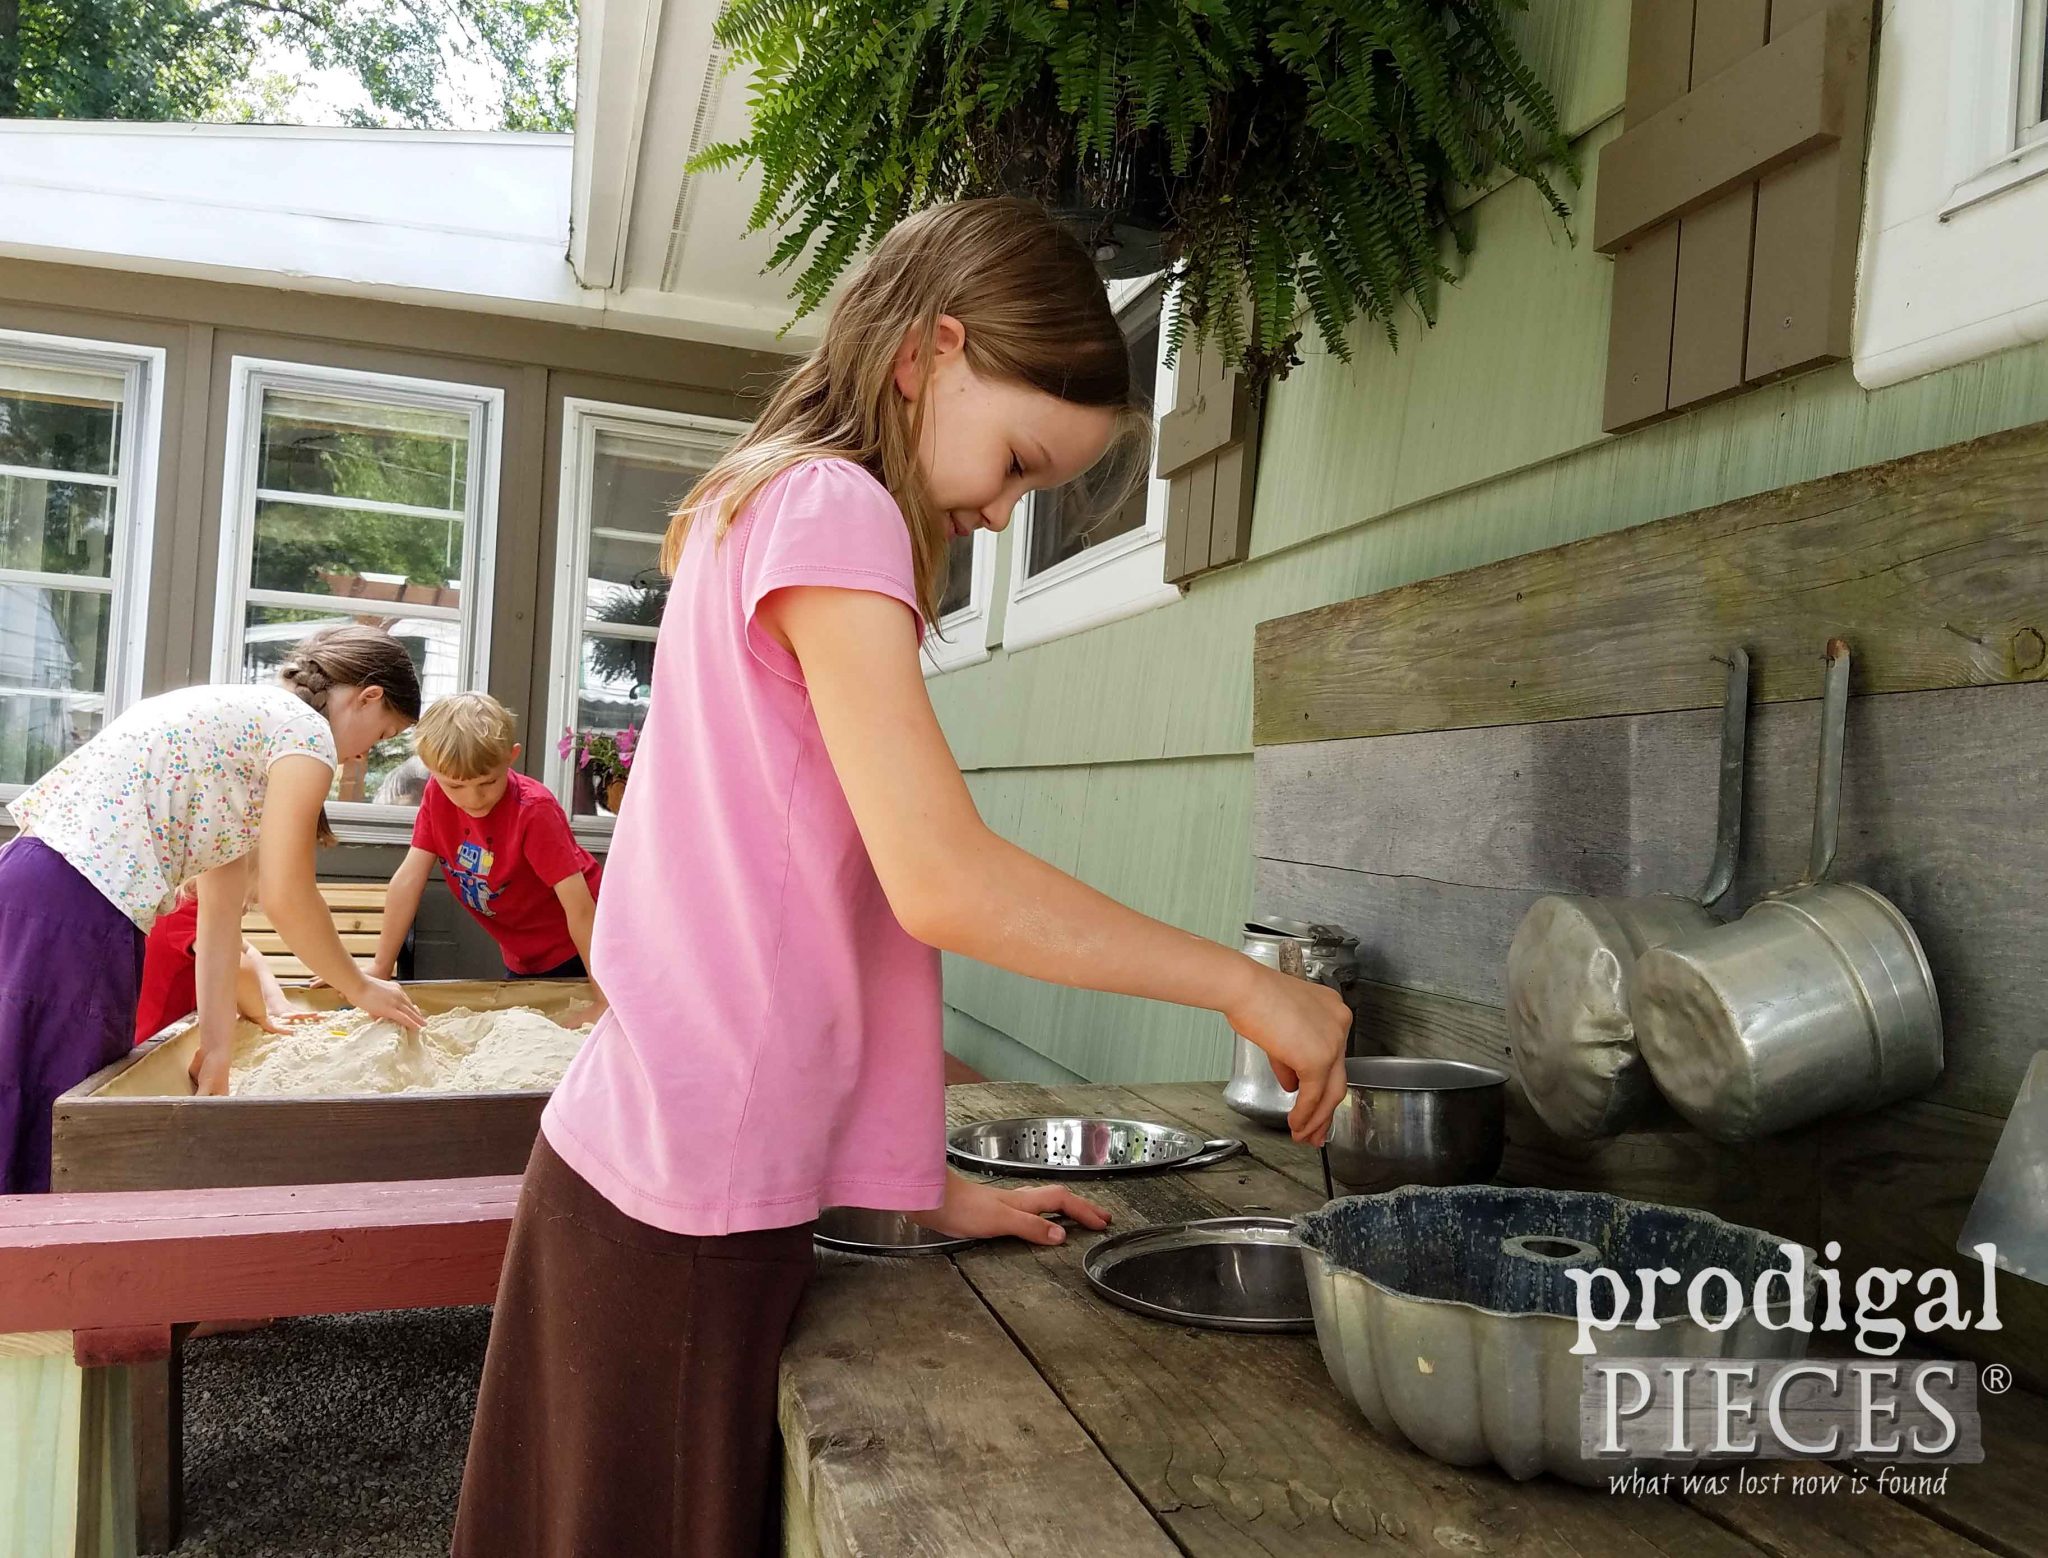
To the right of the wood pile we have our kids mud bar and sand table that were displaced ever since we built our pergola over our patio. This was only to be temporary as you can tell this is not the best place for them up against our neighbor’s garage. Remember, this was taken after winter had done its duty. (no judging…hahaha…)
DIY TIME
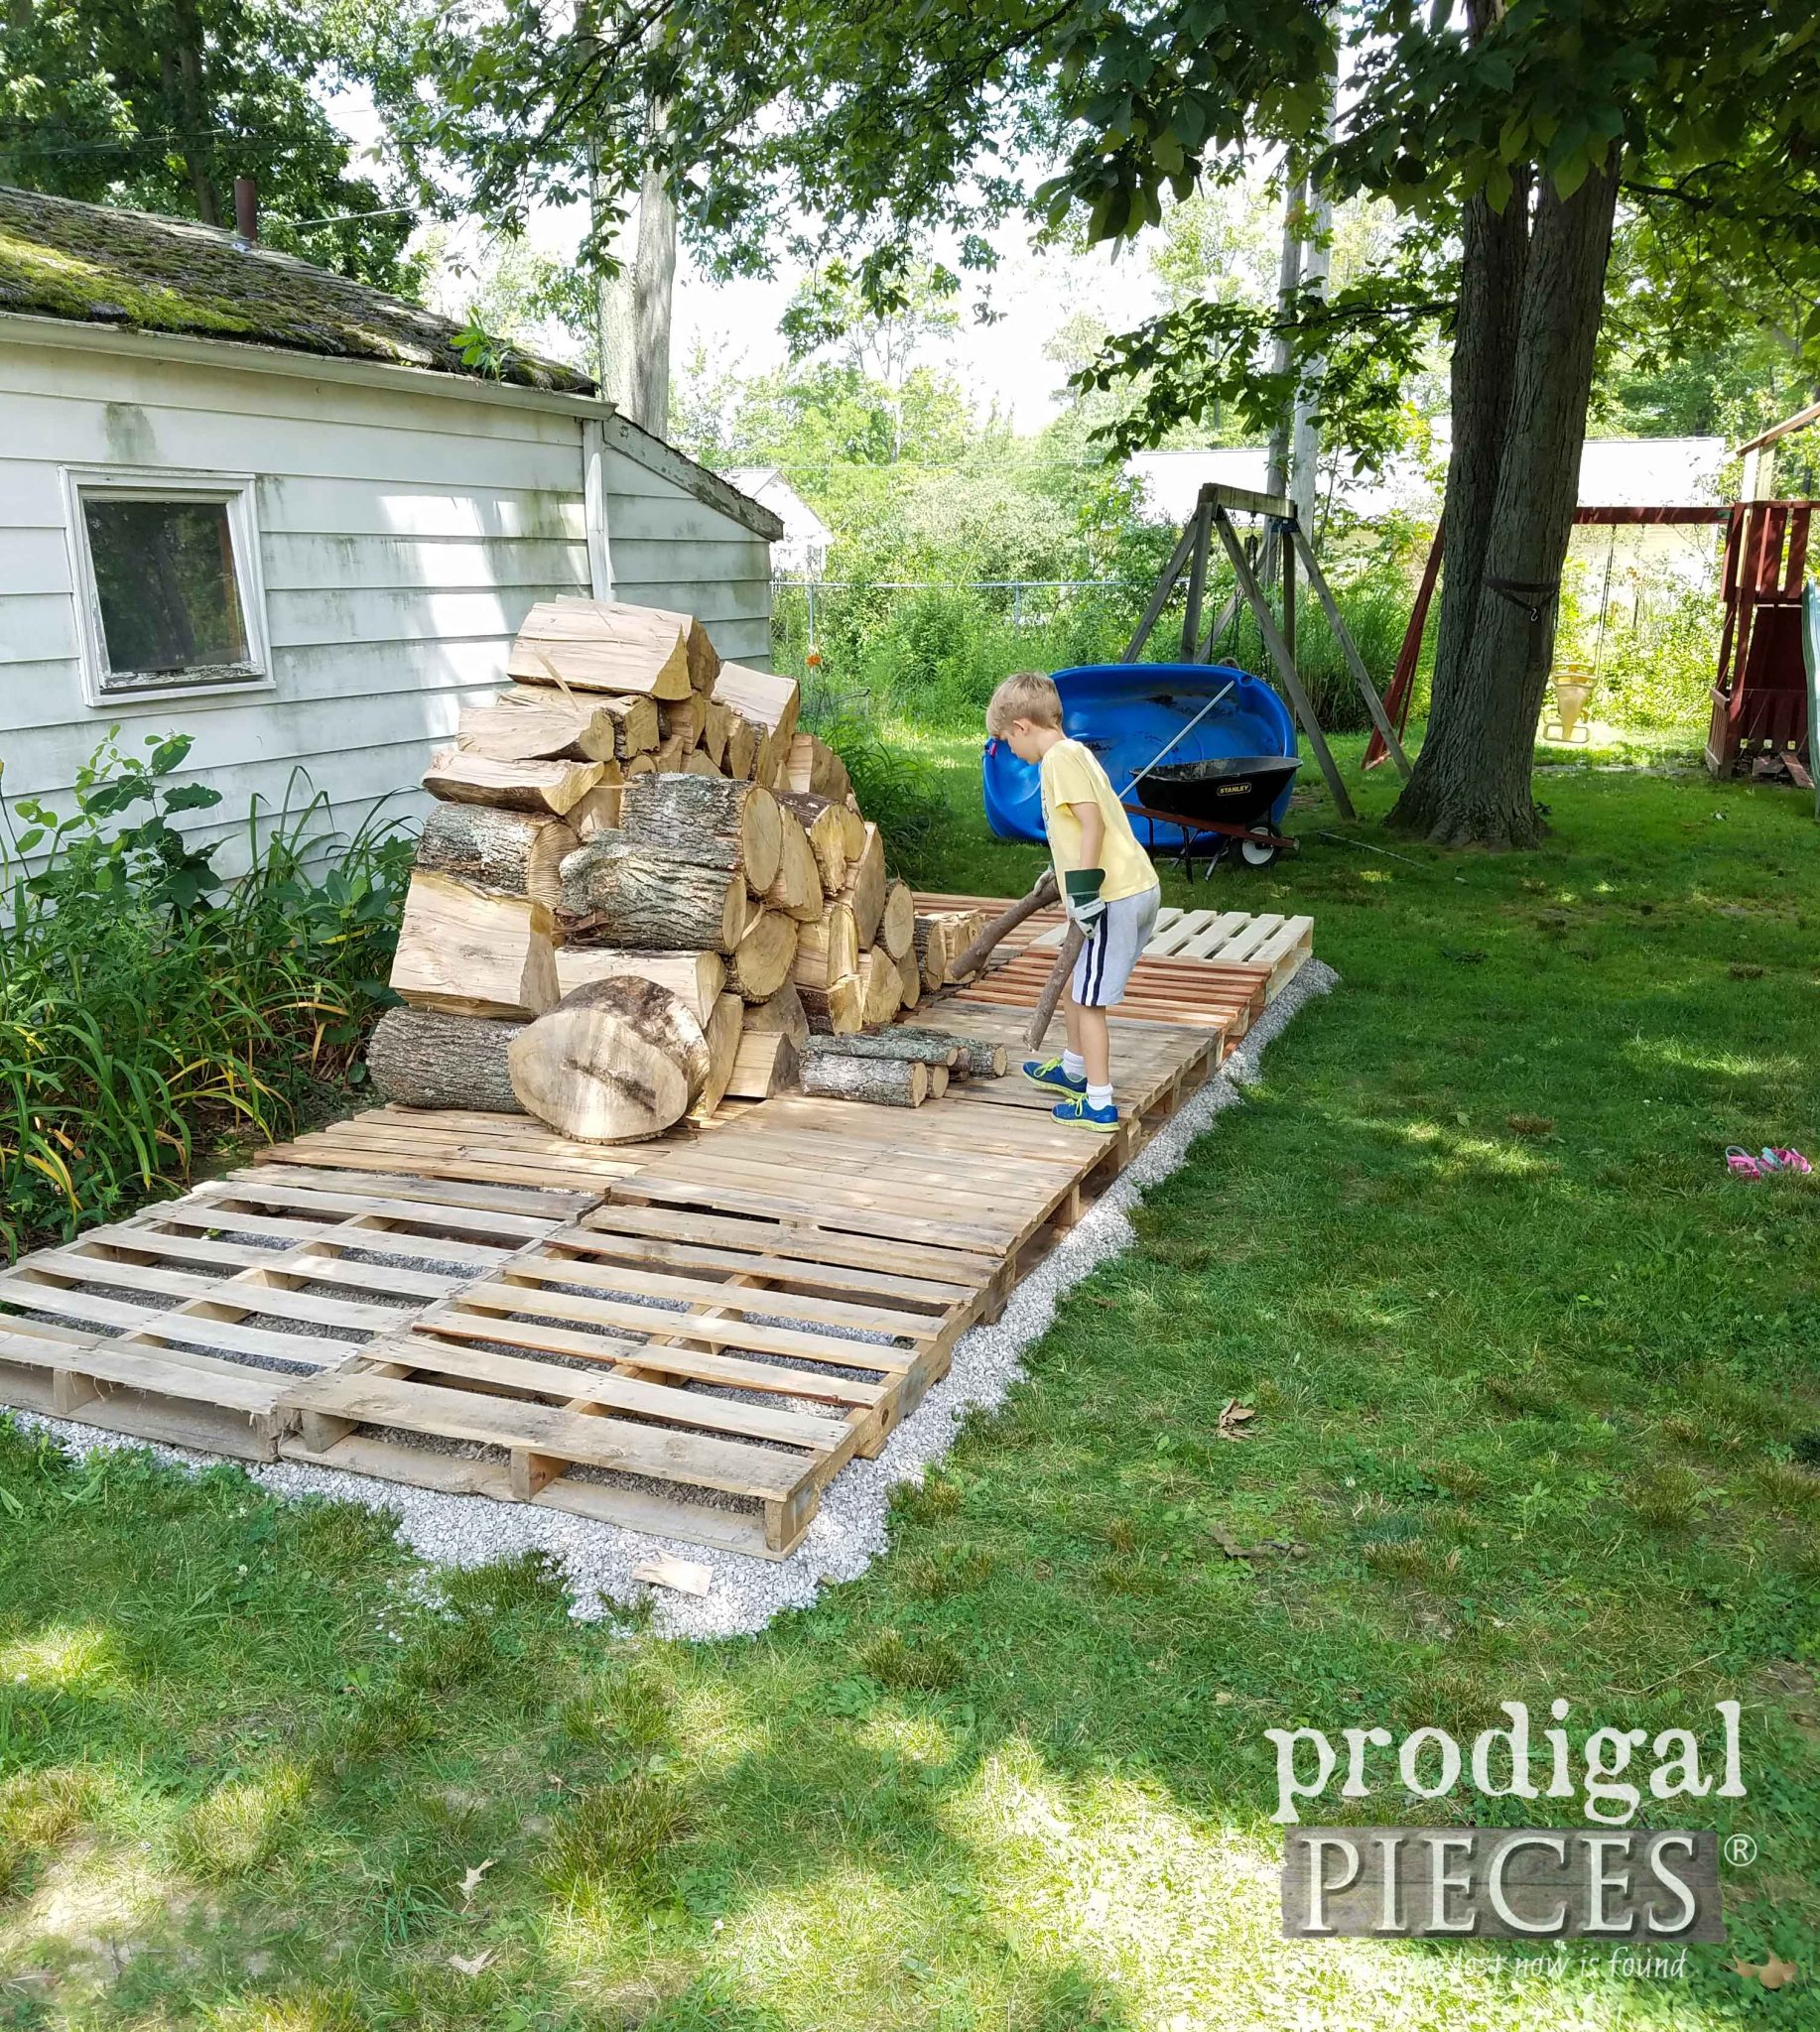
I mentioned we first started by building our compost bins out of pallets. Well, we kept on accruing pallets and are building a new wood shed complete with garden shed attached. Here is what we’ve come up with – or the start of it at least.
MORE MOVING
Lots of wood moving, stone moving and gettin’ ‘er done(ing). haha.
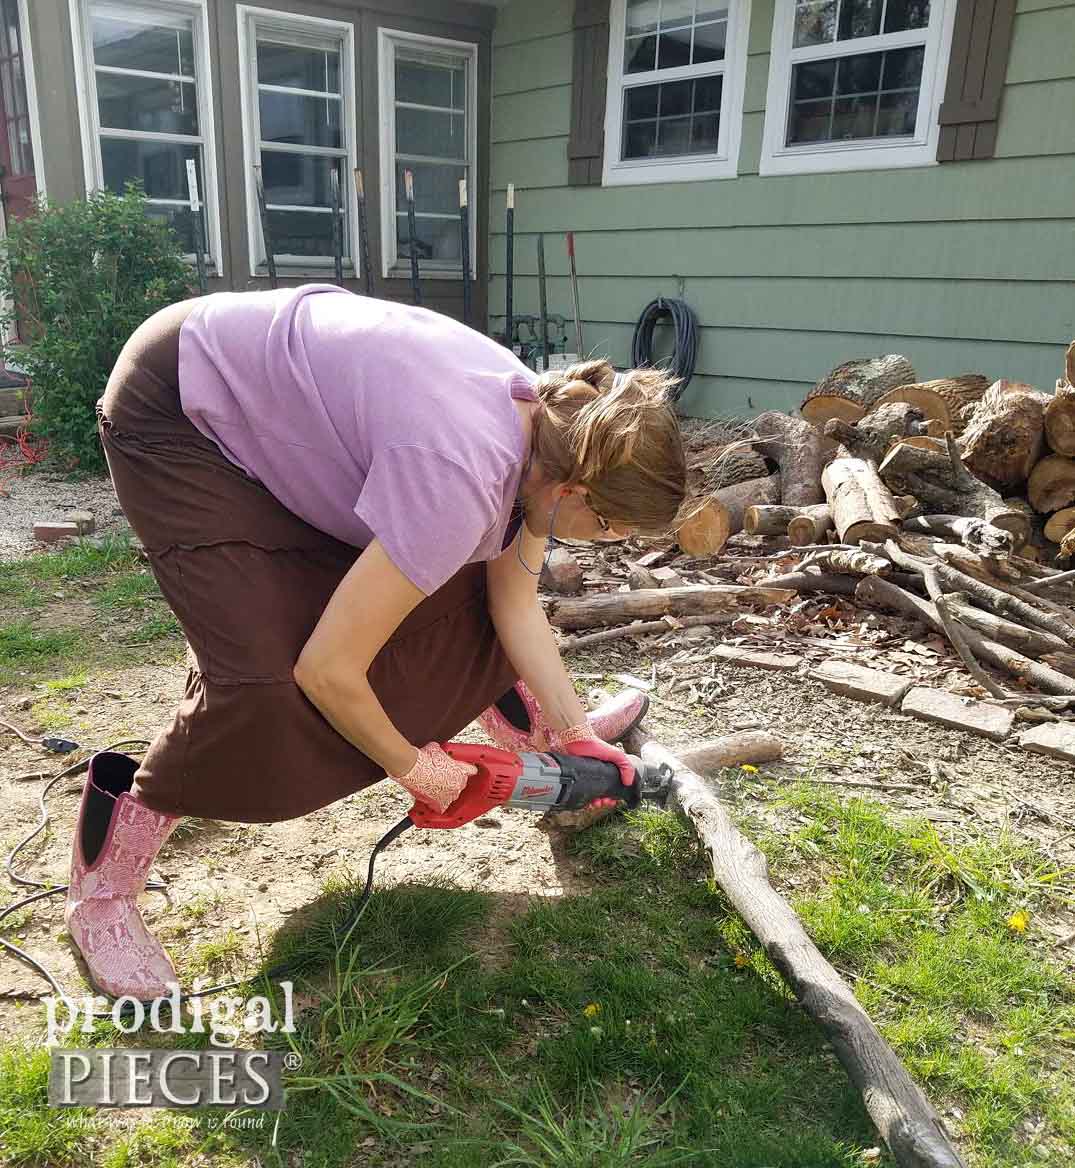
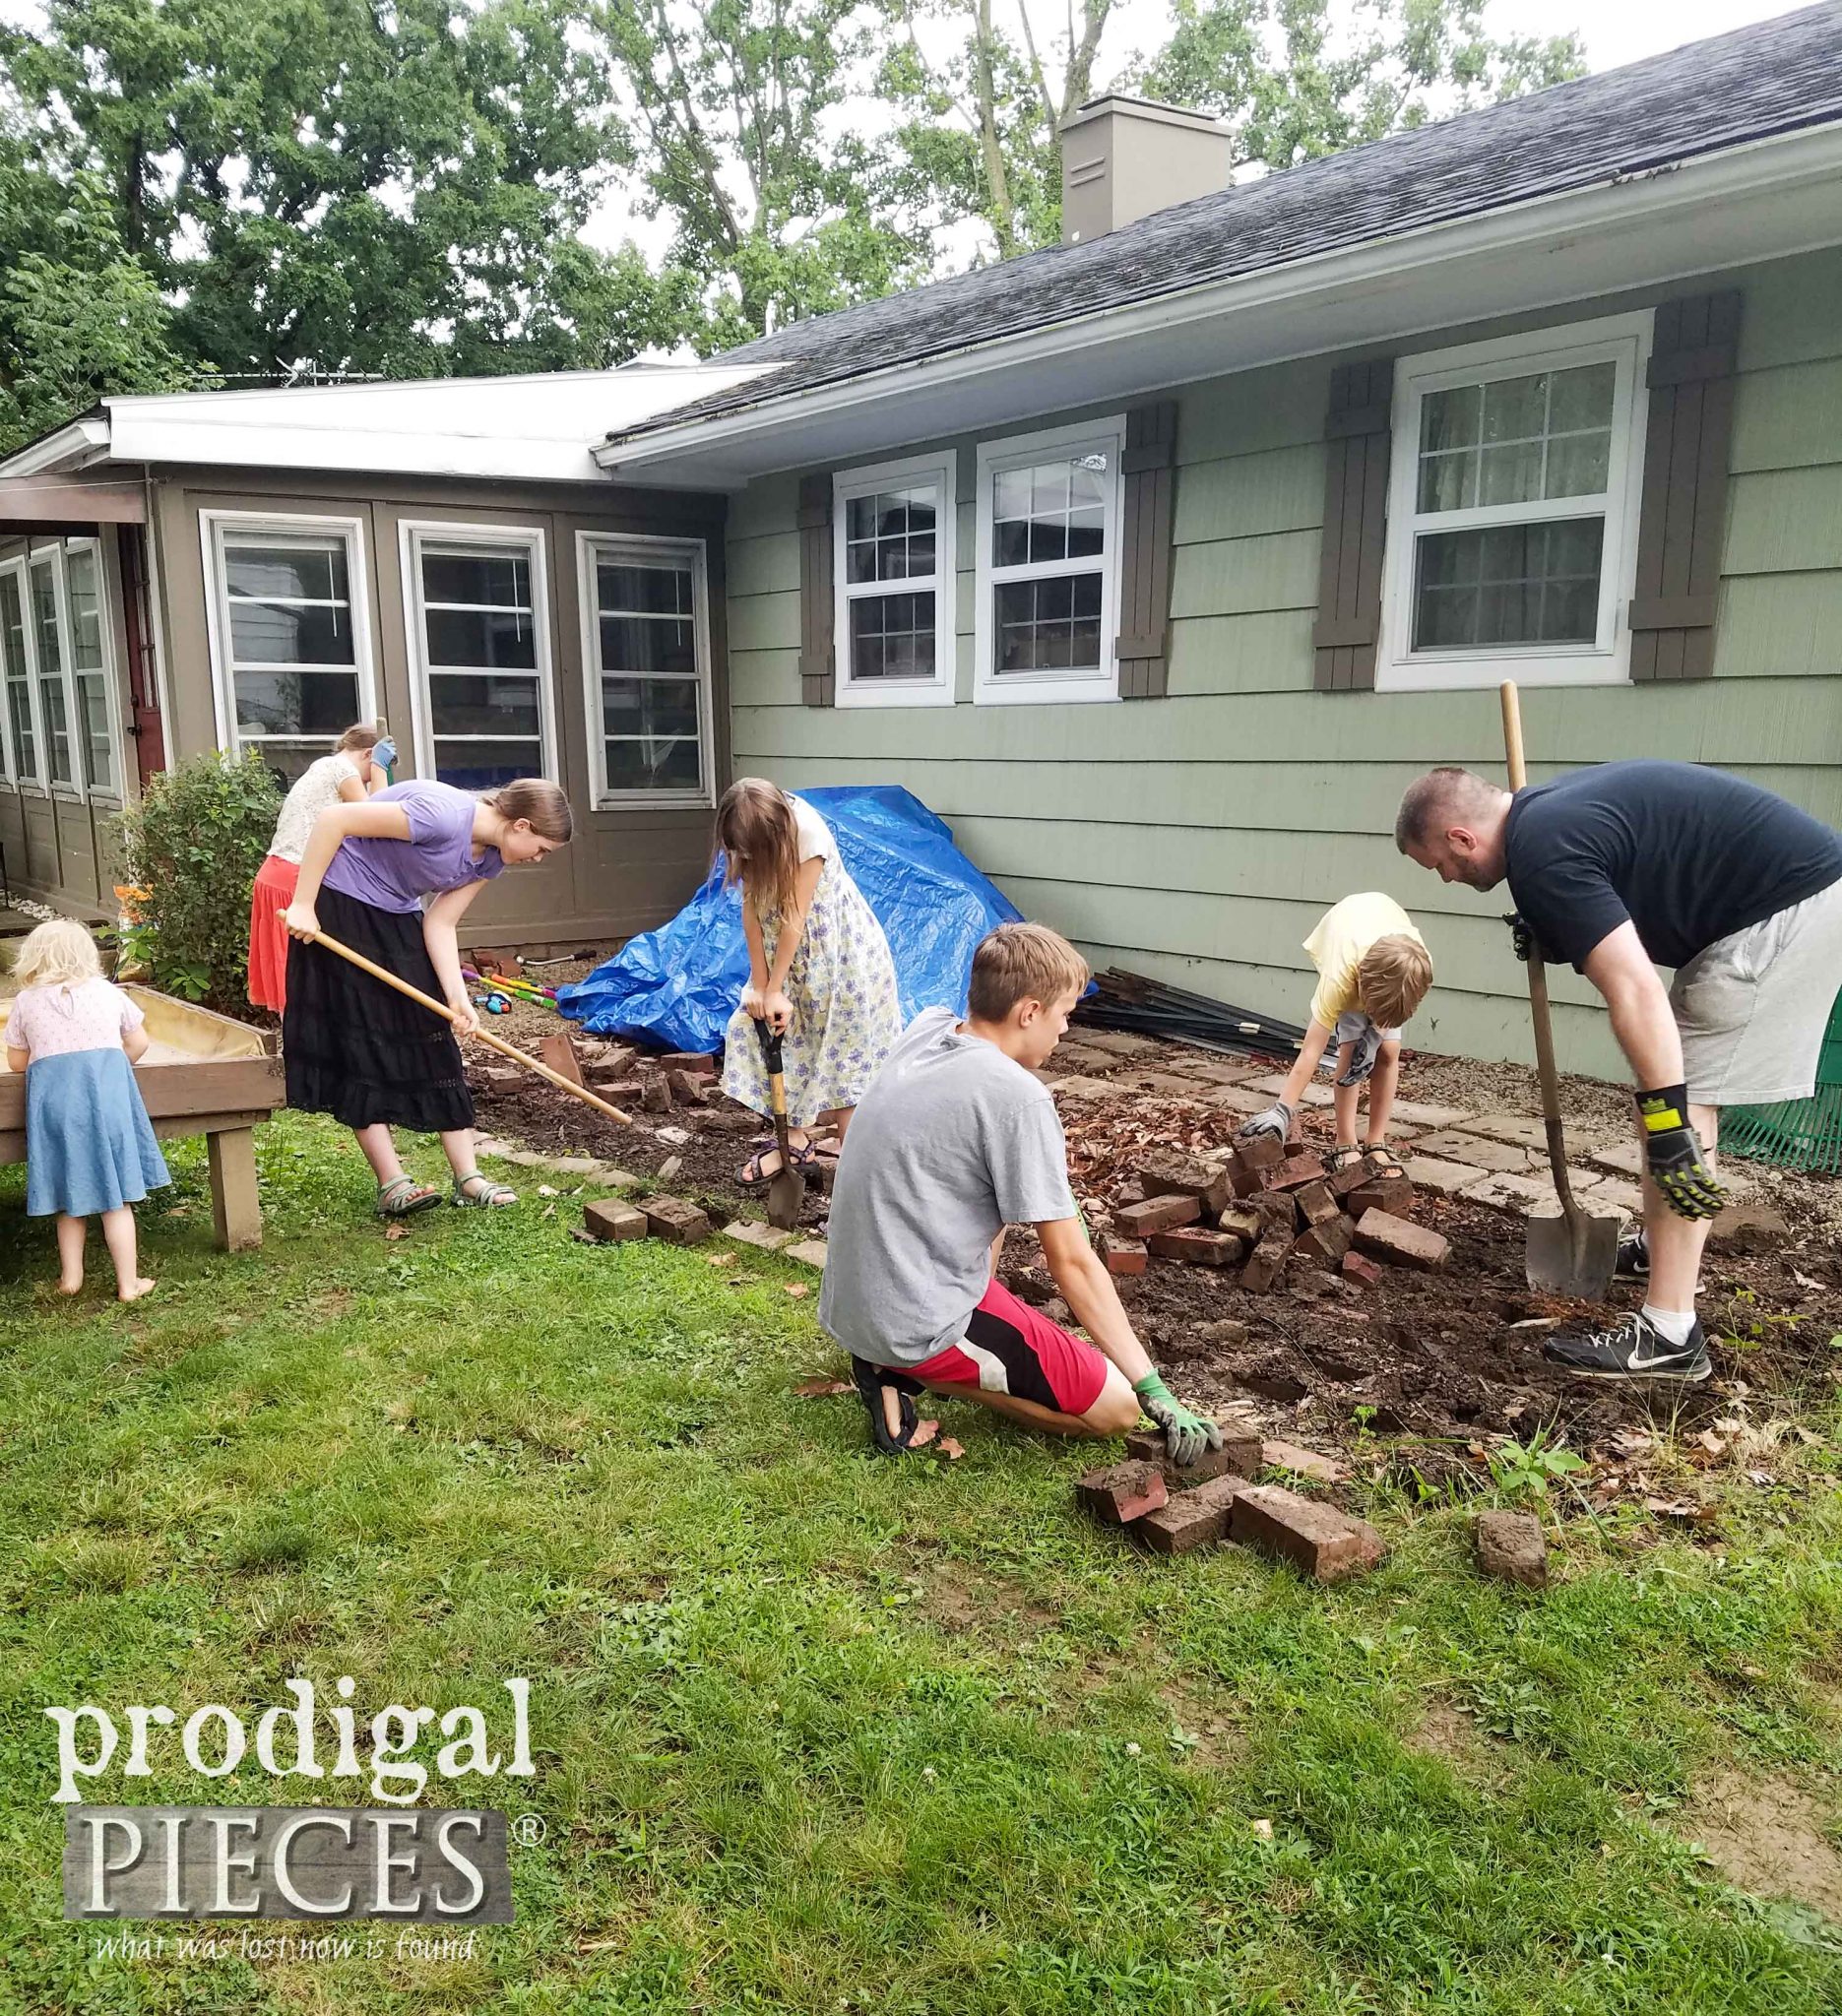
Once the wood was moved, we needed to pull up all the concrete pavers and brick we had put down to rest the wood on. Not only was it messy, but feels so good too.
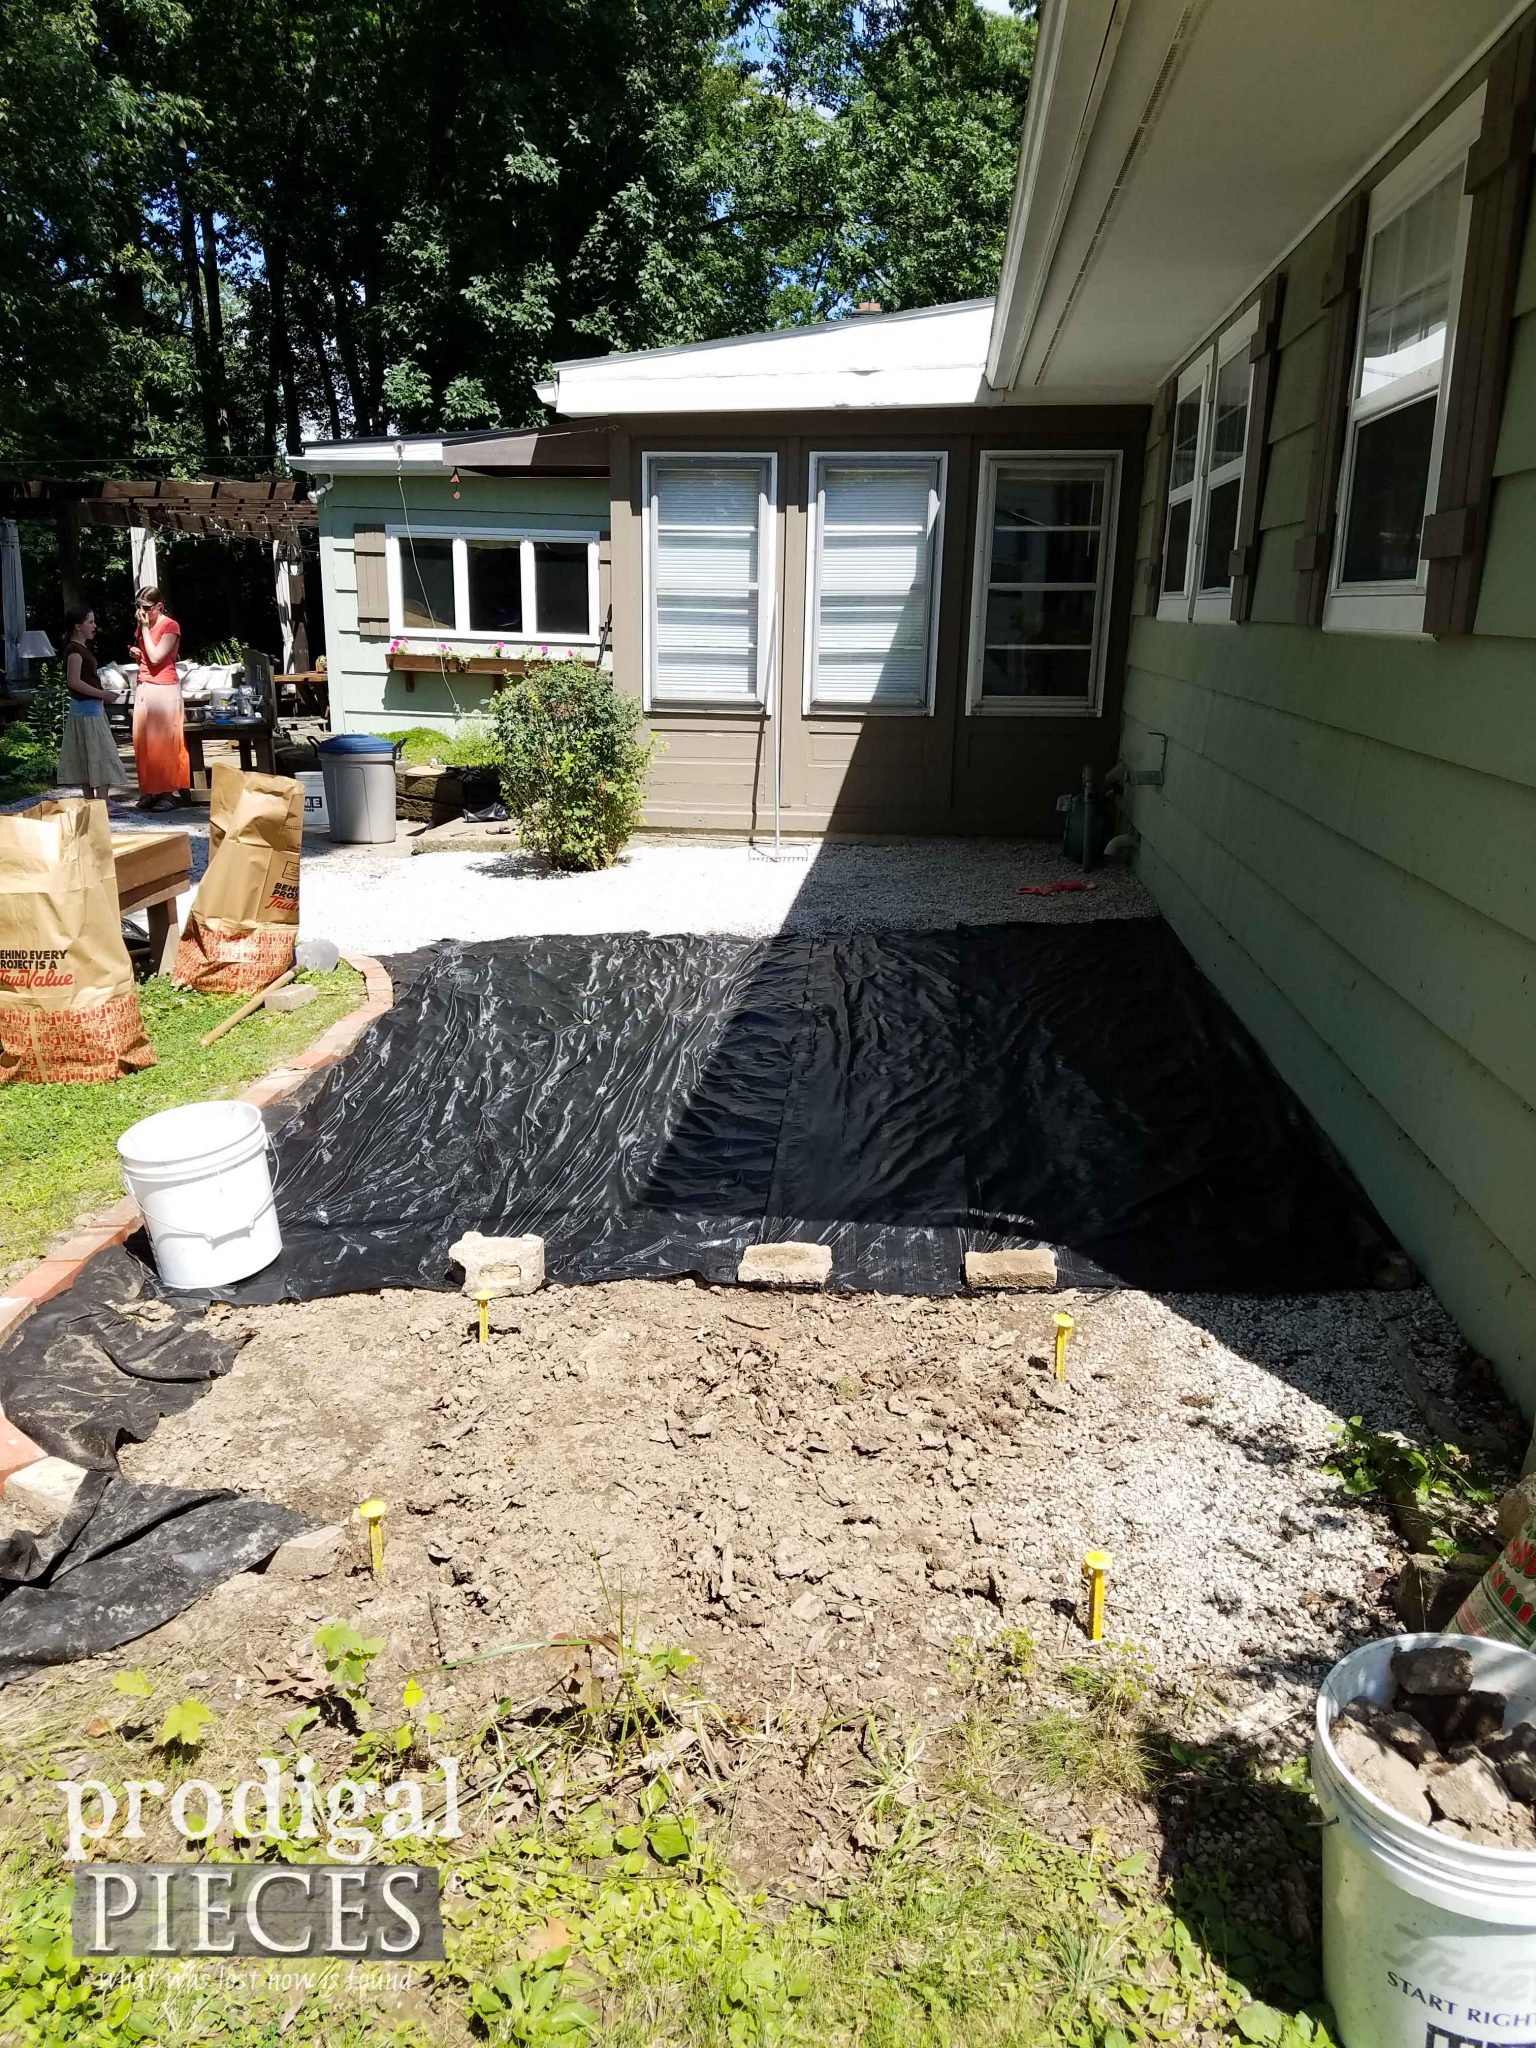
Since we already had some stone just outside our back door, we just wanted to extend the area using the red brick as border and fill it in. First, we graded it and then put down a landscaping fabric. Then, topped with more stone like we used in our fire pit makeover recently.
ROCKIN’ IT
Lots of stone hauling was in the game for me this summer. That’s just fine by me as I prefer to work to get exercise.
While the kids and I were doing that work, JC was busy building the DIY garden arbor I mentioned earlier. We wanted to add a feature that gave us something nice to look at from our side and privacy from the other.
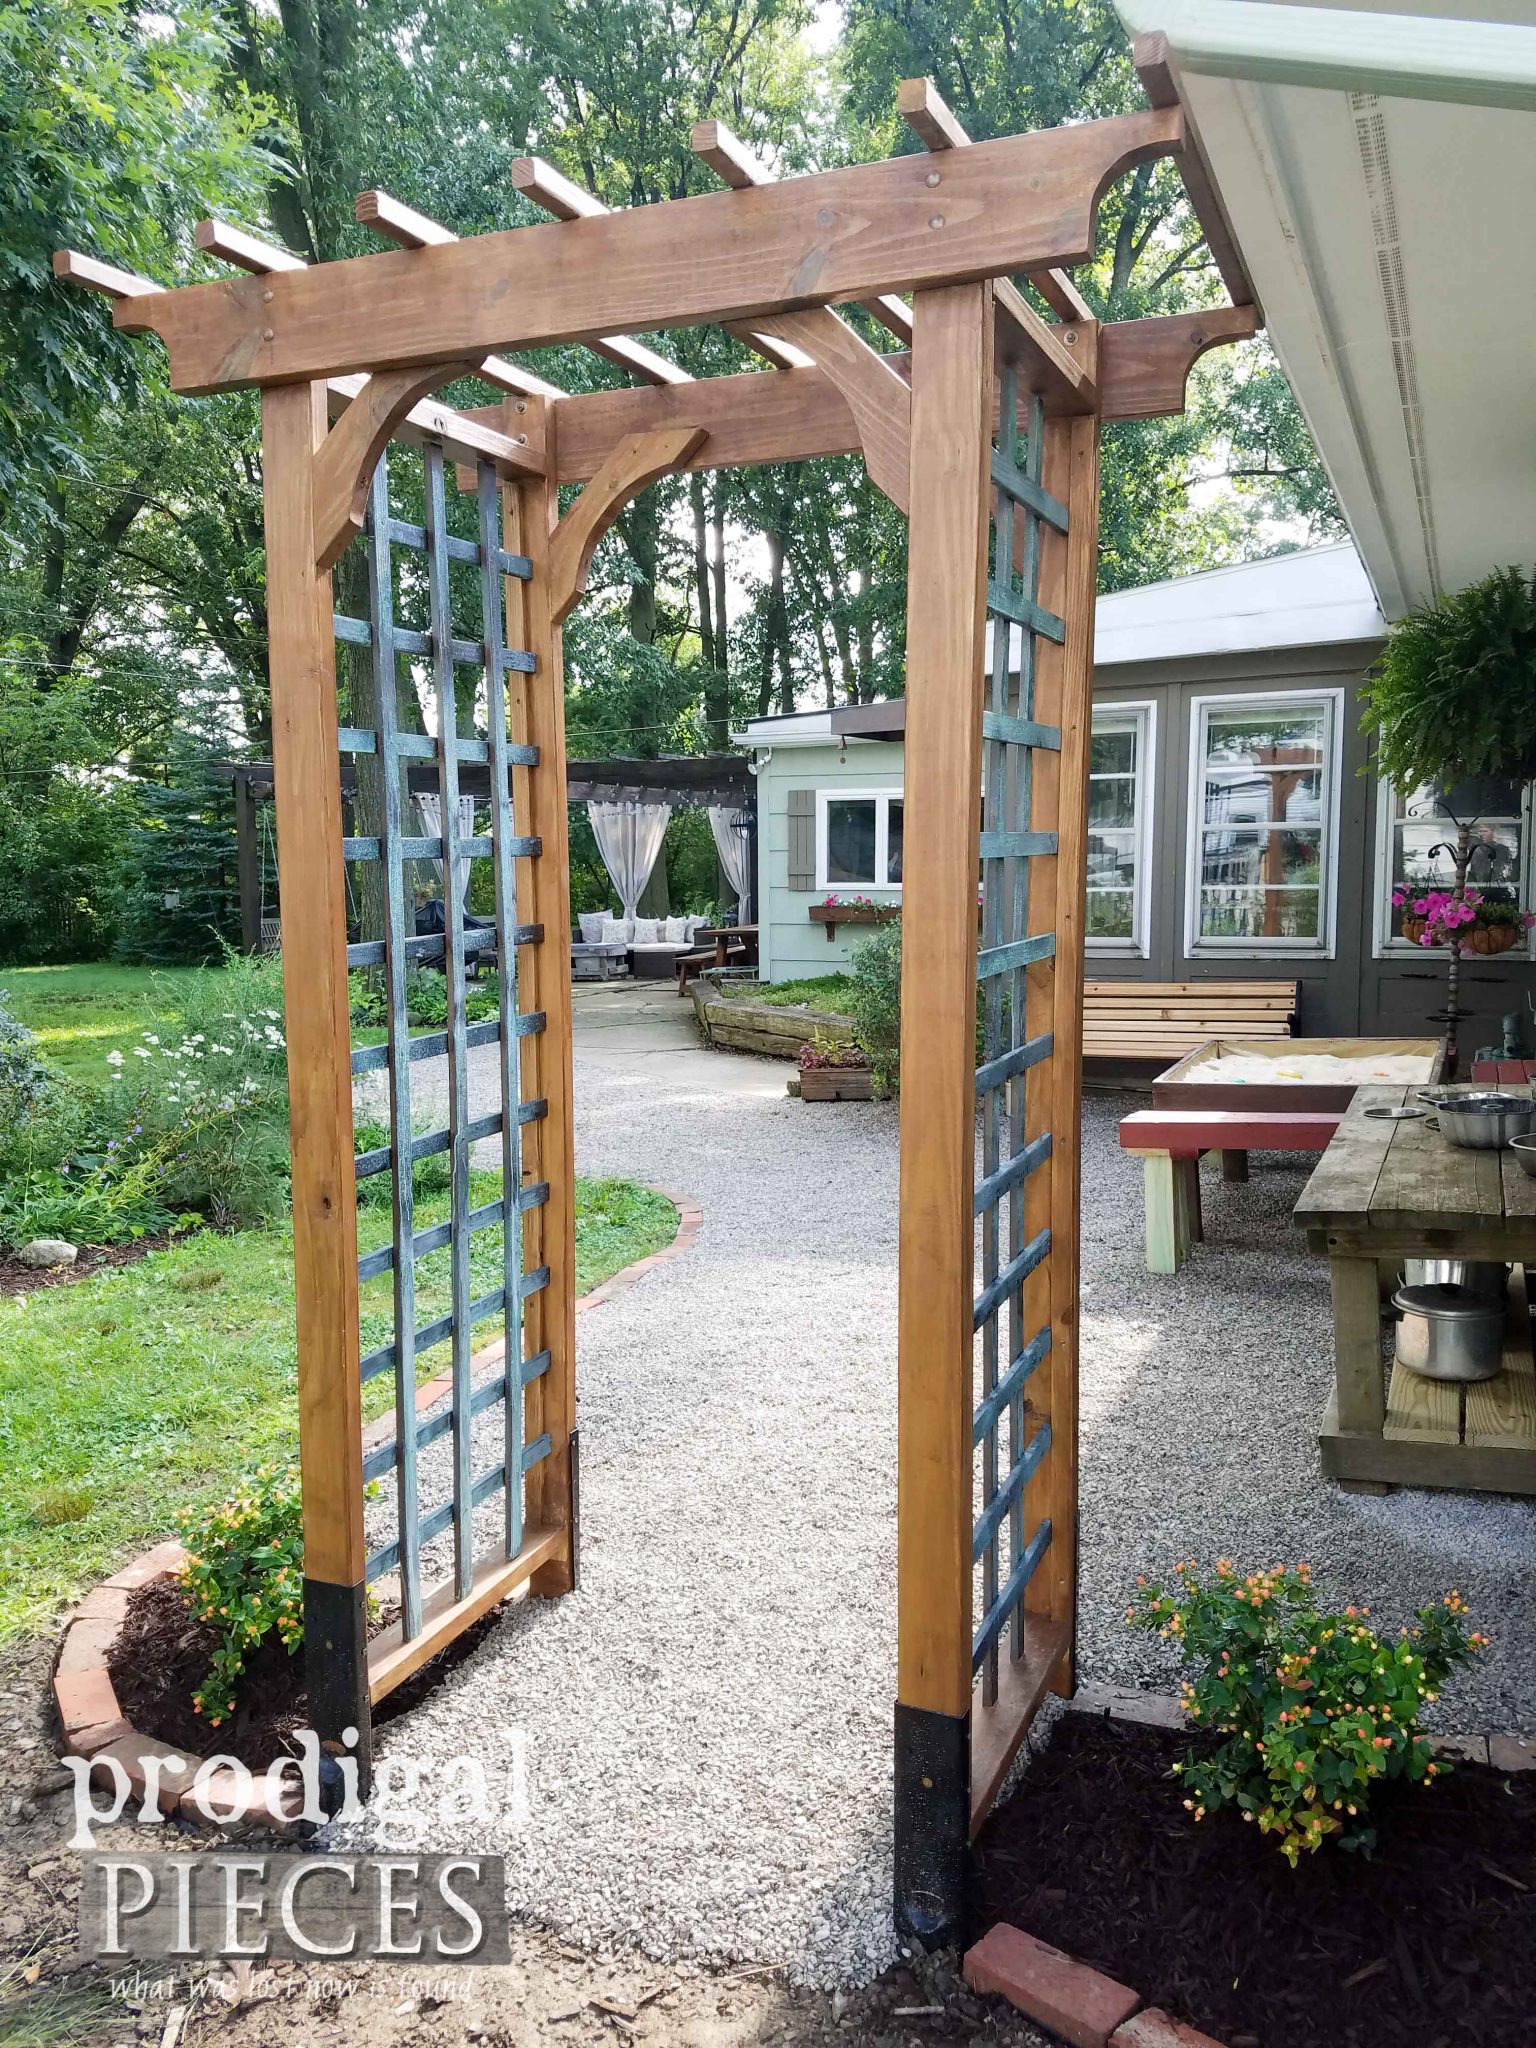
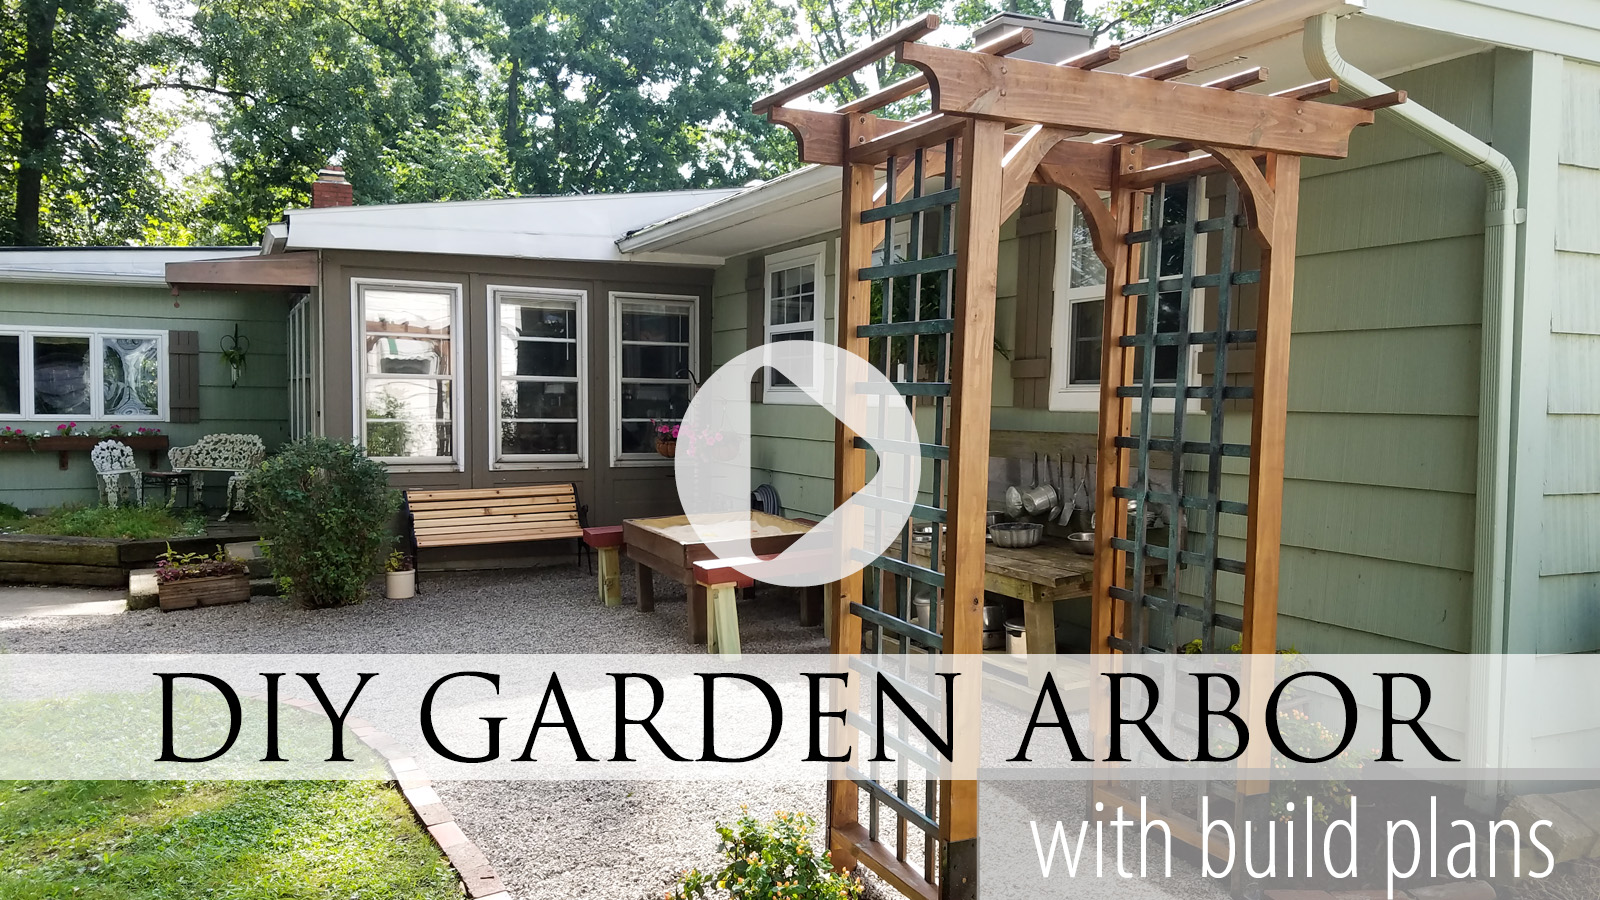
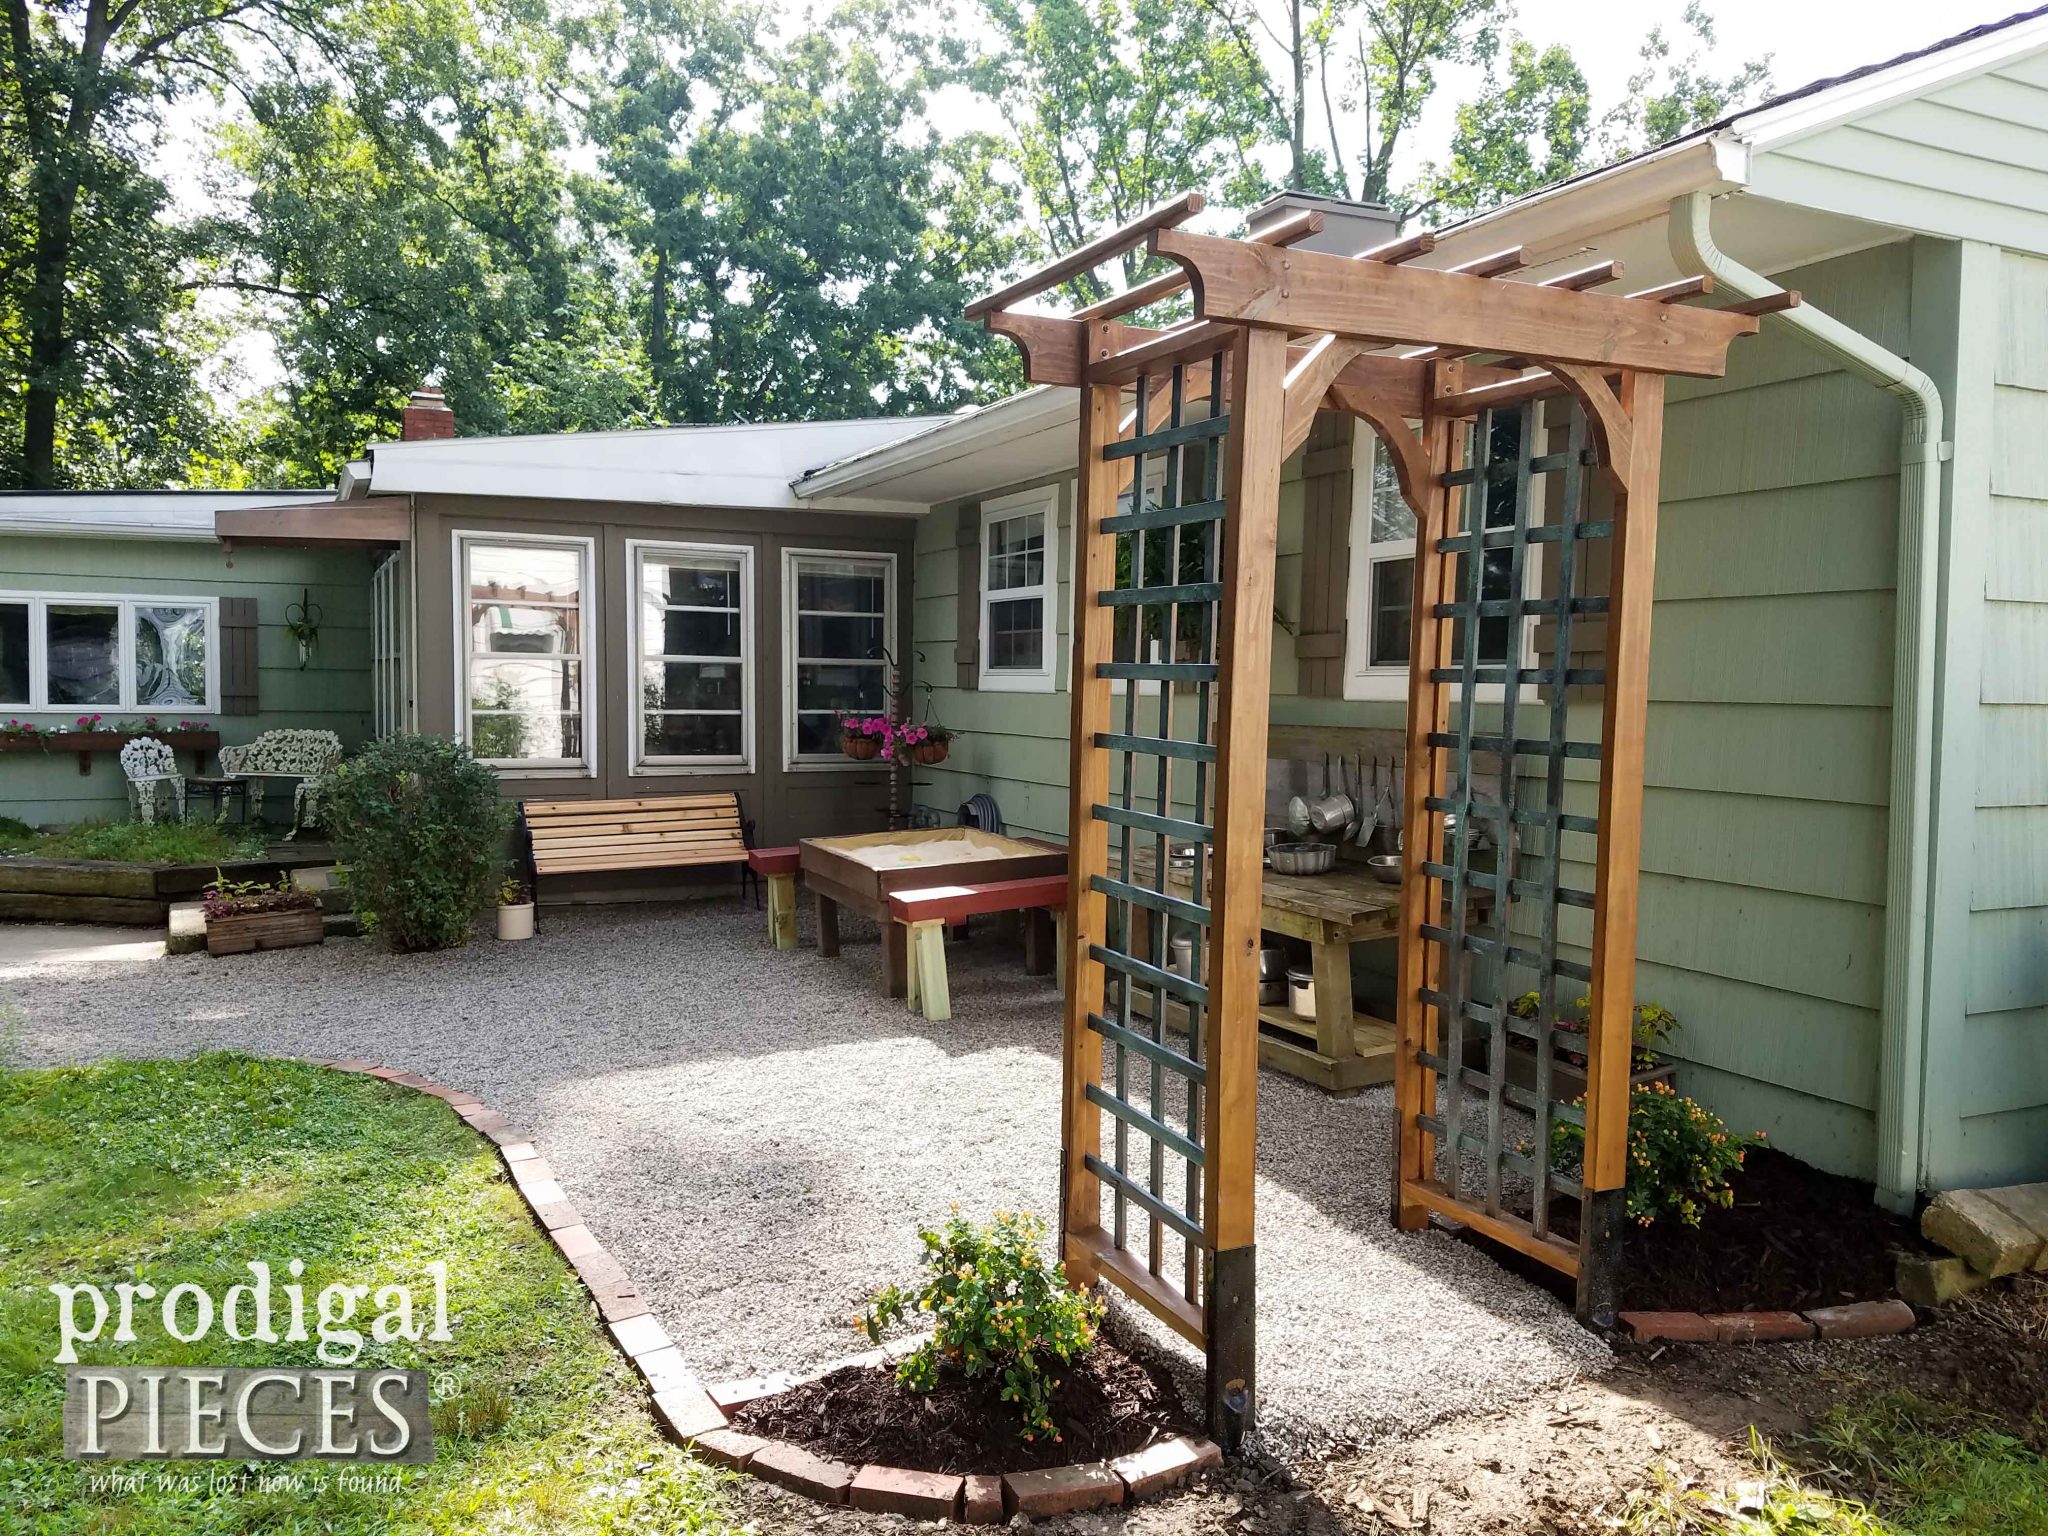
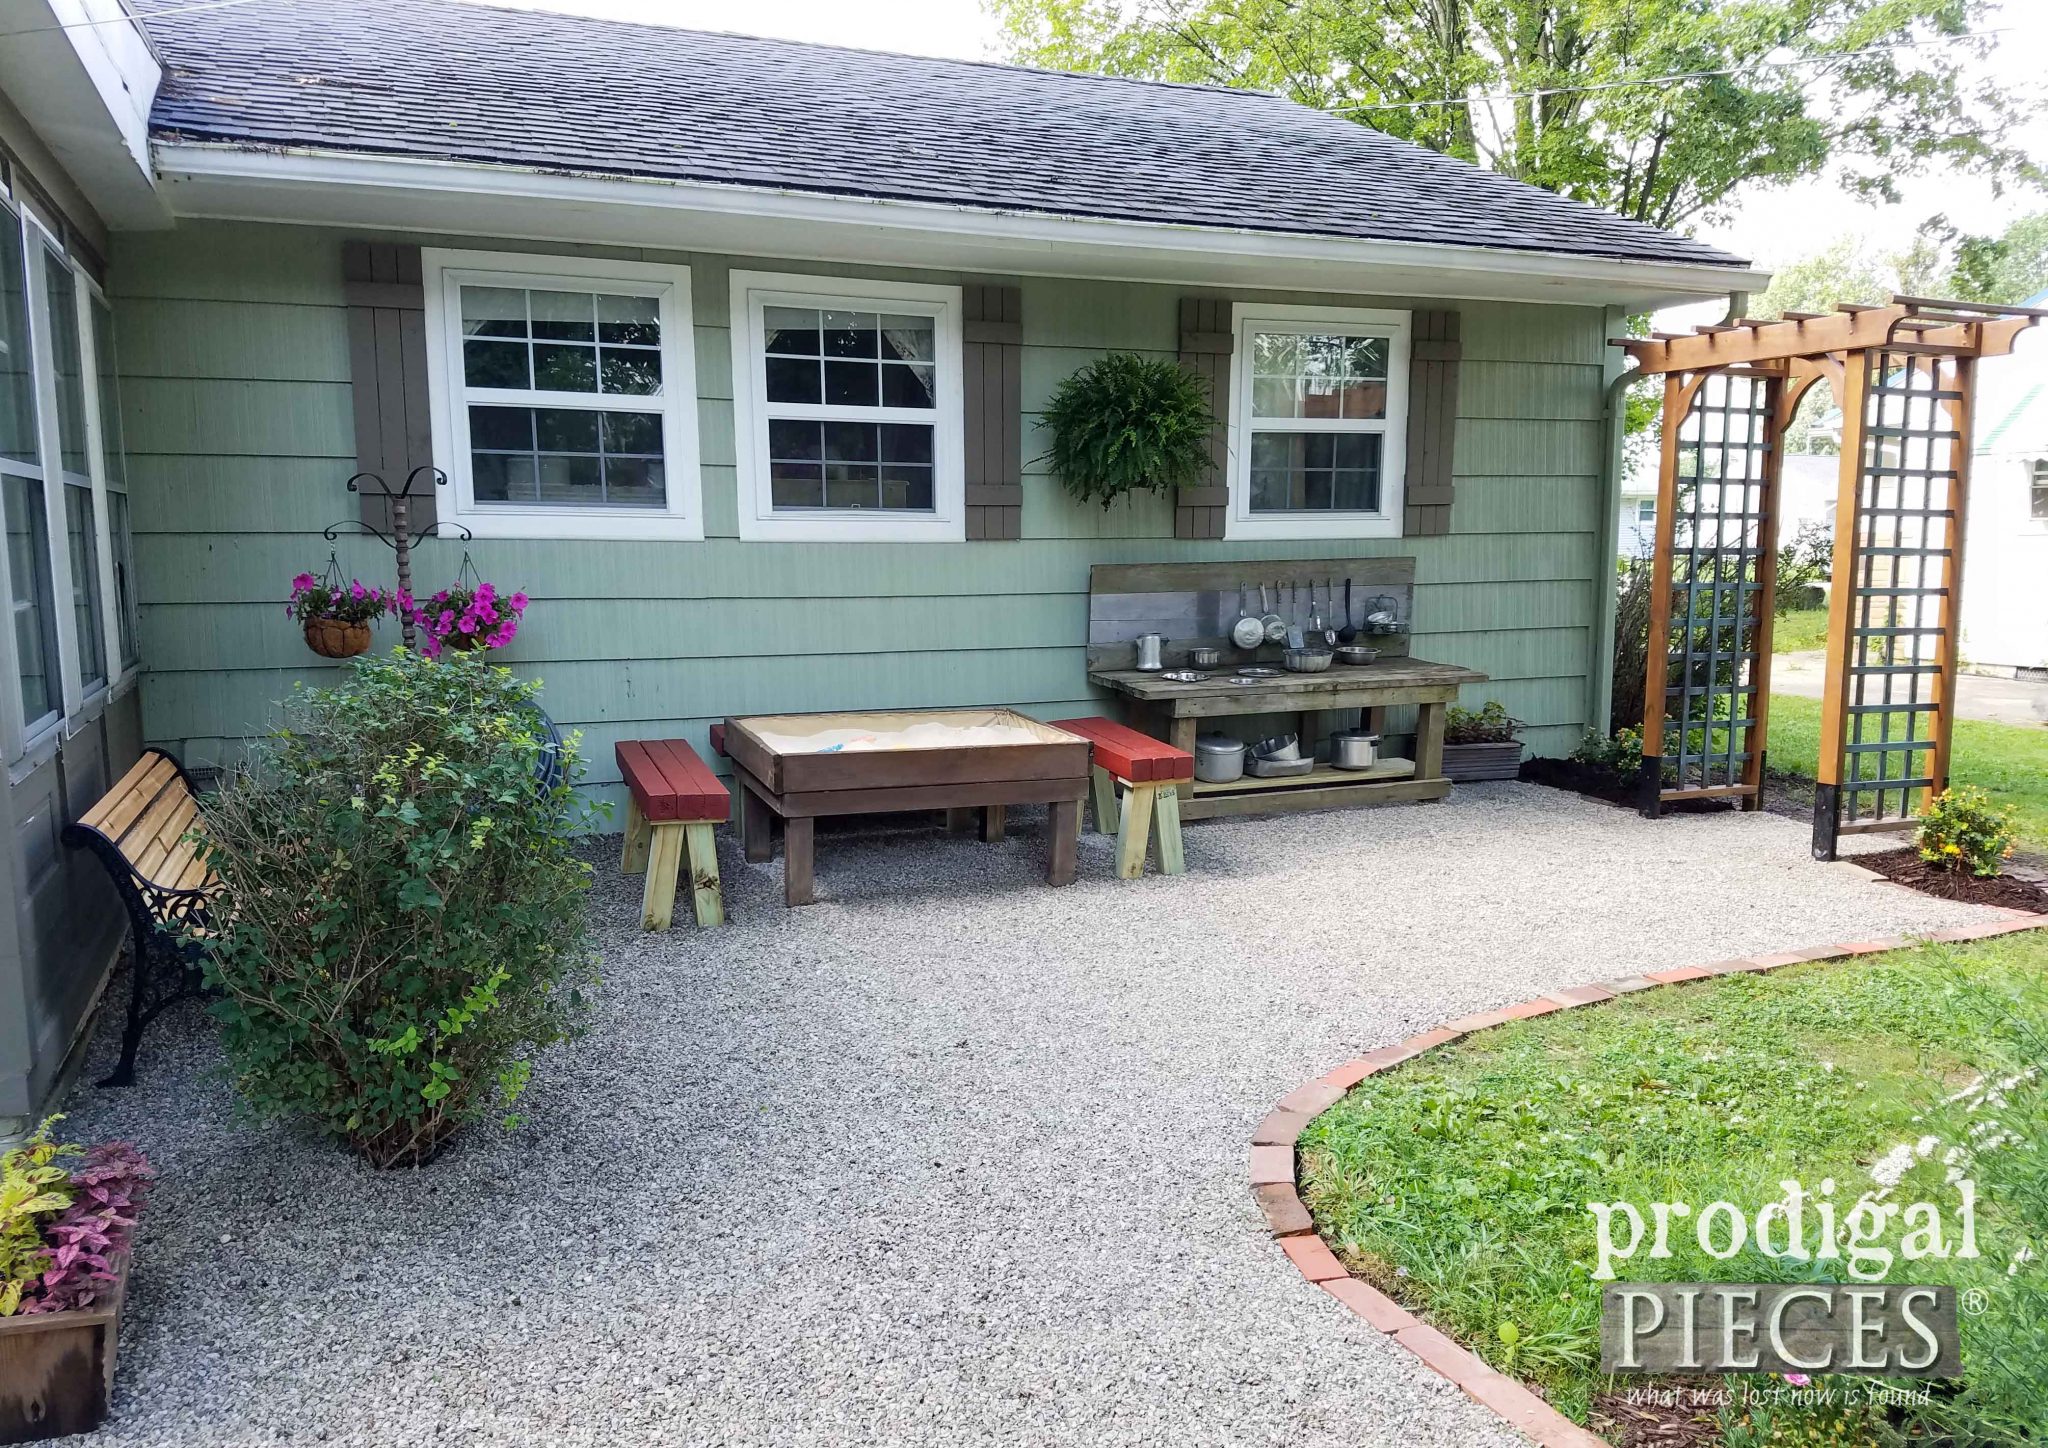
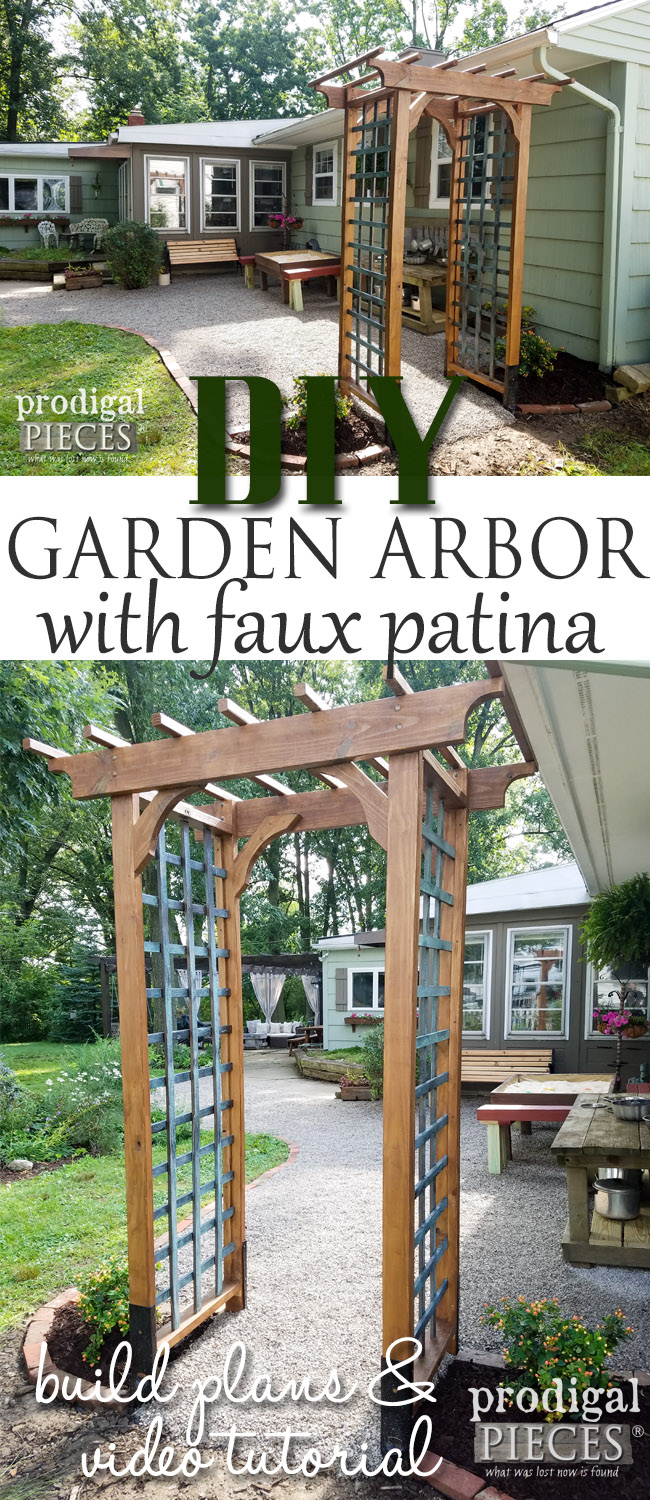
Here is what we designed and feel totally suits our new area. Complete all-in cost to build this was less than $120. Not bad when you consider buying one like this brand new is over $300. Cha-ching!! haha.
I share more picture reveals at the end of this post, so be sure to read through to see what else we did to our space, see my latest video, and enter to WIN!
STEPS TO BUILD
Want to build one of your own? Here is what you’ll need:
Materials: (see cut list below each)
- 5 – 2″ x 4″ x 8′ cut into:
- 4 – 2″ x 4″ x 84″ uprights
- 4 – 2″ x 4″ x 24″ horizontal cross pieces
- 2 – 2″x 6″ x 8′ cut into:
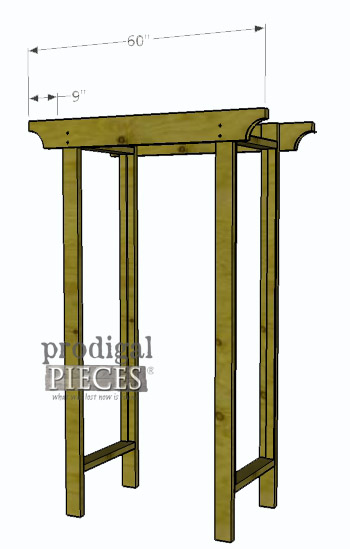
- 2 – 2″ x 6″ x 60″ headers
- 4 – 2″ x 6″ x 17″(see diagram below for details)
- 13 – 1″ x 2″ x 8′ cut into:
- 10 – 1″ x 2″ x 69″ trellis vertical pieces
- 22 – 1″ x 2″ x 24″ trellis horizontal pieces
- 3 – 2″ x 2″ x 8′ cut into:
- 9 – 2″ x 2″ x 32″ top slats
- 3″ decking screws
- 2 ½” decking screws
- 8 – 3 ½” x 5/16″ carriage bolts with 8 washers and 8 hex nuts
- 1″ crown staples for air nailer
- patina kit in choice of finish (bronze, iron, copper)
- E-Z Mender Brackets
- stain of choice: we used Behr Waterproofing Stain in Chocolate
Tools:
- paint brush
- jig saw
- miter saw
- drill / drill bits
- air stapler
- tape measure
- quick square
- sawhorse pair
- level
- safety equipment – safety glasses, dust mask, hearing protection
Step 1
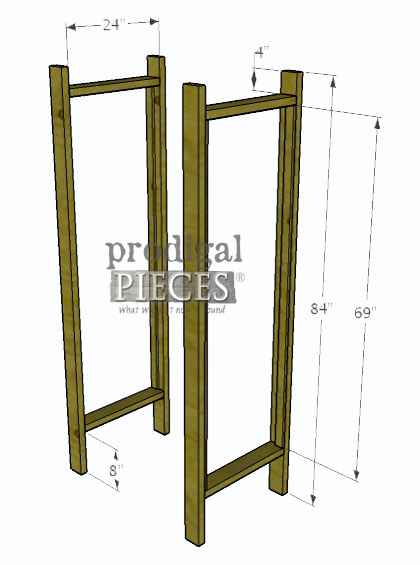
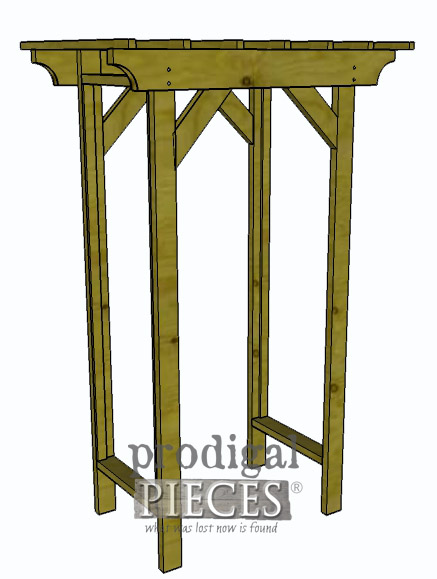
First, you want to build your frames. Grab your cut 2″x 4″ and 1″ x 2″ pieces and assemble them like the diagram shows:
Step 2
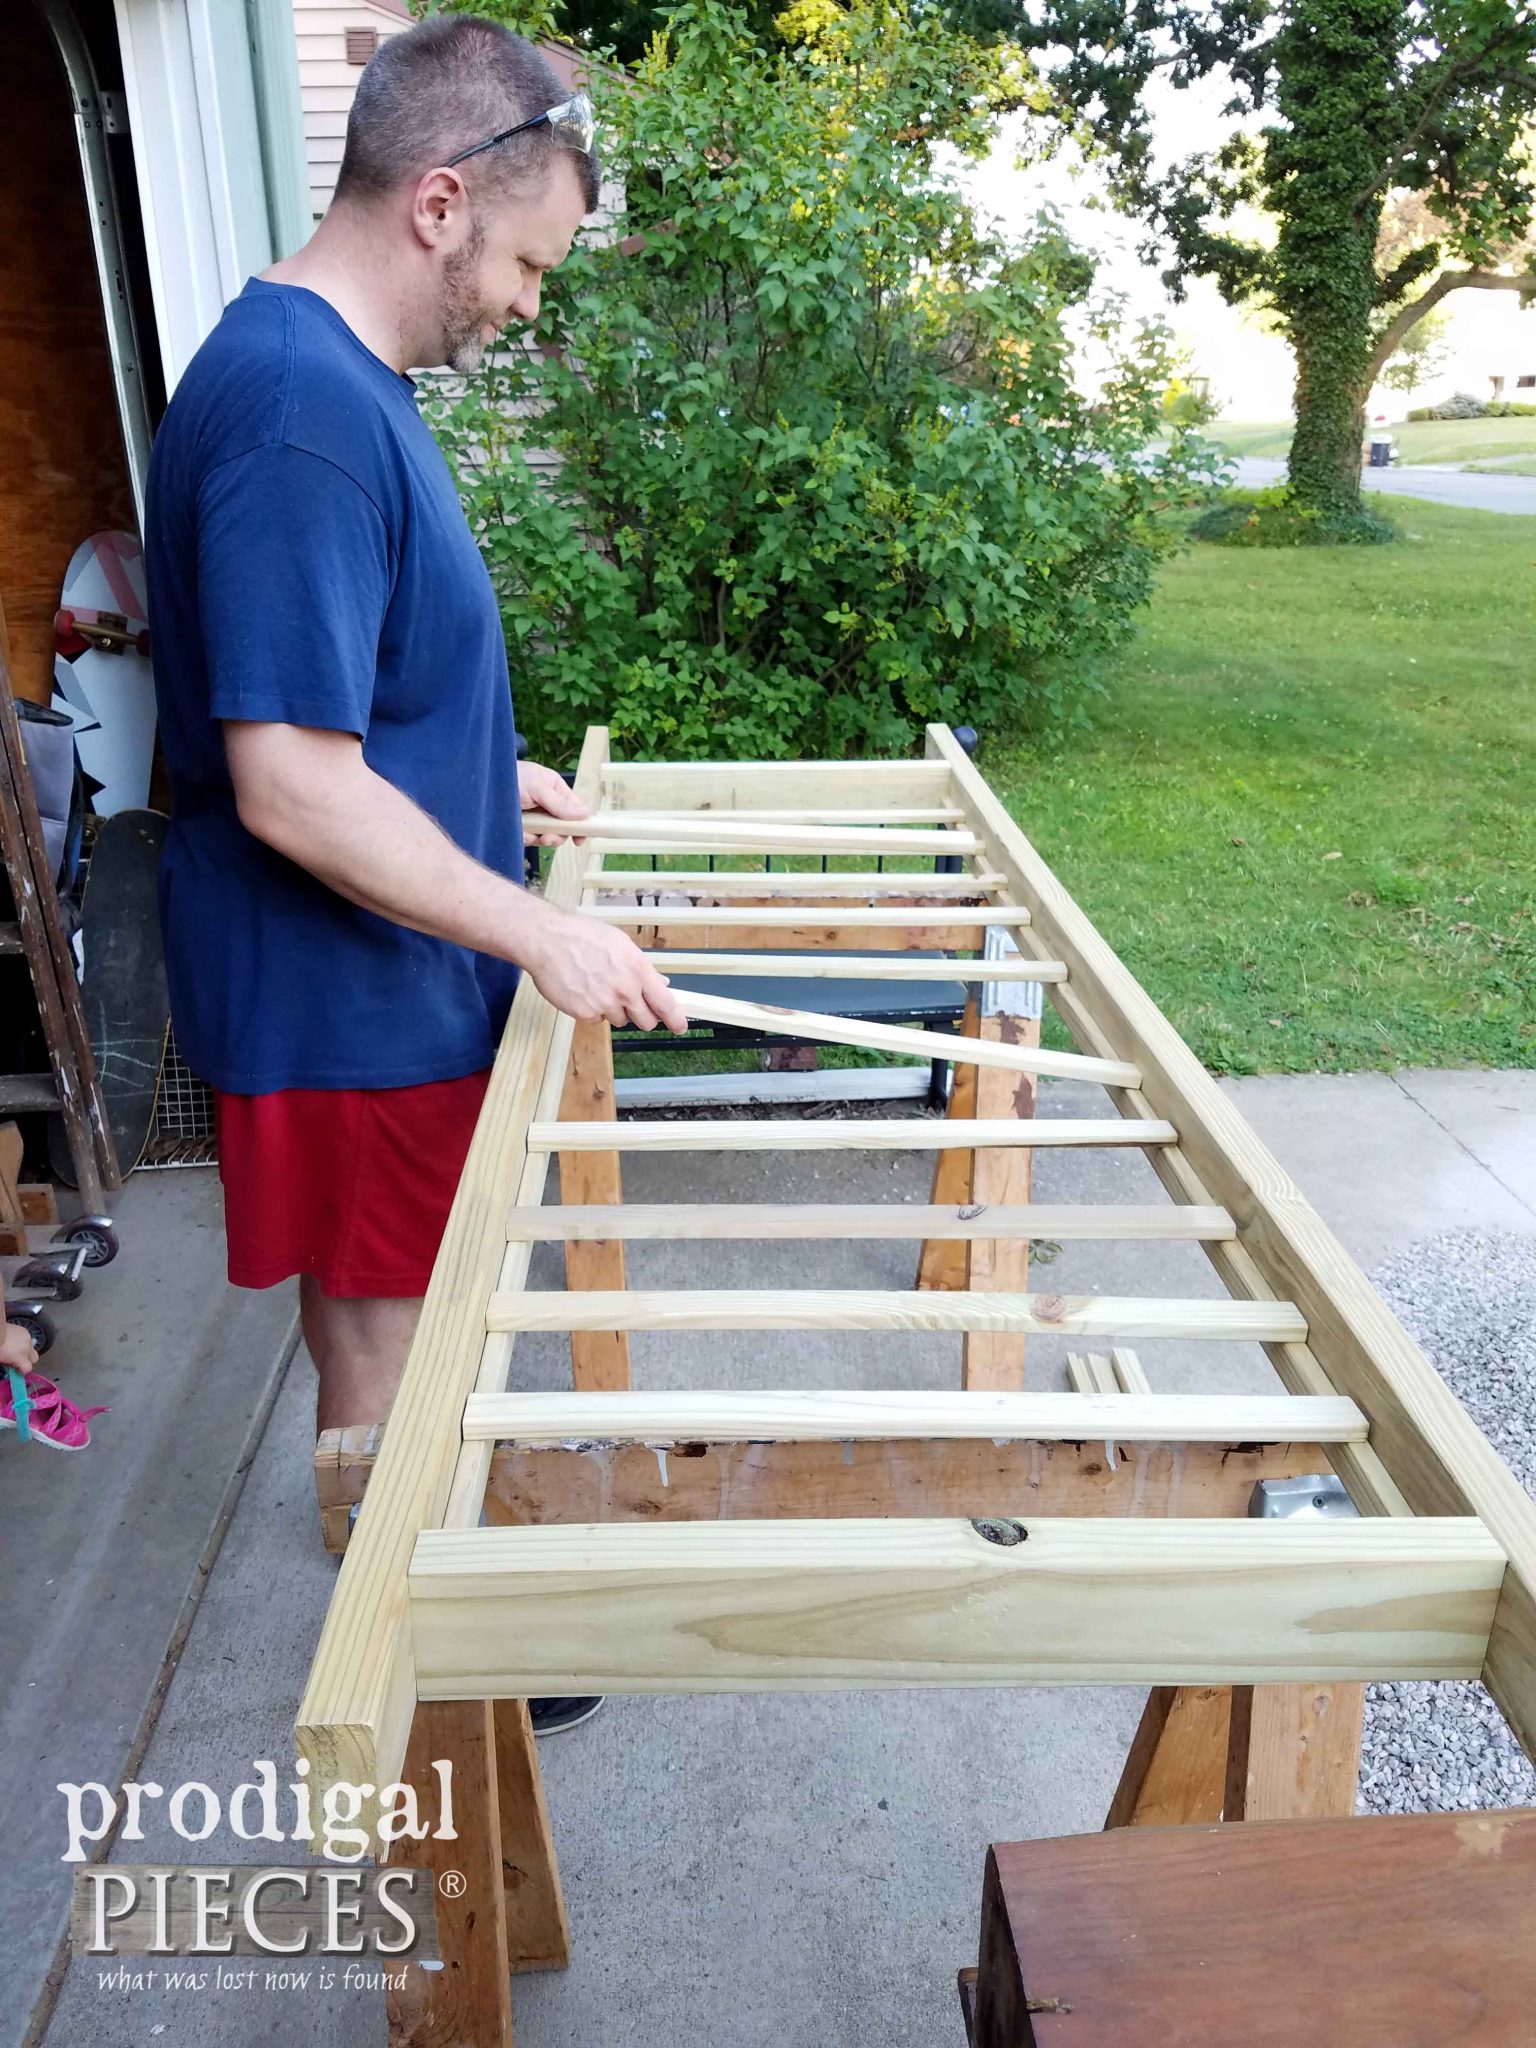
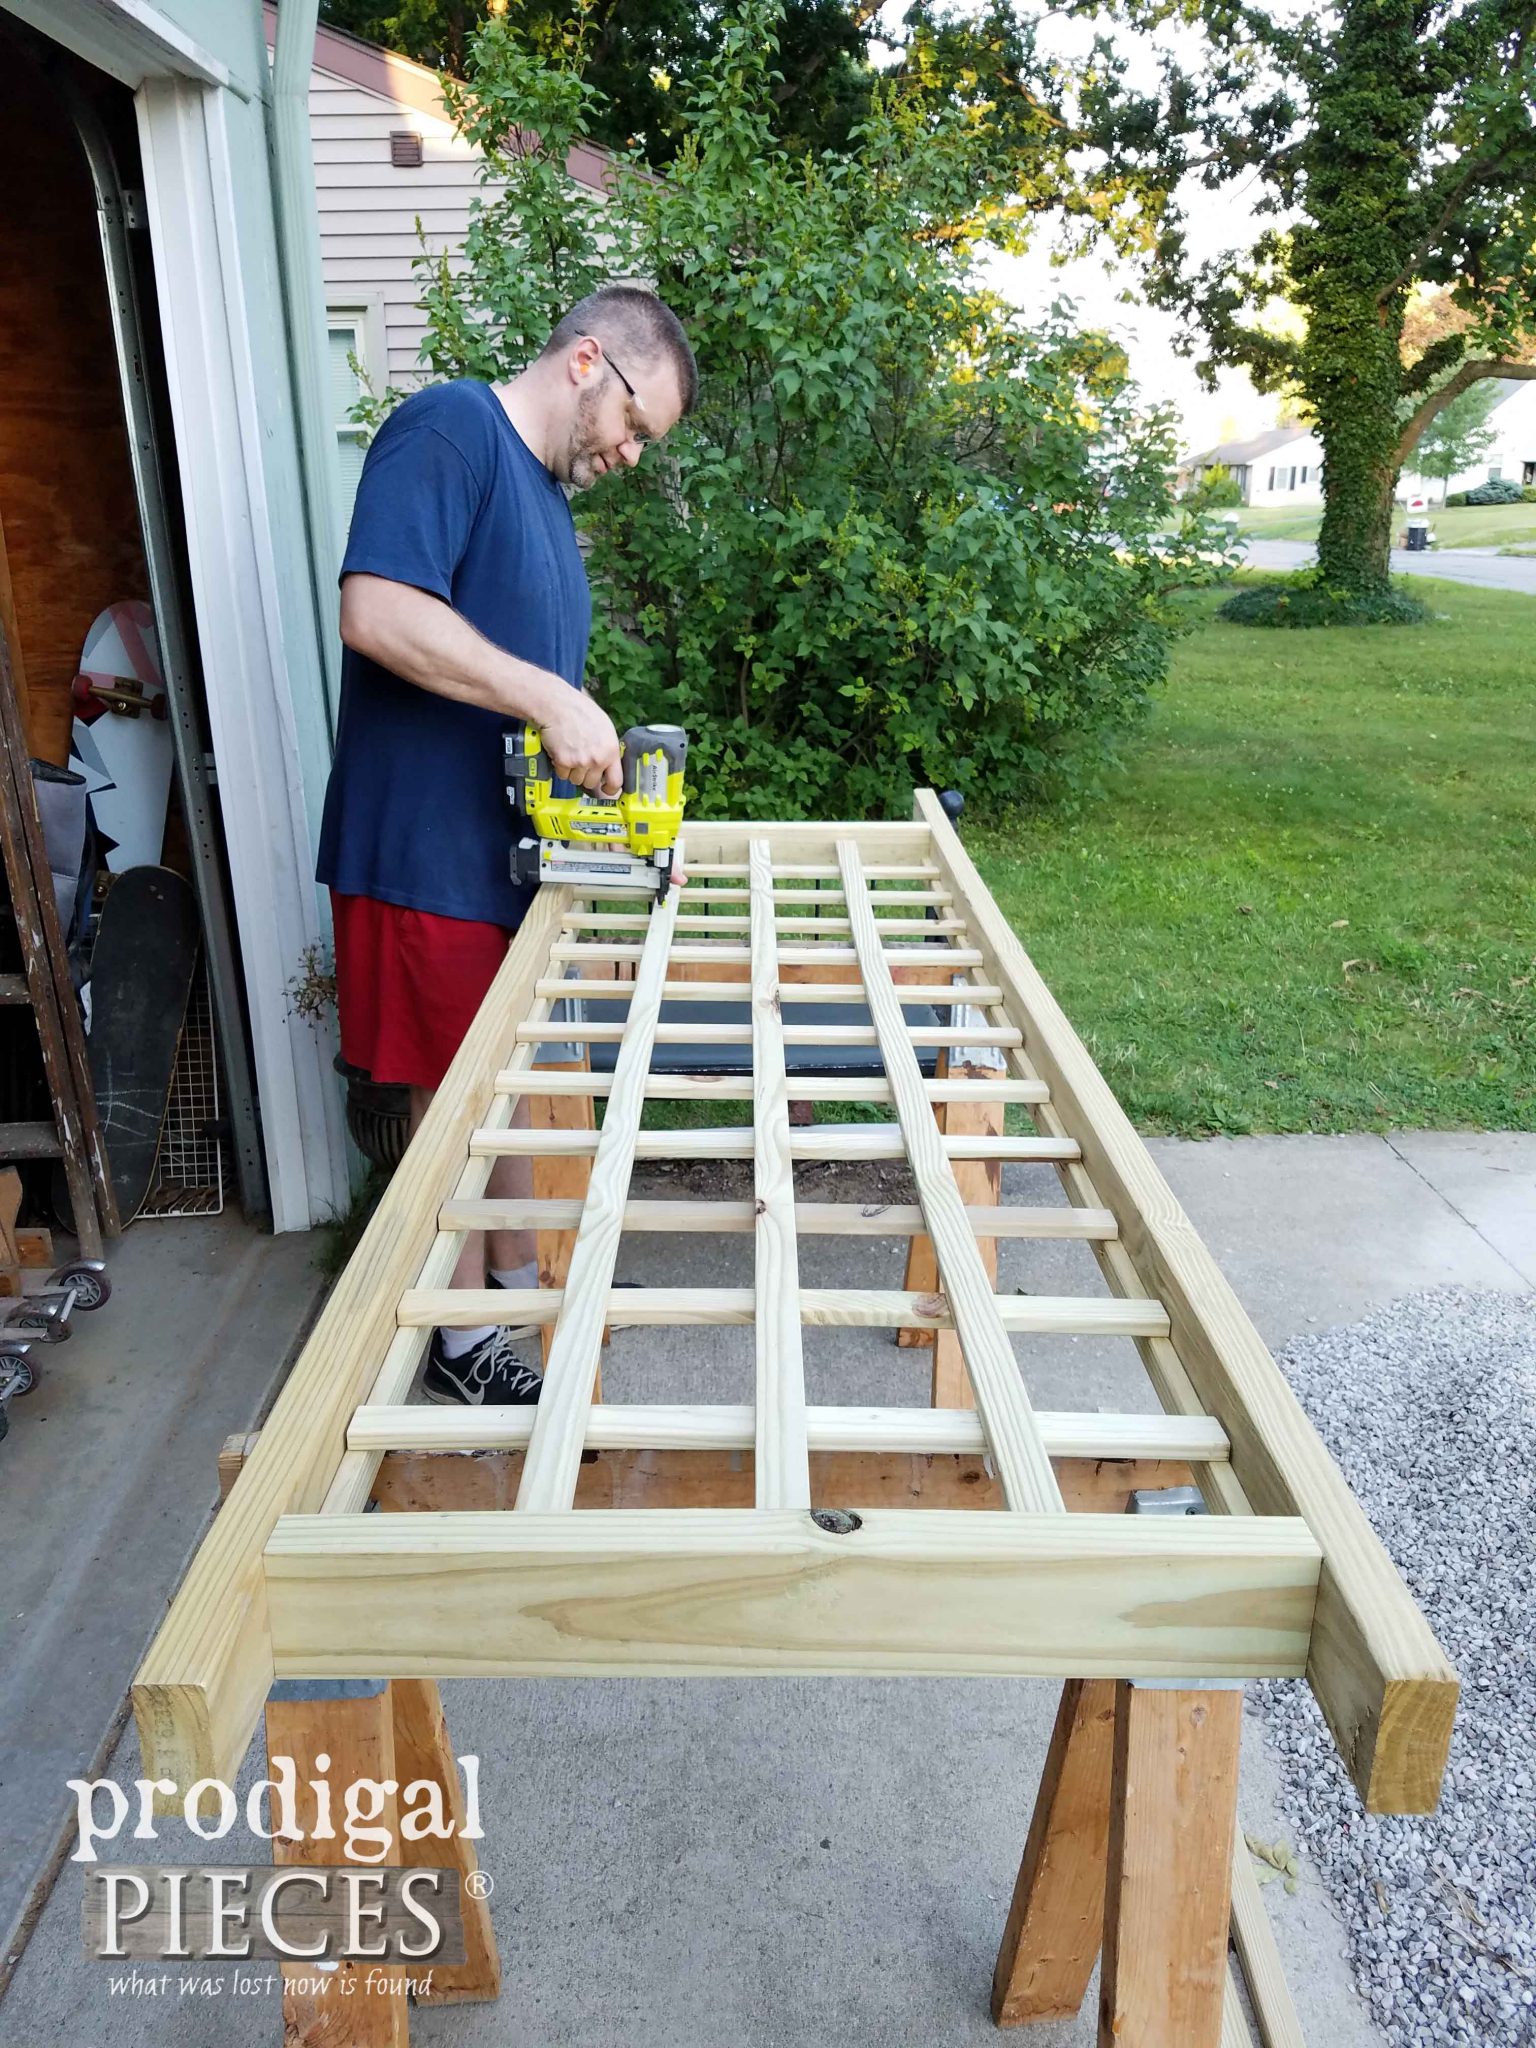
Once your frames are assembled, set them up on sawhorses or work surface. Next, you are going to make the trellis using the frame as a template, but are NOT attaching it to the frame. Ideally, you want to do the faux finish seen in video below before attaching. If you only want to stain the trellis same as the frame, reverse the layout below beginning with the vertical pieces.
However, if you want to accent the trellis with a faux patina or paint or contrasting stain, follow these steps: Place your trellis horizontal pieces into the frame at 6 ½” spacing. Do not attach to the frame.
Step 3
Place your trellis vertical pieces on top of the horizontal pieces at 6″, 12″, and 18″ intervals. Attach only the vertical pieces to the horizontal pieces using your stapler and staples, but not to the frame. This is the back side of the trellis facing you.
Step 4
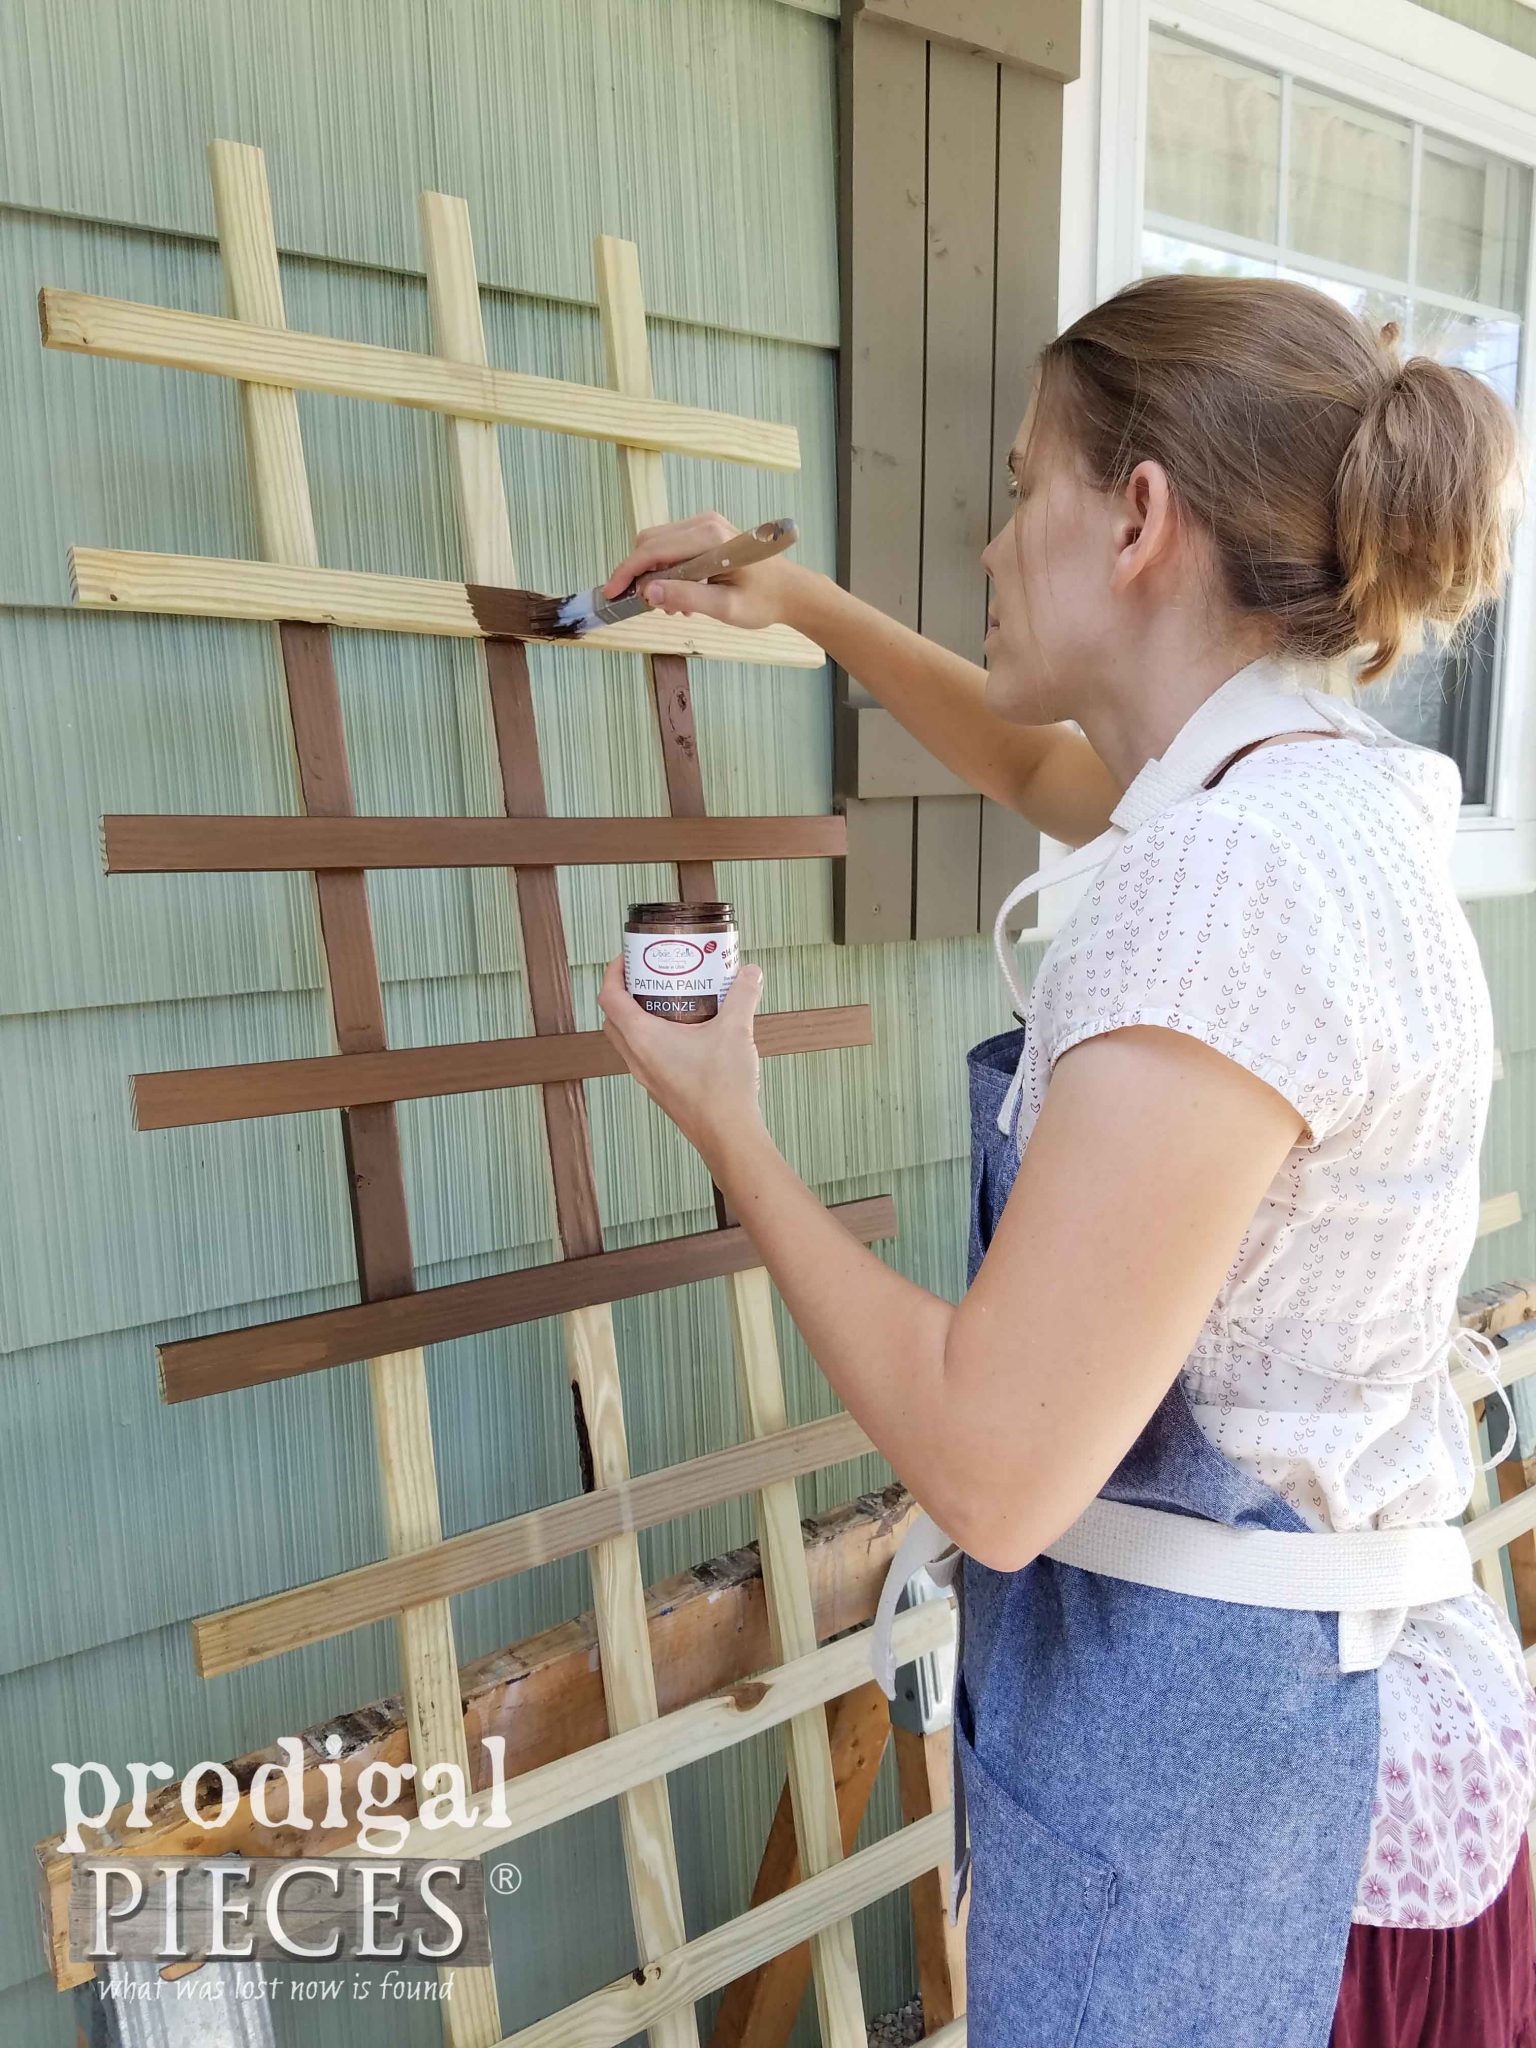
Then, remove the trellis from the frame and complete it as you desire. I chose to create a faux patina using my patina paint kit as mentioned above. I’m all about texture and dimension, so these paints are going to help me create a wonderful aged look to our DIY garden arbor.
The process is simple and amazing! I show it all in the video below.
Step 5
While you are waiting for you coats of paint to dry, you can finish the assembly of your arbor. Begin by, attaching your headers using the carriage bolts. Feel free to make your header have any decorative element you wish. We cut a notch out of our header for a decorative touch. Then, measure 2″ down from top edge, and 4″ in from outside bottom corner.
Step 6
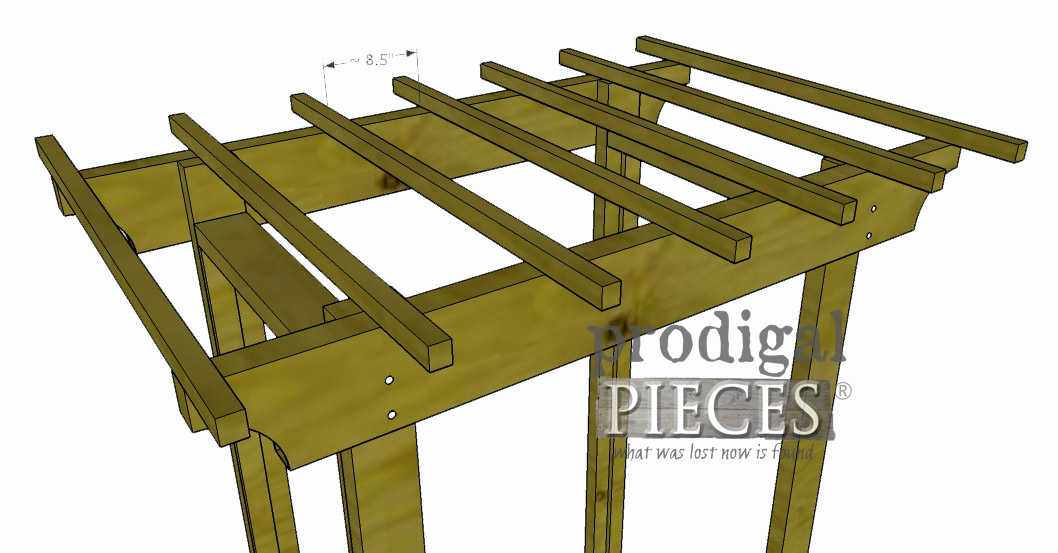
Now to add your top slats. Find center and place your first slat and attach using the 2 ½” screws. Place the next two flush to each end. Then, add the last four evenly spacing them at approximately 8 ½” apart.
Step 7
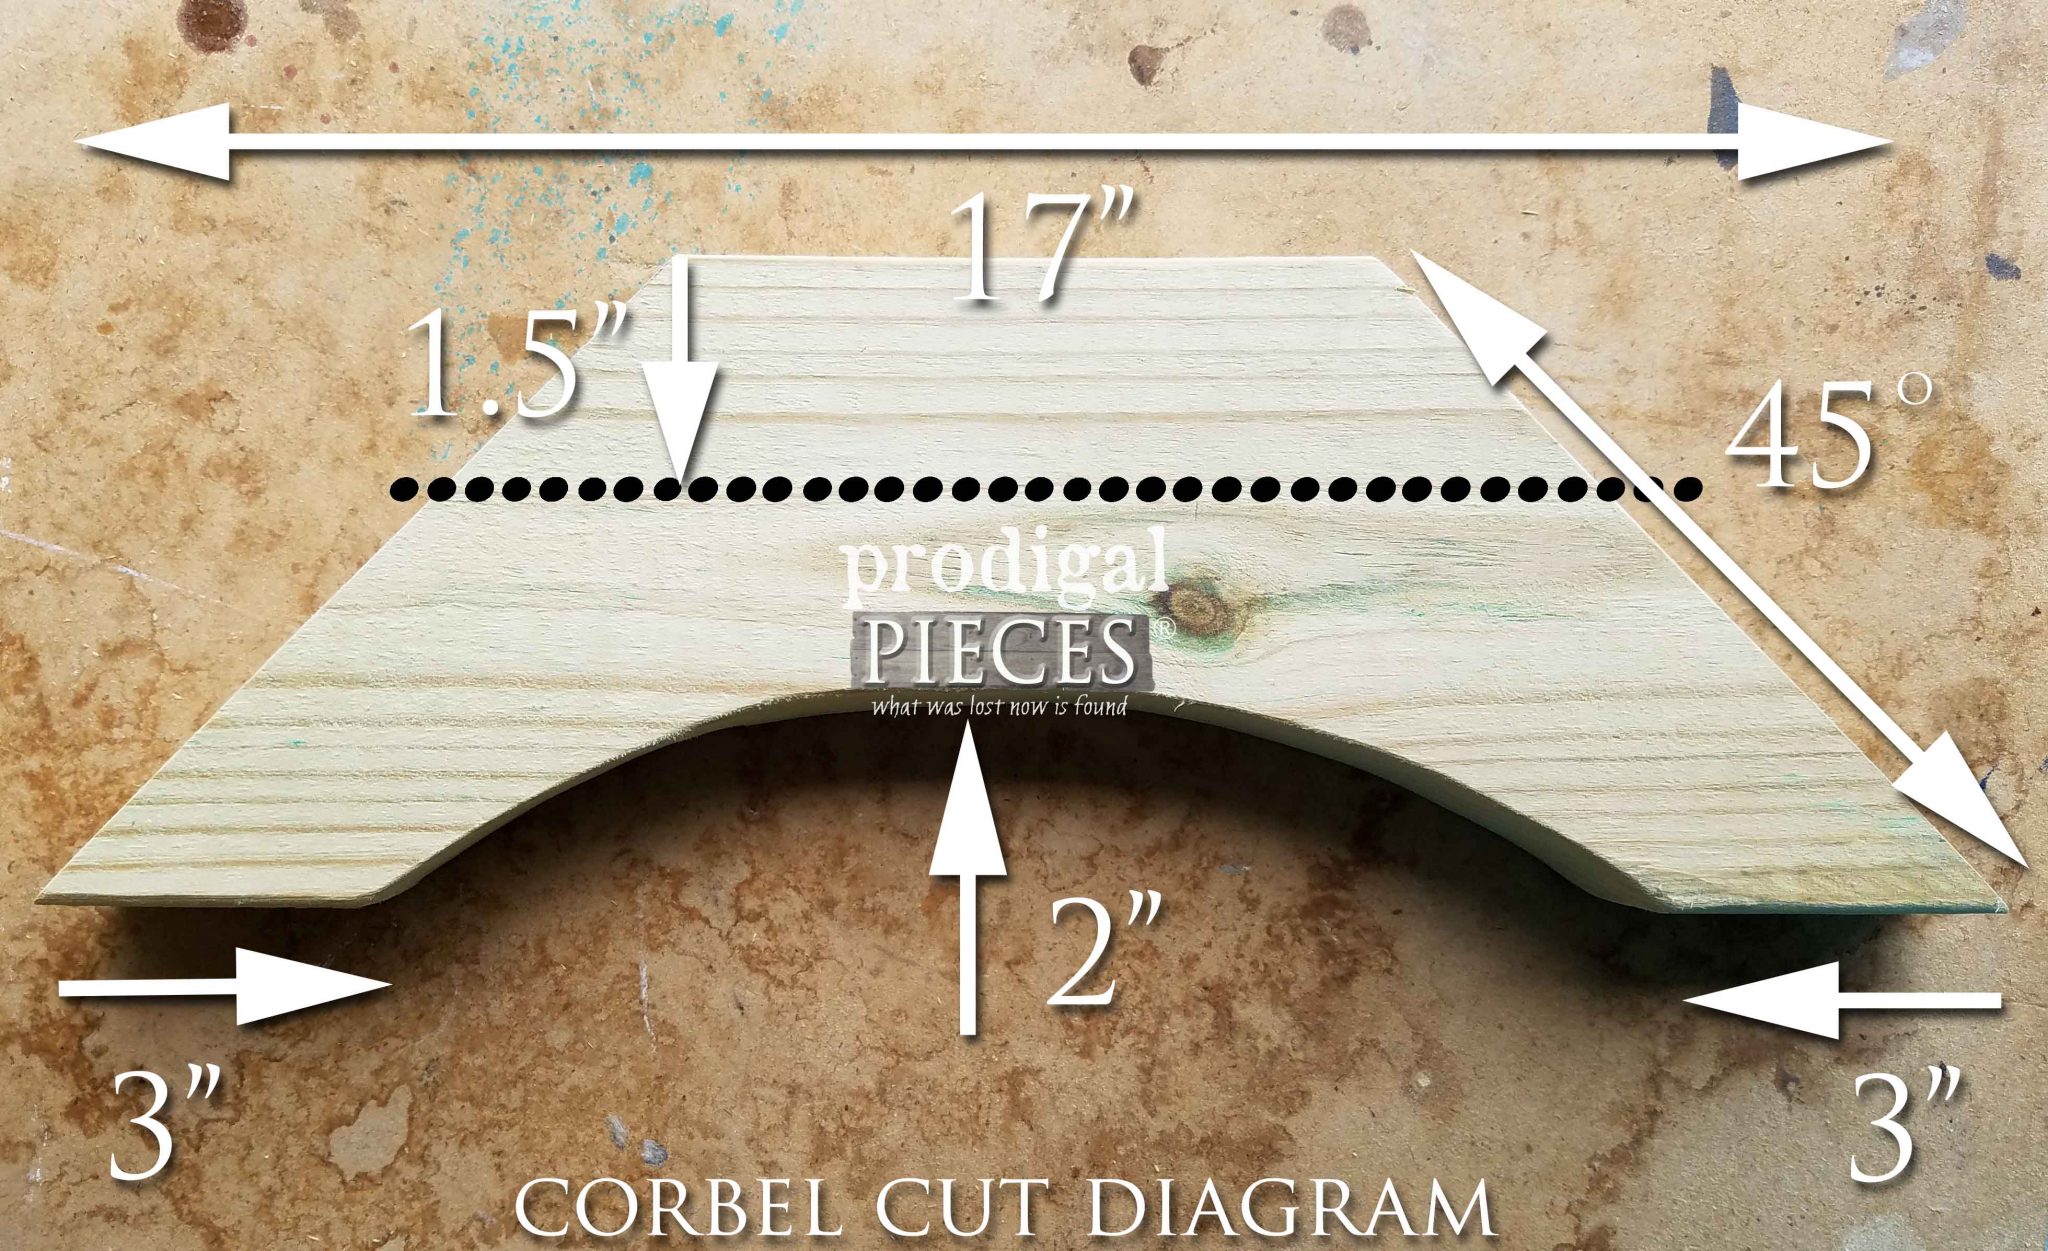
Next, cut your corbels with your jigsaw from your 2″ x 6″ x 17″ pieces using the diagram below as a guide. You will need to cut off 1 ½” from the top edge.
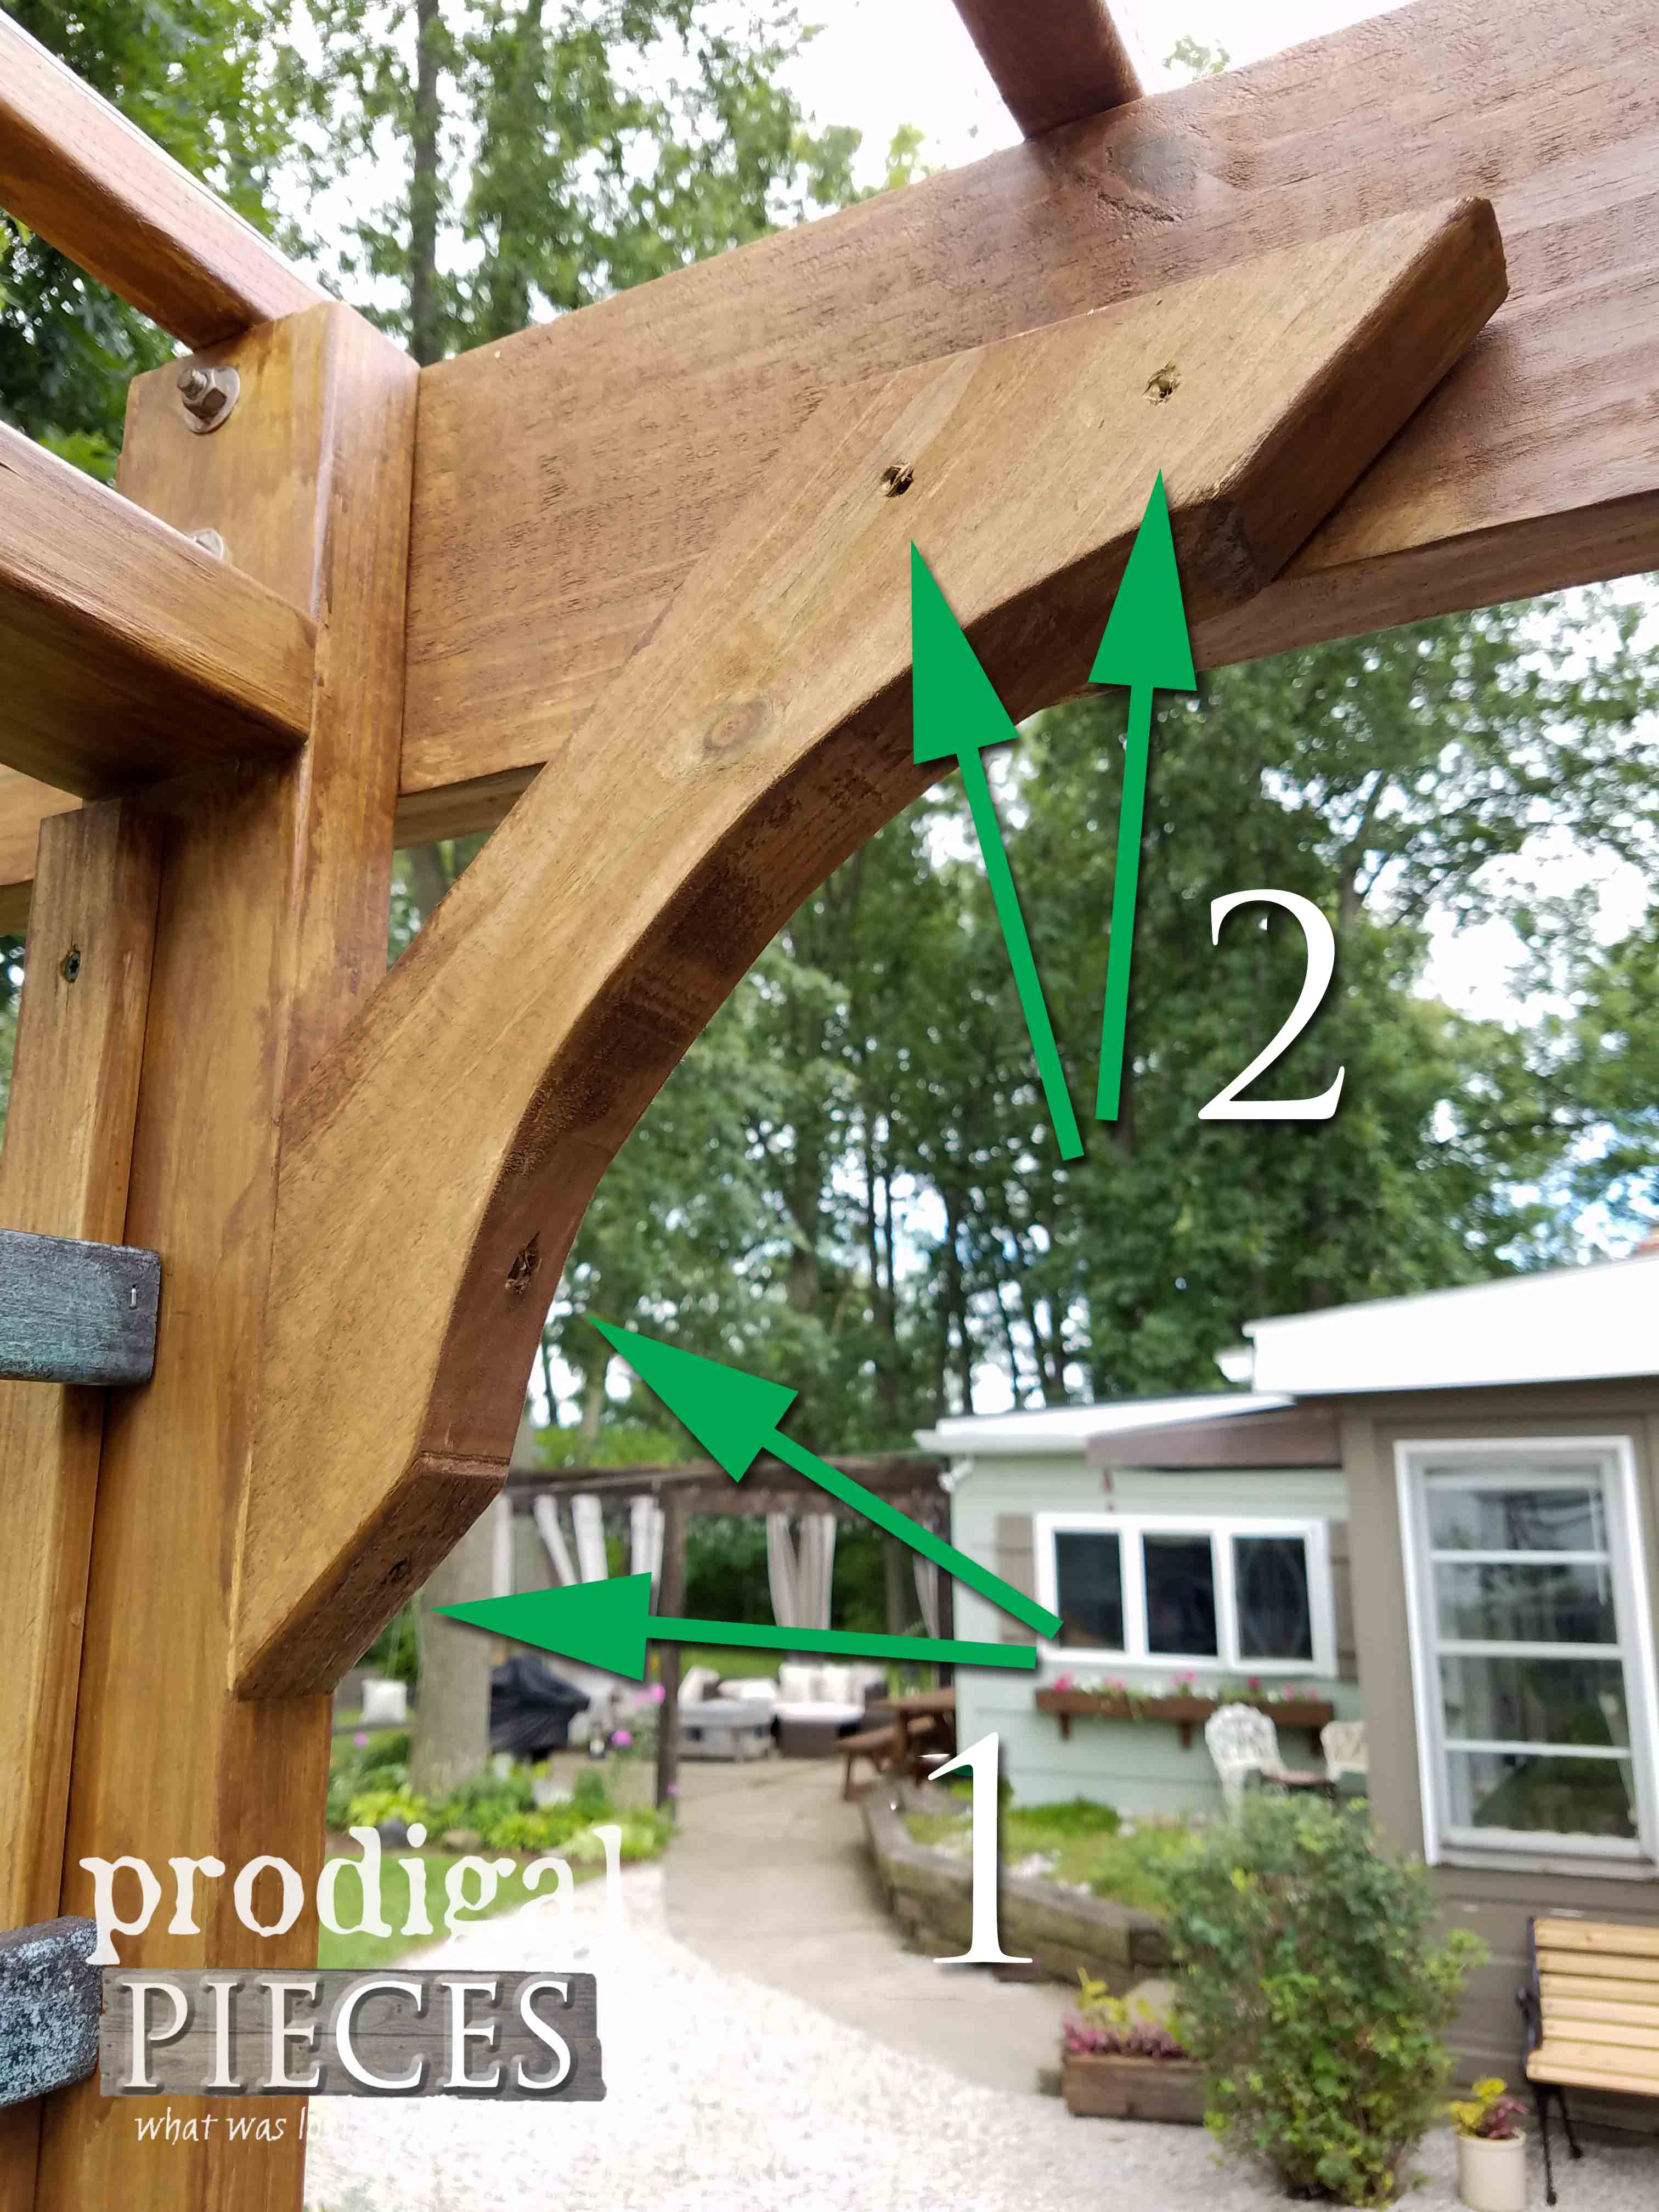
Once cut, attach your corbels as shown below:
Line up your corbel against the upright 2″ x 4″. That will cause the top of the corbel to go behind the 2″ x 6″ header. Using a 3″ screw, attach at the bottom of the corbel into the upright 2″x 4″. Next, use a 5/16″ drill bit to drill into the arched portion of the corbel. Attach with a 3″ screw. Finally, using two 2 ½” screws, attach the corbel from behind to the header.
Step 8
Fun part! This is the best time to stain your arbor if you are going to do so. Your trellis is still set aside if you did a faux treatment and by staining now you will avoid having to painfully cut in around it. Now, depending on what stain you use, it may only take one coat, but ours took two.
Step 9
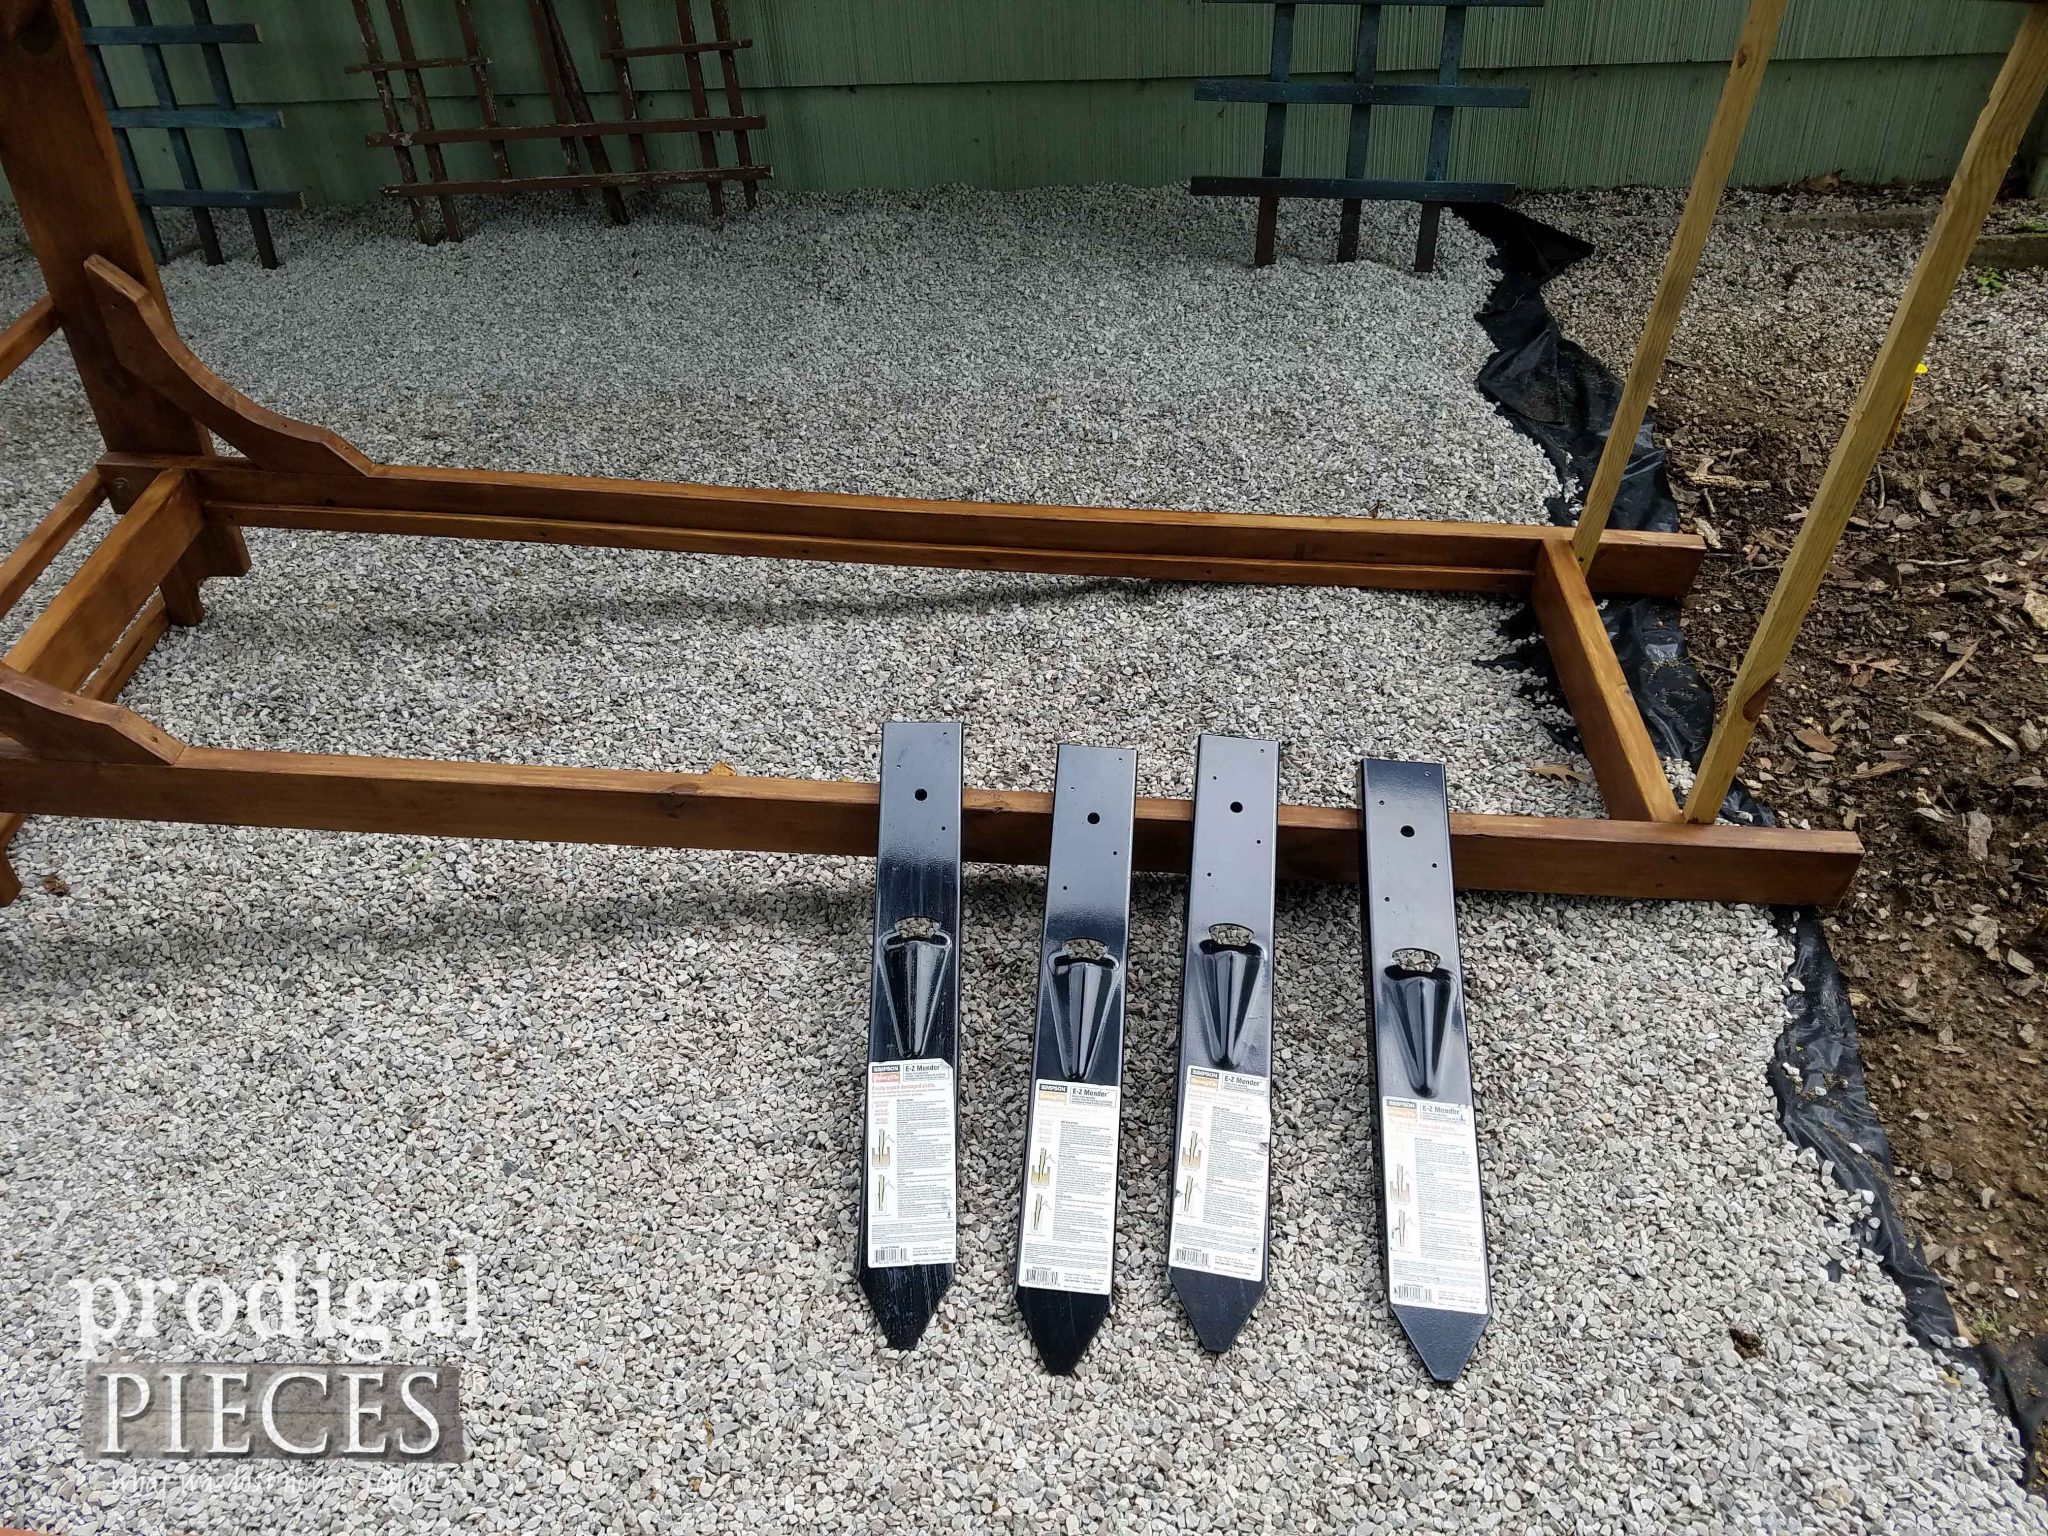
Time to anchor this puppy! We are enamored by the Simpson Strong Tie E-Z Mender products. These brackets can help repair broken down fences, etc and are so easy to use! Perfect for 4″ x 4″‘s or 2″ x 4″ studs like we’re using. Just attach them to the arbor and set the arbor in place using the studs sticking out to hammer them level. Notice we attached a couple of scrap pieces between the legs to keep the from splaying. (moving apart) We left the trellis off until after installation to make it easier to handle.
Step 10
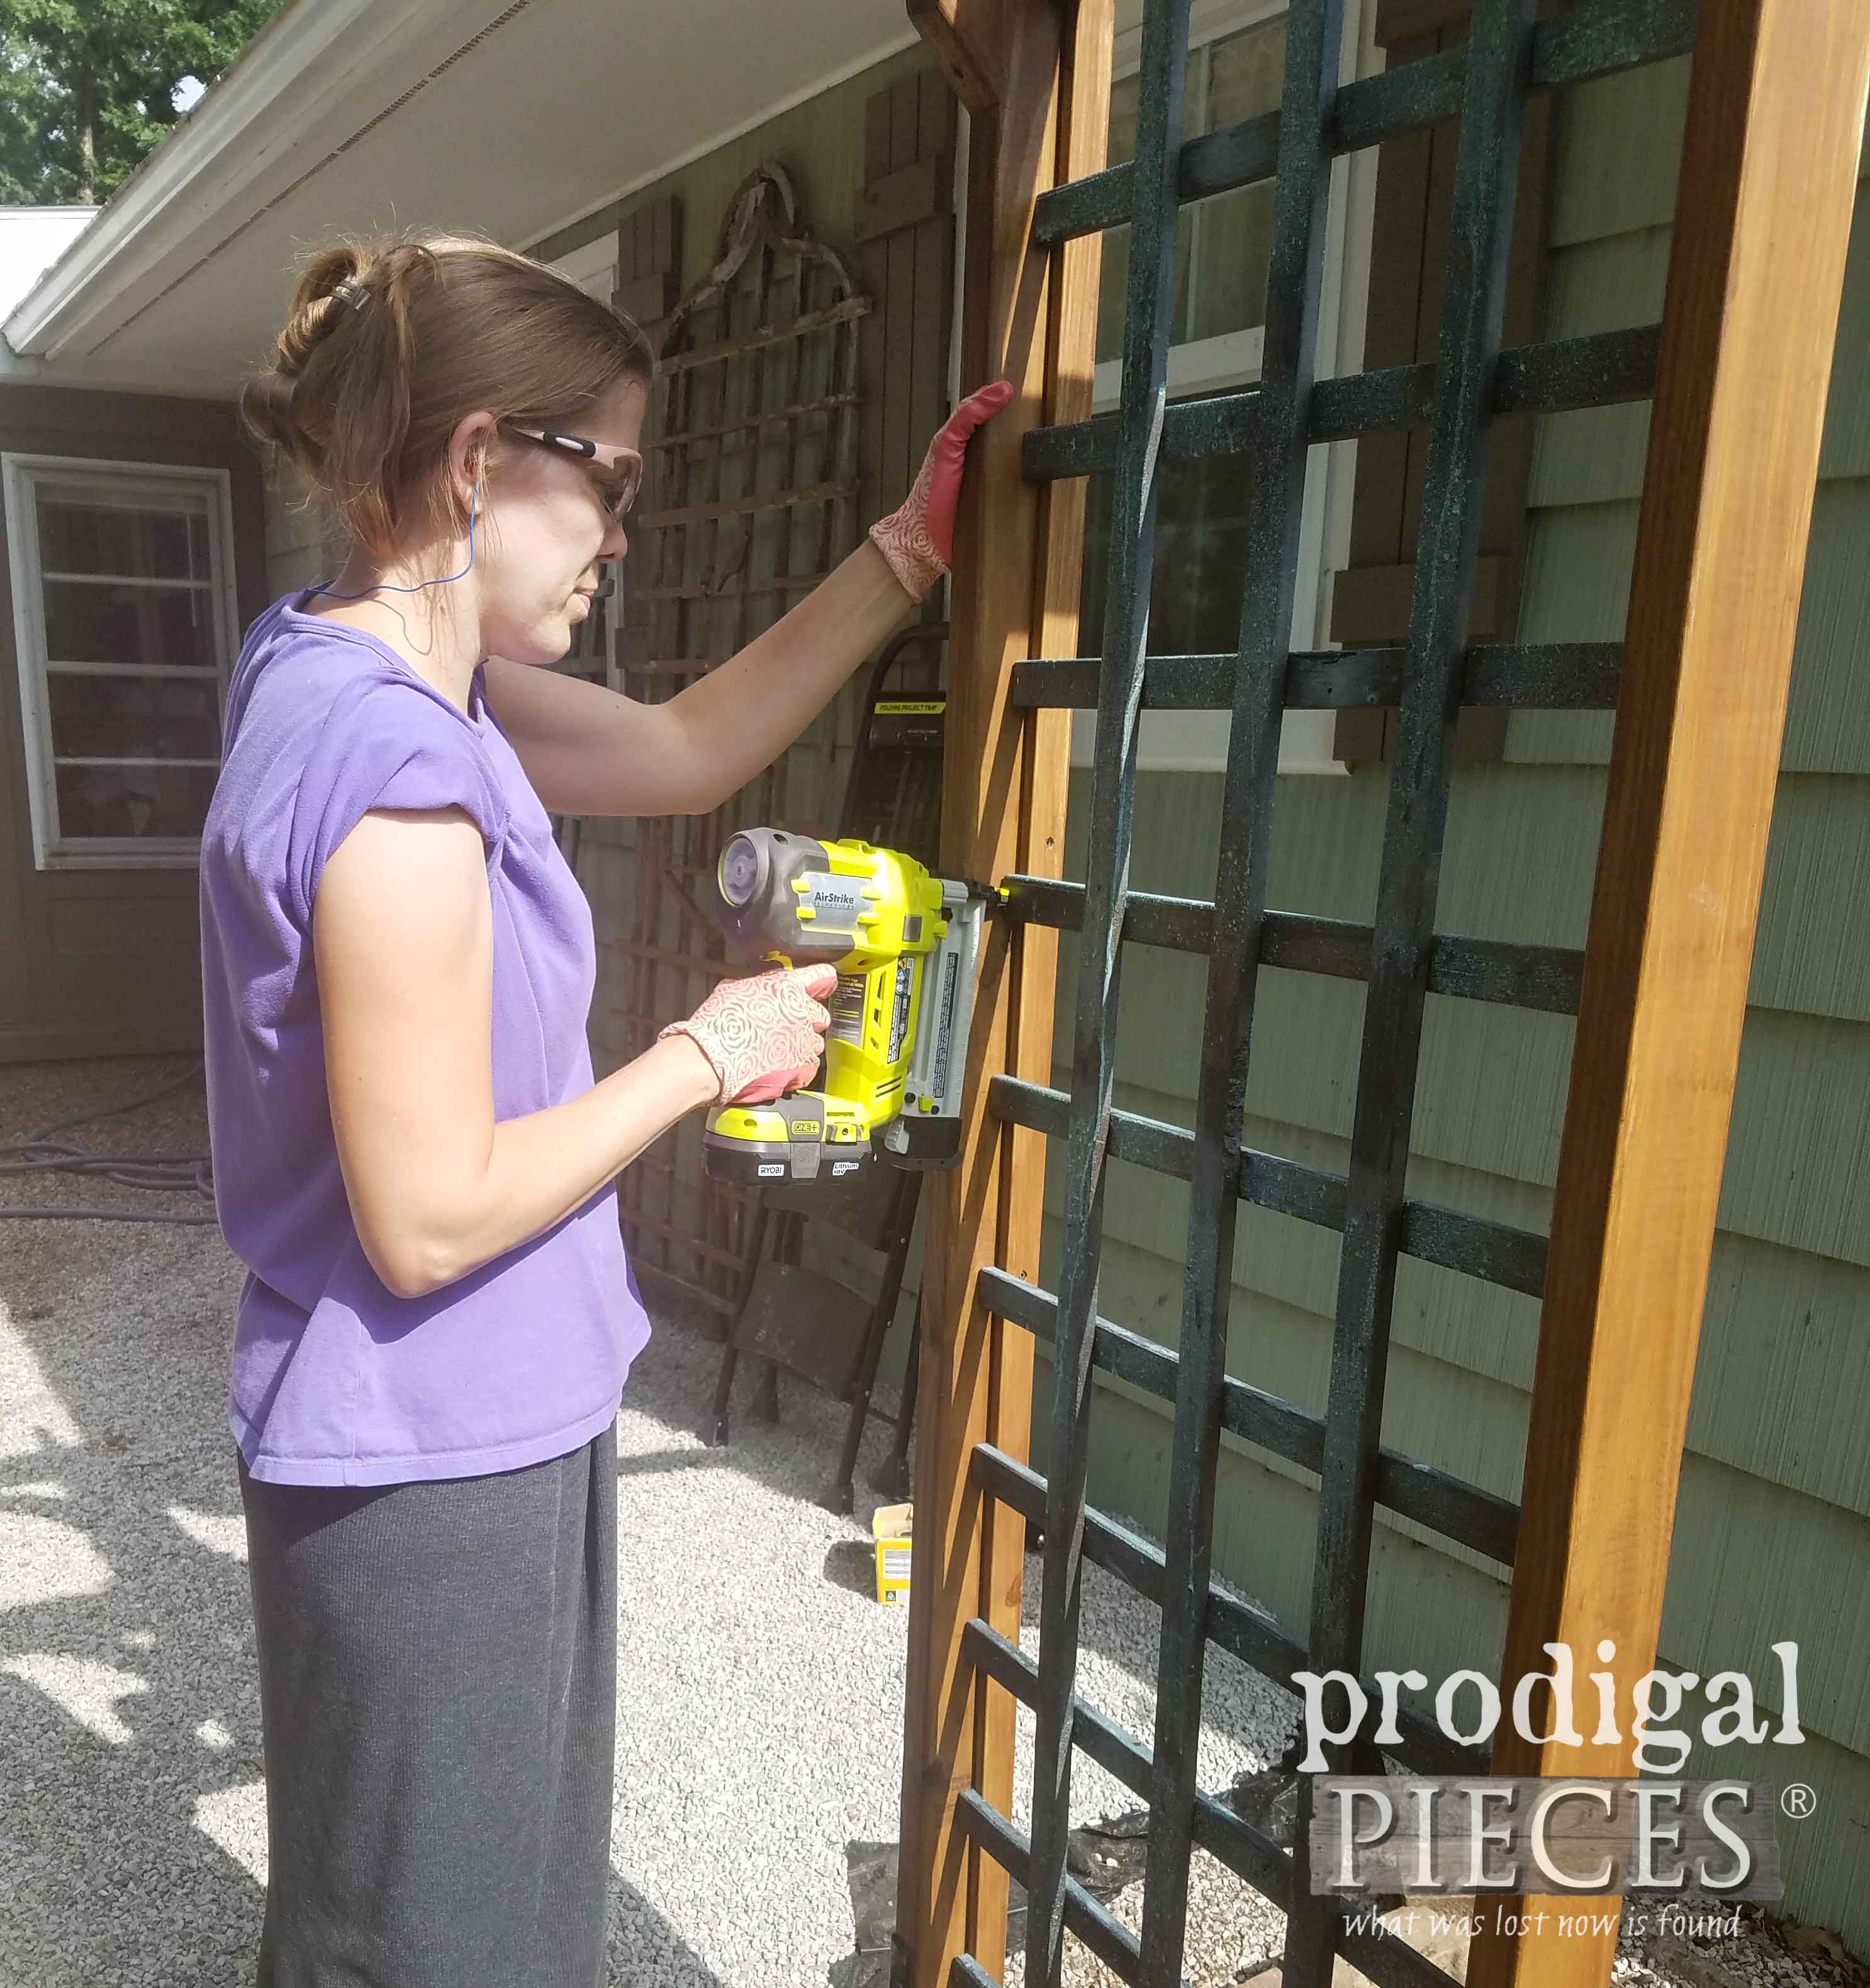
Now your DIY garden arbor is ready for those gorgeous trellis’ you made earlier. Just set in place with the horizontal slats facing out. Last, attach using your stapler and staples.
ALL DONE
And we’re done! Give yourself a pat on the back for a job well done. We did!
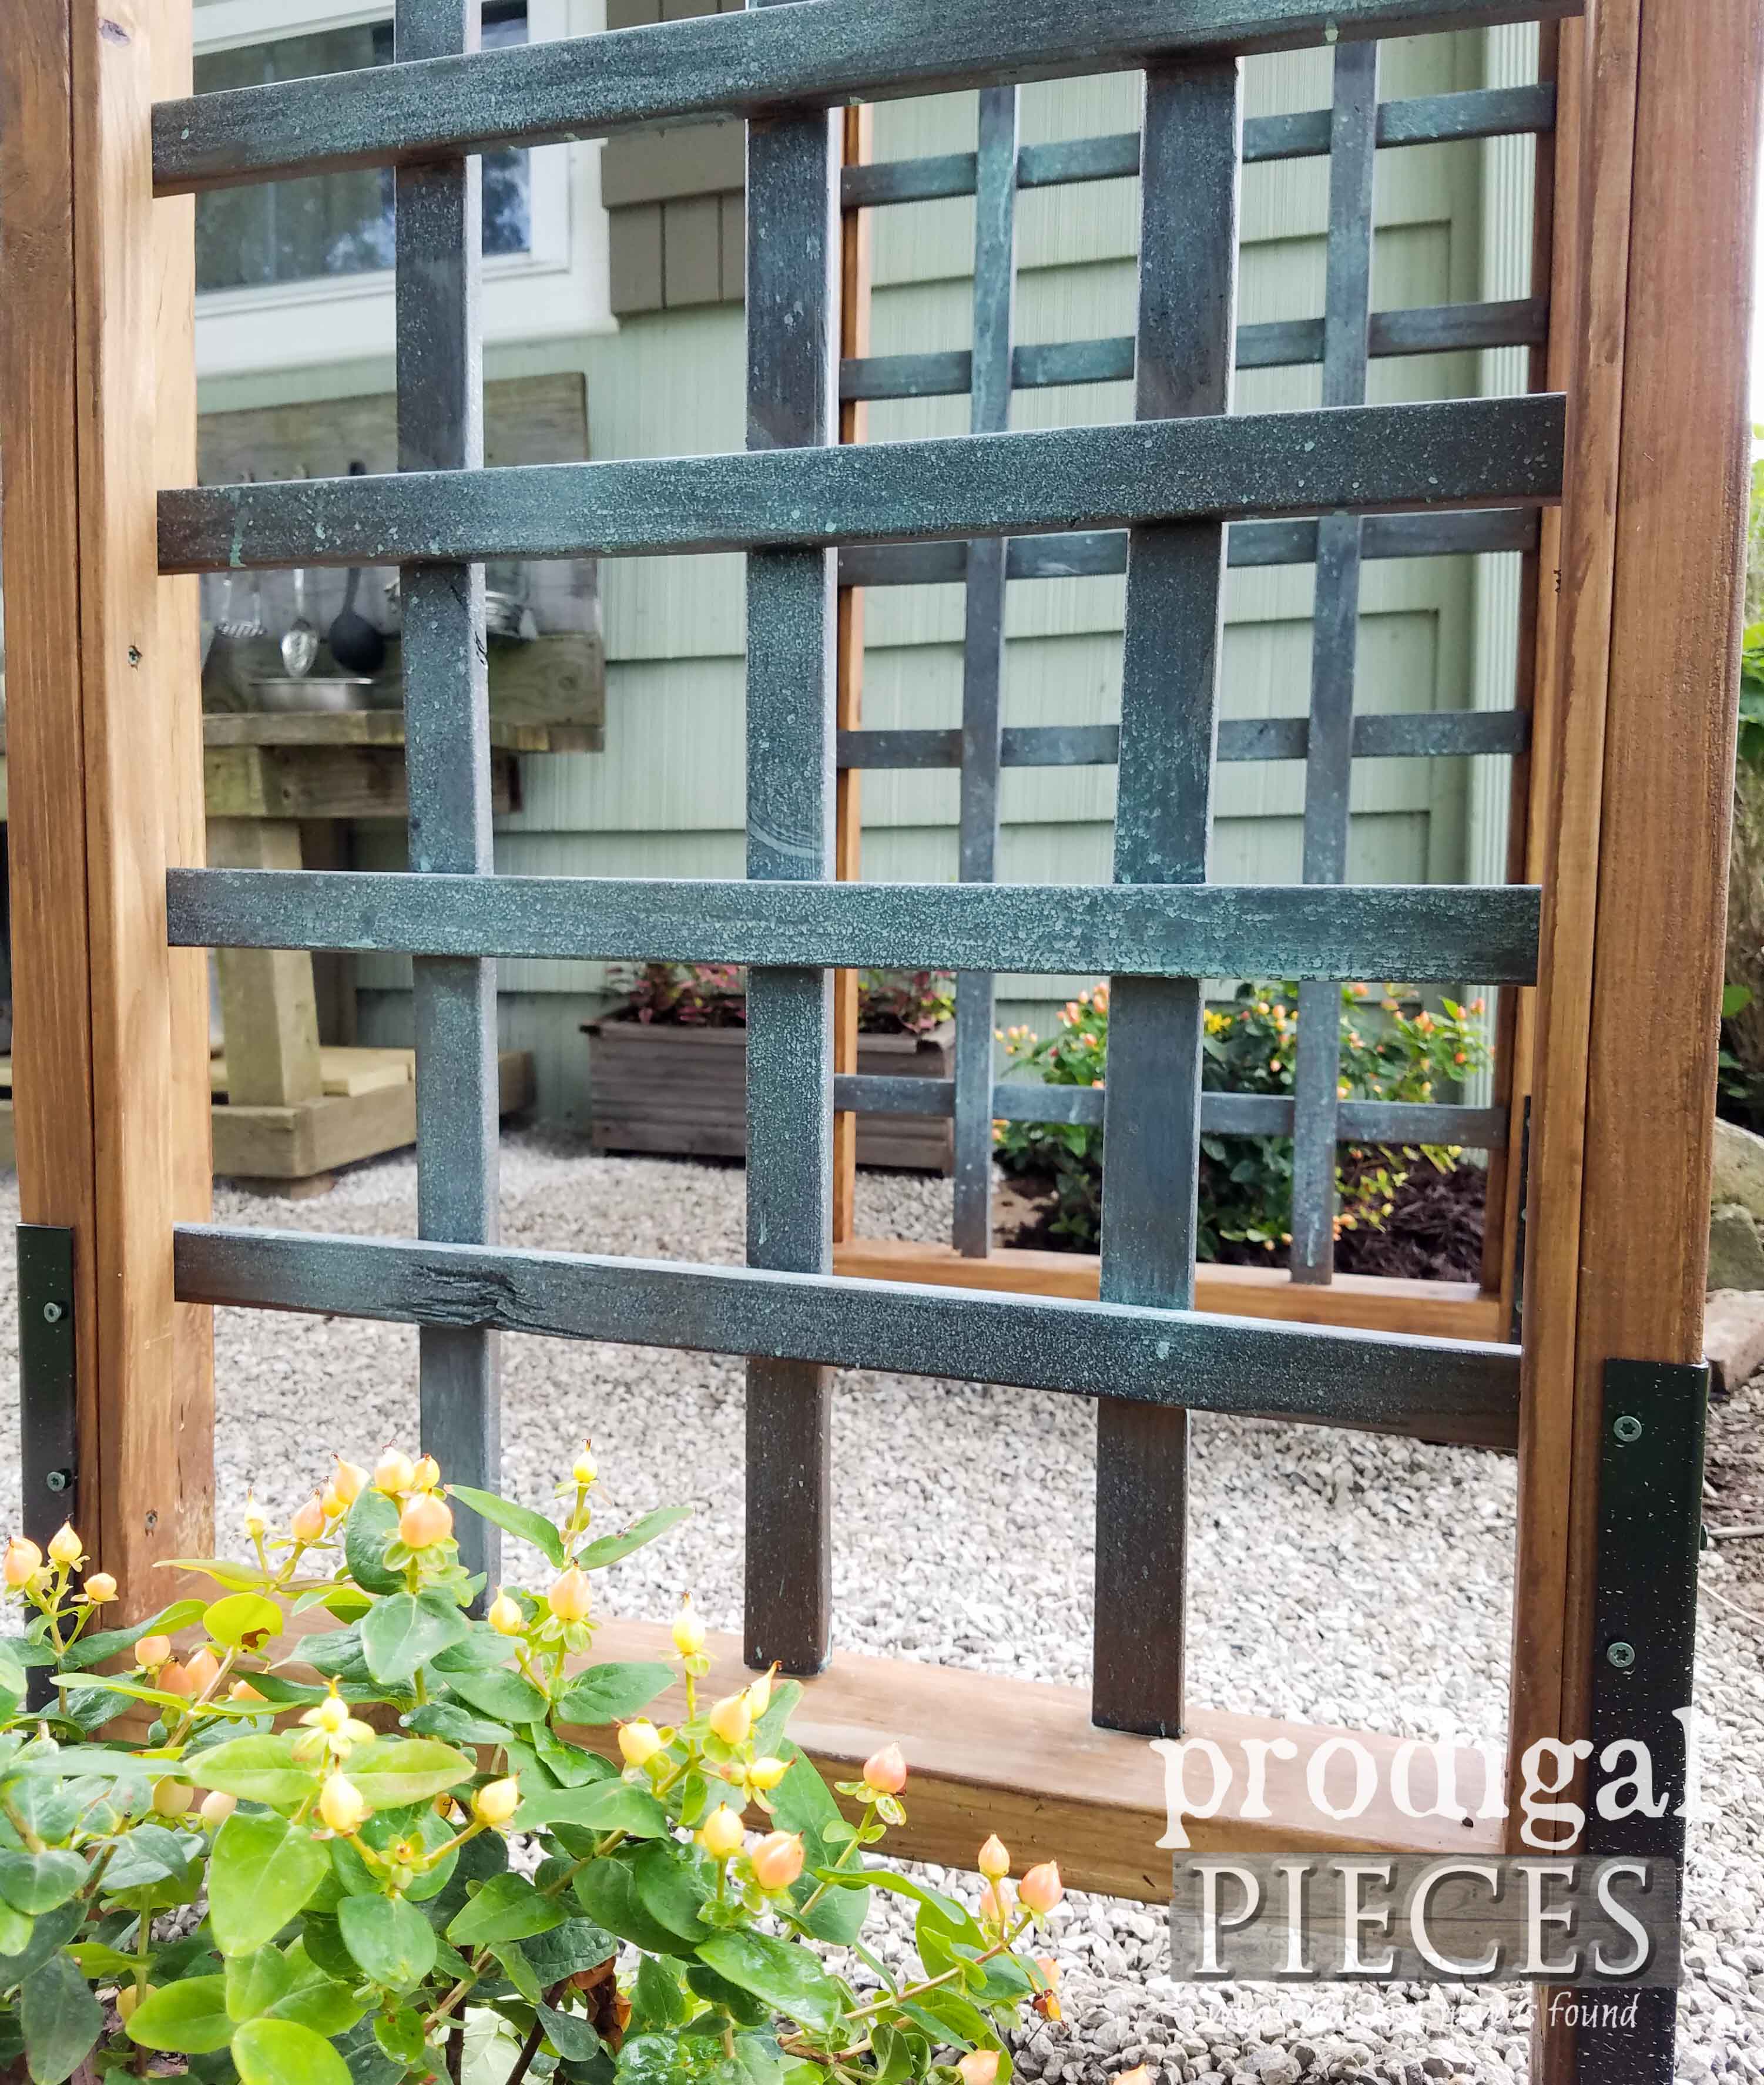
While I haven’t chosen what to grow on those trellis’ yet, I’m leaning towards climbing roses, but may wait until next spring. For now I’m enjoying that amazing patina.
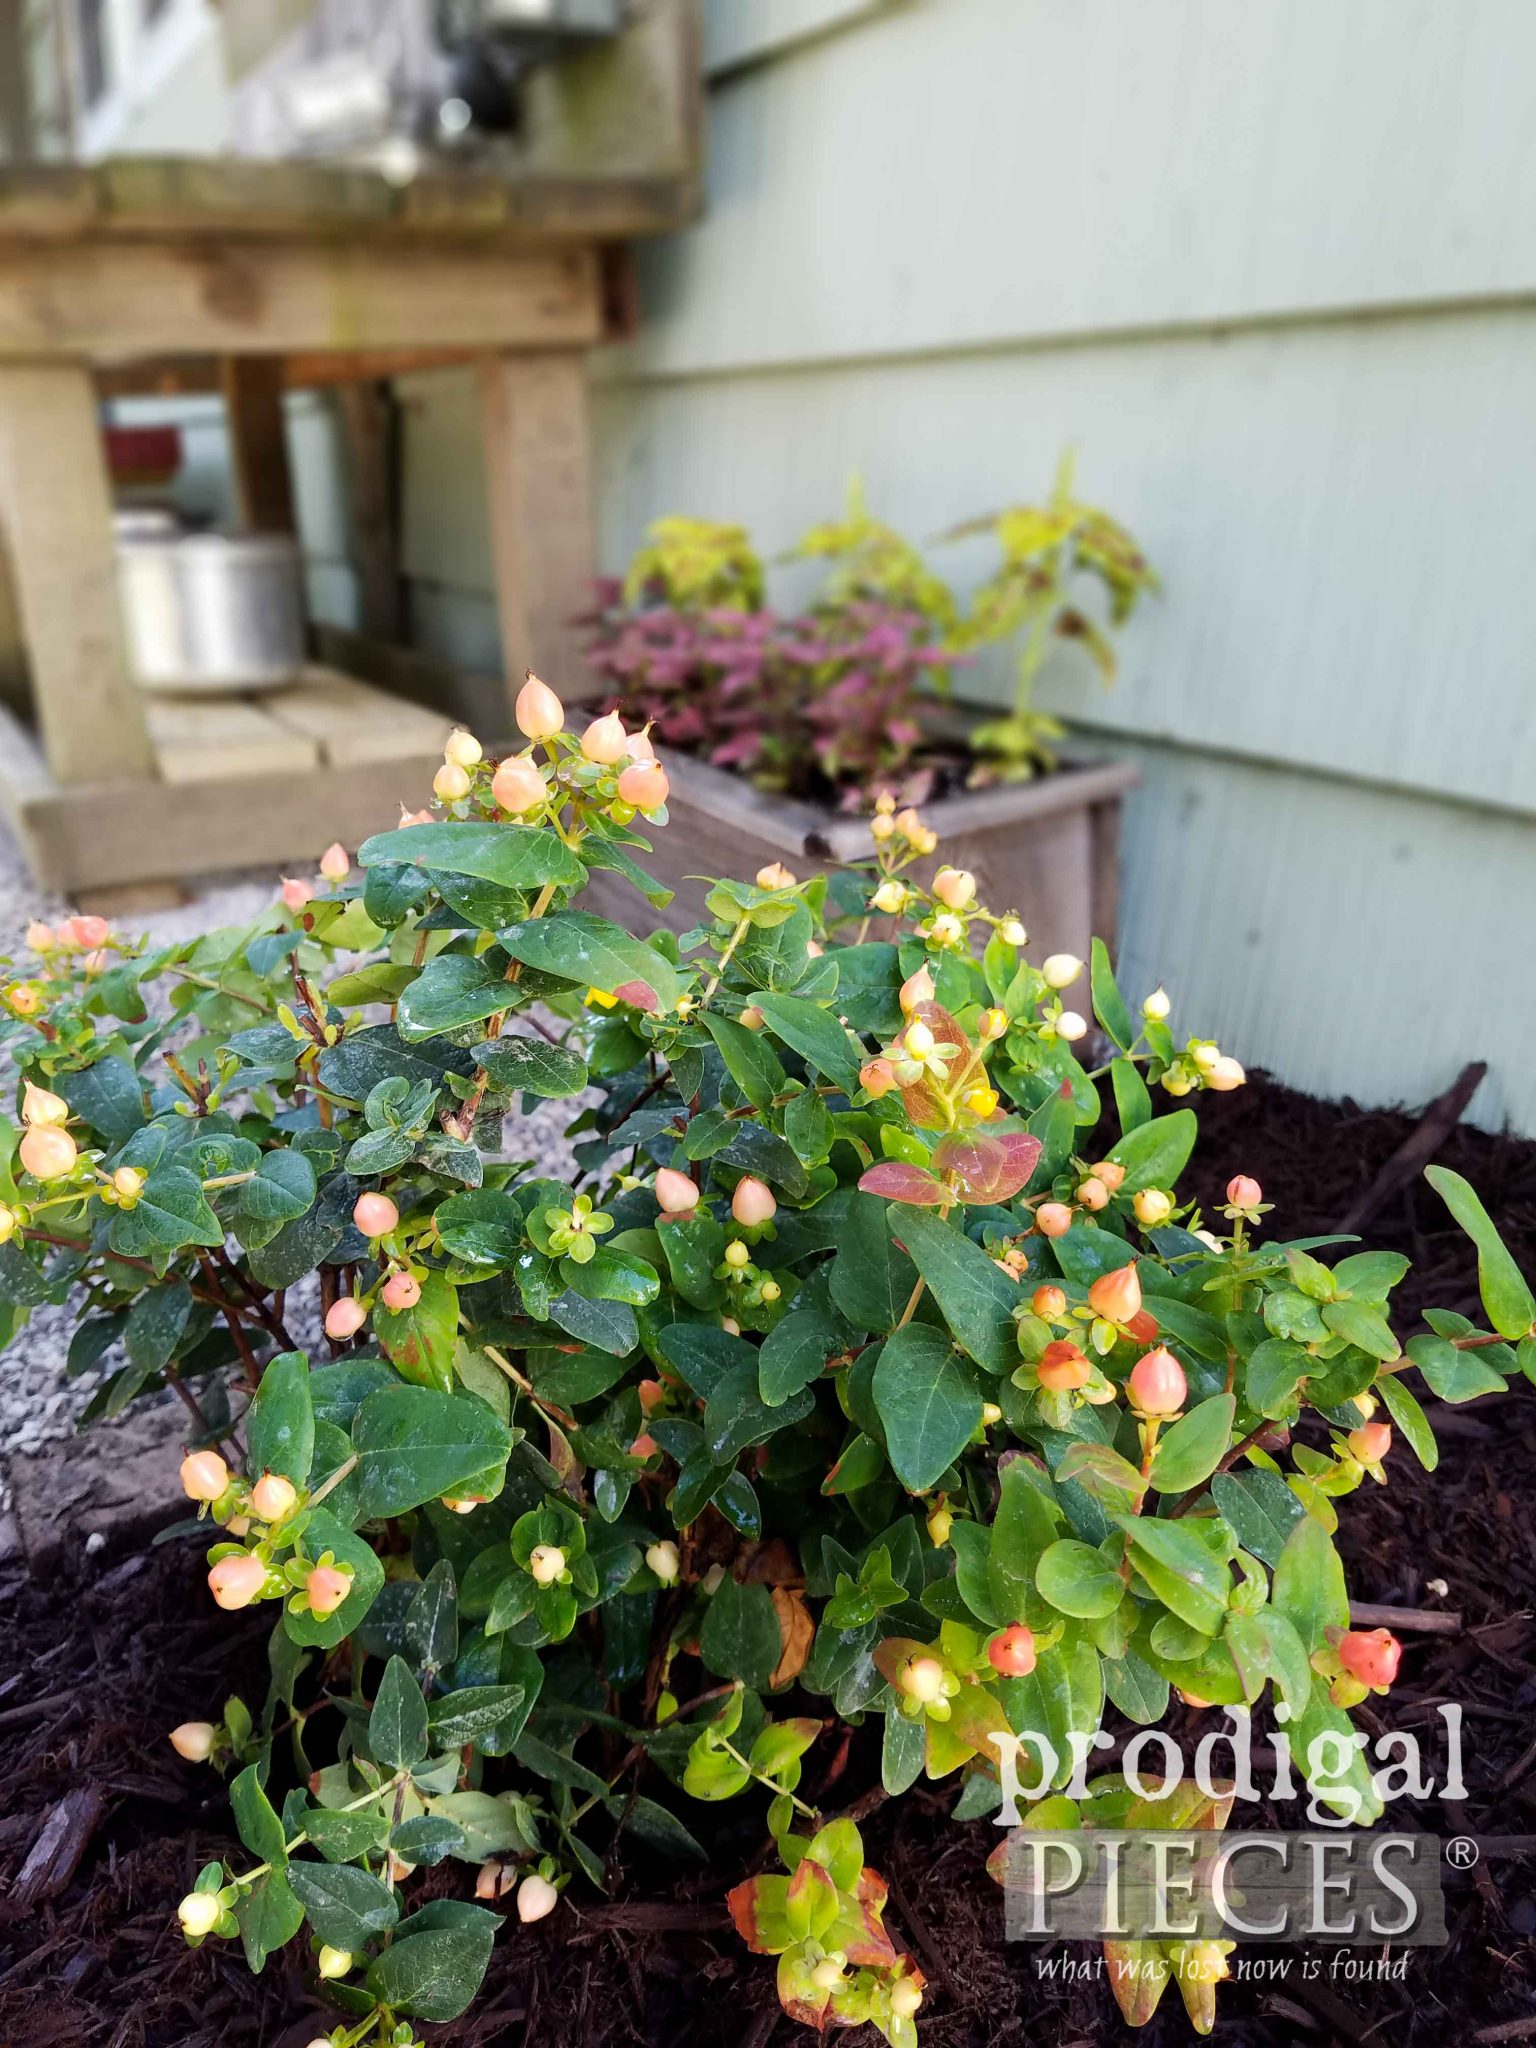
Plus, these gorgeous new bushes I found really caught my eye with their yellow blooms in the spring followed by the pumpkin color berries in autumn. Aren’t they beautiful? I know our birds will love those berries. They are called Pumpkin Hypericum.
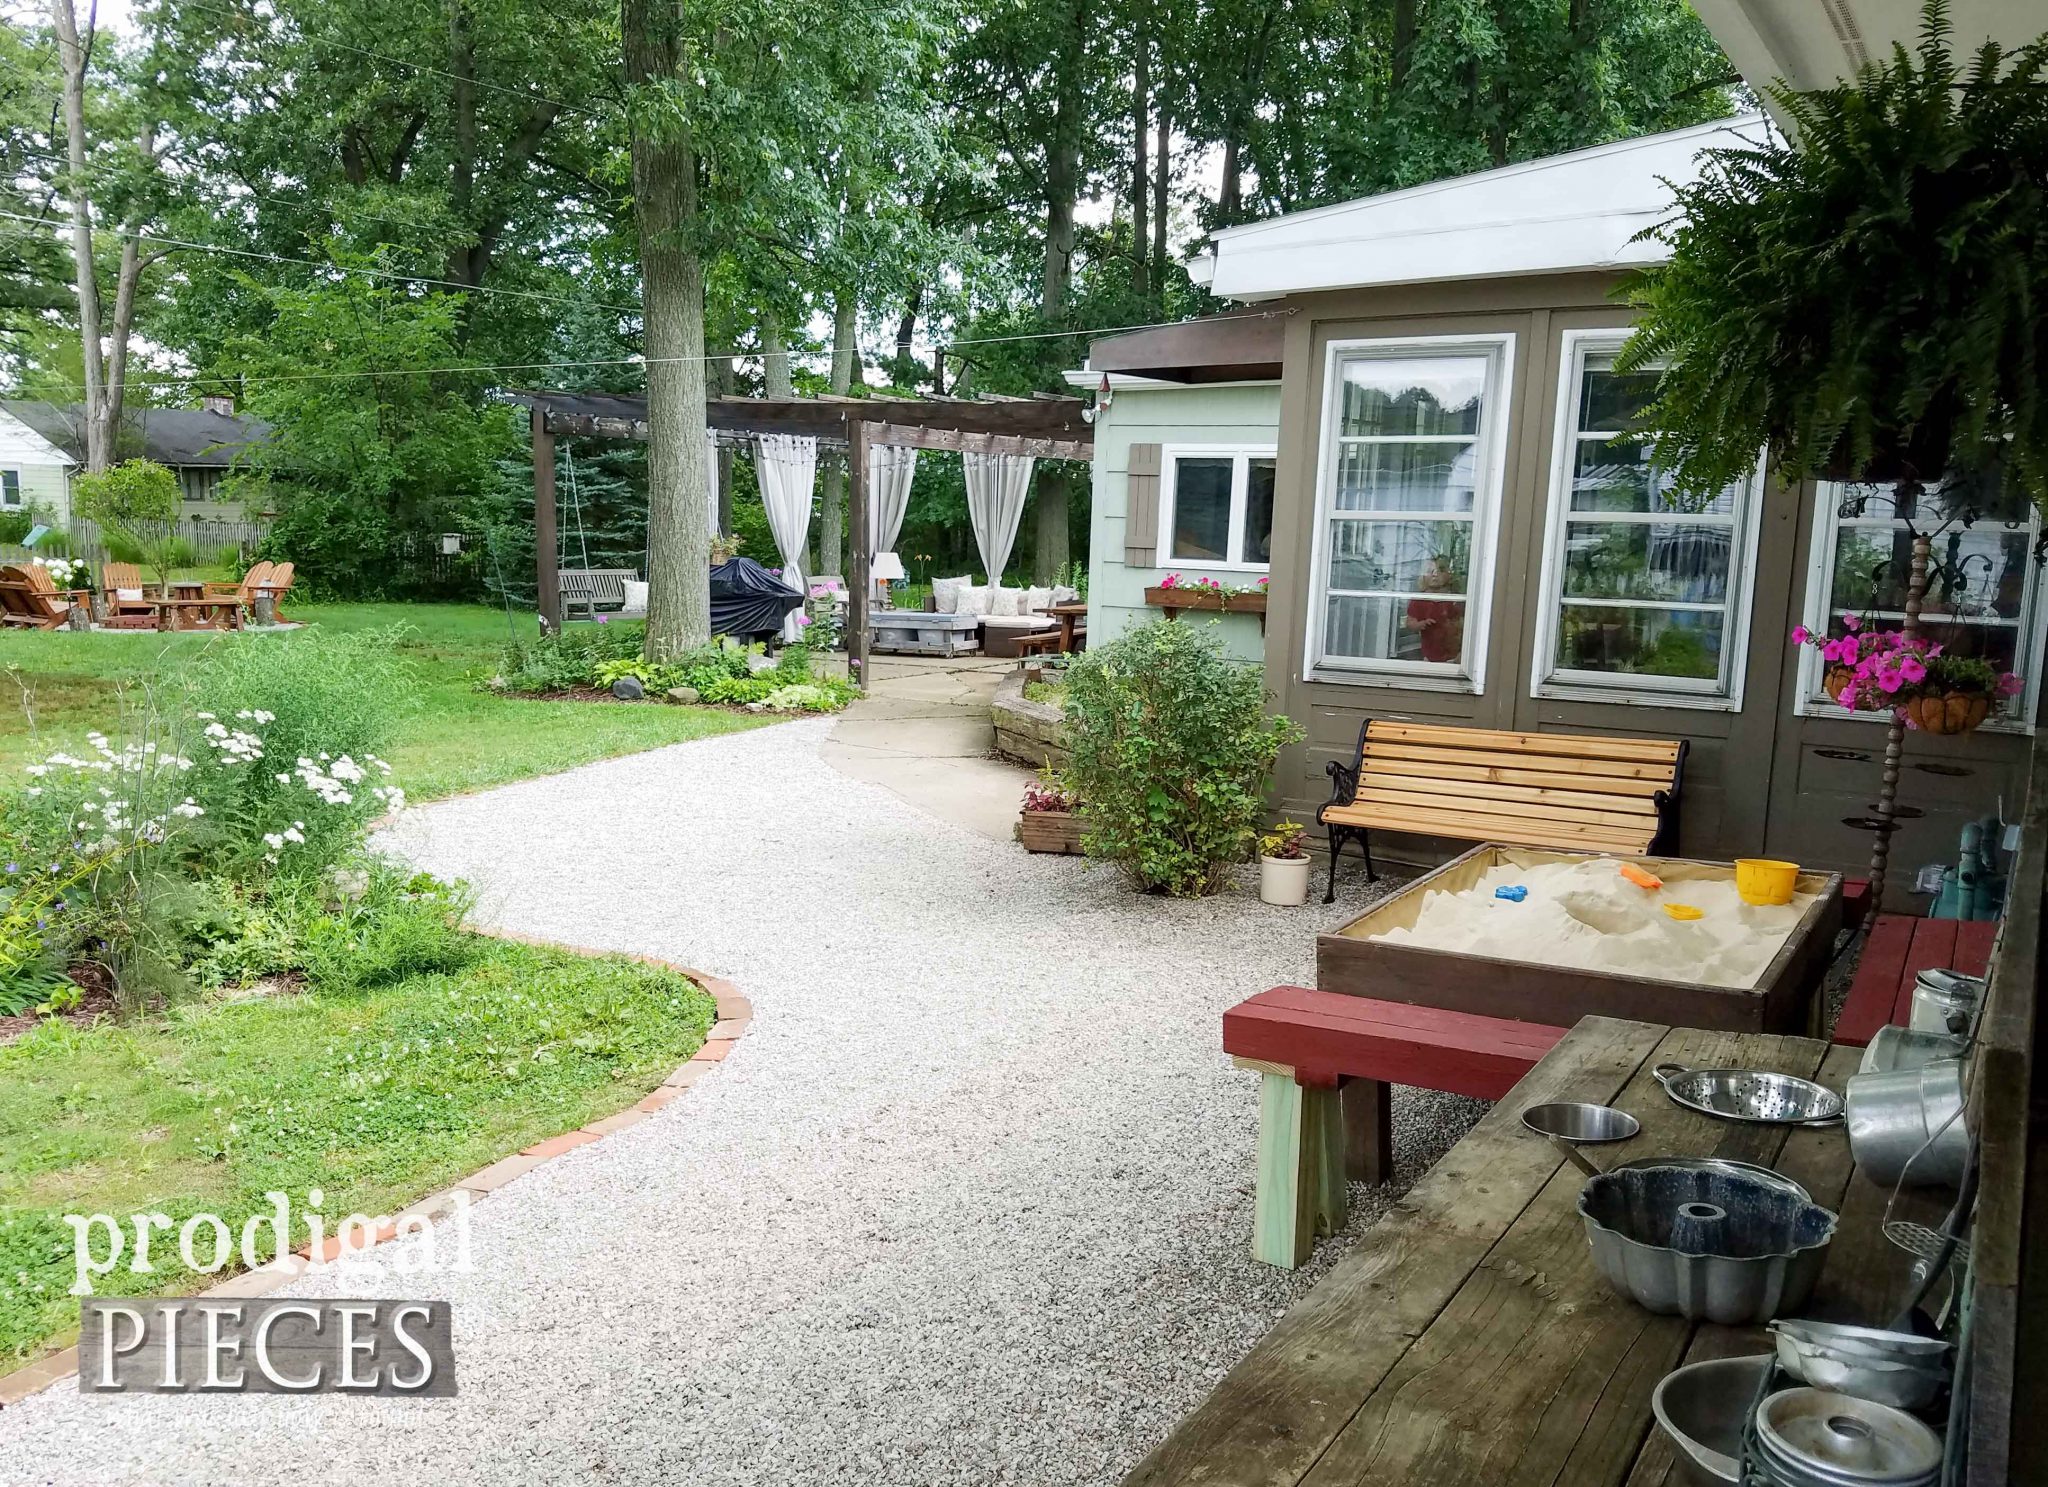
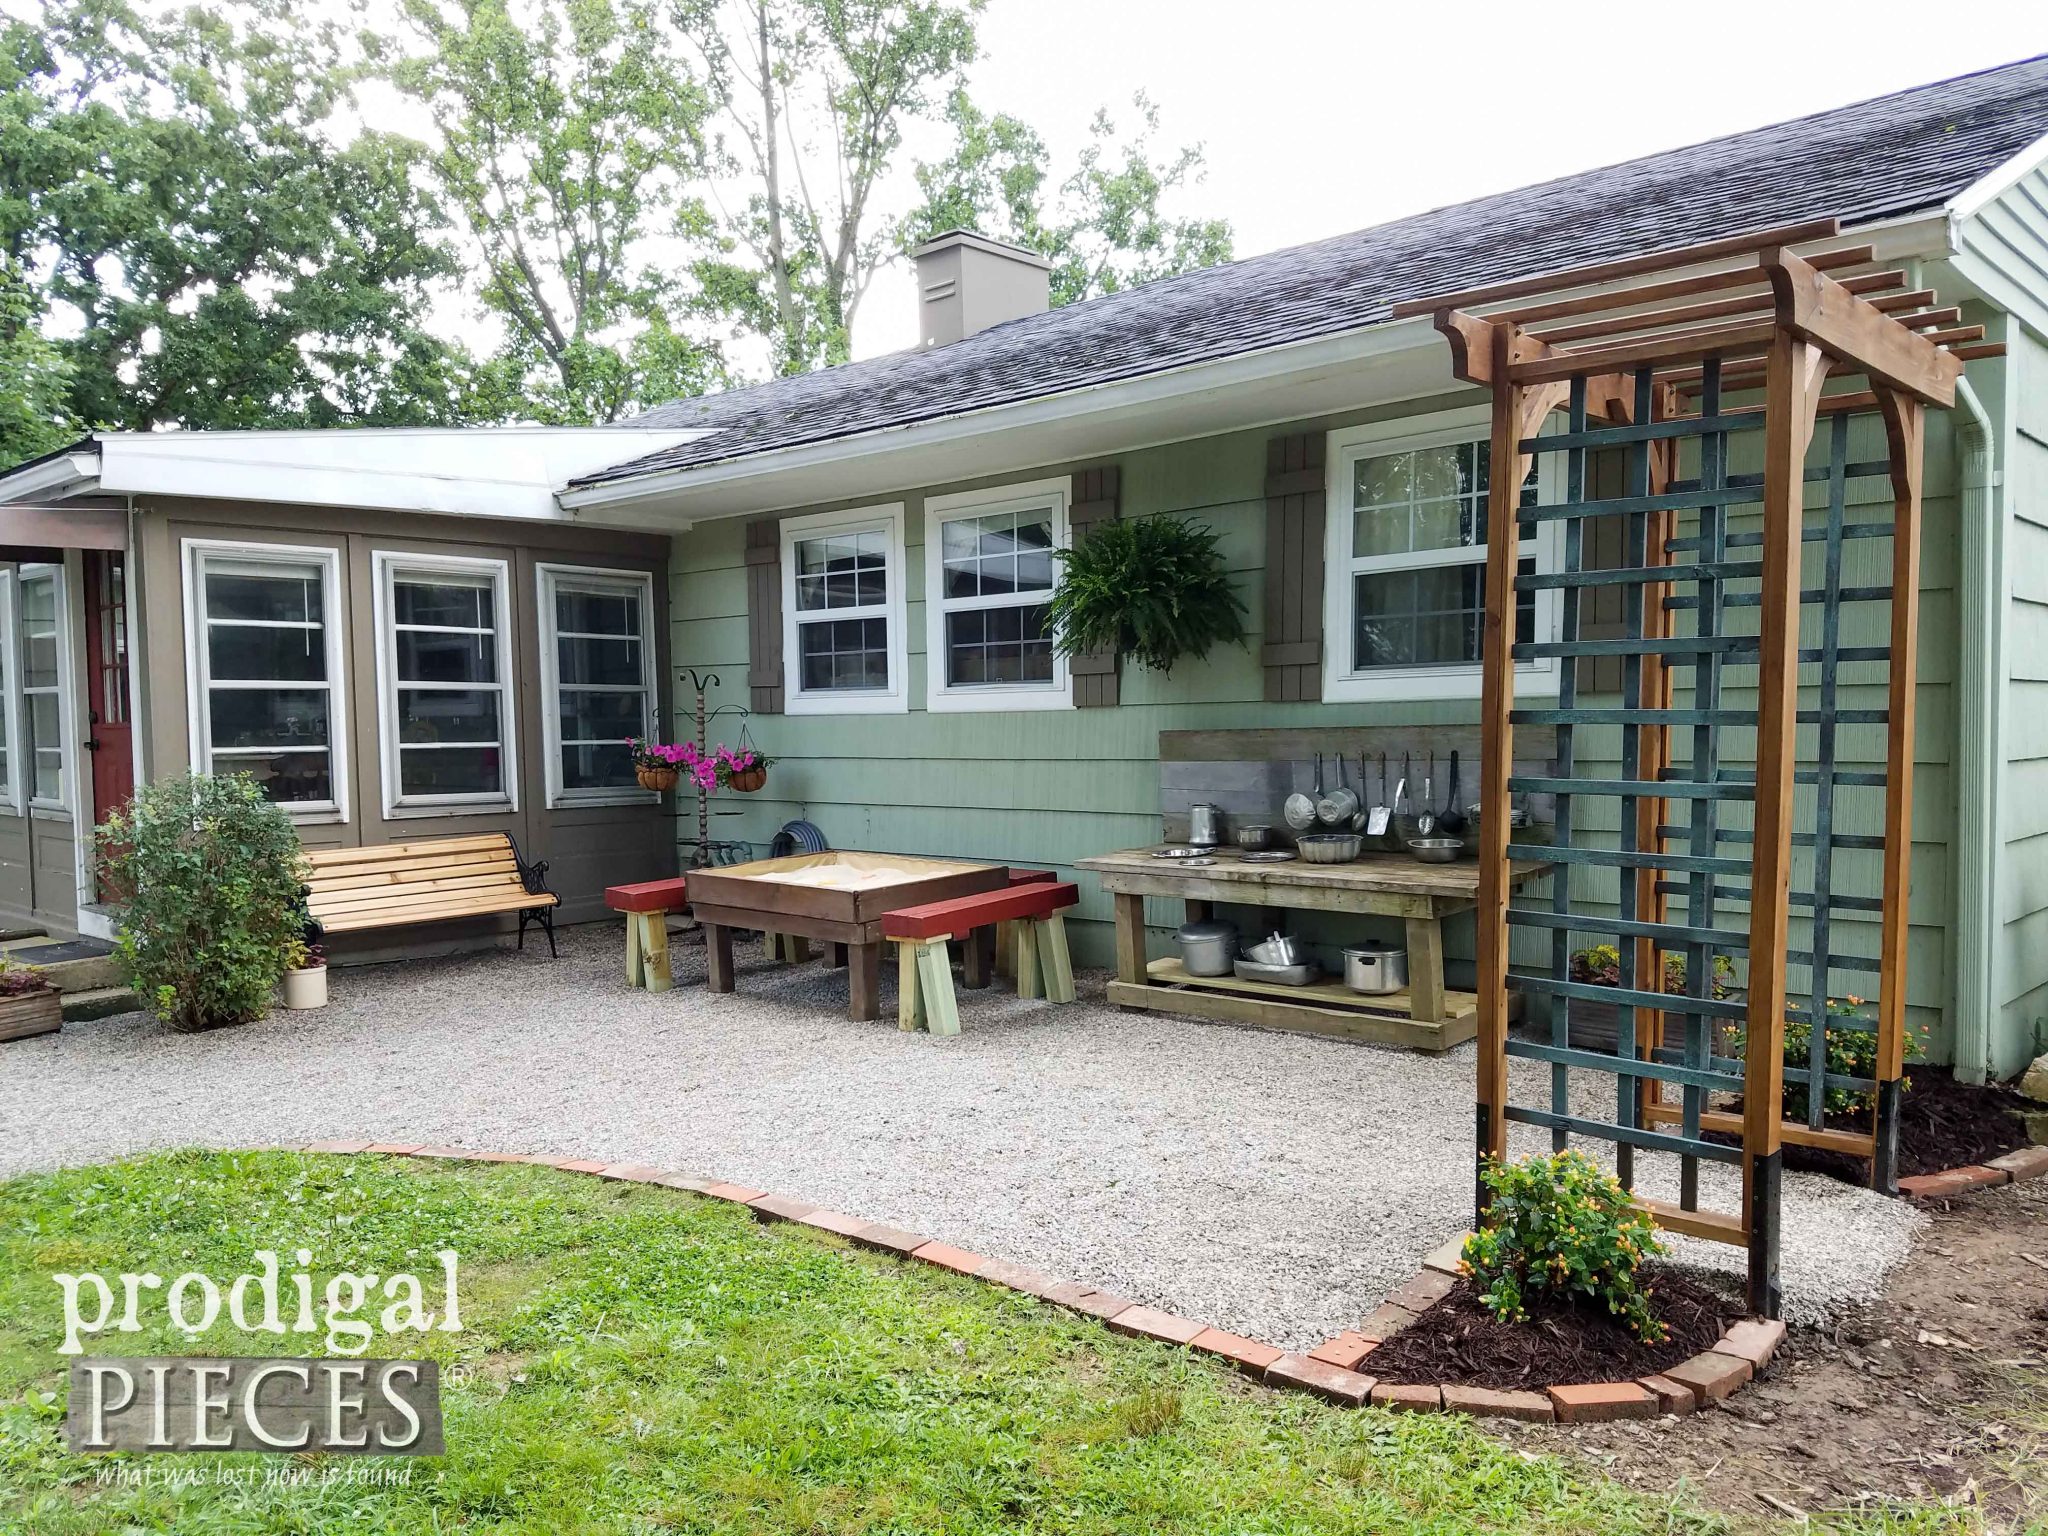
The outcome of all our efforts sure has paid off. Undeniably, this space is no longer an eye-sore.
Likewise, we reused my curbside created bench tops from our fire pit makeover to make benches for the sand table. Also, the mud bar got an addition of a bottom shelf for extra storage.
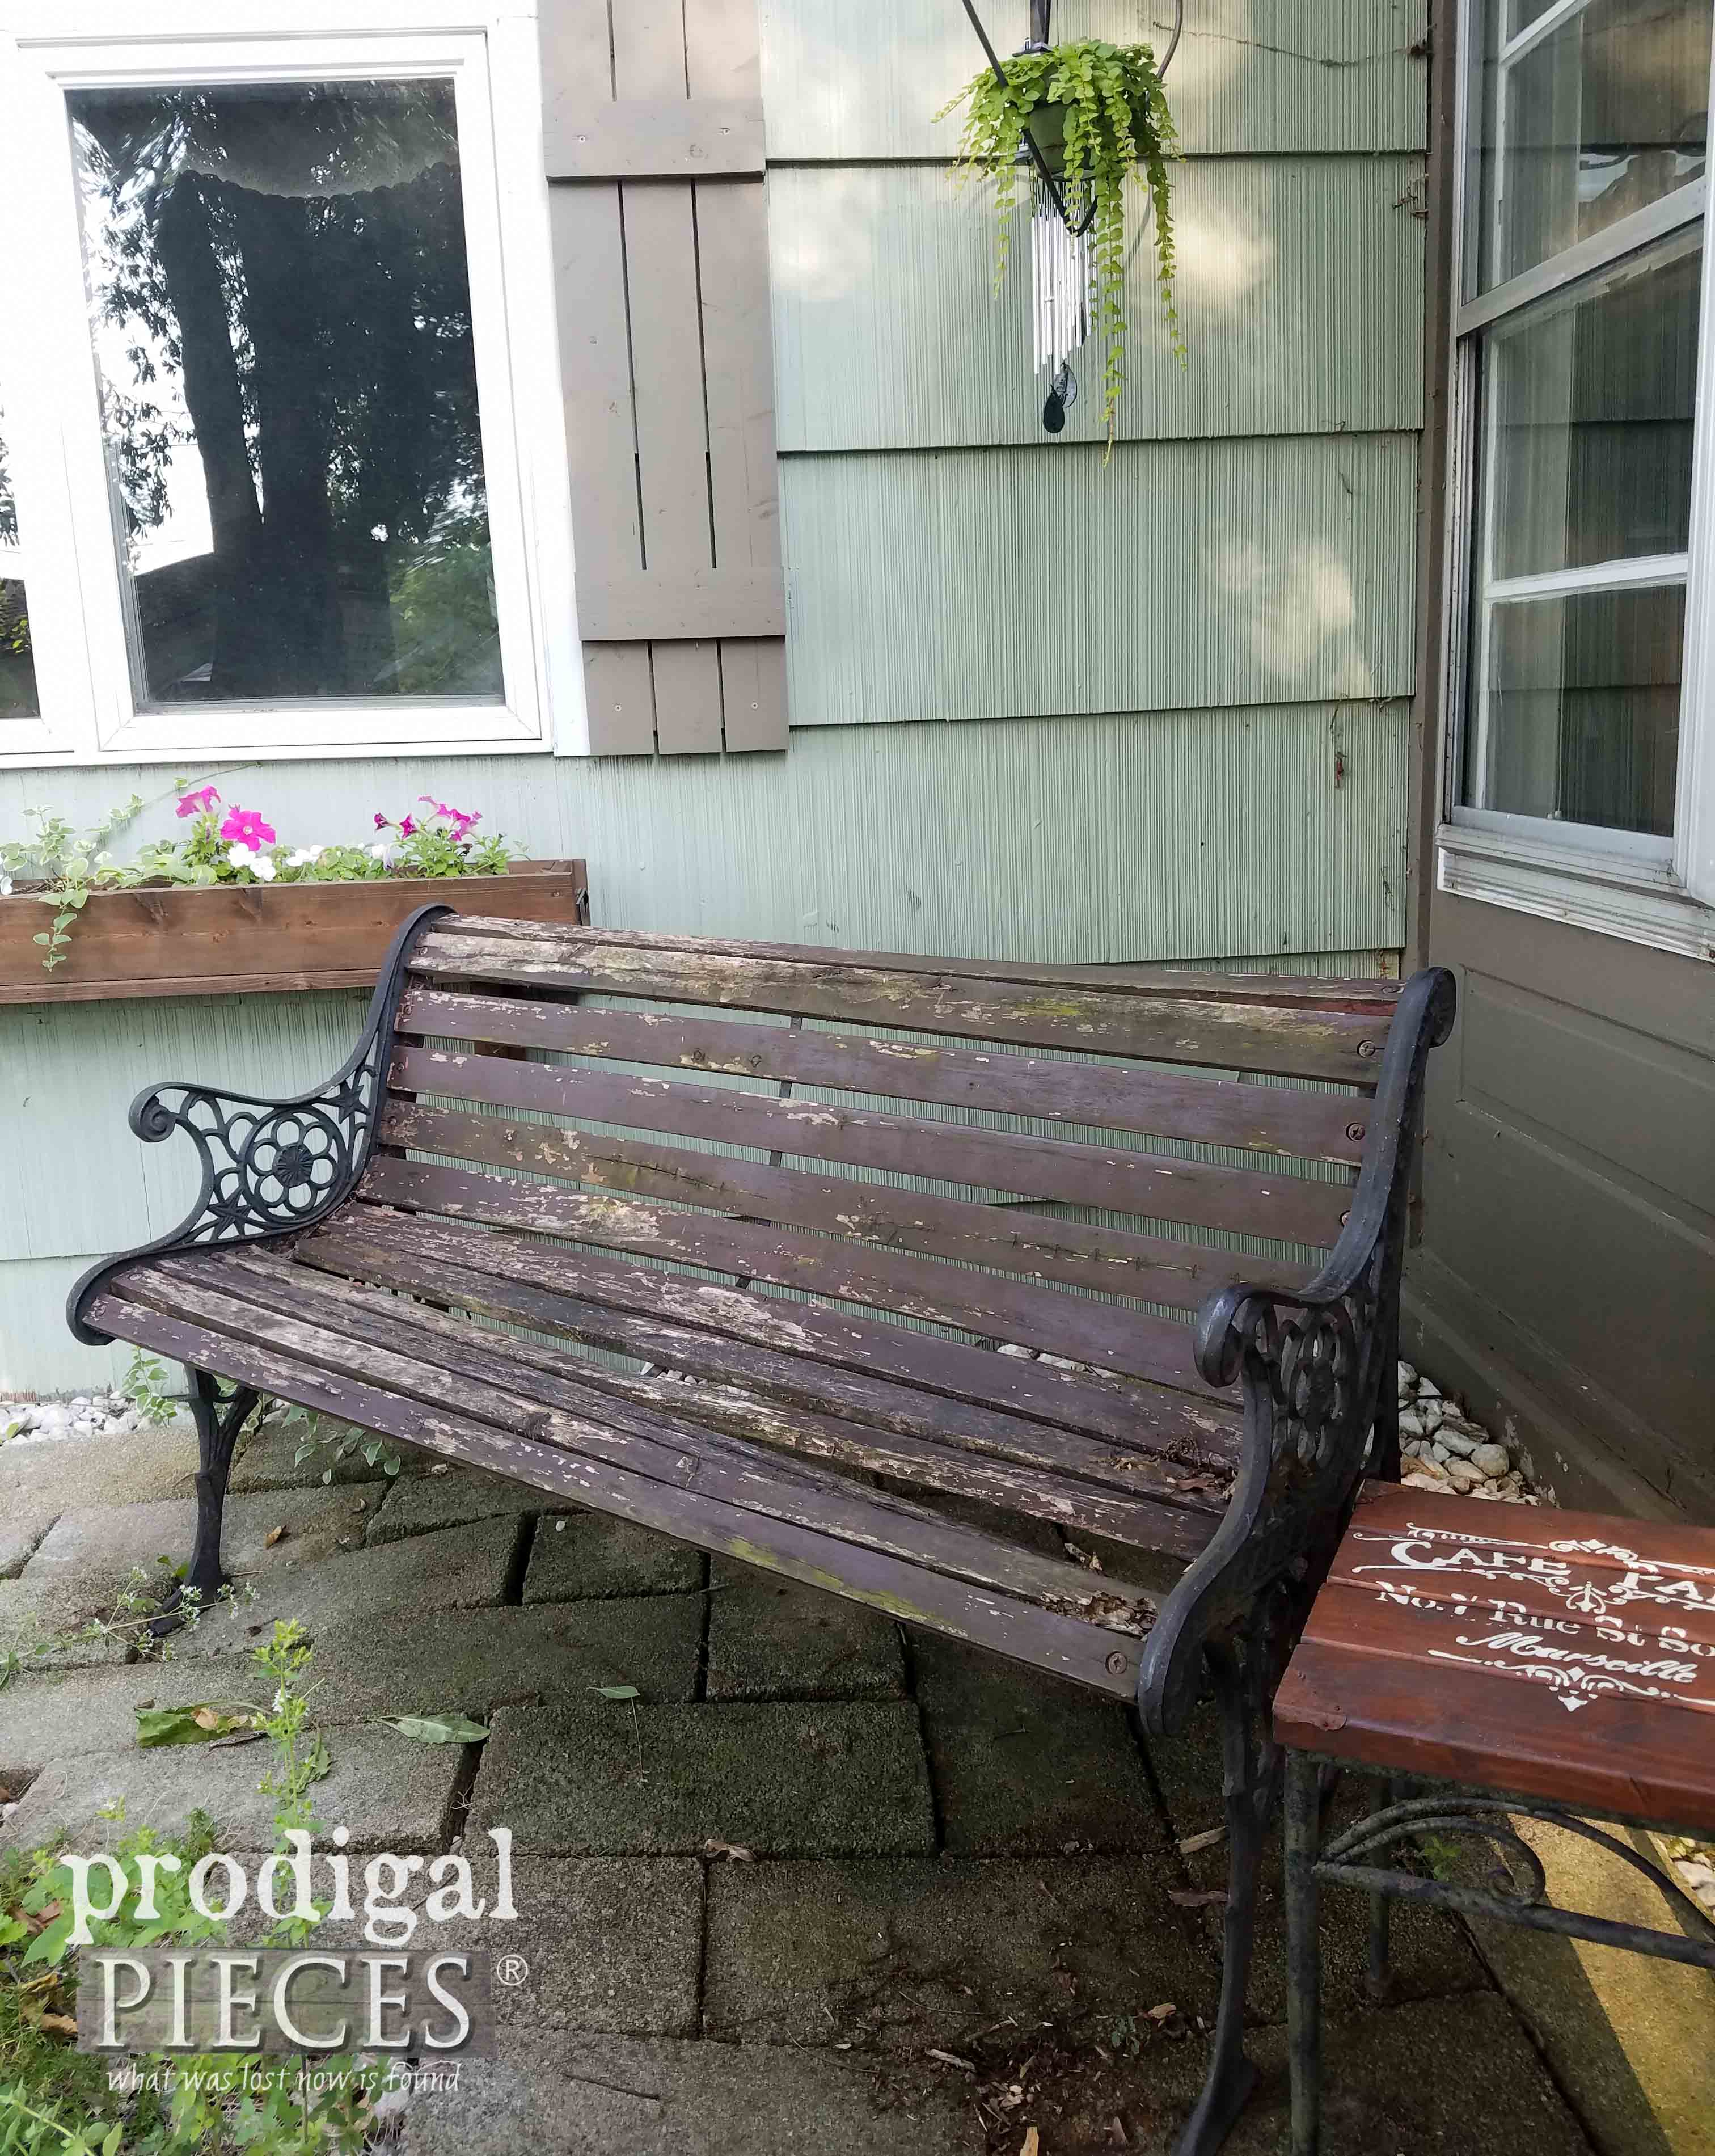
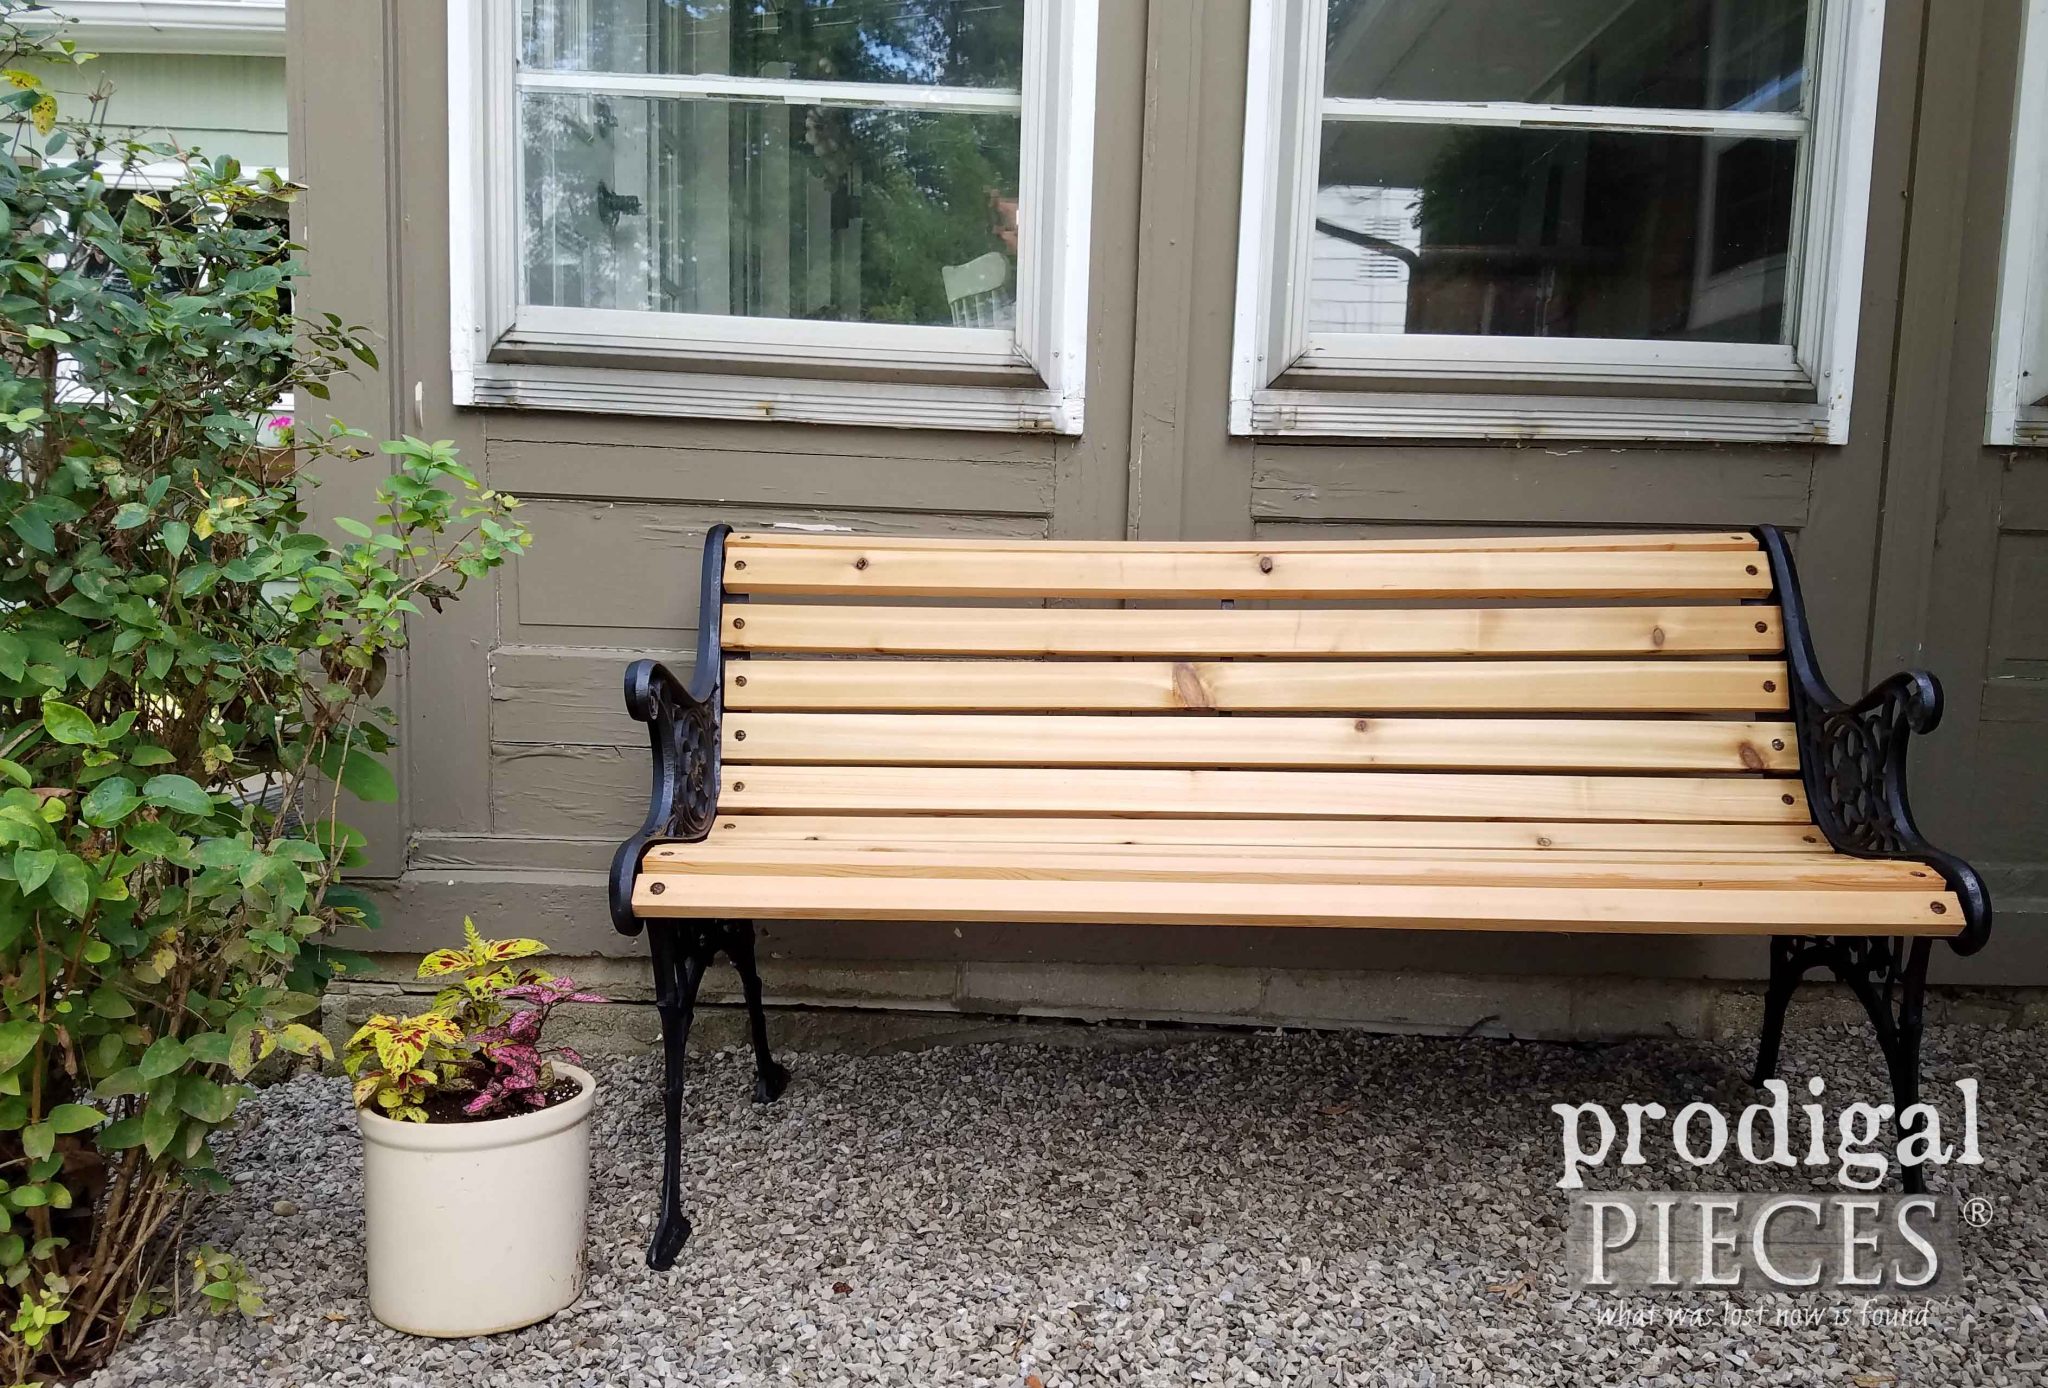
Even my absolutely sad looking park bench was needing a major overhaul.
In addition, there’s a new coat of paint on the iron, and replaced the boards with fresh cedar. I moved it to the play area and it suits that spot perfectly.
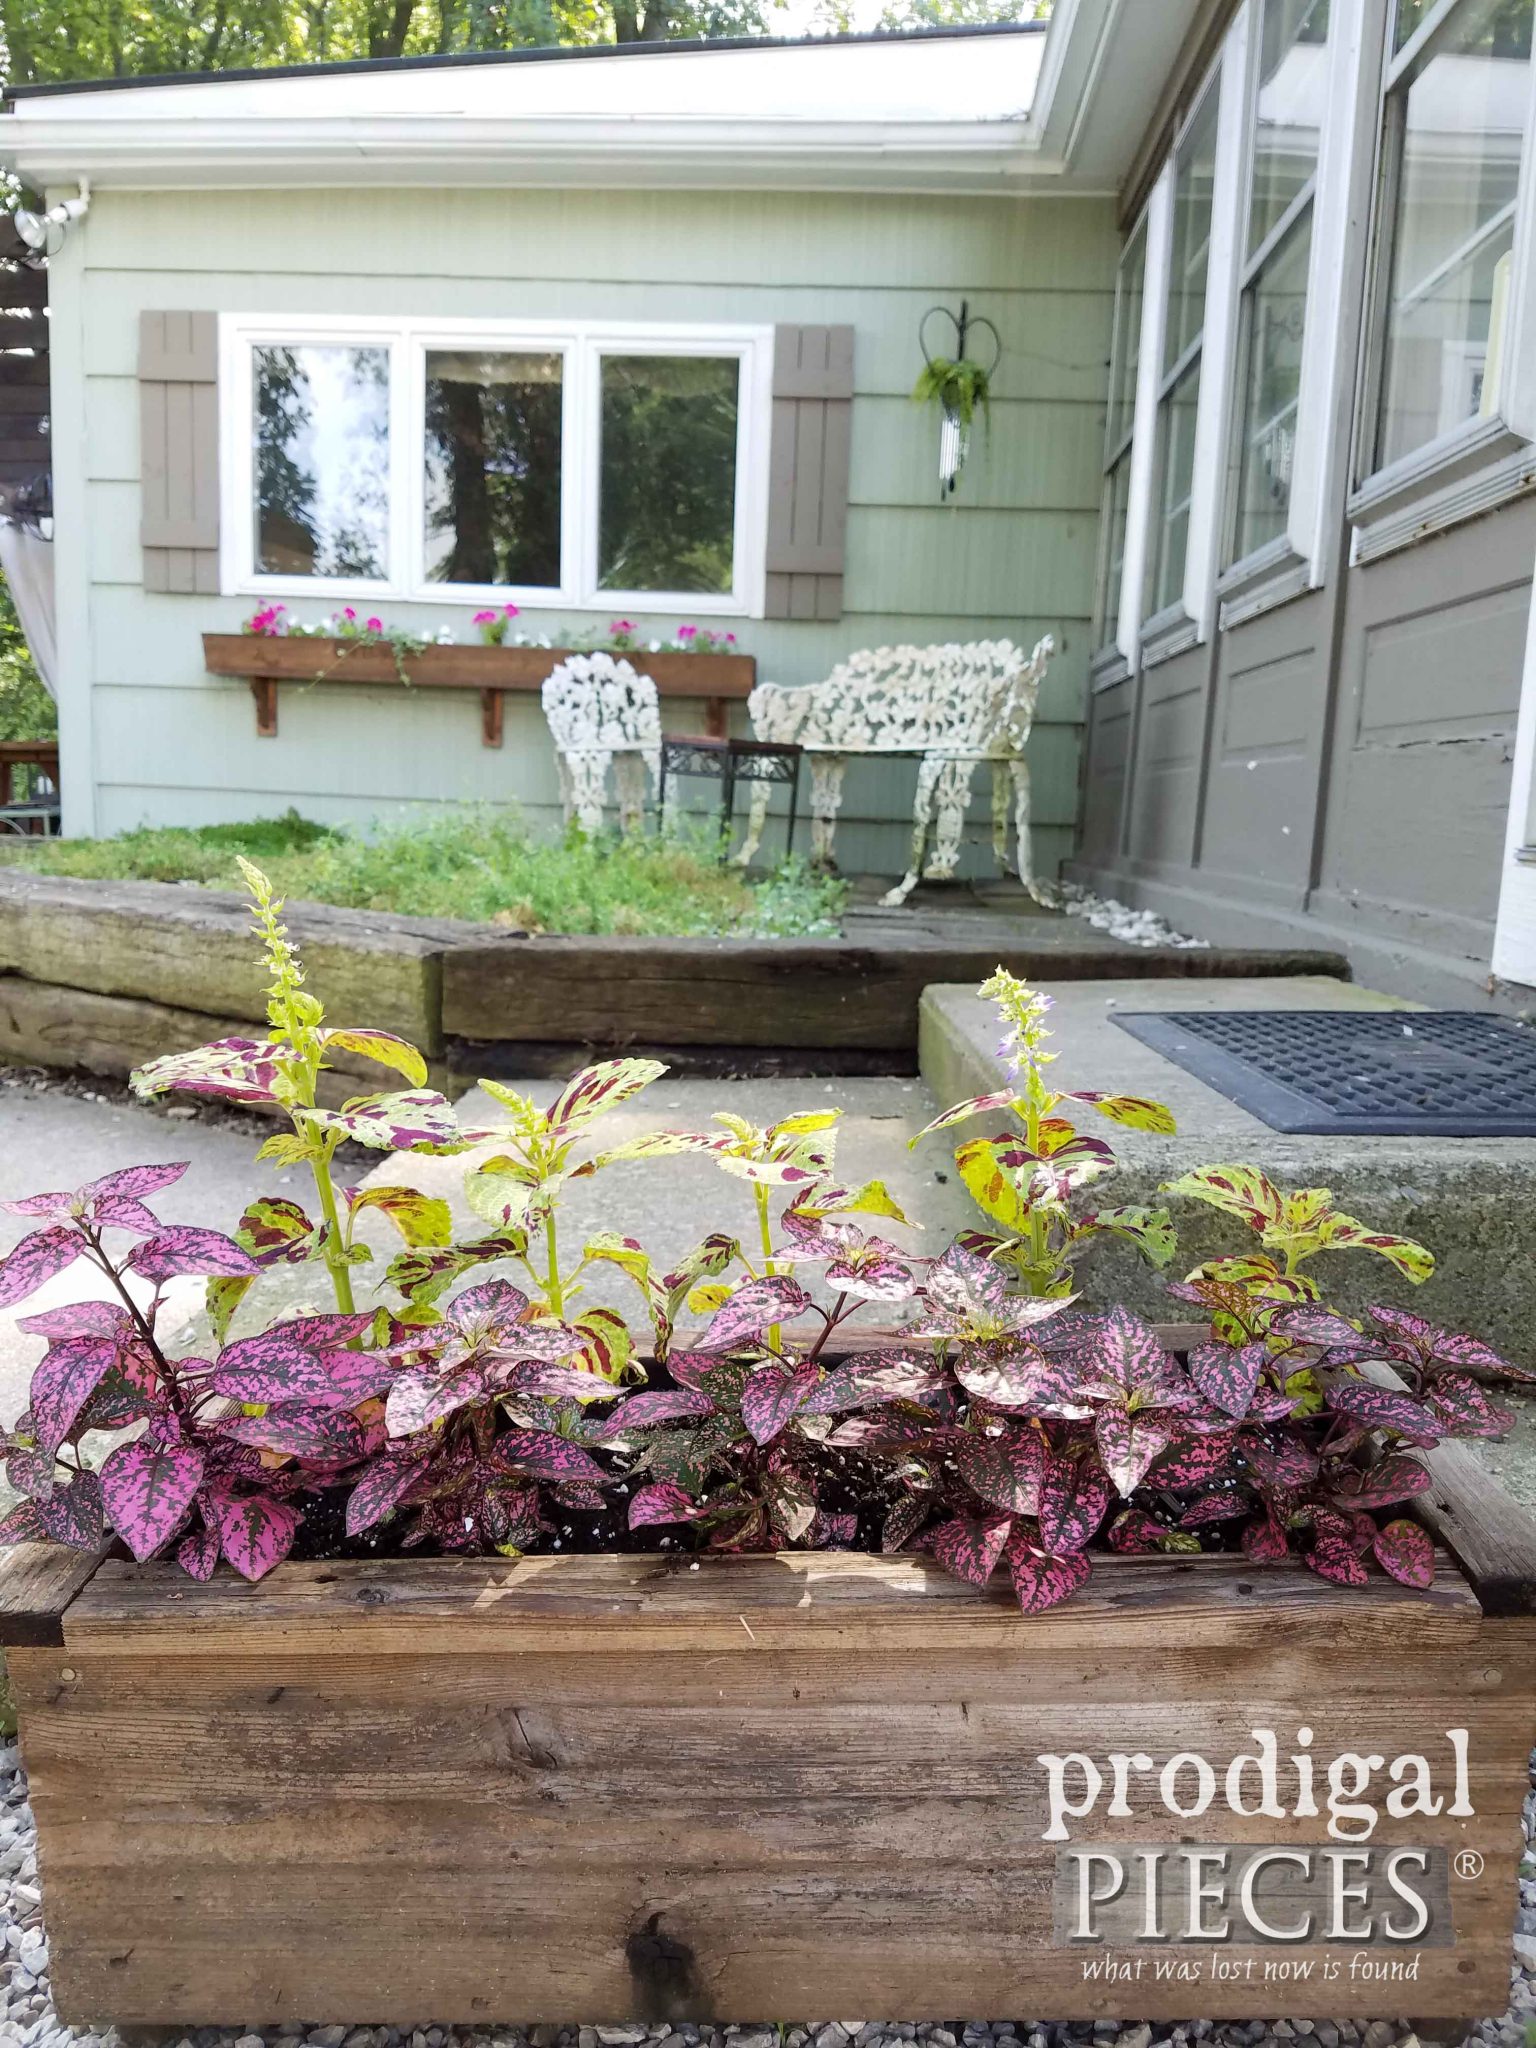
The corner where the bench used to sit still needs an overhaul and repairs. However, for now my new (old) cast iron set fills the corner with a vintage vibe.
WRAP-UP
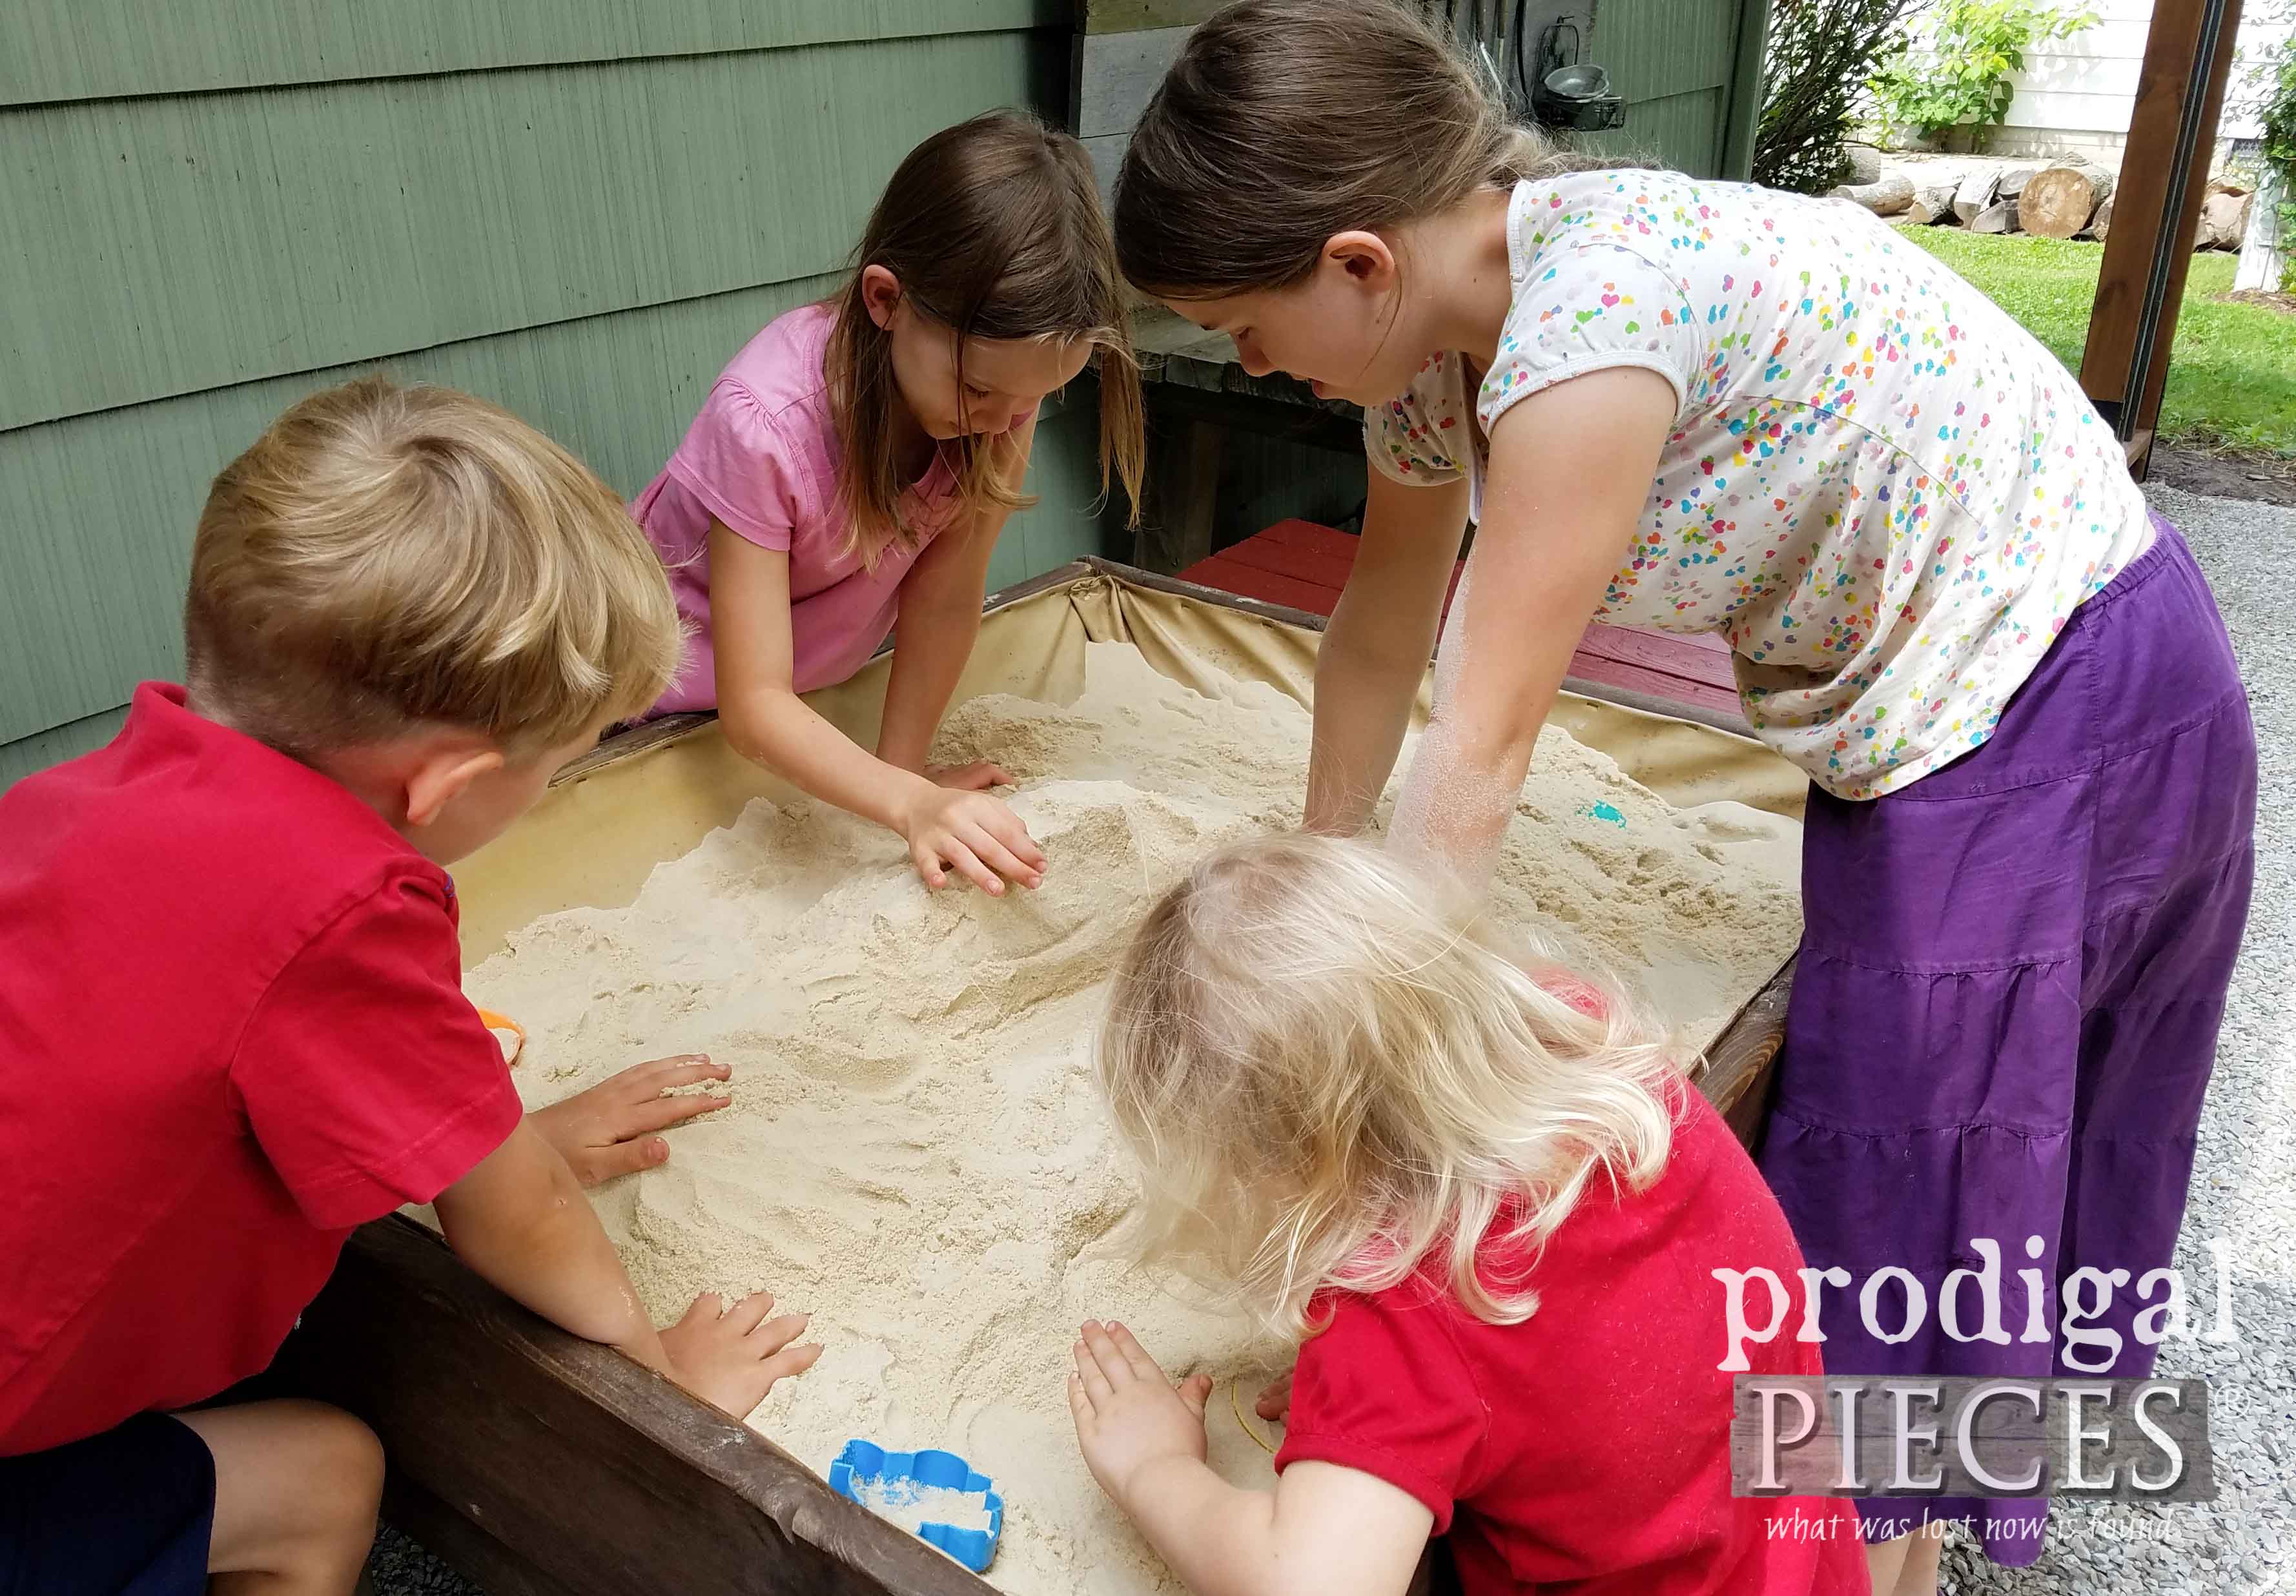
And, the best part…my kids. They love it and have been waiting oh-so-forever to have their things back. Seriously, I can’t tell you how many times they asked to dive into that sand while I was taking pictures. However, I don’t blame them – I love it too!
Do pin and share this DIY garden arbor to inspire others to take their home to a new level…literally.
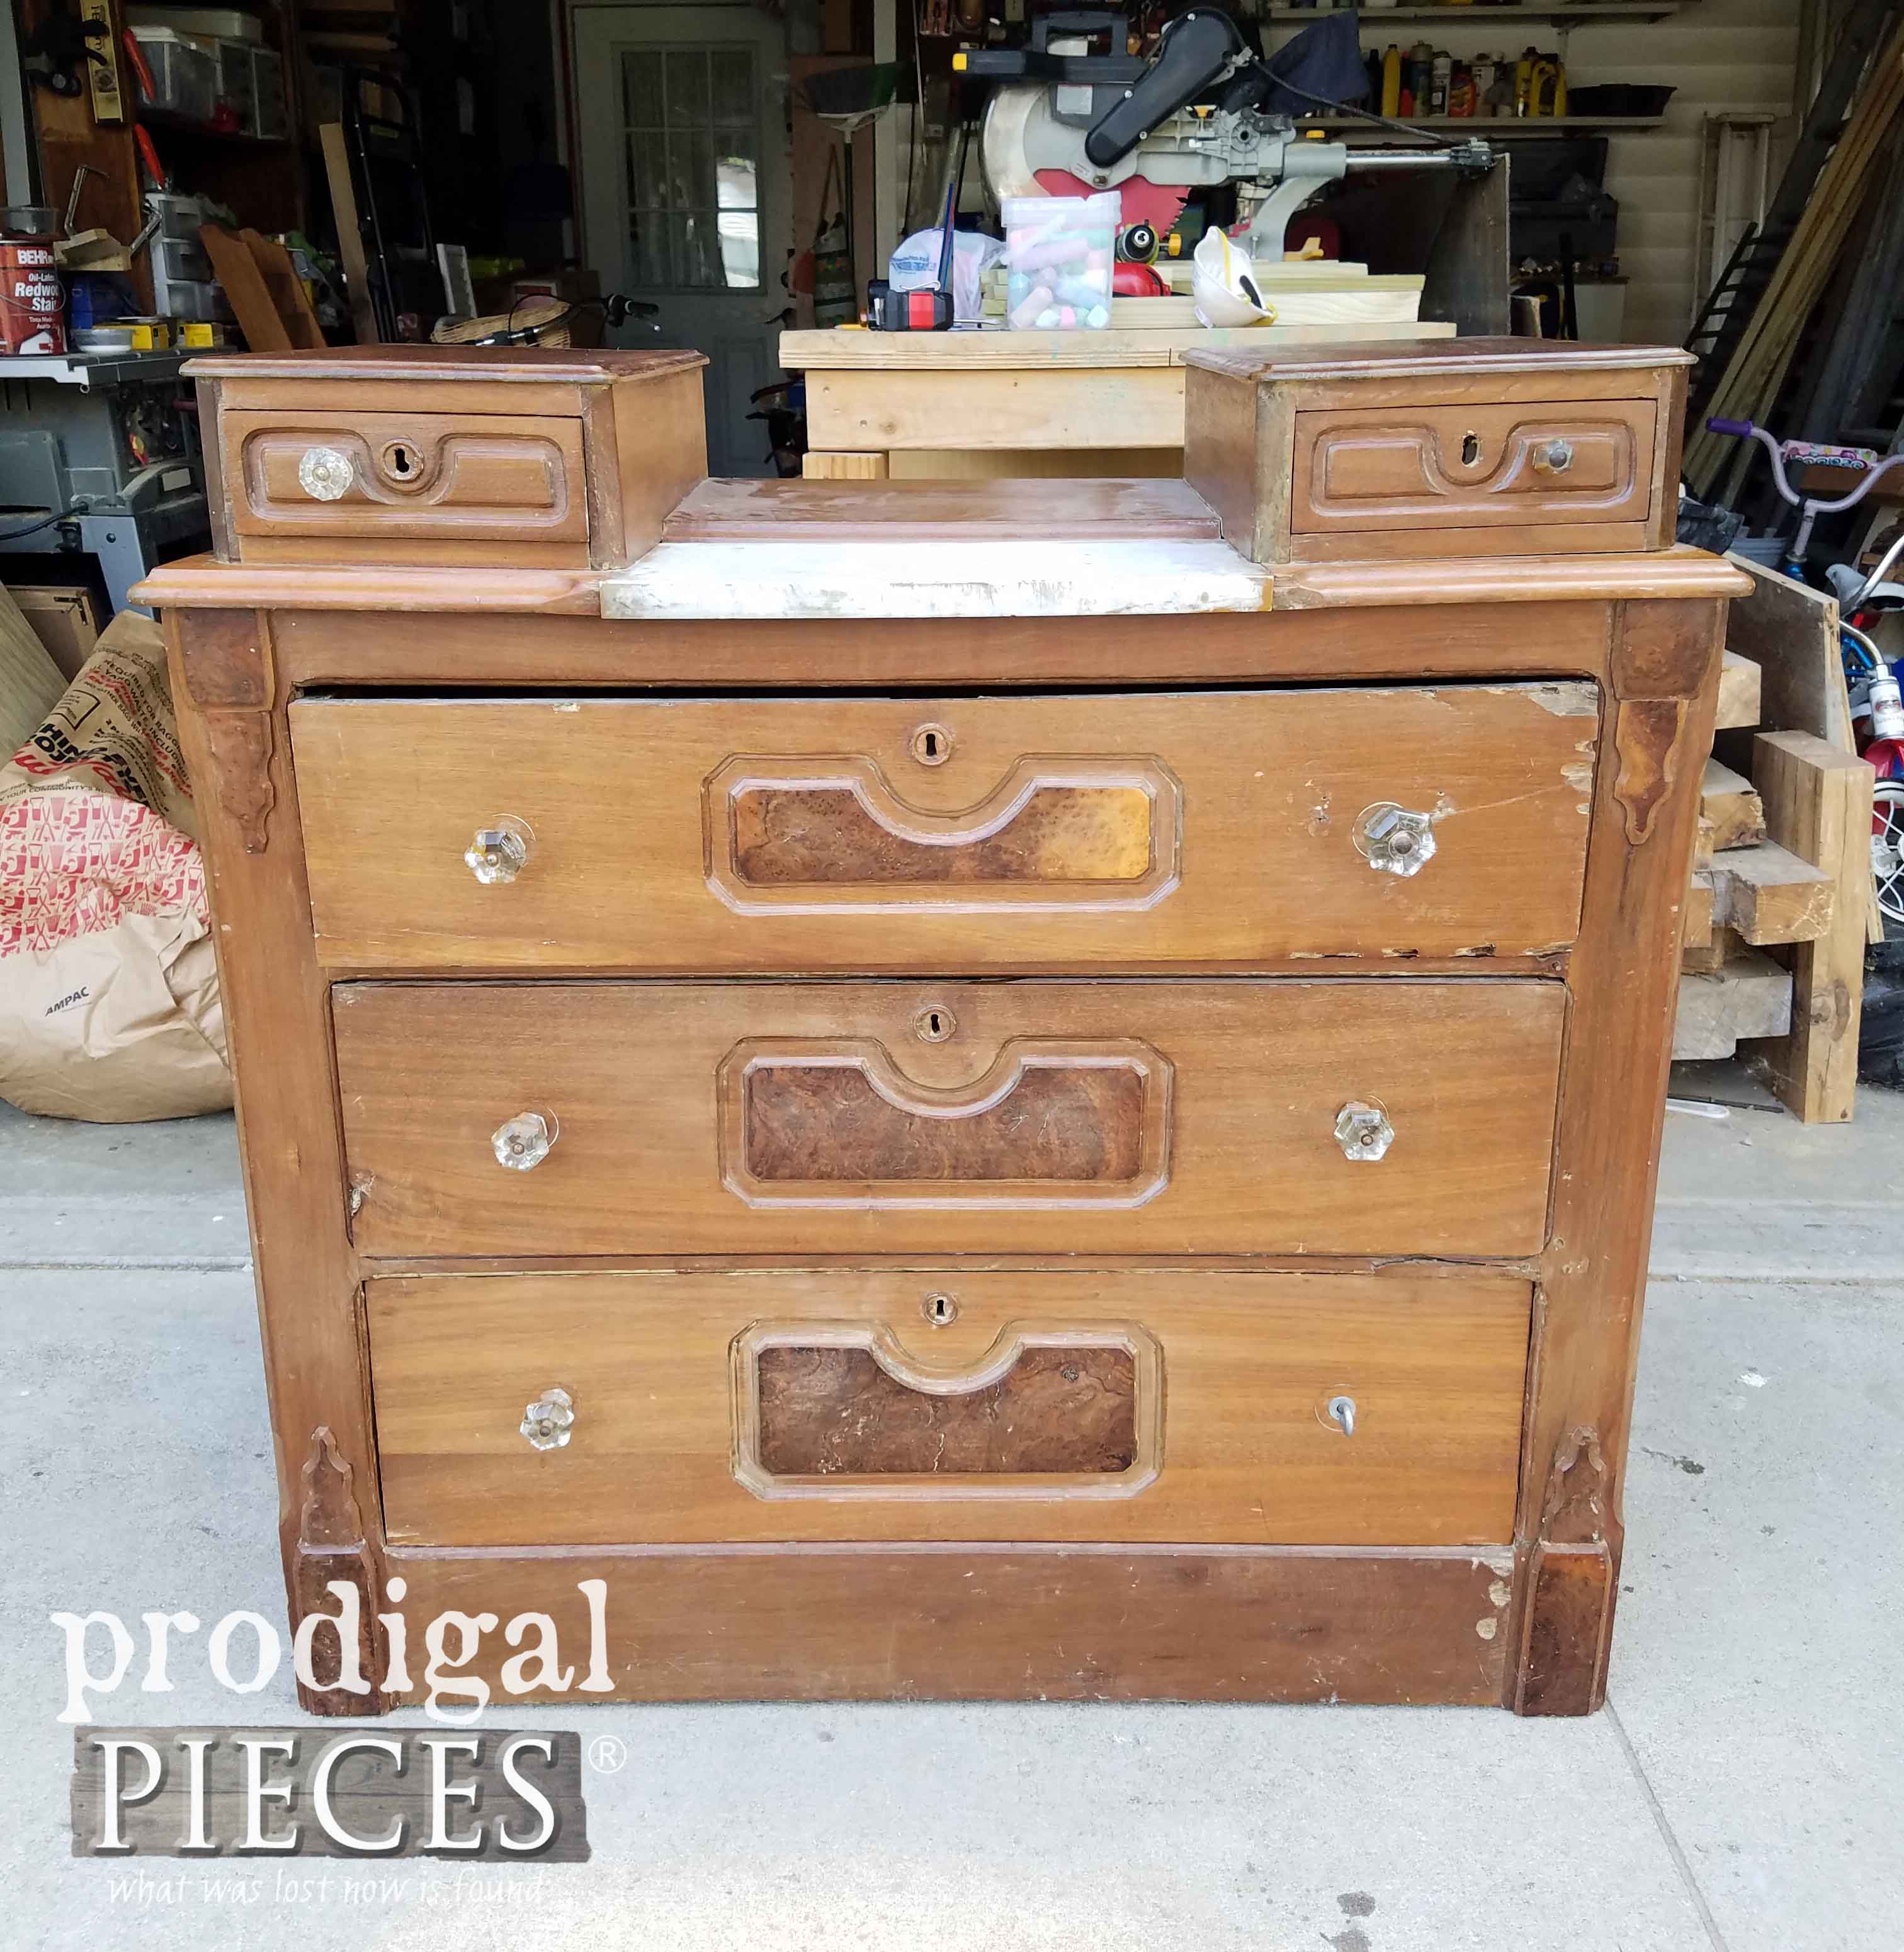
Up next, this antique dresser that was left for dead gets a new lease on life for Furniture Fixer Upper time. Head here to see the after!
To get these DIY tips & tricks in your inbox, be sure to sign up for my newsletter. Until next time!

Beautiful job! My favorite things to paint are old desks in need of some love. I would love to try Dixie Belle Paint on my next adventure!
Thanks! Sounds good, Deb.
Sorry I couldn’t figure how to comment other than reply: This is beautiful! I would try to patina the cedar bench wood to make it look. like metal!
No problem! Your idea sounds awesome!
Same here on having to reply. 😉 I’ve got a children’s bench to to-do, so I was happy to see yours!
hmmm… wonder what’s up with that? Thanks!
You’re new remodeled area looks great. You all done a wonderful job
I have a headboard and foot board that need painting along with a couple of dressers. My paint supply is getting low so really could use more paint and would dearly love to try the Dixie Belle Paints
Thank you for this giveaway opportunity
Pinned
Thanks, Colleen. We still have much to do and hopefully will get it done before the snow flies.
Wowzers!!! What a huge job and beautiful transformation!! Doesn’t it just bring a huge smile to your face and heart? Congratulations!!
Thanks! It was a big job, but so needed. Now we need to finish that wood shed before the snow flies. Yay!
What a gorgeous transformation, I love it…x
You are so kind to say so, Janette. Thank you!
I think your yard is starting to look amazing. Well done all of you, that is the whole family. You can call in at my place any time.? That is Australia ??. Much inspiration for our summer coming up.
Thank you.
Thank you, Chez. We love all the useful areas now. We are on our way to Aussie land! 😀
Beautiful job! Love the arbor & the area you redid looks amazing! I have yard envy now!!
I have a small wardrobe that is begging for that gorgeous blue paint shown in the photo!! That’s what I would paint first!!
hahaha…you have work envy too, right? Thanks so much, Sherry. 🙂
The Arbor adds such charm. The backyard is looking good.
Thank you, Debra.
Great job!
Thanks!
Well done! I can only imagine all the work you and the family put into this transformation!! I’m looking to repaint a dresser. My daughter and her friend made a blue birthday cake…on my freshly painted dresser top (it was drying in the dining room!) Unfortunately, they got blue paint coloring on the dresser 🙁
Yes, much work that we hope pays off. Thank you! And…oh no…blue!
What a beautiful result. I can’t imagine how many hours of work went into making such a wonderful spot. I would love to have such a place!! The arbor looks like something we could tackle with your well written instructions, and we just might give it a try. Thank you so much!
Thanks, Linda. It was much work, but went fast with all our hands helping. I hope you do give it a try and report back.
Love the makeover!
Oh my, so many projects to use this paint on!!!
Yes, the possibilities are endless!
Thanks so much Larissa
I loved seeing the makeover.
Thank you. 🙂
What a lovely area. Well done! Dixie Belle paint sounds like an amazing product.
Thanks! I am picky about my paint, so the fact that I am touting this says something. 😉
I am so missing having an outdoor seating area. Yours is beautiful.
I don’t blame you. We love ours so much. Thanks for the love, Deirdre.
Backyard looks lovely and so inviting. I would love to try DB paints – I have tons of projects waiting to get beautiful!
Thanks so much. 🙂
Beautifully done! I love how it was a team effort. I’ve heard wonderful things about the Dixie Belle products. I would love to give them a try. I don’t have any one specific project to try them on – too many to list! LOL
Go team! 😀 I have only good to say about their products. Love their paint!
I just love how everything turned out!!!! Super impressed, Larissa and what a wonderful family bonding experience!! 🙂
So happy to hear you like it, Teri. Thank you!
The area looks so inviting. I love it. And I love that it was a family project.
We couldn’t be happier with the outcome. Finally not a sore sight to look at. 🙂
Beautiful new patio area … great job
Thank you!
I absolutely love your new space! Complete 180 and So awesome to see your whole family involved! I am so wanting to try the Dixie Belle paint and patina products! Great job 😀 enjoy your new space!!
Wahoo!! We are so pleased with it and glad to have it done. Now, on to the next!
Isn’t it satisfying to be able to sit back and enjoy all of your hard work? Very pretty and relaxing space.
It sure is, especially seeing the kids get to play in a clean area. Thank you!
Your yard looks great! Love the arbor and pergola.
Thanks so much, Bev!
That was an amazing makeover. I have a wood storage area that looks pretty sad too. I think I am getting some ideas!
Ours was just not doing what we need it to. We are working on the wood shed now and hope to share soon. Thanks!
Sweet – will post your contest on my FB pages. I have to show my hubby your great arbor!
Blessings xx
Thank you!
You are an inspiration with all of your great ideas and tips. I love the arbor and thanks for sharing. I change my mind every single day or minute, but I would paint a bookcase that used to belong to my grandmother. Thank y’all for the giveaway too.
You are so kind to show love. Thank you, Brandi.
I loved the makeover! Your home is beautiful and you continue to find practical ways to make it even prettier. I’d love to live next door to you!
The first thing I’d paint is an old desk.
How fun! Thank you for the encouragement. We love to DIY!
That is a lot of work and we love your post and how tos. We also love our @Dixie Belle Paint. We have been using it for three years on hundreds of projects at our shop-Just Repurposed.
Awesome to hear, Mike! It definitely is a favorite of mine.
Seeing all your hard work makes me tired! HaHa, but it also always is so inspirational. Thanks!
Whew! haha… Thanks, Rhonda. It’s either DIY or don’t get it done. 🙂
This is beautiful!
Thank you, Linda!
I love love love your blog! I also love how you have all of your awesome kiddos helping out! Reminds me of my childhood helping my parents around our house. They may complain about it, but they’re making memories and they don’t even know it.
Such music to my ears, Kaitlyn. Thank you! They actually love to help and it’s all we can do to keep them busy. Yay!
Looking GOOD. I need to paint a table top for my front porch.
Thanks!
I wish I were this handy. Love how all this turned out.
It sure is a blessing to be able to DIY. I would be lost without my tools. My motto #toolsoverjewels. 😉
Love Dixie Belle paint! Using it today to paint some signs.
Hooray! Hope you fun.
Every time I read one of your posts I am blown away by your hard work and creativity! I love the garden arbor and in fact I will be sharing this one with my husband! If I win the first thing I think I will paint is a cute little fence around my air conditioner….Thank you!
That means much, Karie. Thank you!
Love the arbor, and I love love love the faux patina! I know what my first Dixie Belle purchase is going to be!
Wahoo!! We are delighted to share. Thank you!
Wow! Your outside looks fantastic. So peaceful and serene. Don’t know how you manage to do it in this heat but what an excellent job!
It was hot, but felt so good to get it done. Thank you, Barb.
Love the arbor, pinning it for a project for my husband this fall
Love those honey-do lists. 😉
Great blog! Thanks for the great information.
Thank you, Sara.
Looks absolutely fantastic.
You are so kind to say so. Thanks, Deb!
Your backyard looks so nice now! What a great feeling you must have after all that work!
Such a relief to not have an eyesore. Now to get that wood shed done. 🙂
All of your yard projects look fabulous! I’m saving this arbor though because I have dreams of building one into my vegetable garden.
Ooh…that would be wonderful!
I love the makeover. We built an arbor that looks very similar. Ours is wider and we hung a porch swing in it. It is one of my favorite places to go….when it isn’t 105….. our heat index for the day? I have never used this brand of paint. I would love to give it a try!
Love my swing, and I bet you do too. Yes, the heat feels like it will fry you. ha!
Your hard work certainly paid off.
Thank you, Dianne.
My hubby tells everyone if it stands still long enough I will paint it! I need to try the Dixie bell paint! Your yard looks beautiful now!!
bwahahaha!! Love it.
Very nice!! I love reading about your projects. The pictures are great. Thank you.
Thank you, Terri.
It is absolutely beautiful! Your garden is gorgeous! I have a back lanai area, I’d love to do like that on a smaller scale. I’m wanting to paint a trellis similar to that in patina.
Sounds like you’re a gal after my own heart, Leslie. Hope you win!
Super area. You make everything you touch amazing. Love it!! Would love to try the Dixie Belle paints.
aww… thank you, Debra!
Amazing transformation. I love to use paint to update instead of throw away!
Thanks! Yes, it’s fun to save. 😀
How sweet to see the whole fam doing it together. Looks great!
We rock as a team. hahaha…woot!
What an awesome transformation!
We are so excited to be getting it done. Thank you!
Youryard is beautiful! And I love that your whole family is helping when you do a project. Thank you for the giveaway!
Thank you, Rebecca. We are so blessed to have them – many hands make light work.
Thanks to your blog I have tried Dixie Belle paint and love it. I need to try those patina sprays ❤️ Thanks! Lisa
Yeah, baby! So good to hear. Thanks for the feedback!
I love what you did to your backyard! Wonderful family projects.
Awesome to hear. Thank you!
Love the new play area.
I would paint my patio rocker.
Thanks!
Love all your ideas! everything turned out great!!! Love me some Dixie Belle paint too! I did my kitchen cabinets in Drop Cloth! Love it! Thank you!
Love that color. I just used it on my blanket chest makeover too.
The first thing I would paint right now would be my dining room table and chairs! Drop Cloth of course!
Sweet! Good color choice.
your backyard looks amazing!! I am sure the neighbors approve as well:) I am wanting to do something for my backyard as well….I will show the trellis / arbor to my husband tonight!!! love it!
We are definitely the annoying overachievers in our neighborhood. ha! Thanks, Melinda!
I’m not sure what I would paint first! It would depend on what project my husband and I built next!
Go team!! You sounds like us. 😀
Wow! What a grand transformation! The pergola and garden area look like it will be well used and enjoyed! It all is a lot of work, but so worth it, especially knowing how much $$$ is saved! I would use the paint to repurpose an entertainment center for my sewing room. I want to add shelving and doors to store my supplies.
We just love it. Makes it fun to be out here instead of walking around messes. Thanks!
It looks so inviting. I love the kids play area!
Fun for big kids like me too. yay!
I like the vibrant colors of the Dixie Belle paints. I think the first thing I’d like to paint (with my HomeRight paint sprayer that I LOVE) is a vintage wrought iron dining set I have outside. Currently it is a non-vibrant red and really could use a pop. While it is an adorable vintage set that I got for a steal at a garage sale and it has awesome shape to the chairs, the color is quite drab. I think a bright torqouise might do the job.
Woot, woot! (on both accounts 😀 ) Sounds like fun!
THIS IS AMAZING!!!! Come do my yard next, OK?!?! : ) You guy’s back yard has to be the beauty-spot of the neighborhood! WELL done!!!!
hahaha…we still have work to do, but on our way! Thank you.
I am so jealous of your play area! It looks so fresh.
I haven’t tried Dixie Belle yet, but would love to try them out on a desk I am about to make-over.
aww…you can come and play! 😀 haha Thanks, Kimberly. We are so glad we can look out the window to check on the kids and they love their new shaded spot.
I haven’t tried Dixie Belle but I love what you did with it! I have a glass topped patio table that has white legs. It would look great with patina added!
Ooh…so cool! That would be perfect.
Love all you have done! It looks amazing. I would love to paint some end tables and a coffee table, so that is what I would use the paint for.
It sure was a blessing we could get it done. Thank you!
Oh. My. Goodness! Your yard is gorgeous! I love in AZ and don’t have the luxury of much green. I miss it so much! And I think your darling cast iron set would look good in white. I said yellow when you posted it earlier. If I win the paints I have a shelf full of little projects in my garage waiting for a fresh look. One is a cute mirror shelf combo!
How fun to hear. Thank you! I couldn’t live out there for that reason. I love to garden and grow and especially love the seasons. Though I may head your way during winter! 😀
What a GORGEOUS transformation!! Your backyard is beautiful! And I love me some Dixie Belle Paint!!!
High five to you, Candy! 😀
Wonderful job on everything! It’s really making a difference.
It was such a relief to get it done even though I want to finish our kitchen. Gotta do what ya gotta do, right?
Wow! What a difference! This “yard section” turned out great, congratulations on your new view – you must stand at the window and smile!
We sure do, especially because we can see the kids better and know they have a safe area to play.
All that hard work sure paid off. Yard looks wonderful.
Thank you, Janet! We are delighted with it.
Great job! I have an entryway bench I would love to freshen up with some Dixie Belle paint
Thanks!
Wow, Larissa, your yard is coming along beautifully! I bet your kids love their new play zone too. Pinned
They are out there 24/7 ha! Or so it seems. I’m happy that we are making better use for our space and particularly that our wood will be ready to go. I want to get our kitchen done! 😀
I am so inspired by the post on the arbor and the wonderful paint. I know my grand daughter will love this post when I send to her.
What a treat to hear, Sandy. Thank you so much!
Wonderful! You have quite the working crew. Looks awesome!
The best evah. hee hee hee. We are so blessed by these guys and how the jump in to help. Thanks!
Larissa! You and your family have limitless energy! I continue to be amazed!
A wonderful projectheath. Love the patina
Love me some patina!
Your backyard is looking fabulous! The arbor, with the lovely patinaed trellises, is beautiful! I also really like your pergola. I can’t figure out what to do outside our house. We have a gorgeous view out the front and side of our house, but the back, which would be the best functional location for outdoor dining, has very little going for it… Ugh!
That was kinda like our area we did today. Eye sore and what do you do with it? I hope you can find inspiration from what we are doing. Thanks for stopping by!
Wow, Larissa! Your back yard look so good now! It is so inviting and the arbor really makes it. I know your family must love to spend time out there now! XOXO
So much easier on the eye, right? hahaha… Thanks, Christy!
What a great job. The arbor looks fantastic & I loved how you added the patina using Dixie Belle paints.
It was so fun to create that dimension on that side of the house to create balance with the pergola. Thank you!
Love what you did to the backyard! I also have an outdoor bench that needs a new paint job.
Thanks, Denise!
Love the patina on the arbor! I have a lamp, outdoor furniture and flower pots i want to patina. So many plans… so little time!
I totally hear you, Lisa!
You’re the hardest working blog-posting, home-schooling, cooking-from-scratch, DIYing mom EVER! Wish I had half your energy . . .
More like crazy lady, but I will take those awesome compliments. Thank you, Donna!!
Larissa, this space looks AMAZING! Wowza! As a rose-grower myself, I would recommend that you plant clematis on your arbor instead of the roses. It’s a little close against the house to put a rose there and I think they’ll be a bit too large for your area. Clematis would be a lovely choice! And no thorns or hard branches to poke you! thank you for the chance to win the paint. I would love to have some to play with. I have a lot of pieces of furniture to paint, but my first ones may be tables or stools!
Yes, I had tried that on our pergola and only one grew. Am considering it again. I want an easy, non-invasive plant, but I already have a trumpet vine. Those grow like crazy.
All I can say is….. I ‘m speechless! Beautiful job.
Wahoo!! You are so kind. 🙂
Great job! What a difference and love the paint job!
Happy dance!! Thank you, Vickie.
Love Your Makeovers, makes me want to makeover the rest of our deck, have a bench that needs a new redo with a great color, Thank You!!!
Wahoo!! It’s fun to improve your home.
Love the patina on the trellis. I would like to try the patina look with the paints on some flower pots.
That would be sweet! I’ve done it with some of mine too.
Thank you for an inspiring tutorial.
My absolute pleasure, Renee.
Oh my goodness Larissa. I had to scroll and scroll just to comment. But that is a good thing. I love what you did in your back yard. And that faux patina has me drooling! I think I’ll come over for a bit! 😉
hee hee hee…sorry! 😀 You most certainly are invited.
I have some planter boxes my husband made for our patio to paint & would love to try this paint
They would look beautiful!
Such an awesome transformation!
You are so sweet, Brandi. Thank for stopping by!
I always enjoy seeing your new projects. I am hoping to transform an antique table soon but haven’t decided what colors to paint it.
They have oodles to choose from! You will love it.
Your backyard is looking wonderful! I think I’d paint a small bookcase with these paints. Thank you for the giveaway.
Thanks! We are certainly enjoying it.
I love your project. The arbor turned out great, would love to build one for my lady banks rose to climb across. Thank you for the inspiration and giveaway.
That would be beautiful!
Gosh! That looks amazing! Absolutely stunning! Would love to hear details on the park bench makeover as I have one that needs the wood replaced AND painted! Thanks or the chance to win!
Thanks! We just took off the old wood and replaced with new – pretty simple. 😉
What a beautiful makeover for your yard.
Thank you, Maryann. We love it!
You guys did an amazing job! Looking good! I’ve never used Dixie Bell Paint, but I’m sure that it would make one of my antique dressers that are collecting dust in the basement look fabulous!
Sweet to hear your kind words. You will love their paint! 😀
WOW, Such a transformation and I LOVE the arbor/pergola that your husband built! I must try some of the Dixie Belle paint. It seems to work so well in all of your projects!
P.S. What an amazing family you have! In every photo I’ve seen, no-one is frowning. All seem happy to be helping out.
Gosh, we sure need more excellent examples of what a family is all about. Lucky me, my own 3 children (now grown), were almost always proud to help out. “That’s what families do, help one another”; is what I always told them. Sorry for the length of this post… I felt moved to express my appreciation. Thank you for sharing so much of your sweet family!
I couldn’t say enough how blessed we feel to have each and every one of them, including each other. You are a blessed mama indeed.
Awesome job! Beautiful back yard.
Thanks for saying so. 🙂
That is an amazing makeover! Wish I had some great helpers!
My crew is on their way! 😉
The chest looks gorgeous! I would paint my mom’s antique buffet to use as a table in my living room.
Thank you!
Looks like the whole family has done a great hob in the yard. It looks amazing!!
We have the best help ever!
Wow! That is seriously an amazing transformation! I bet the whole family loves it!
Thank you! Yes! Plus, it helps hide my neighbor’s mess. 😉
Did you use treated lumber?
Yes, we did.
Thank you so much for the plans on how to make the Arbor. It took me a while because of the erratic UK weather ,wood shortages and skill but I persevered and managed to build my own. It’s not perfect but I love it and I’m really proud of myself. It’s given me the confidence to try other projects. Love the result of your garden makeover too ?
How absolutely wonderful to hear, Adele! You just made my day. Yes, such crazy times everywhere, and I’m glad you got ‘er done. Bravo!