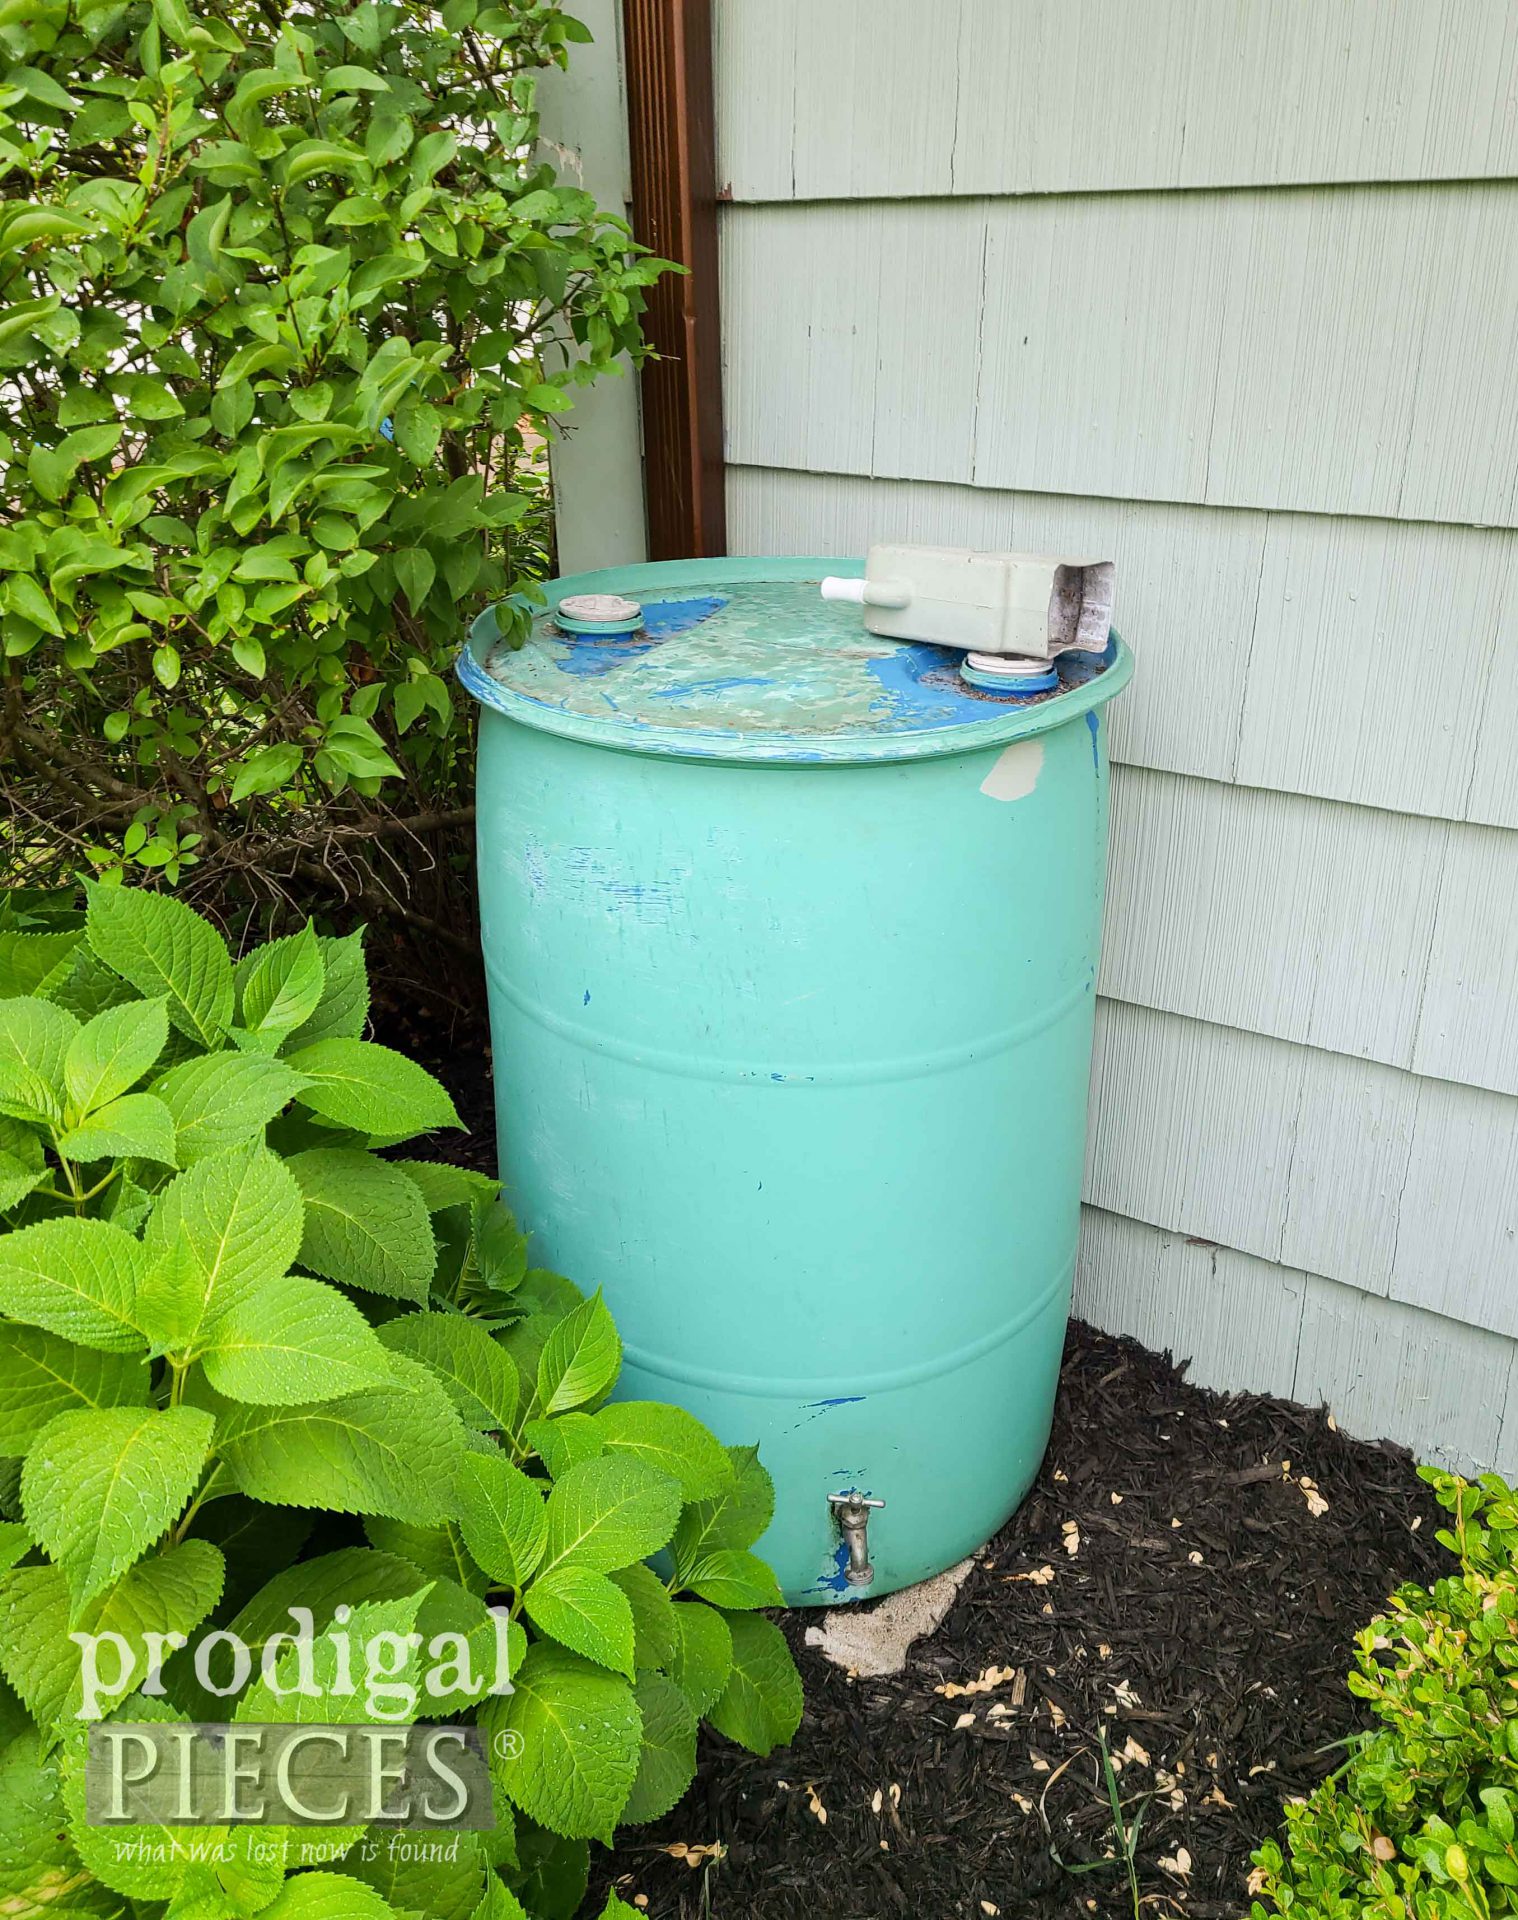
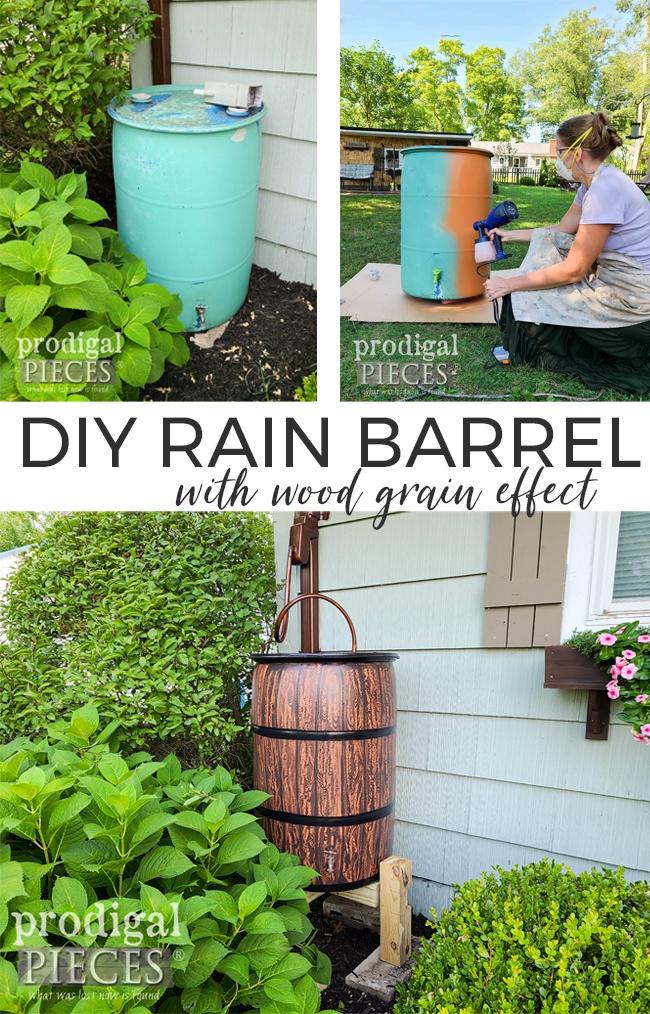
As summer nears a close, I try to wrap up any projects I’ve been working on or wanted to get done before autumn rolls in. This year, one goal I have is to finally update my DIY rain barrel. Don’t you think it looks like it needs it? ahem.
About seven years ago we set this up when we added our DIY raised garden beds to collect water for our needs. Its super handy and we enjoy having it in our garden arsenal. However, there are a few things we learned that would make things easier, but I also tend to take things to the next level…literally.
Our rain barrel can be seen from the curb, so it was key for me to keep it working with our design. If you haven’t figured it out yet, my barrel is a food-grade 55 gallon drum that used to house apple juice. I bought two drums, one for this and the other for a compost tumbler we built. So, that means that you can do this too!
DIY TIME
First, if you want to set up a DIY rain barrel of your very own, consider finding a food-grade 55 gallon drum. I paid about $40 for one, so this is definitely affordable as opposed to those expensive store-bought ones. Second, you’ll want to purchase a diverter kit. It fits standard home downspouts. However, you’ll also want to make sure you are legally allowed to collect water in your city. Some, unfortunately, have limitations.
Next, you can use your drum as-is or dress it up. I used second-hand paint many moons ago, but now I’m going to make this puppy sing. haha. In order to do that, I need some fun tools.
Materials
*post sponsored by HomeRight see full disclosure
-
- exterior paint of choice: I used Maple Glaze for base, and a Charcoal for wood grain, Black for the rings
- paint brush
- diverter kit
- painter’s tape
- chalk
- foam paint brush
- plastic primer (optional)
Tools:
- sprayer
- wood graining tool set
STEP 1
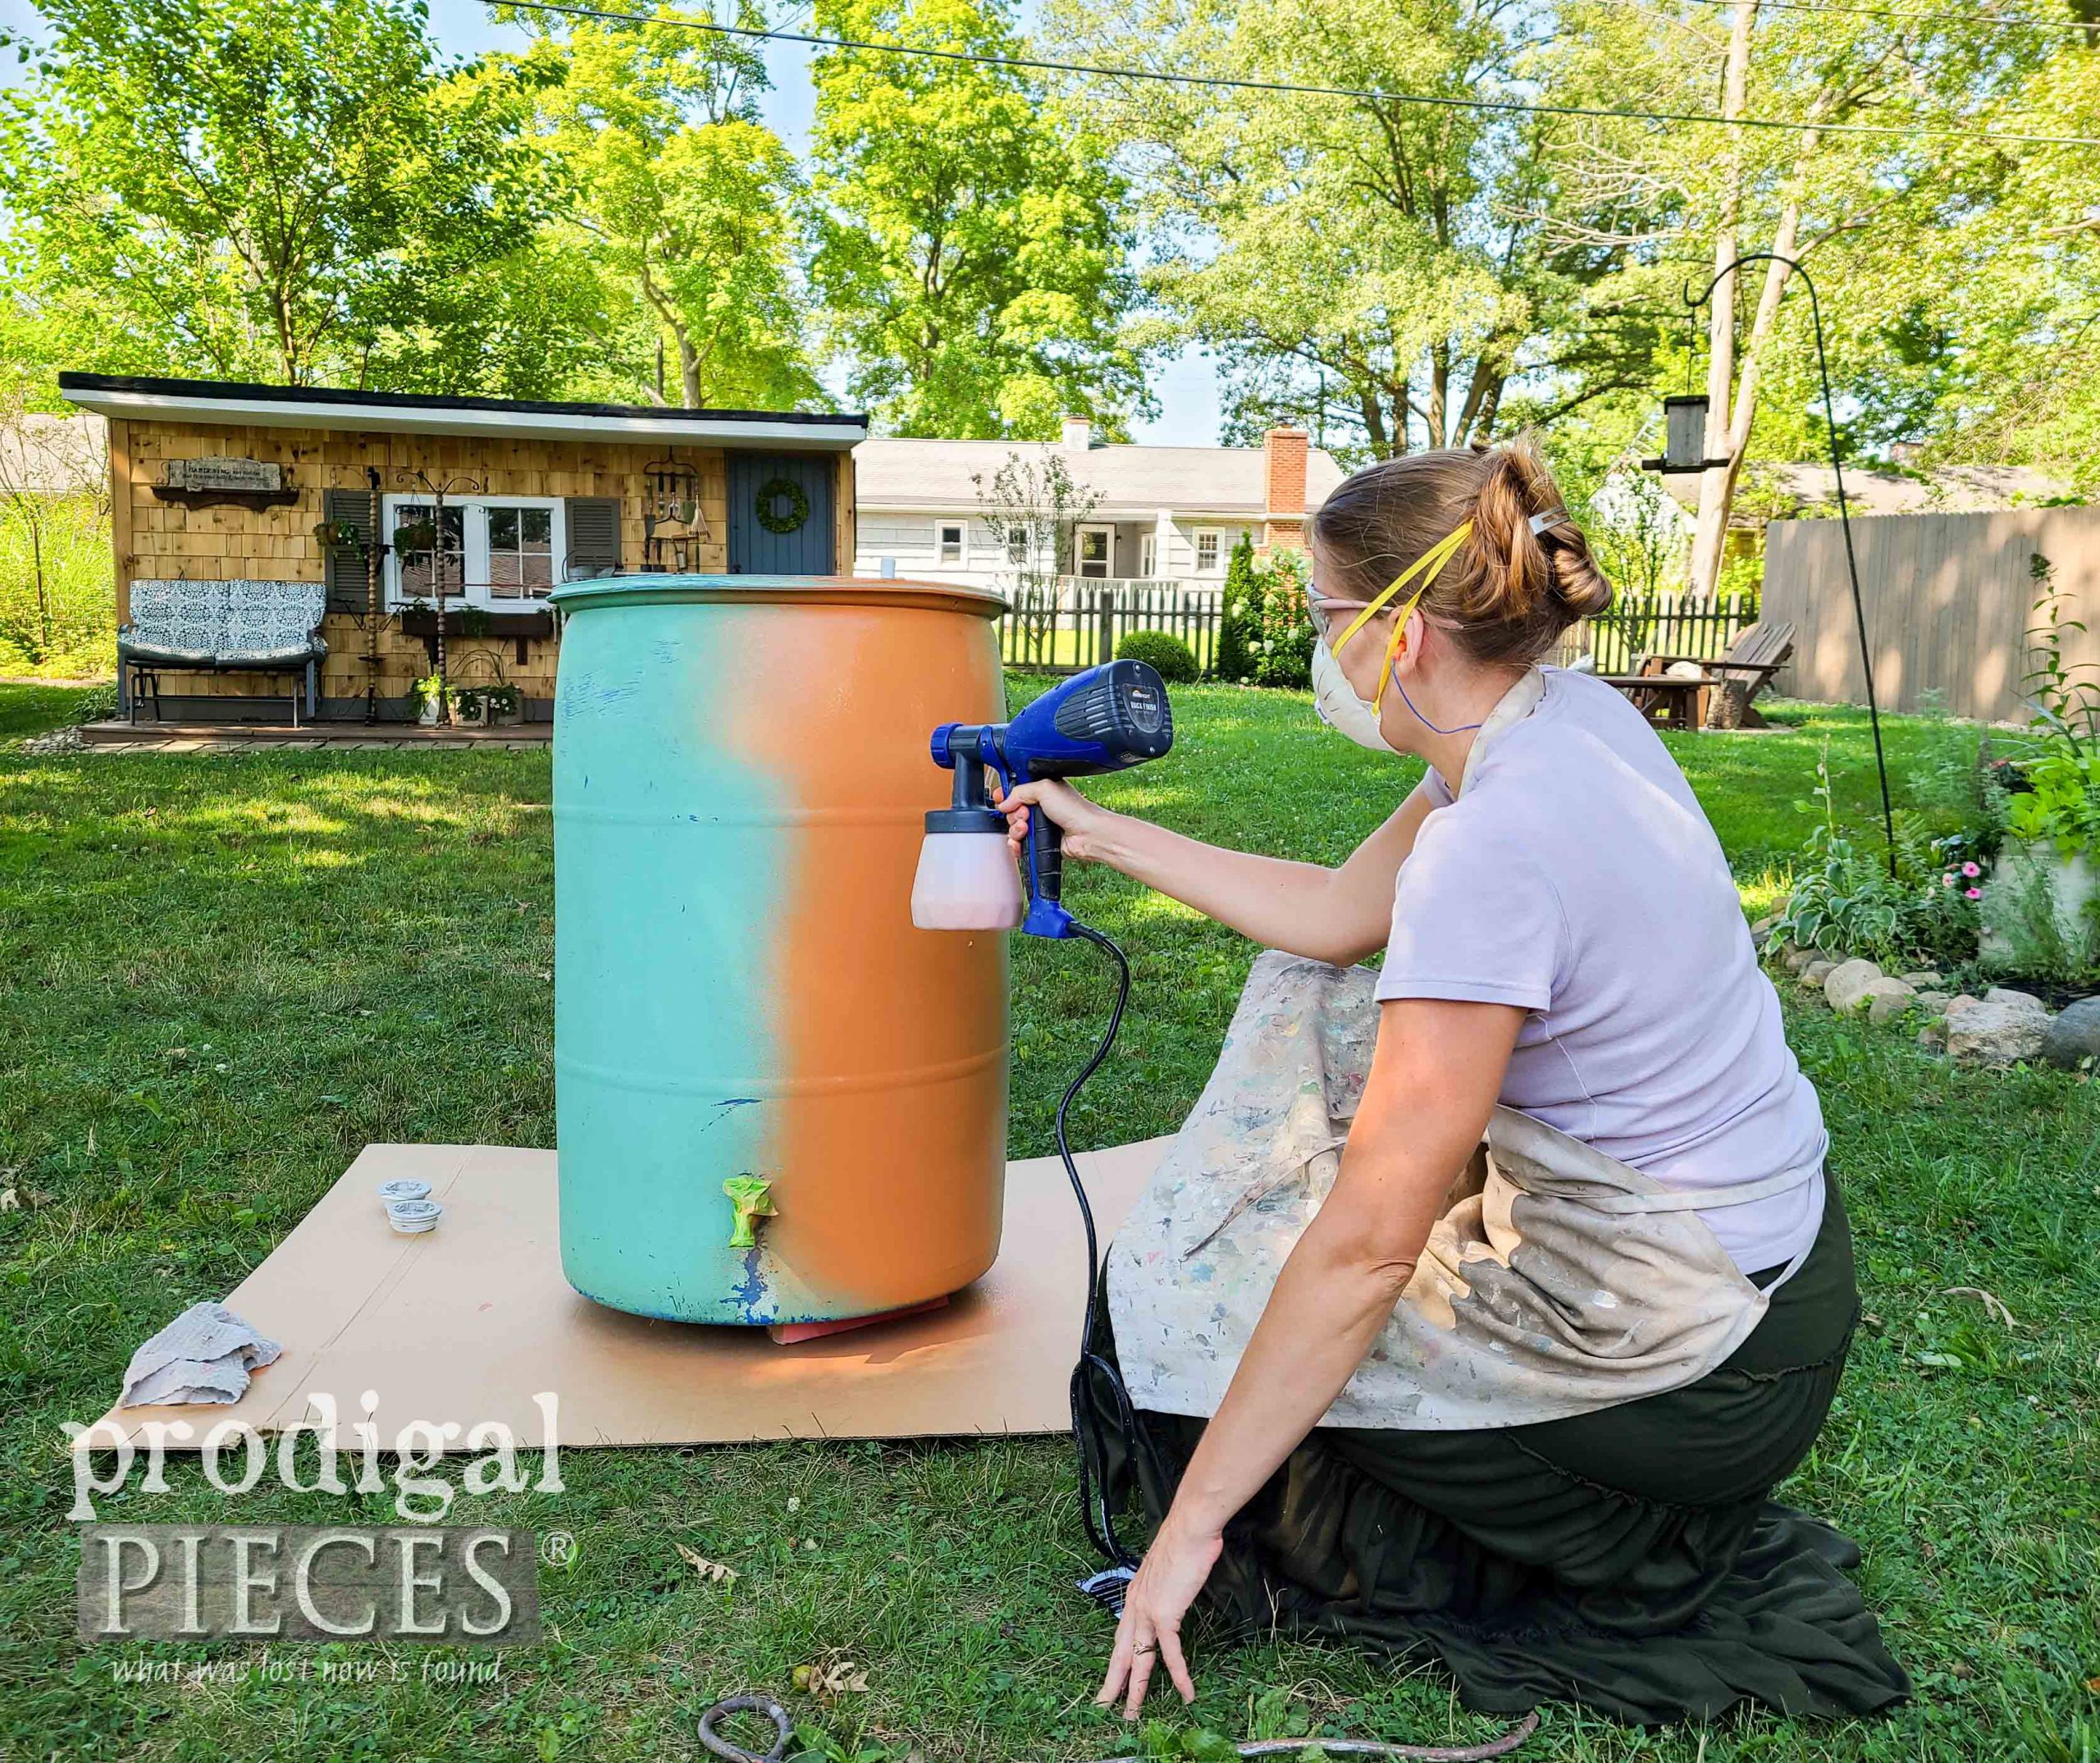
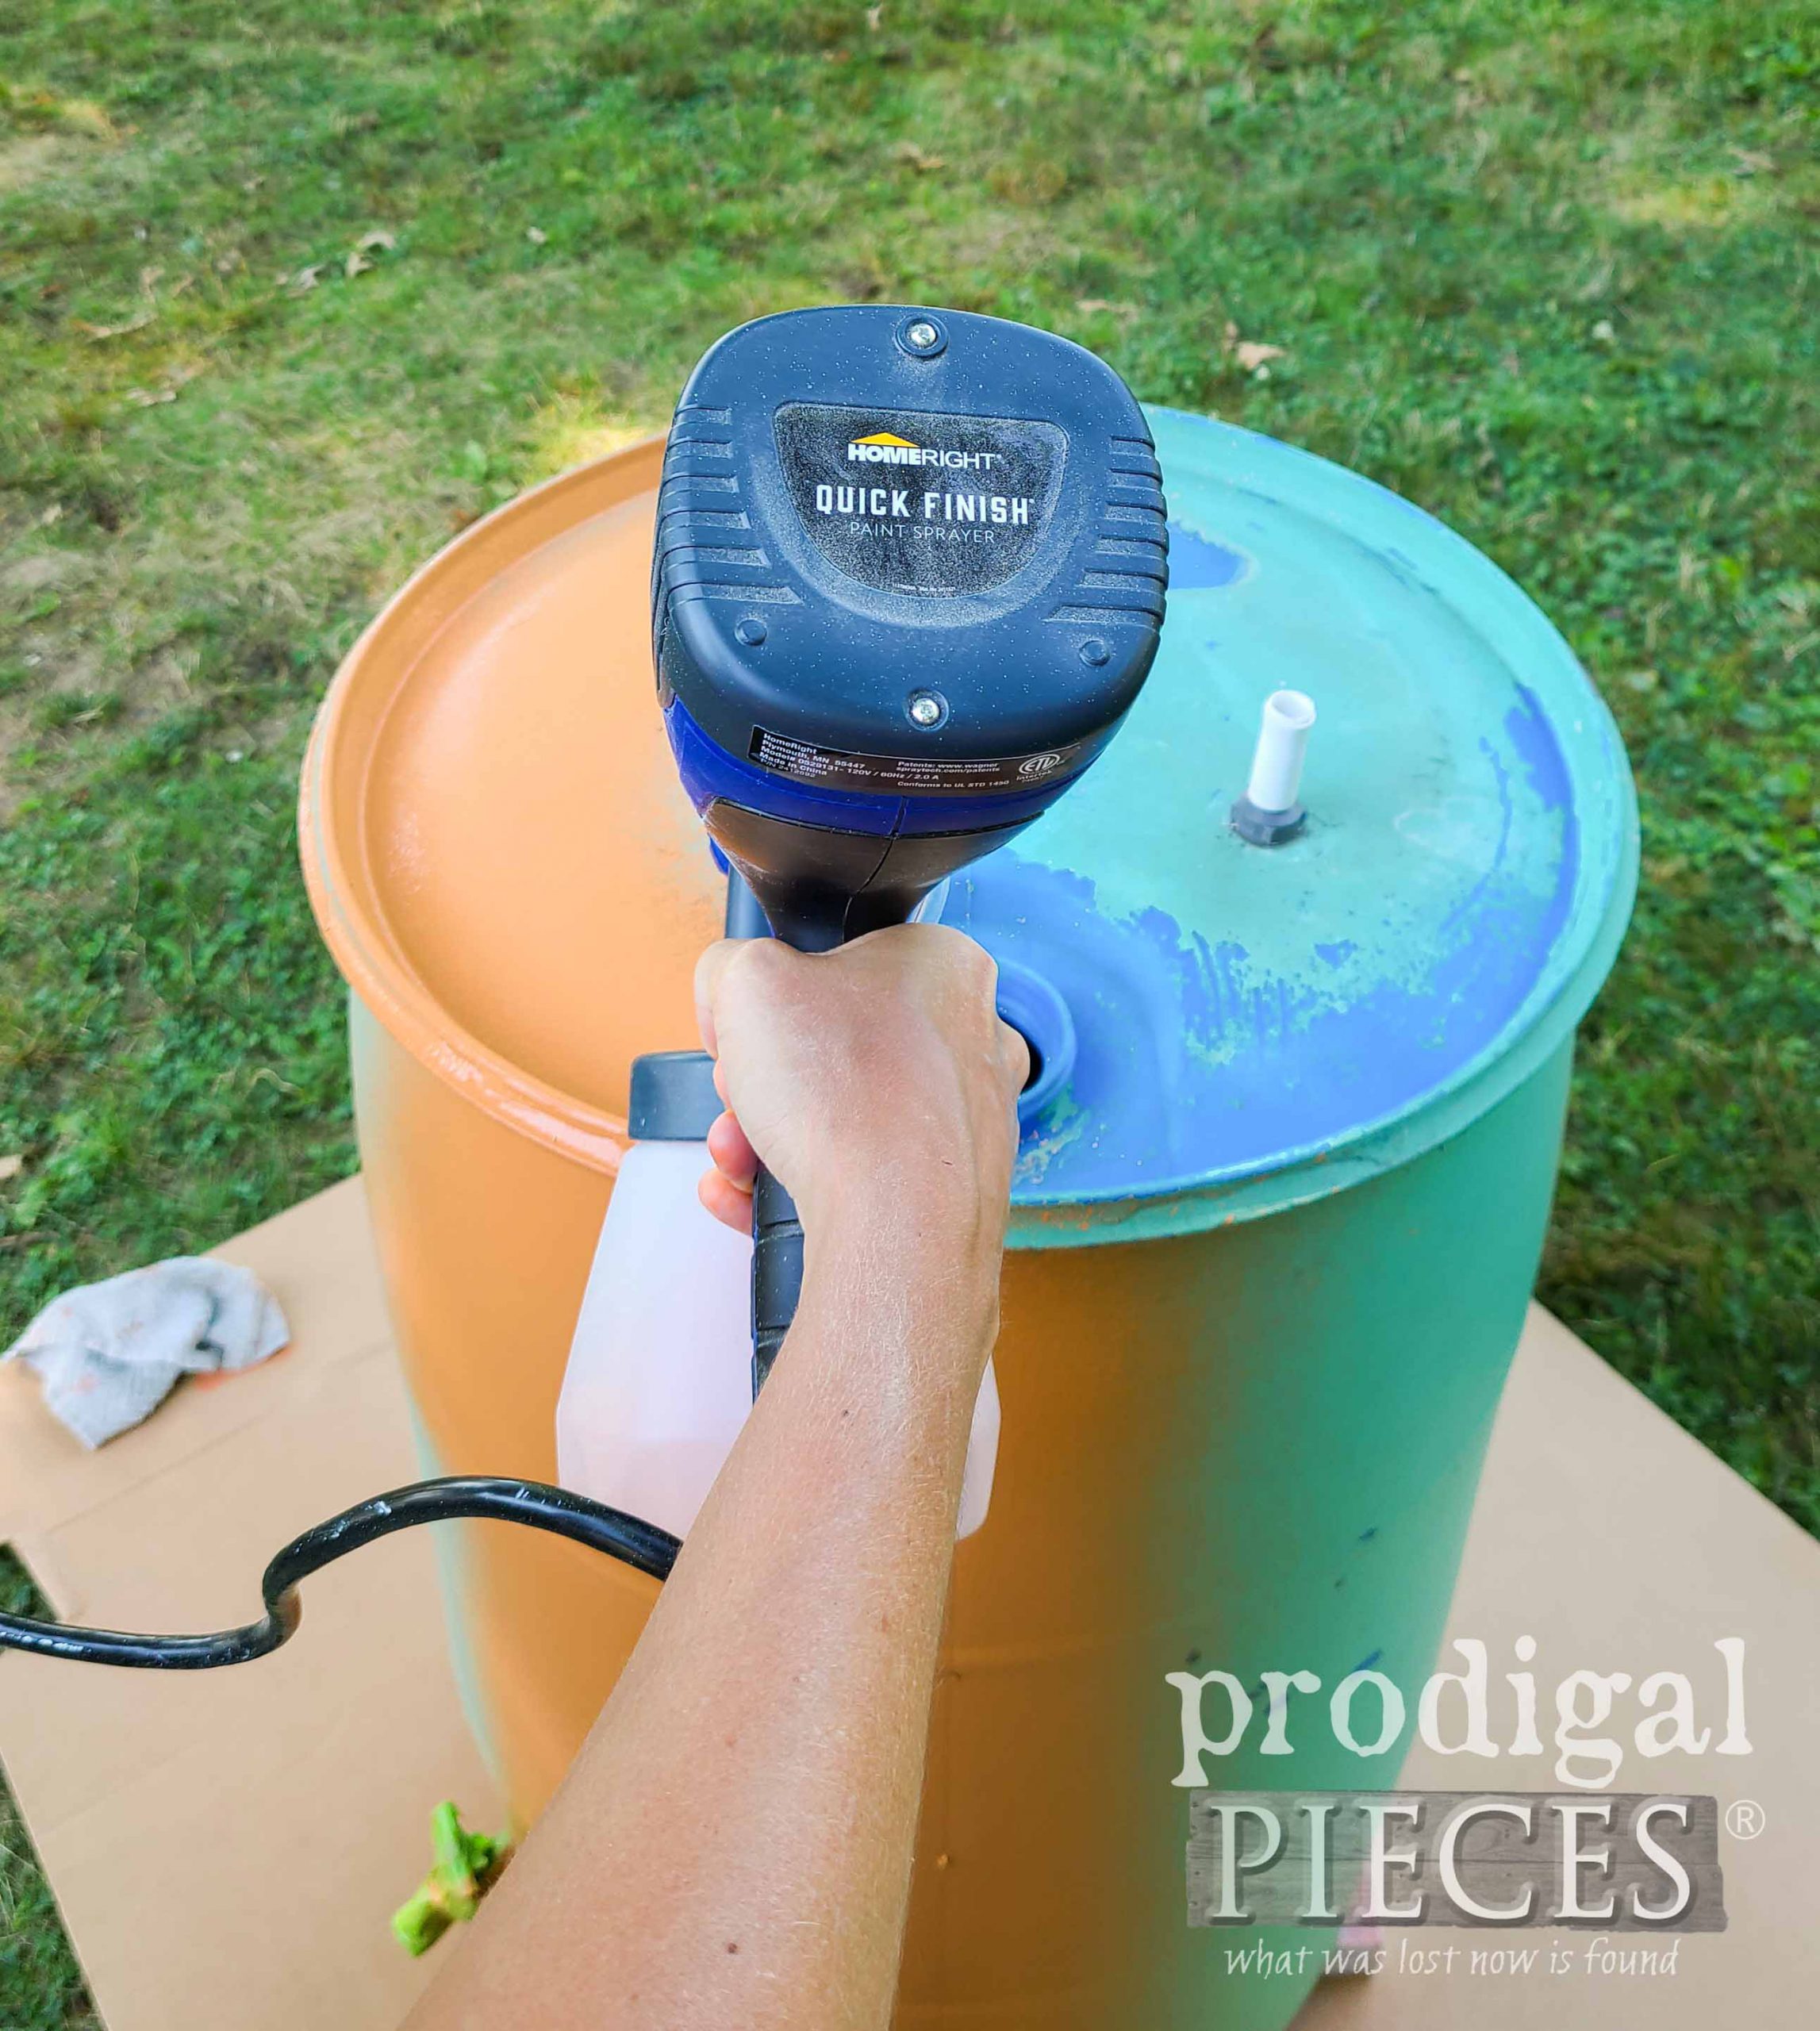
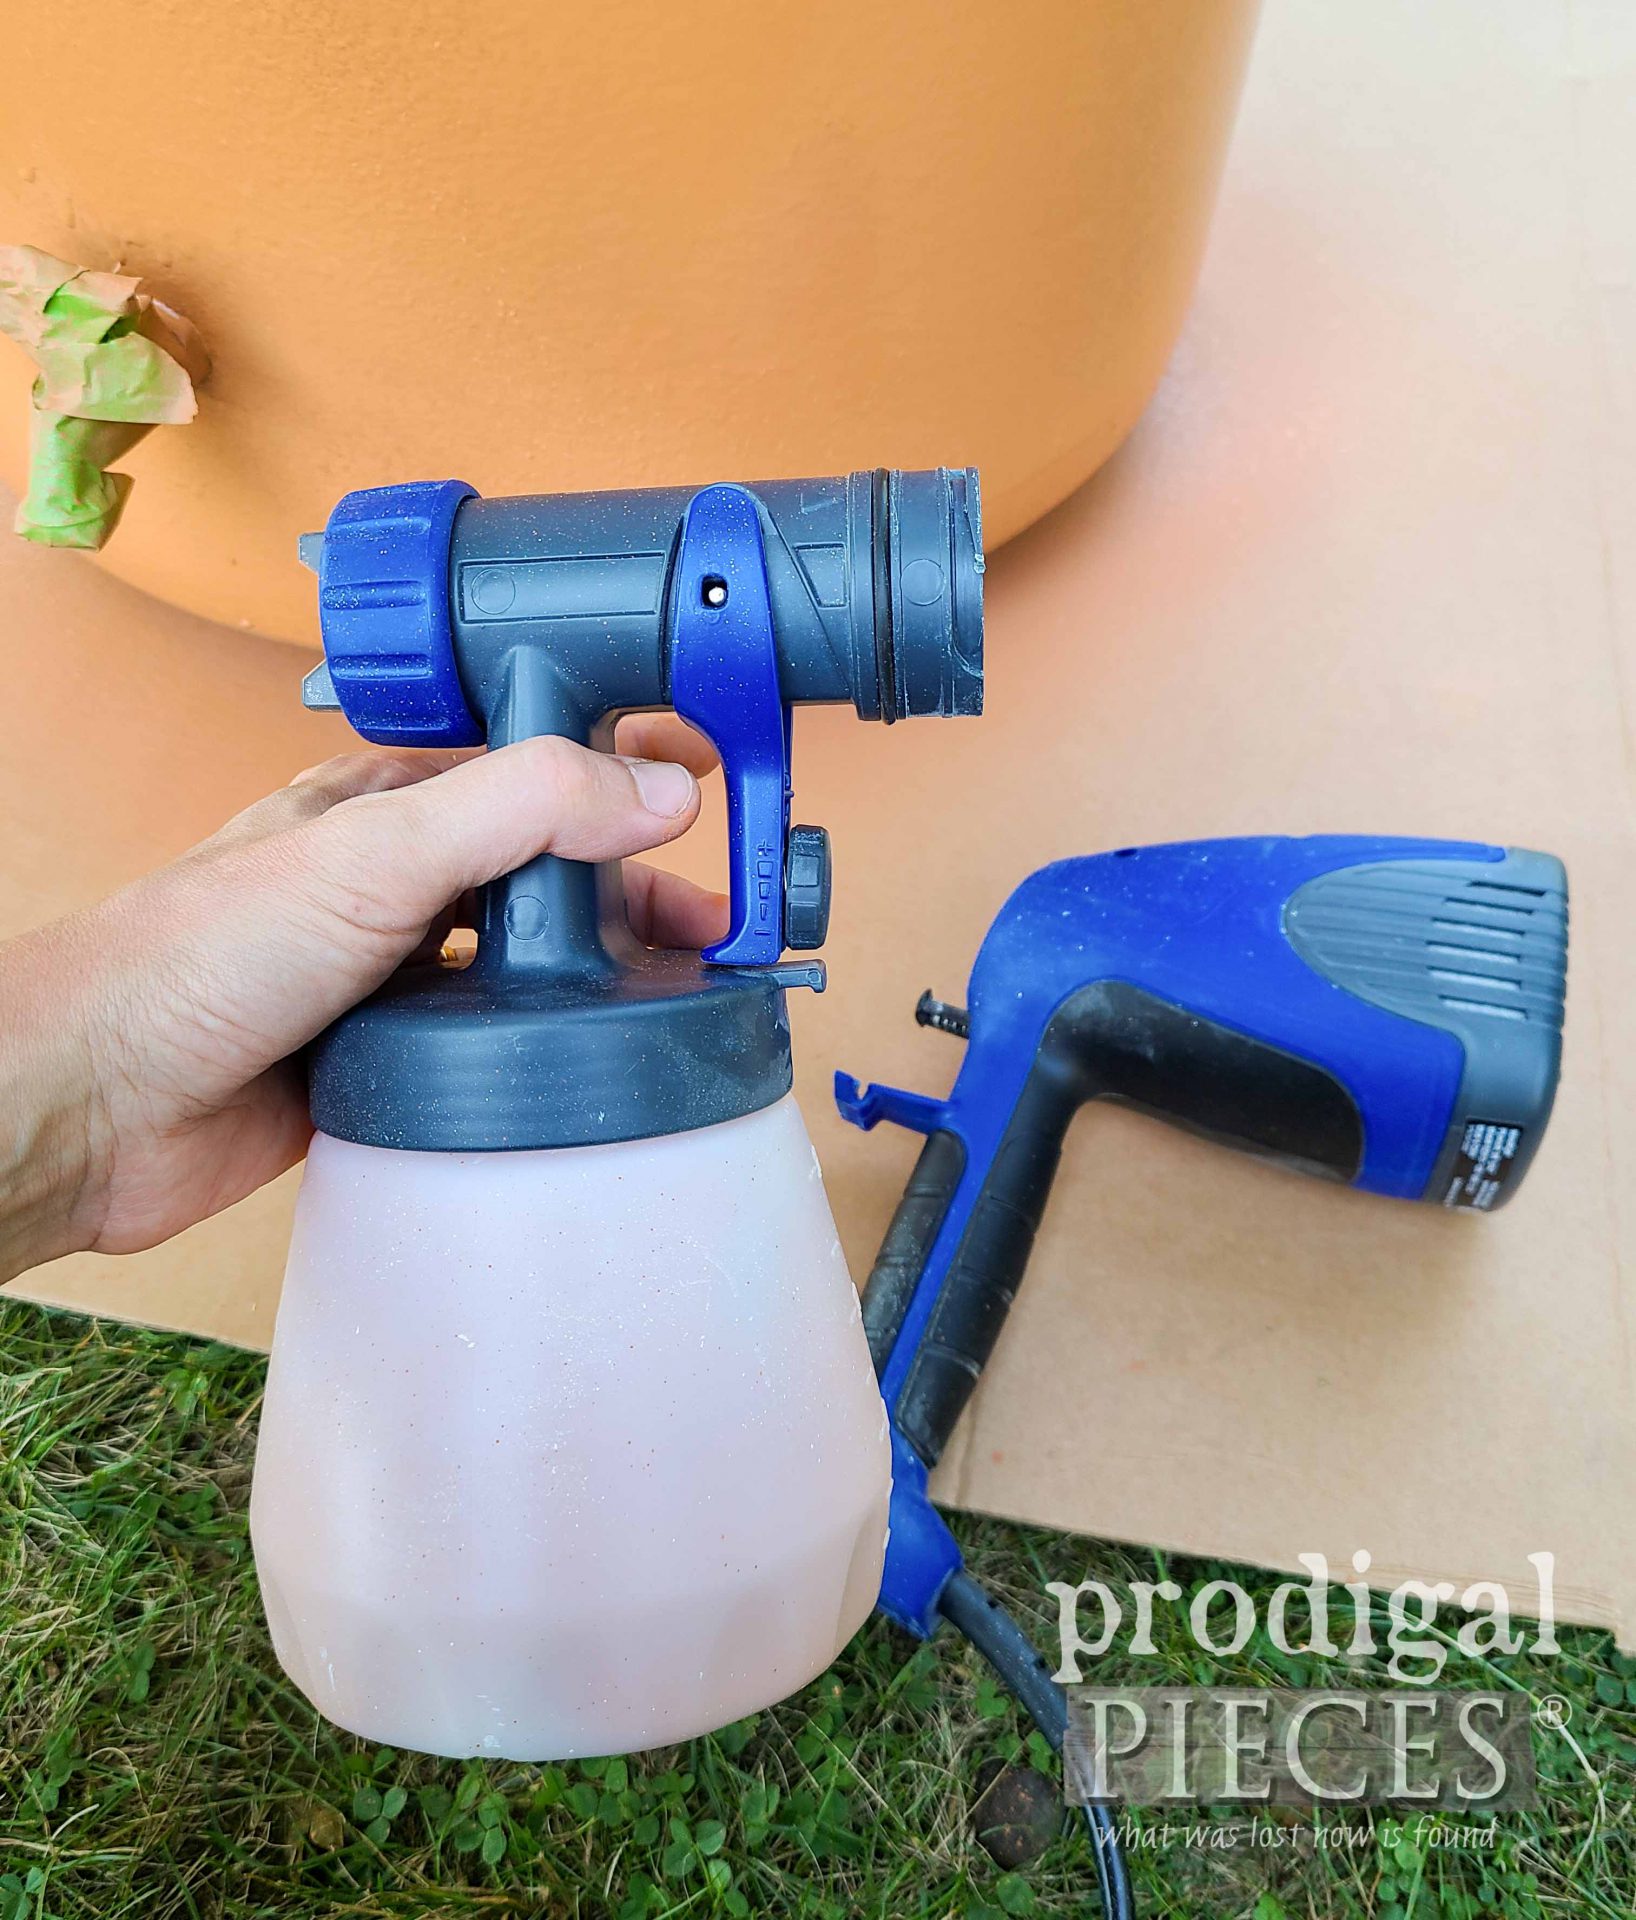
Let’s get started! First, I begin by cleaning my barrel inside and out. Plus, I make sure all peeling paint is removed. To quickly coat my barrel, I break out my Quick Finish Sprayer, and fill up with an exterior paint.
Before beginning to spray, I practice on the cardboard to get my flow settings as I like. Then, I apply one coat. With my sprayer, I knock out the first coat in minutes. See it at work in my video below.
STEP 2
Next, while the paint needs to cure for approximately 2 hours, I clean up my sprayer.
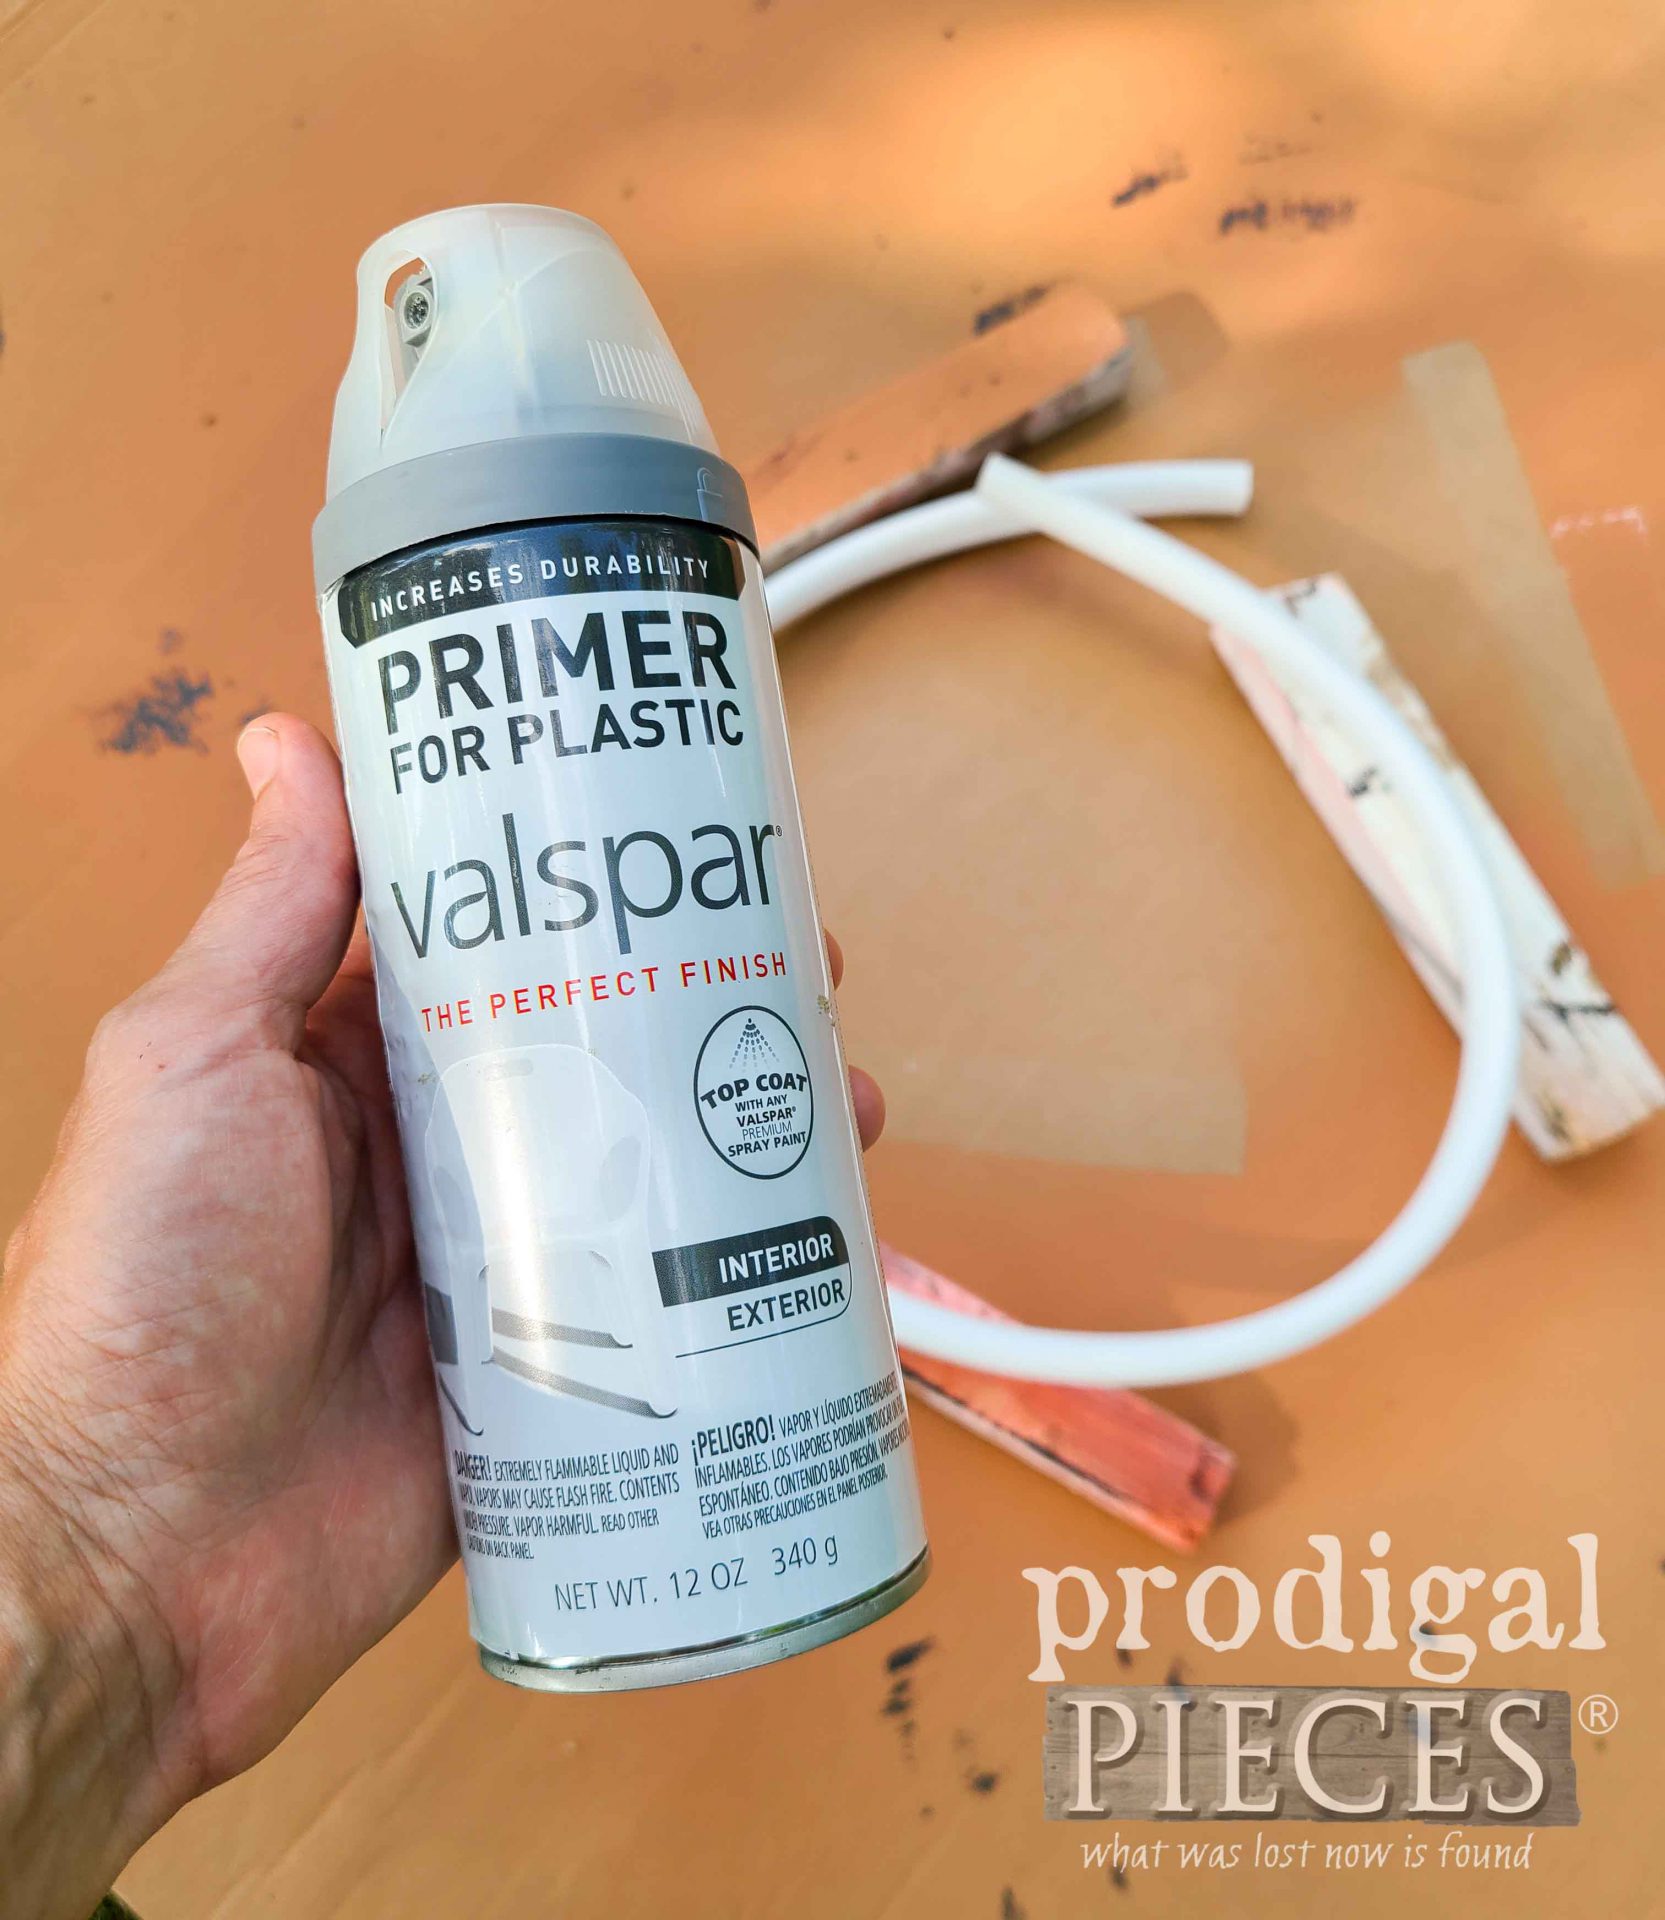
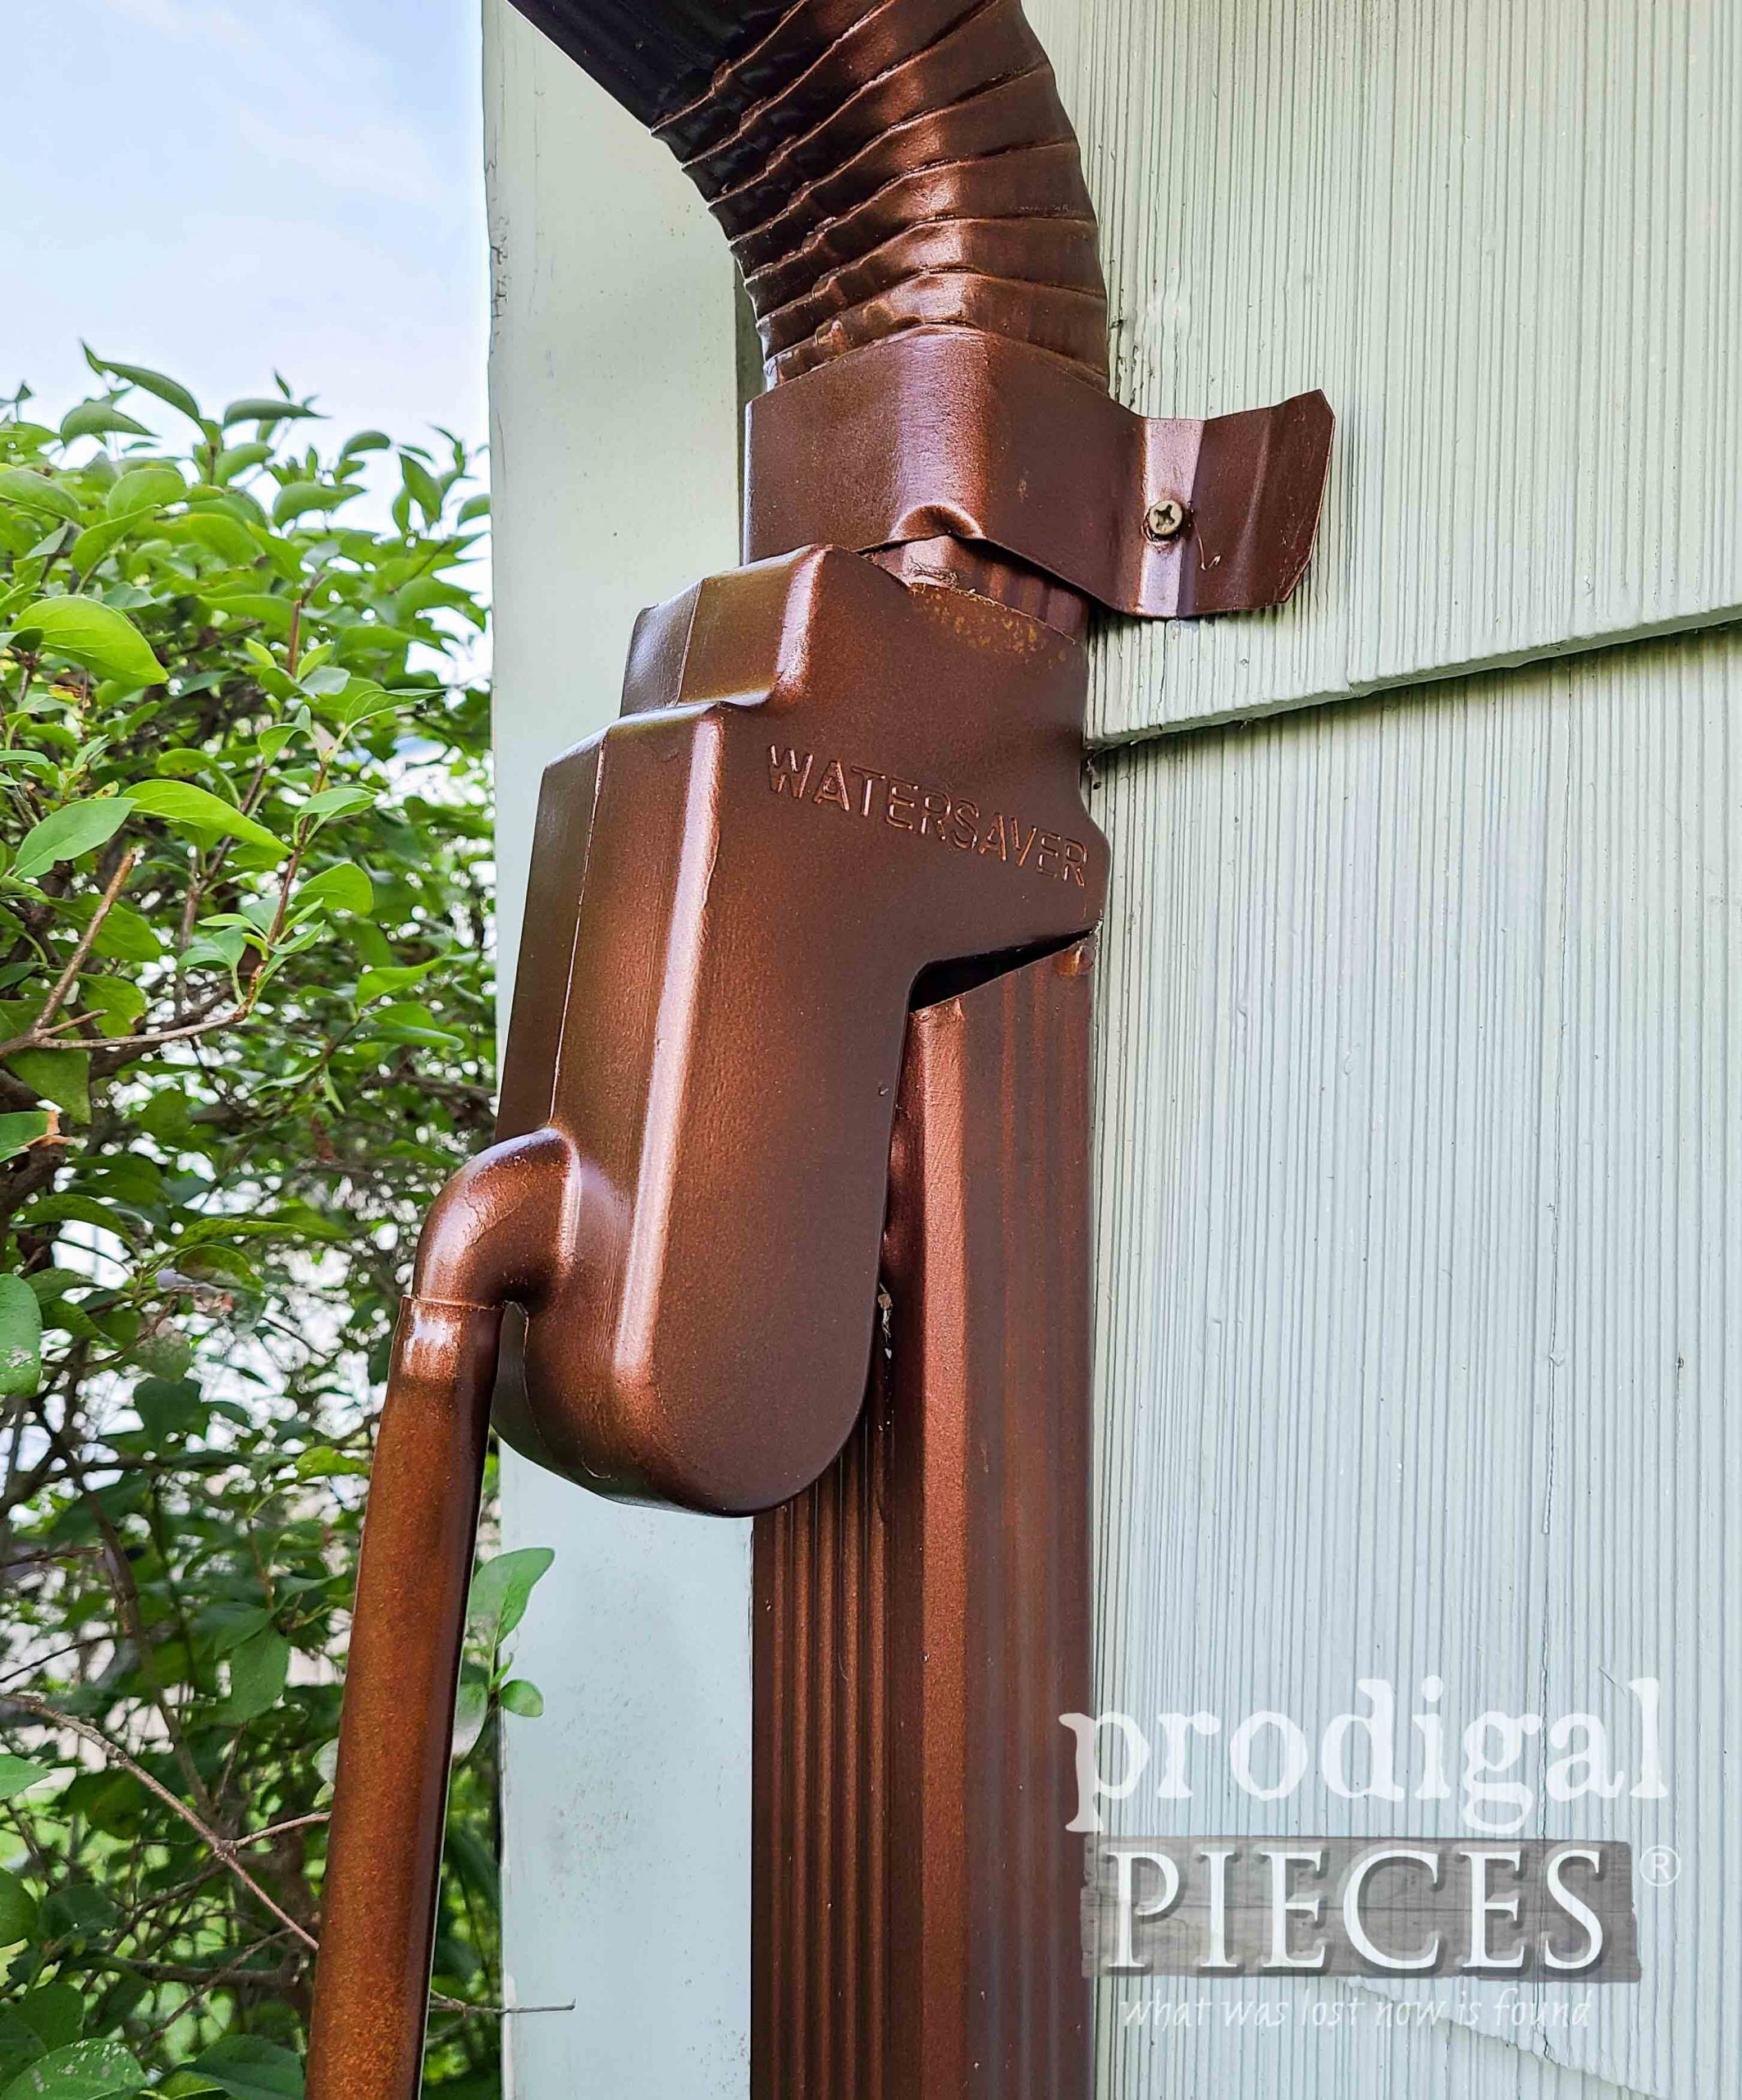
Then, I use the cure time to spray paint my diverter. Back in the fall, I painted my downspouts to a metallic finish and want my accessories to match. Specifically for the hose, I used this plastic primer to make it ready for paint.
STEP 3
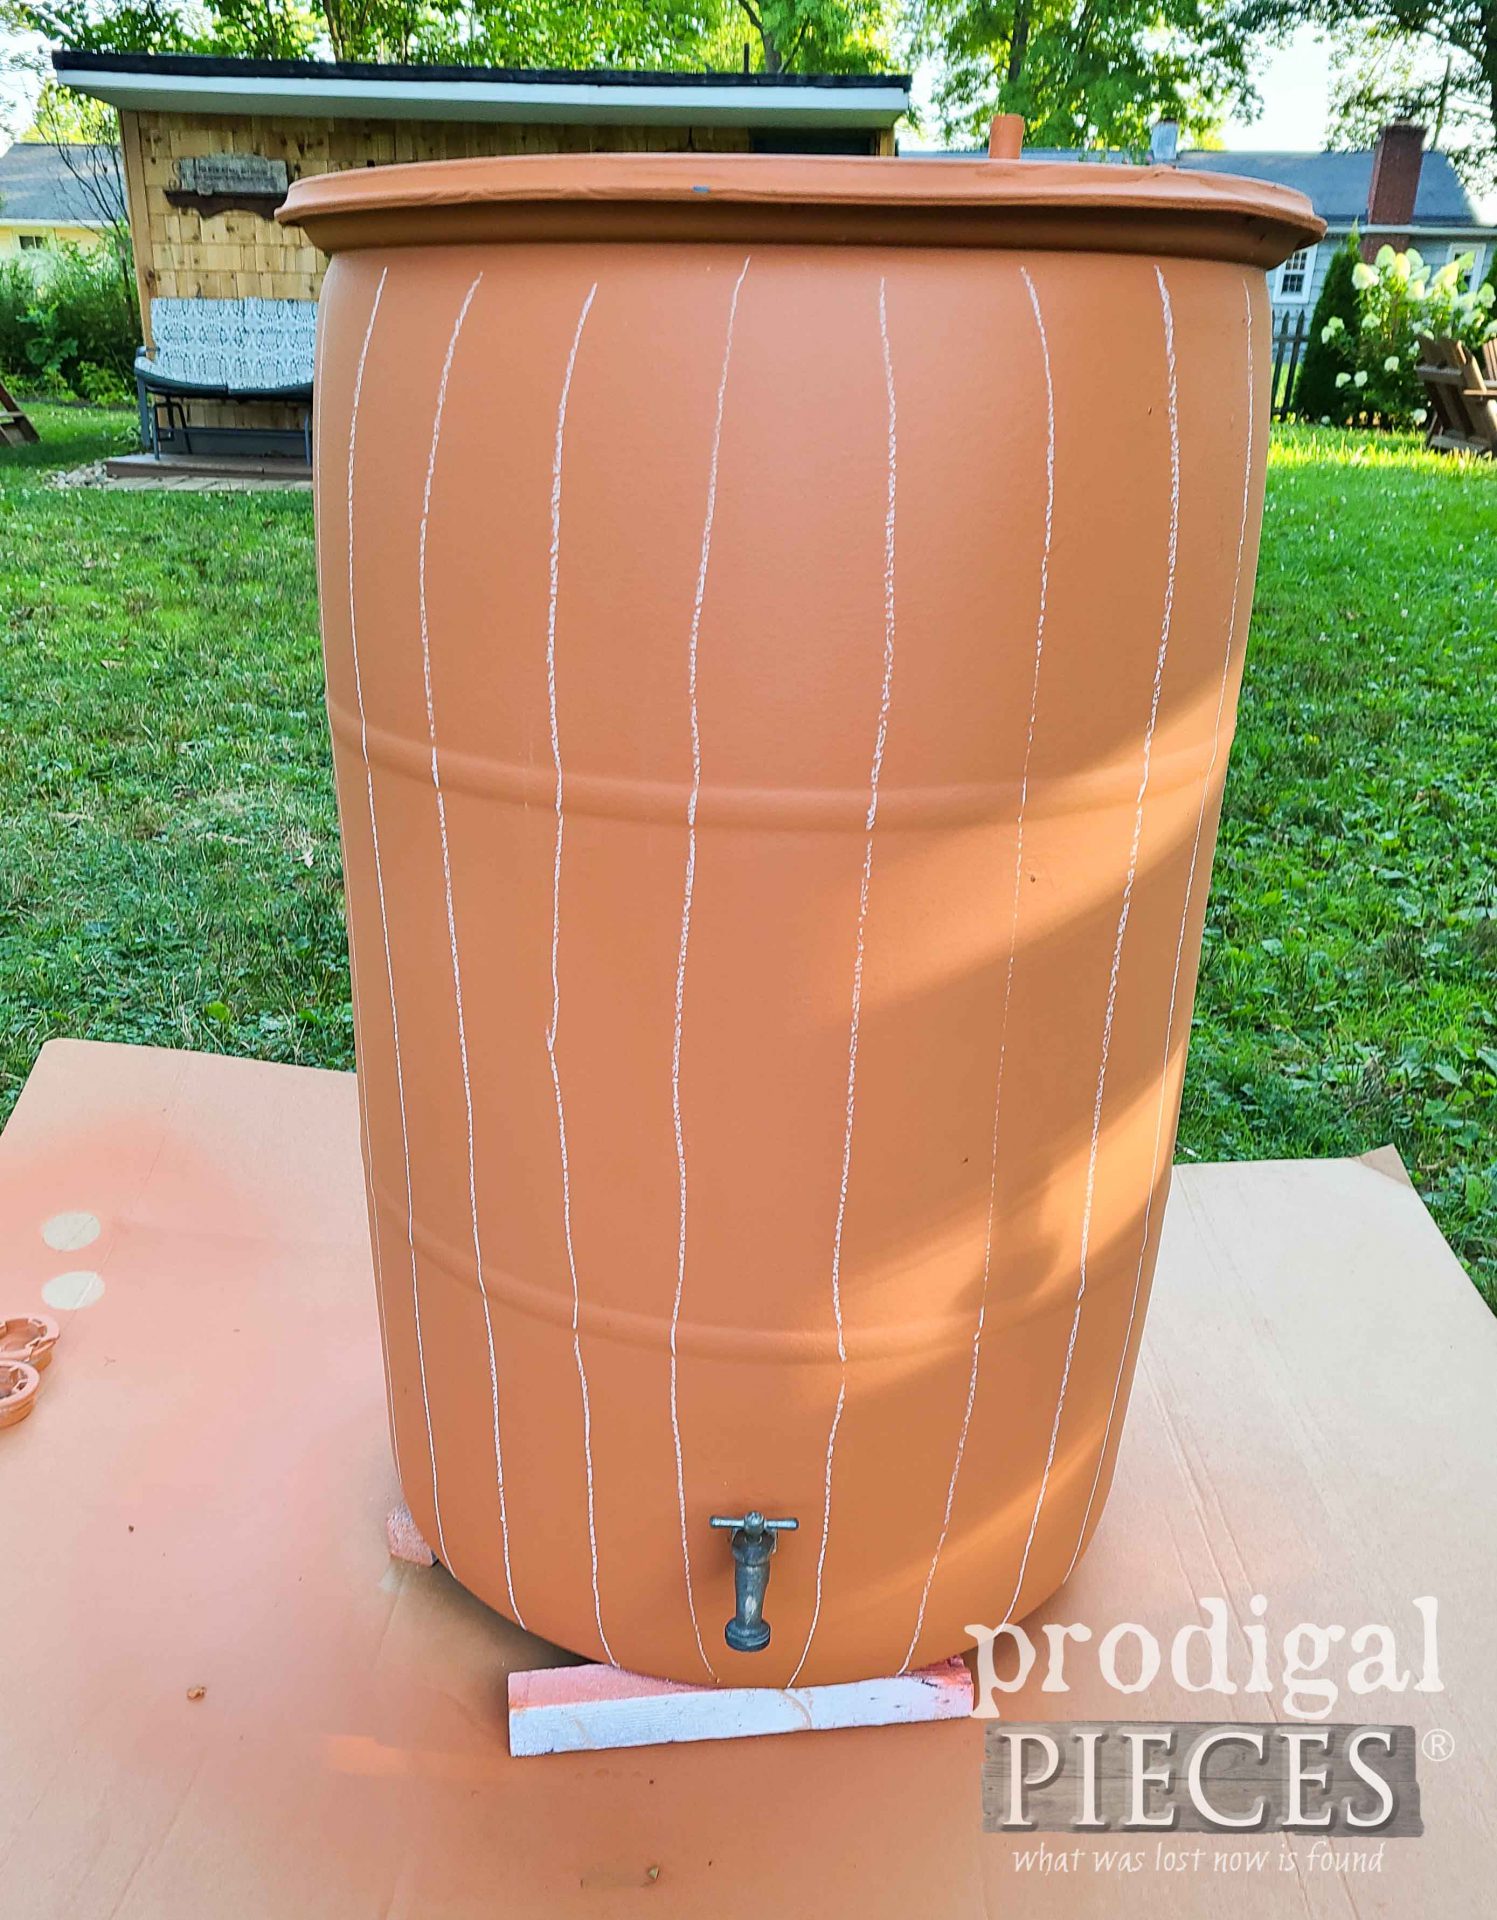
Then, after the second coat is cured, it’s time to add the fun. (if you want to). For me, I wanted my rain barrel to have a rustic effect, so I wanted to add wood grain to make it look like an old wooden barrel. Using school chalk, I eyeball lines down the side and across the top to help me get my visual. Notice I’m making them kind of bow out from center to make the barrel look more rotund.
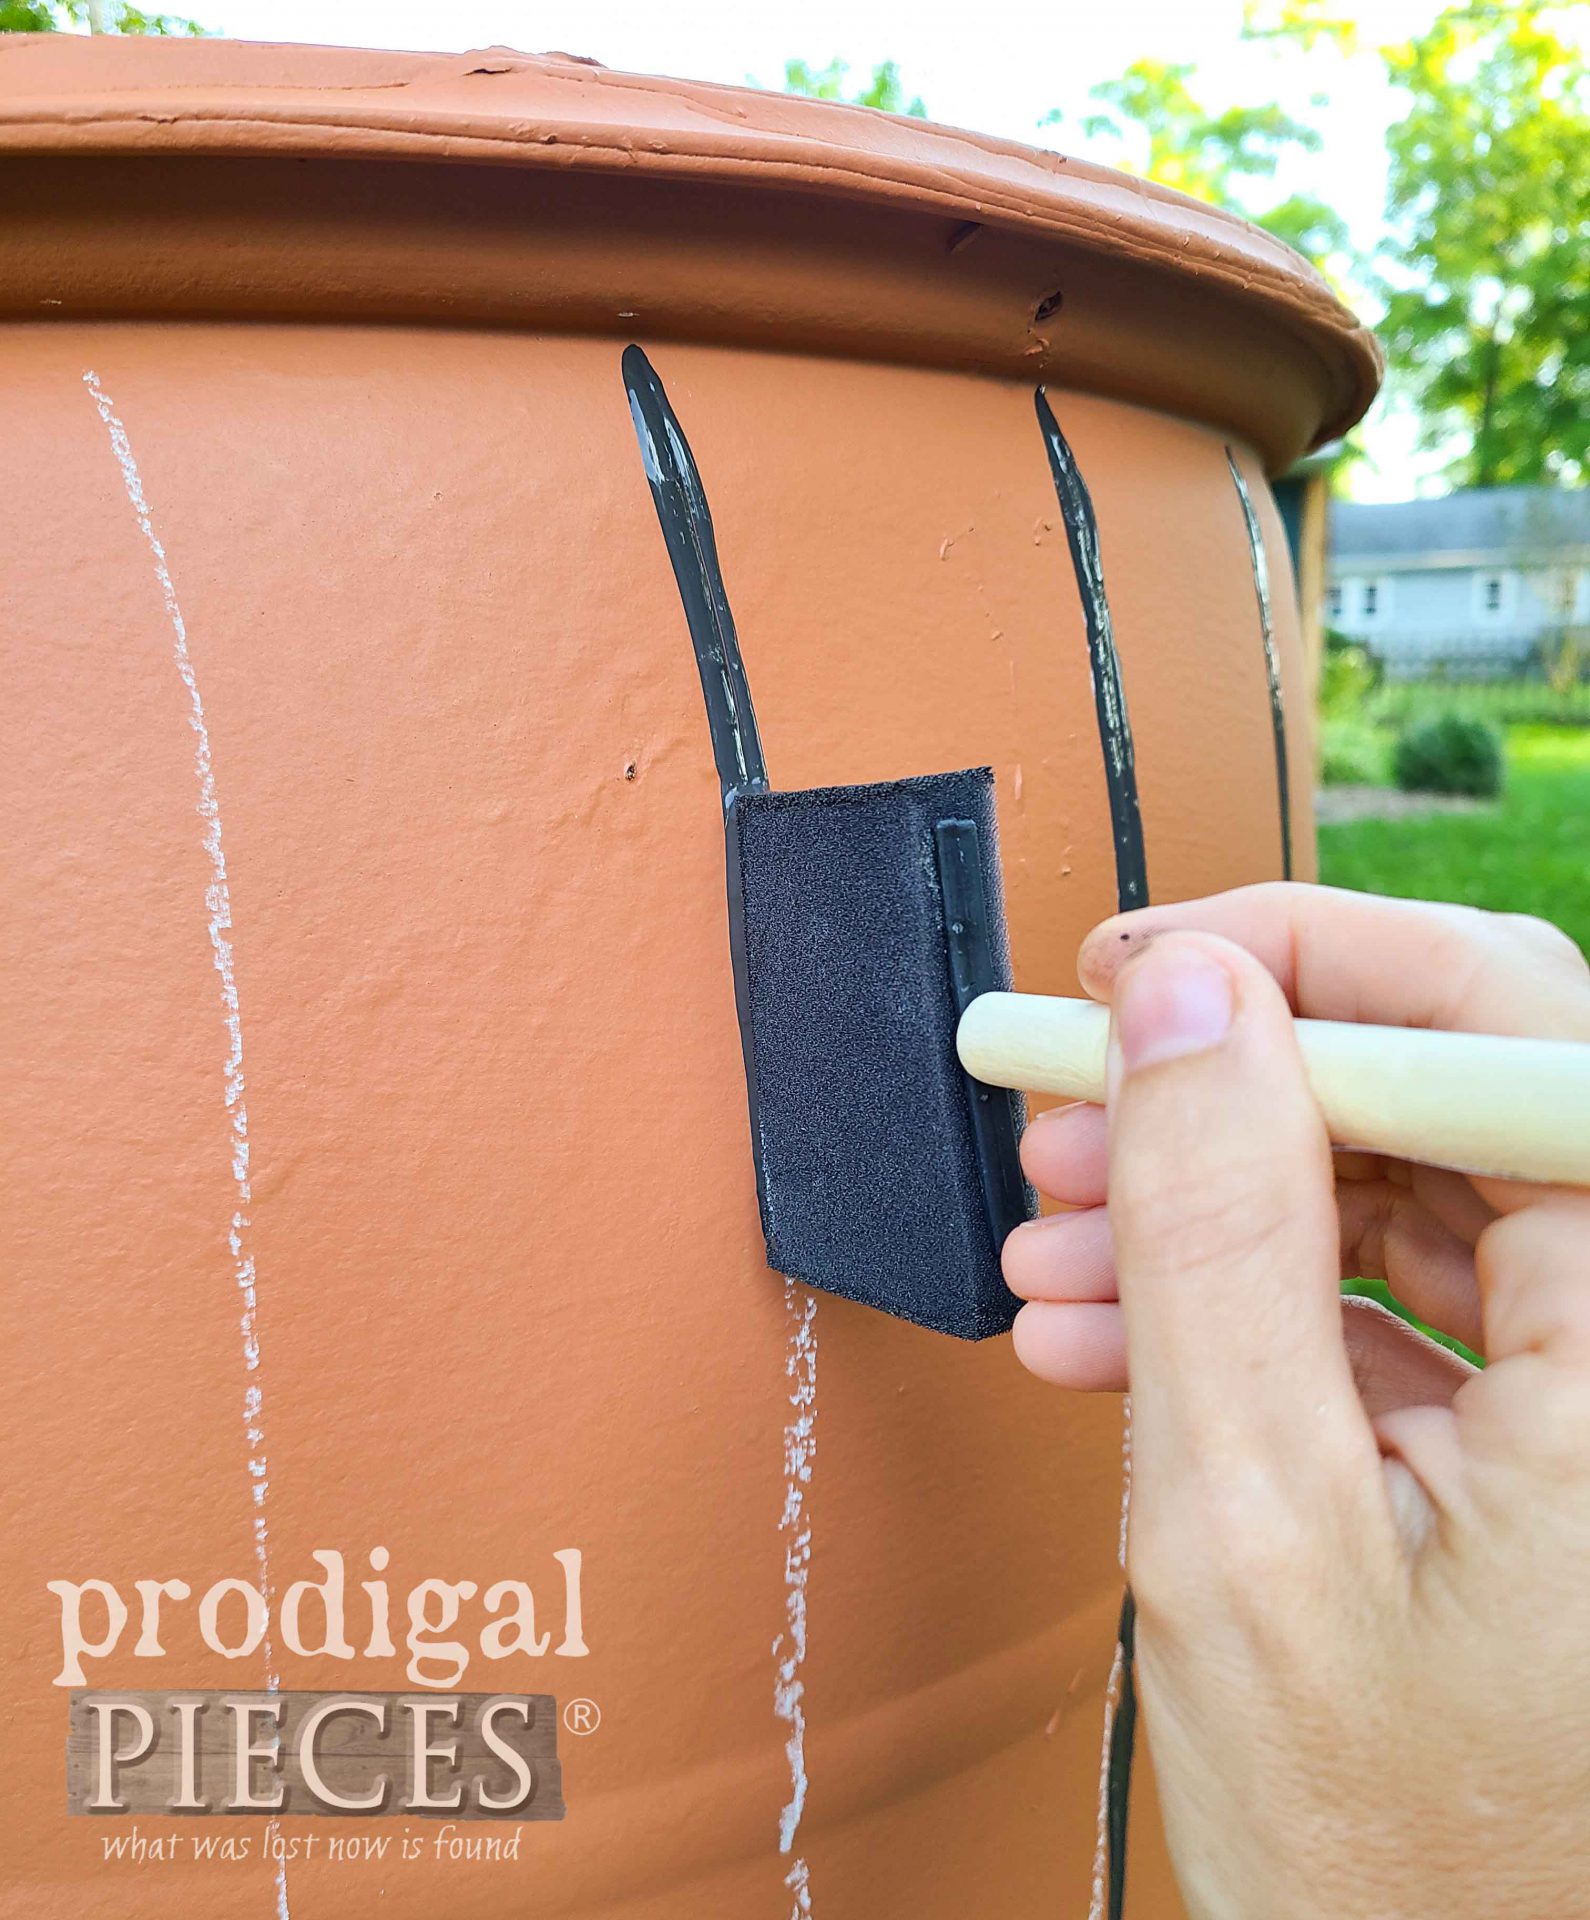
When you’re happy with the line placement, use your foam brush and charcoal paint to make the lines. No need to be picky on how good they are, just get them on, and let them cure.
STEP 4
Grab your wood-graining tools and let’s have some fun! This part is totally free-for-all. you’ve been following along to my remodel on social media, you can see how I’ve been using this tool to rework our interior door. The basic jist is to paint on a stripe of paint, then use the tool to run it over the paint, walking it back and forth as you go.
You can see it in action over in this post HERE. With the rounded surface, it’s best to run the tool over the area in strips. However, if the surface was flat, it would just be one pass. Make sure to let the paint cure before moving on.
STEP 5
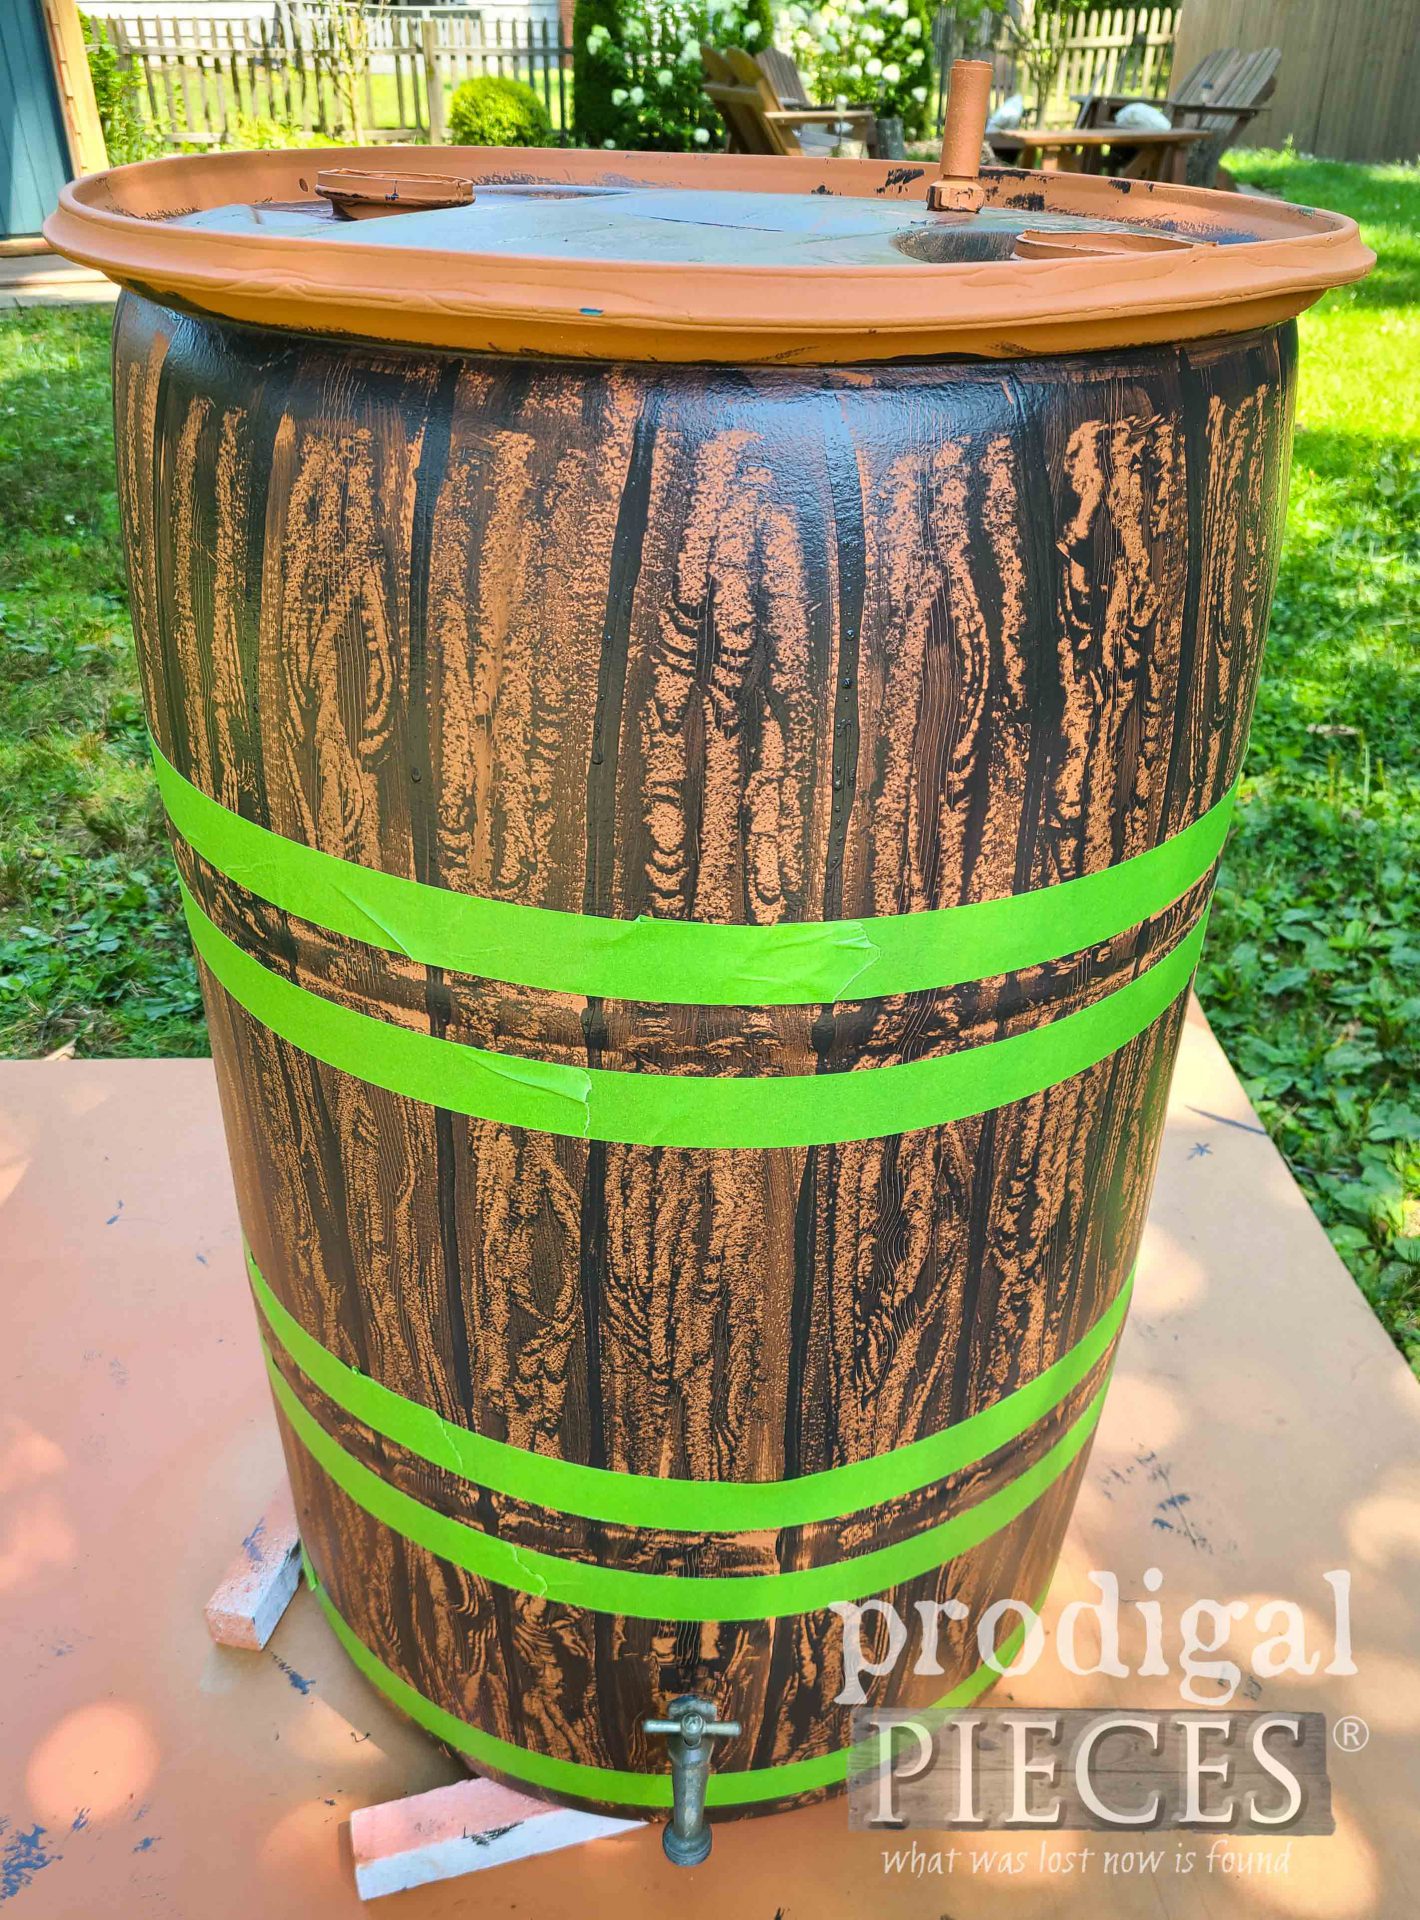
Last, but not least, we want to add rings to our DIY rain barrel to give it the authentic feel. I use my painter’s tape to mark off rings. My barrel already has some raised rings, but if yours doesn’t, just measure and mark.
Then, using the paint brush, apply the black paint (or whatever color you choose) to the rings. I used two coats for a solid effect.
THE REVEAL
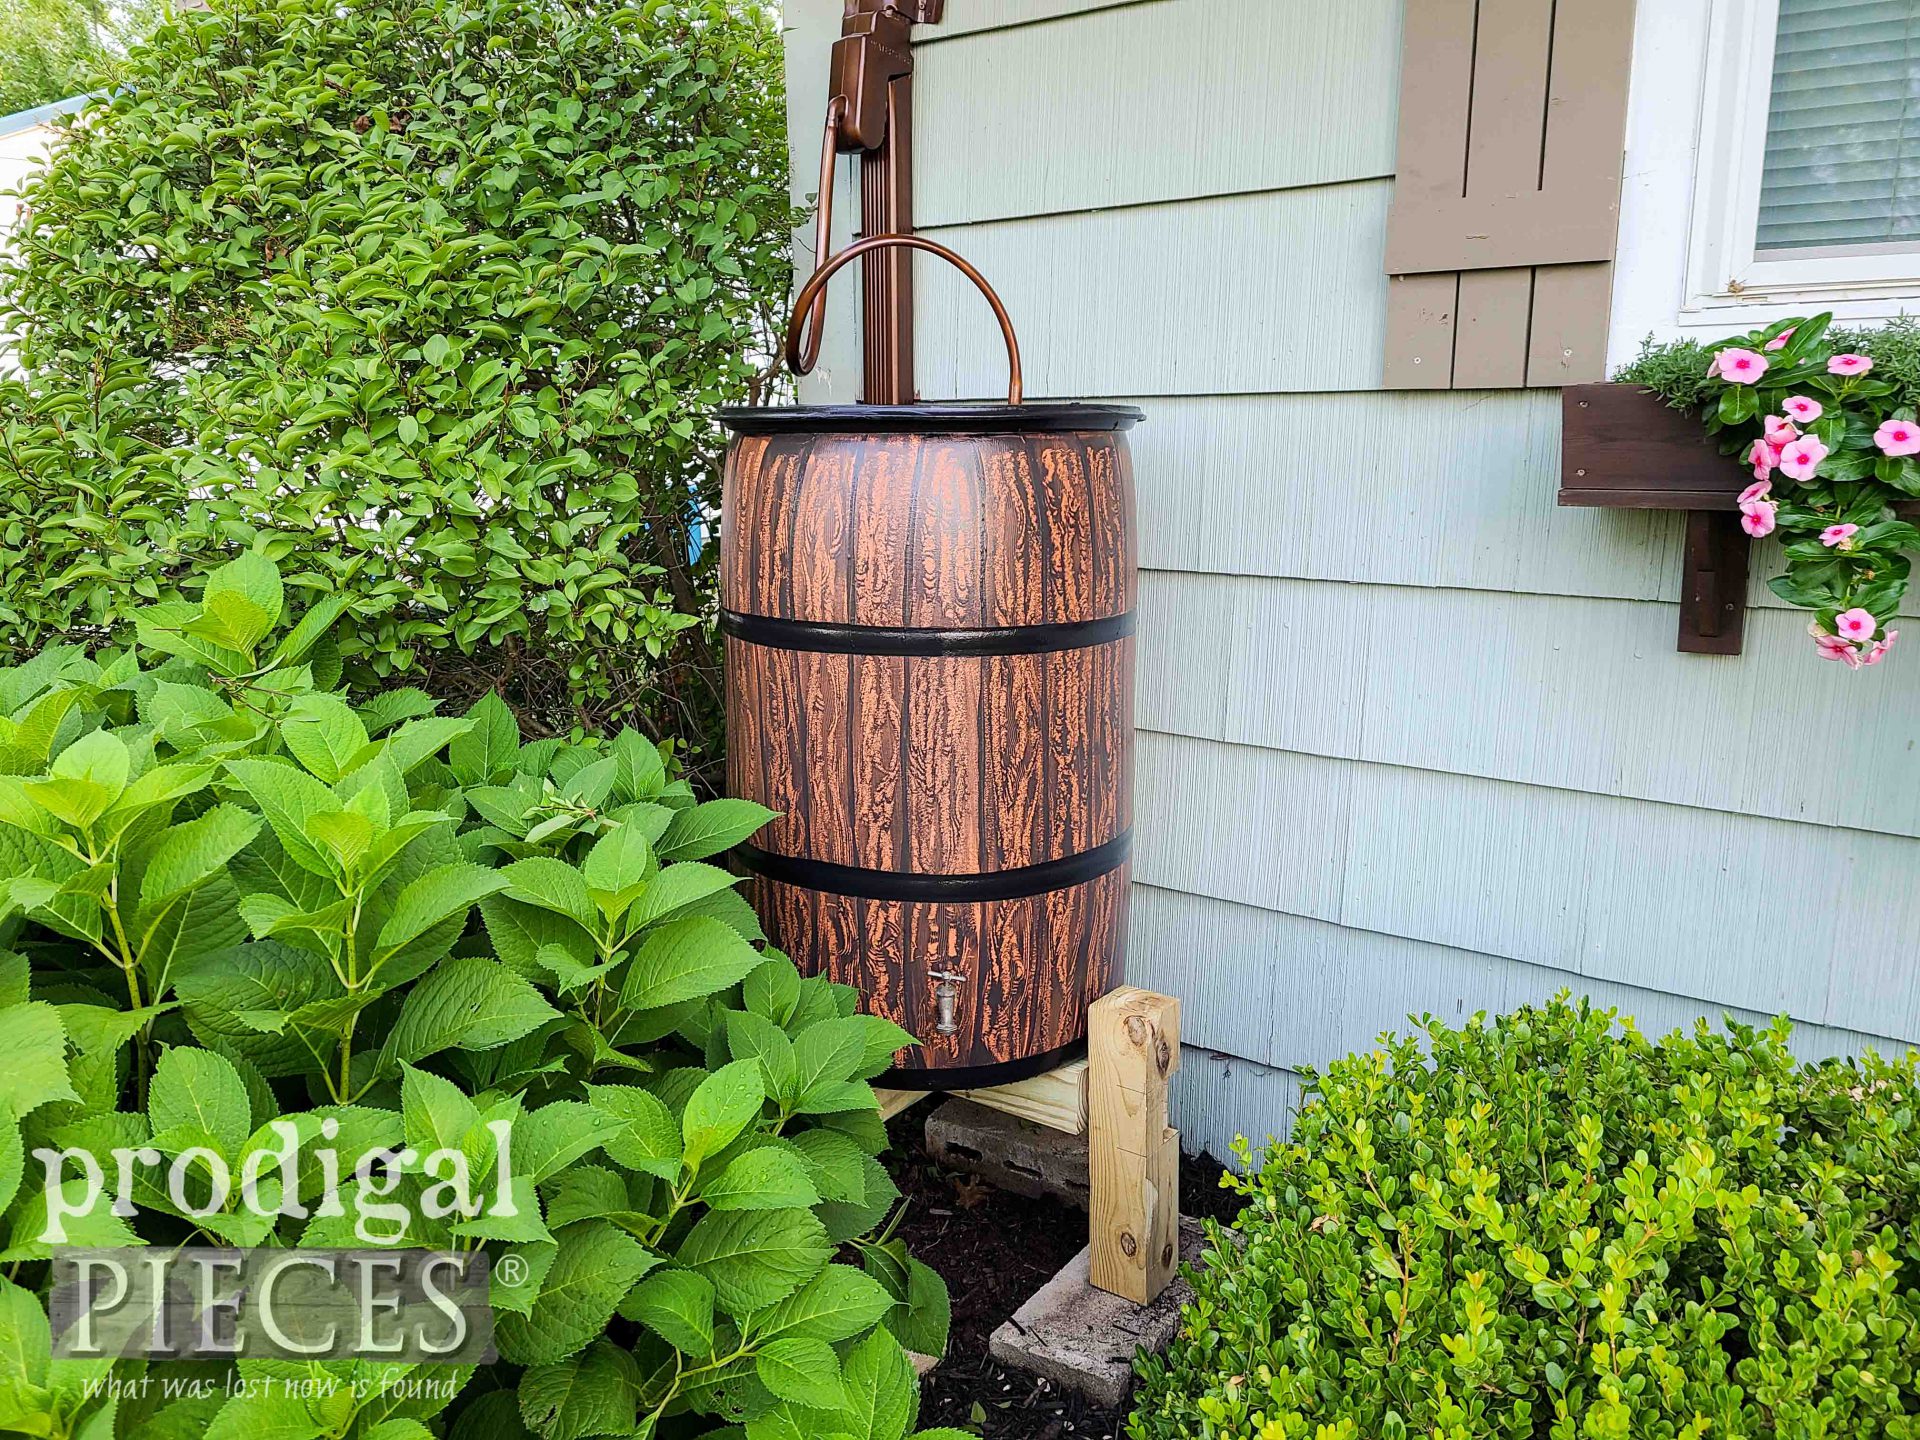
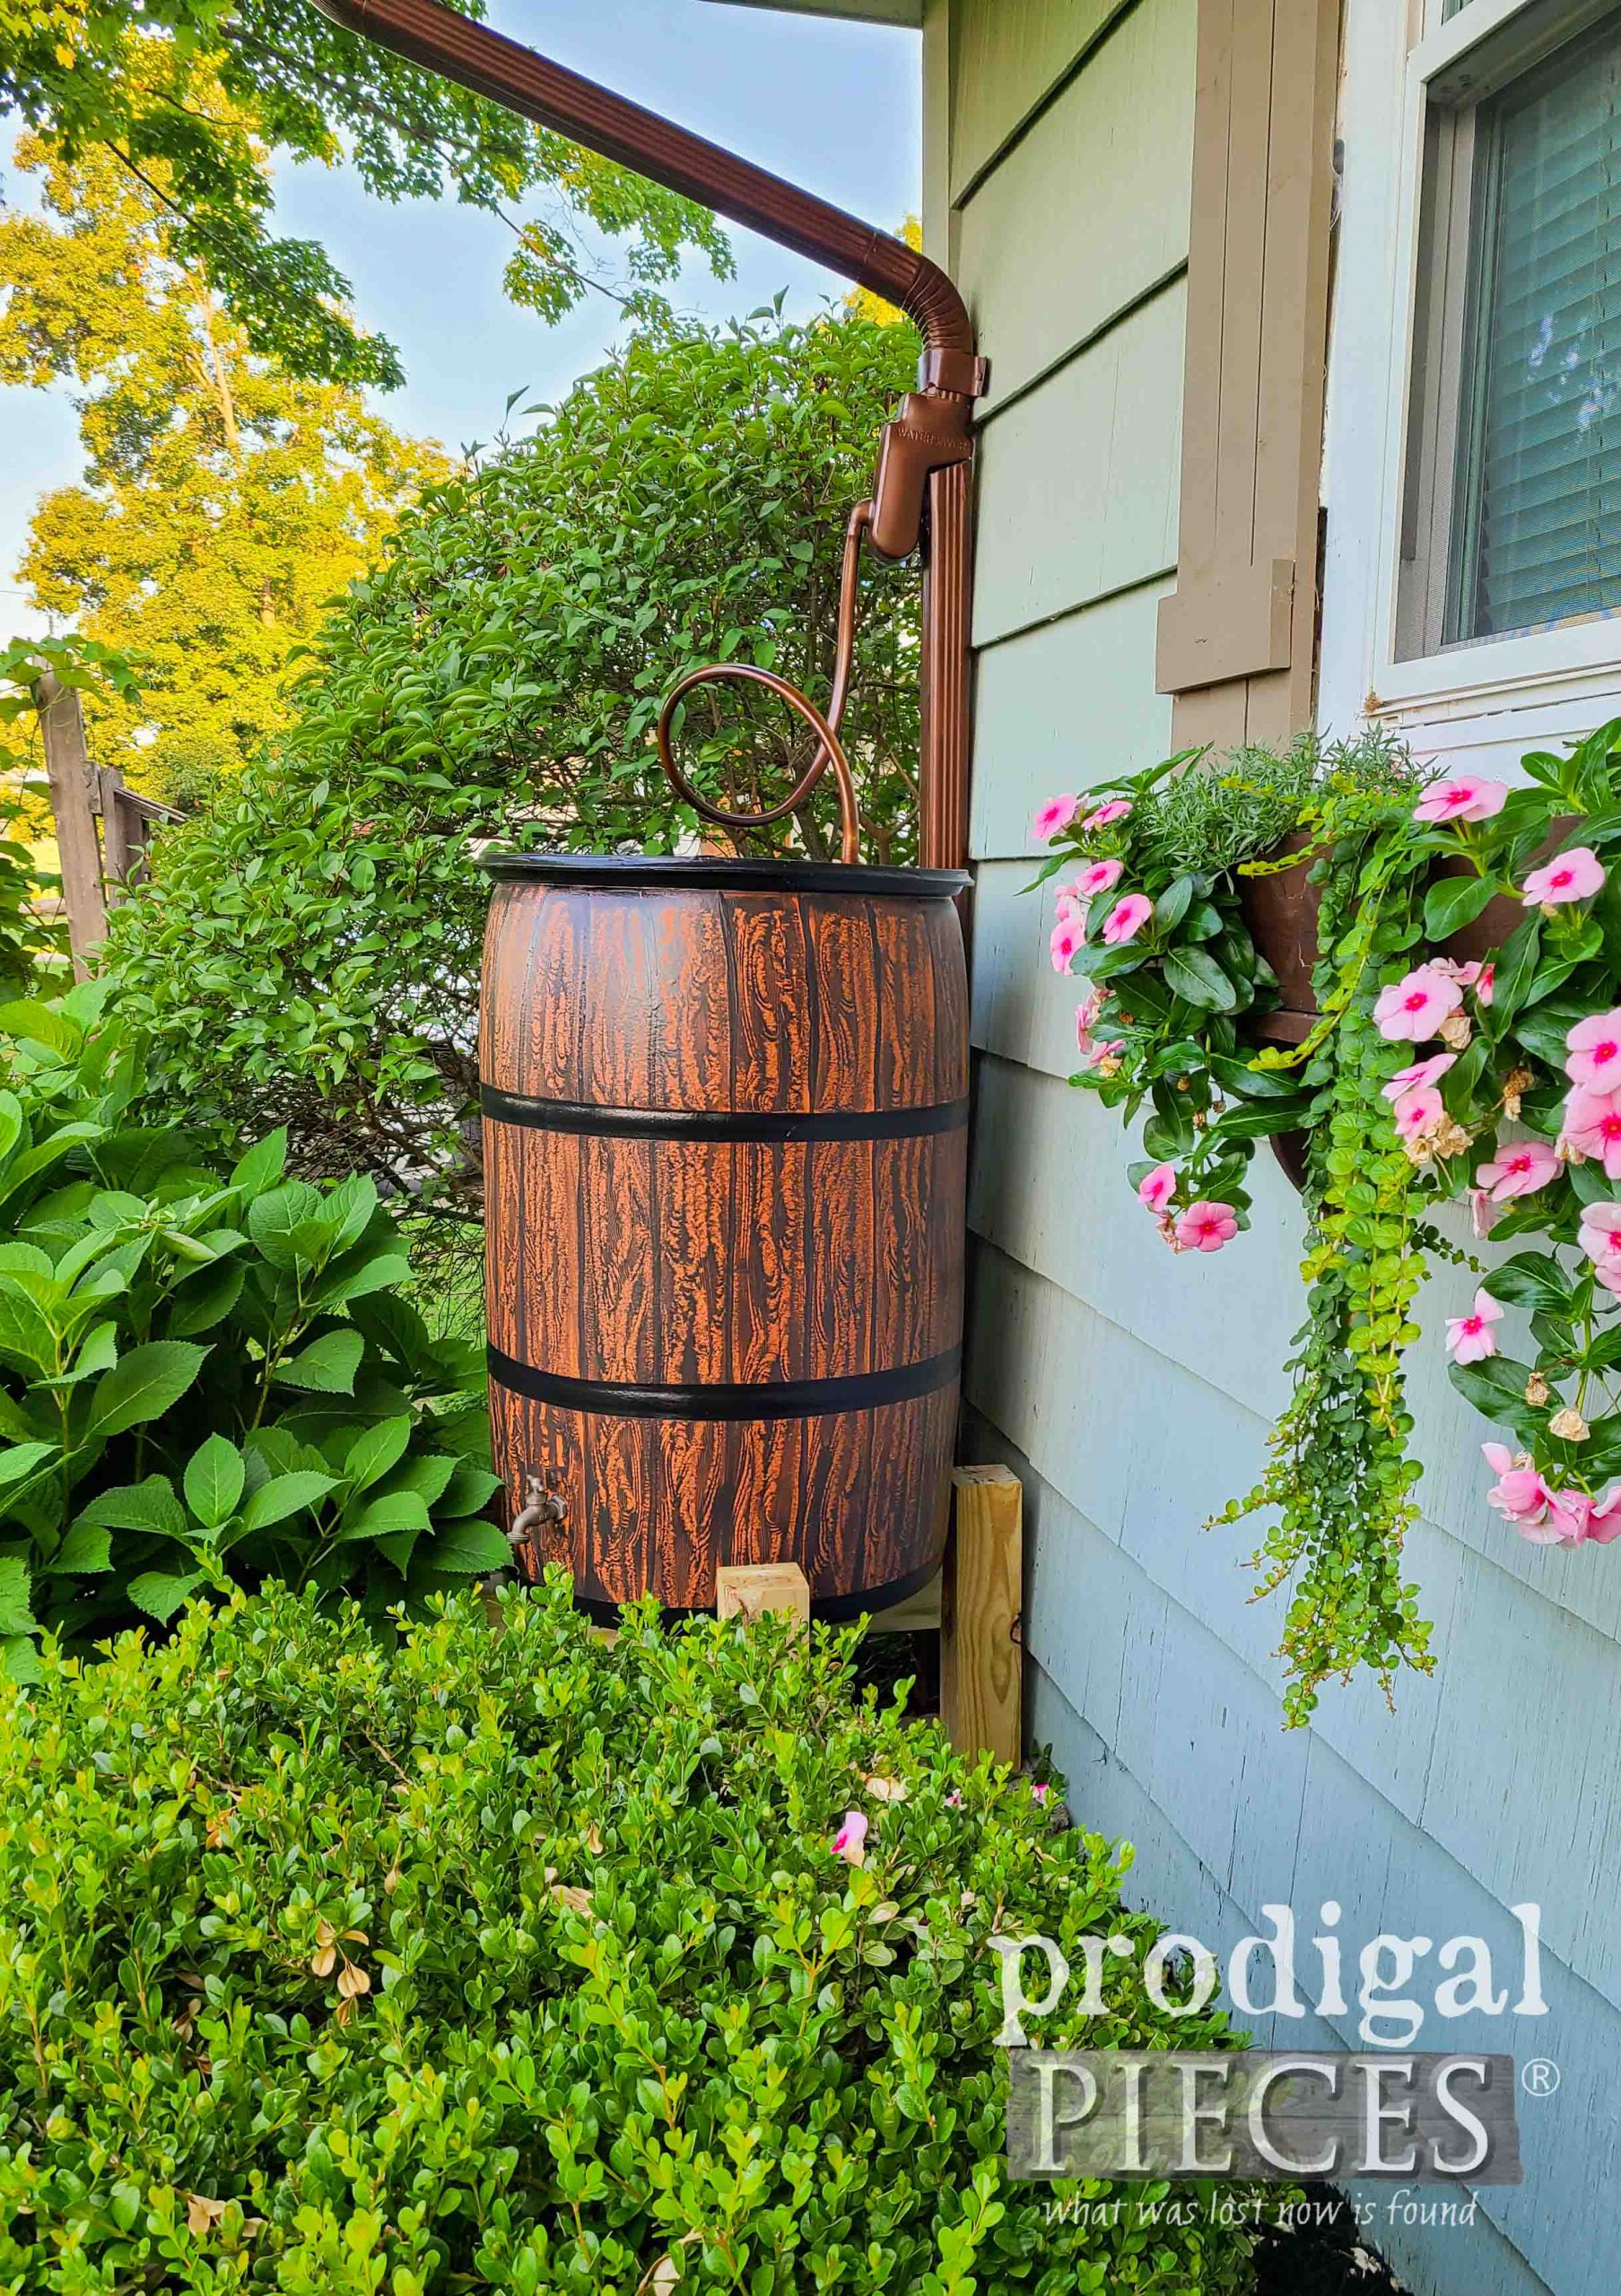
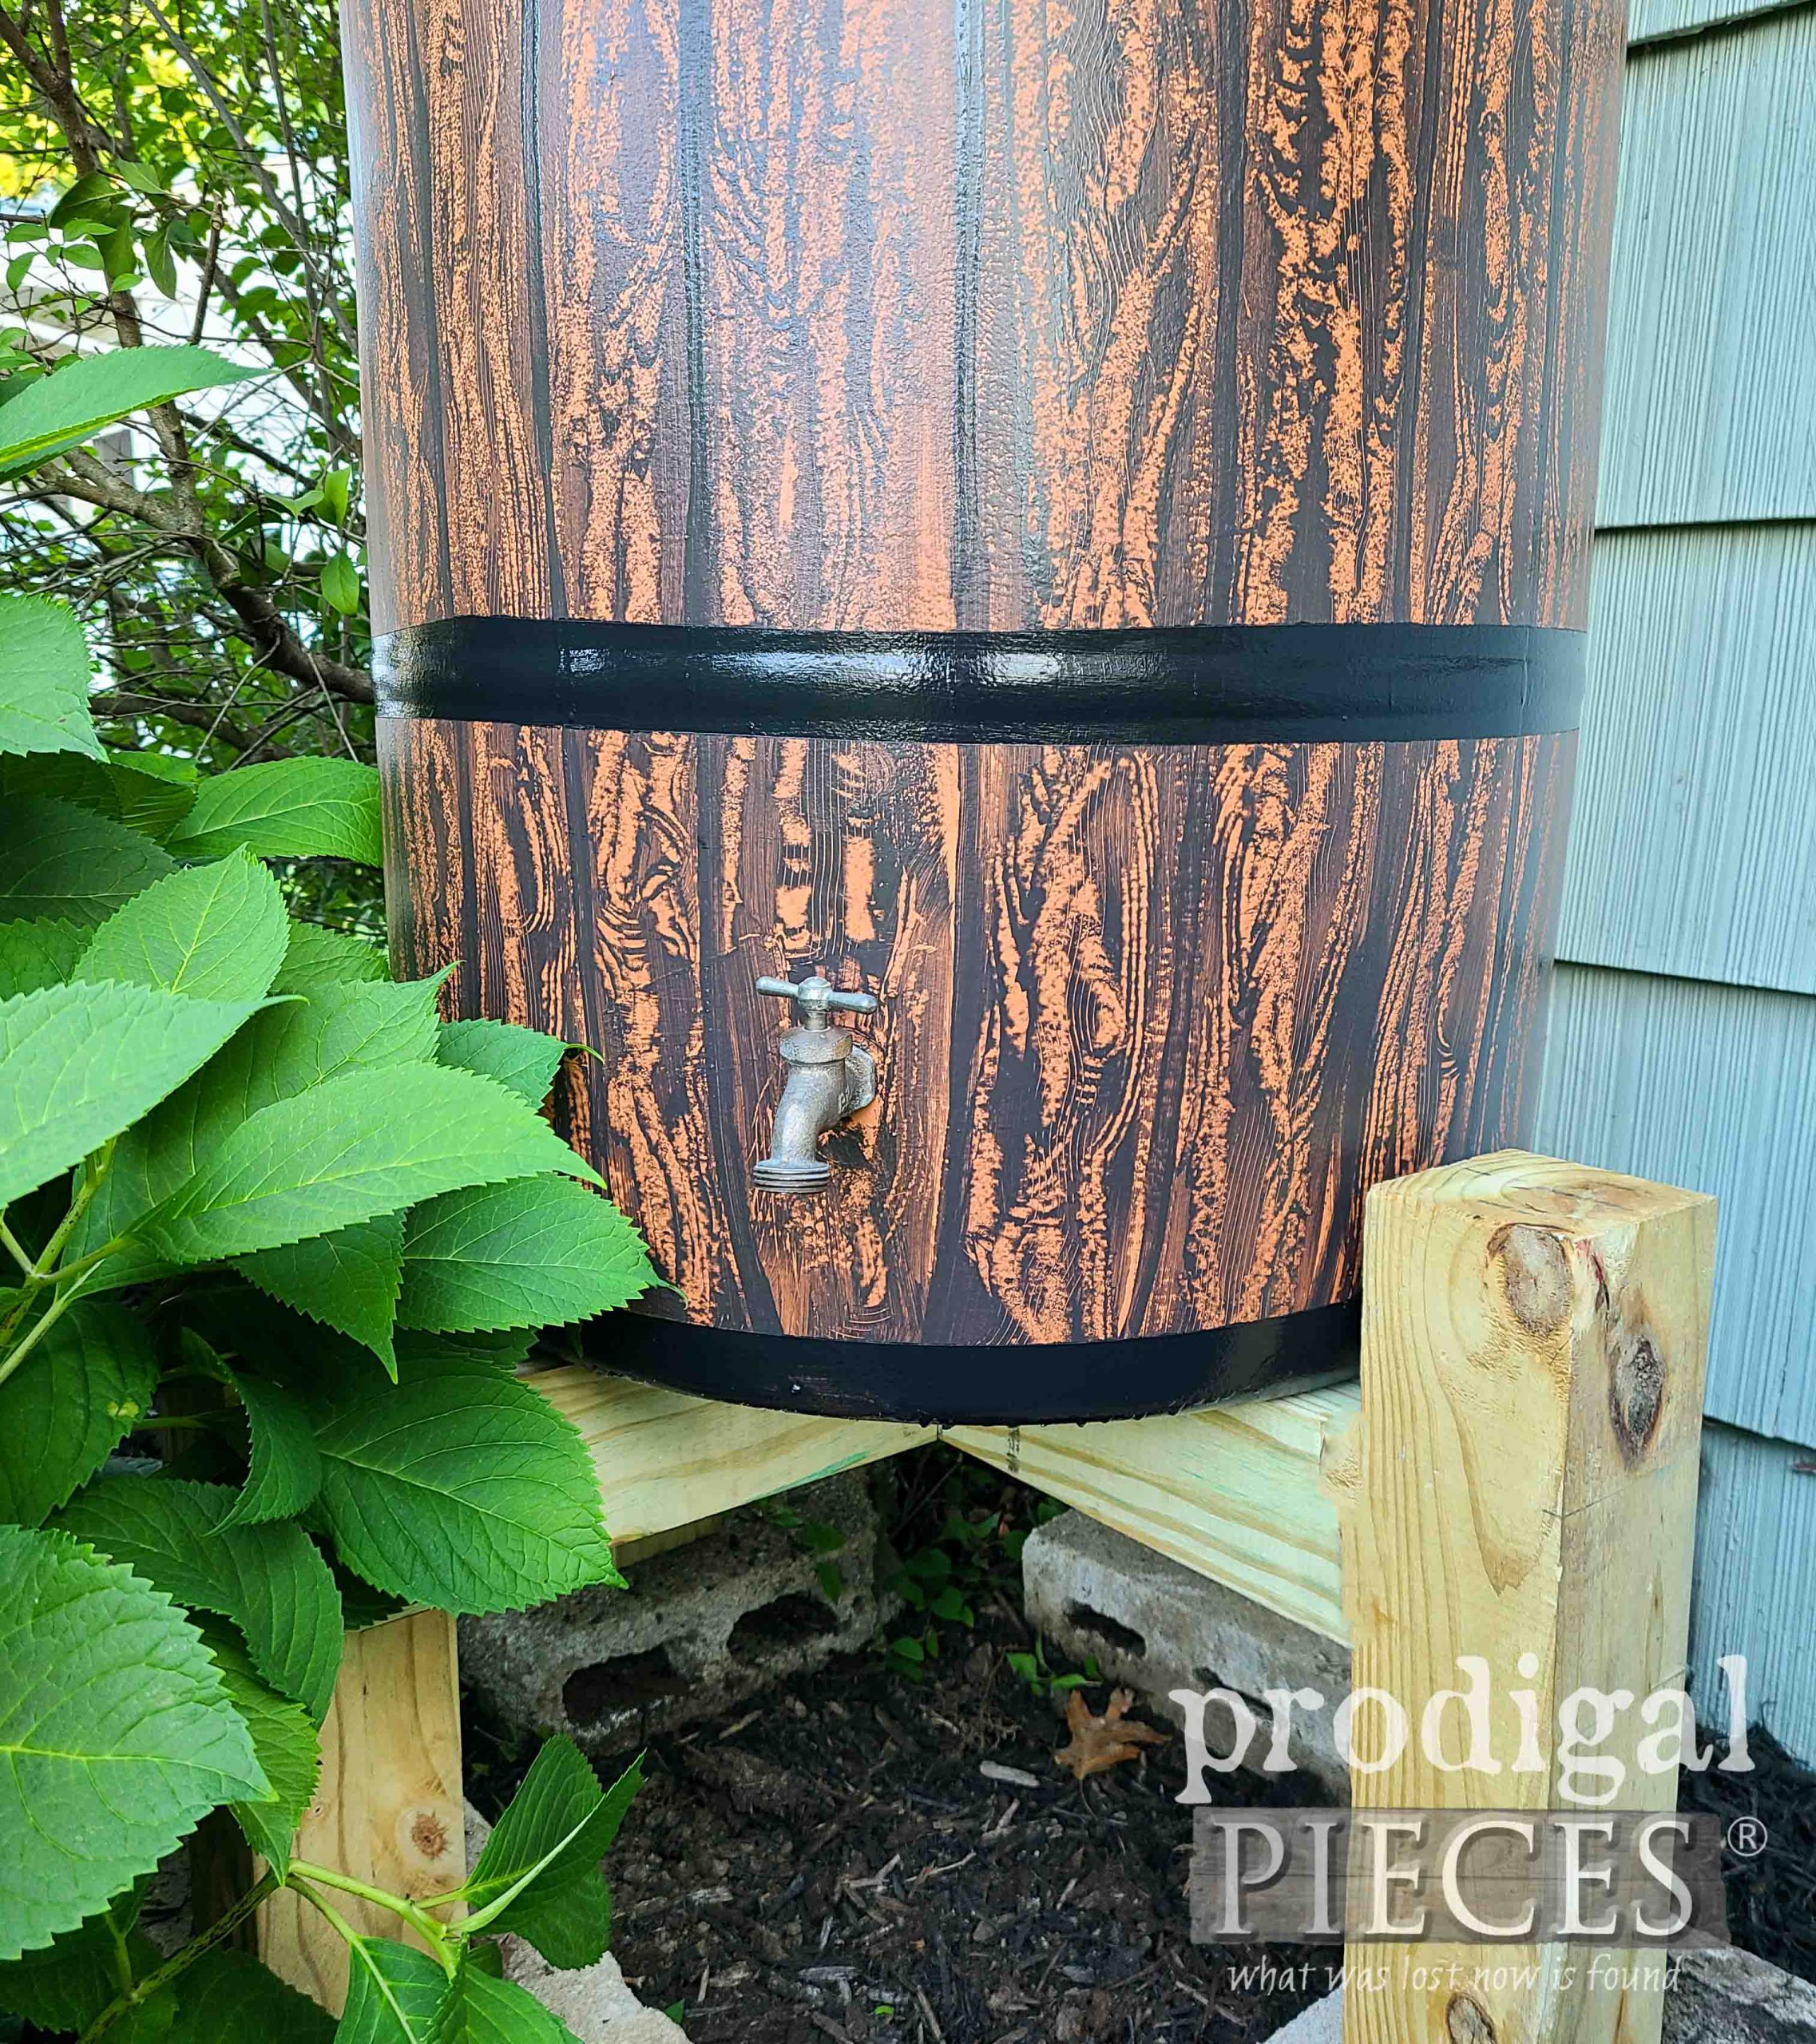
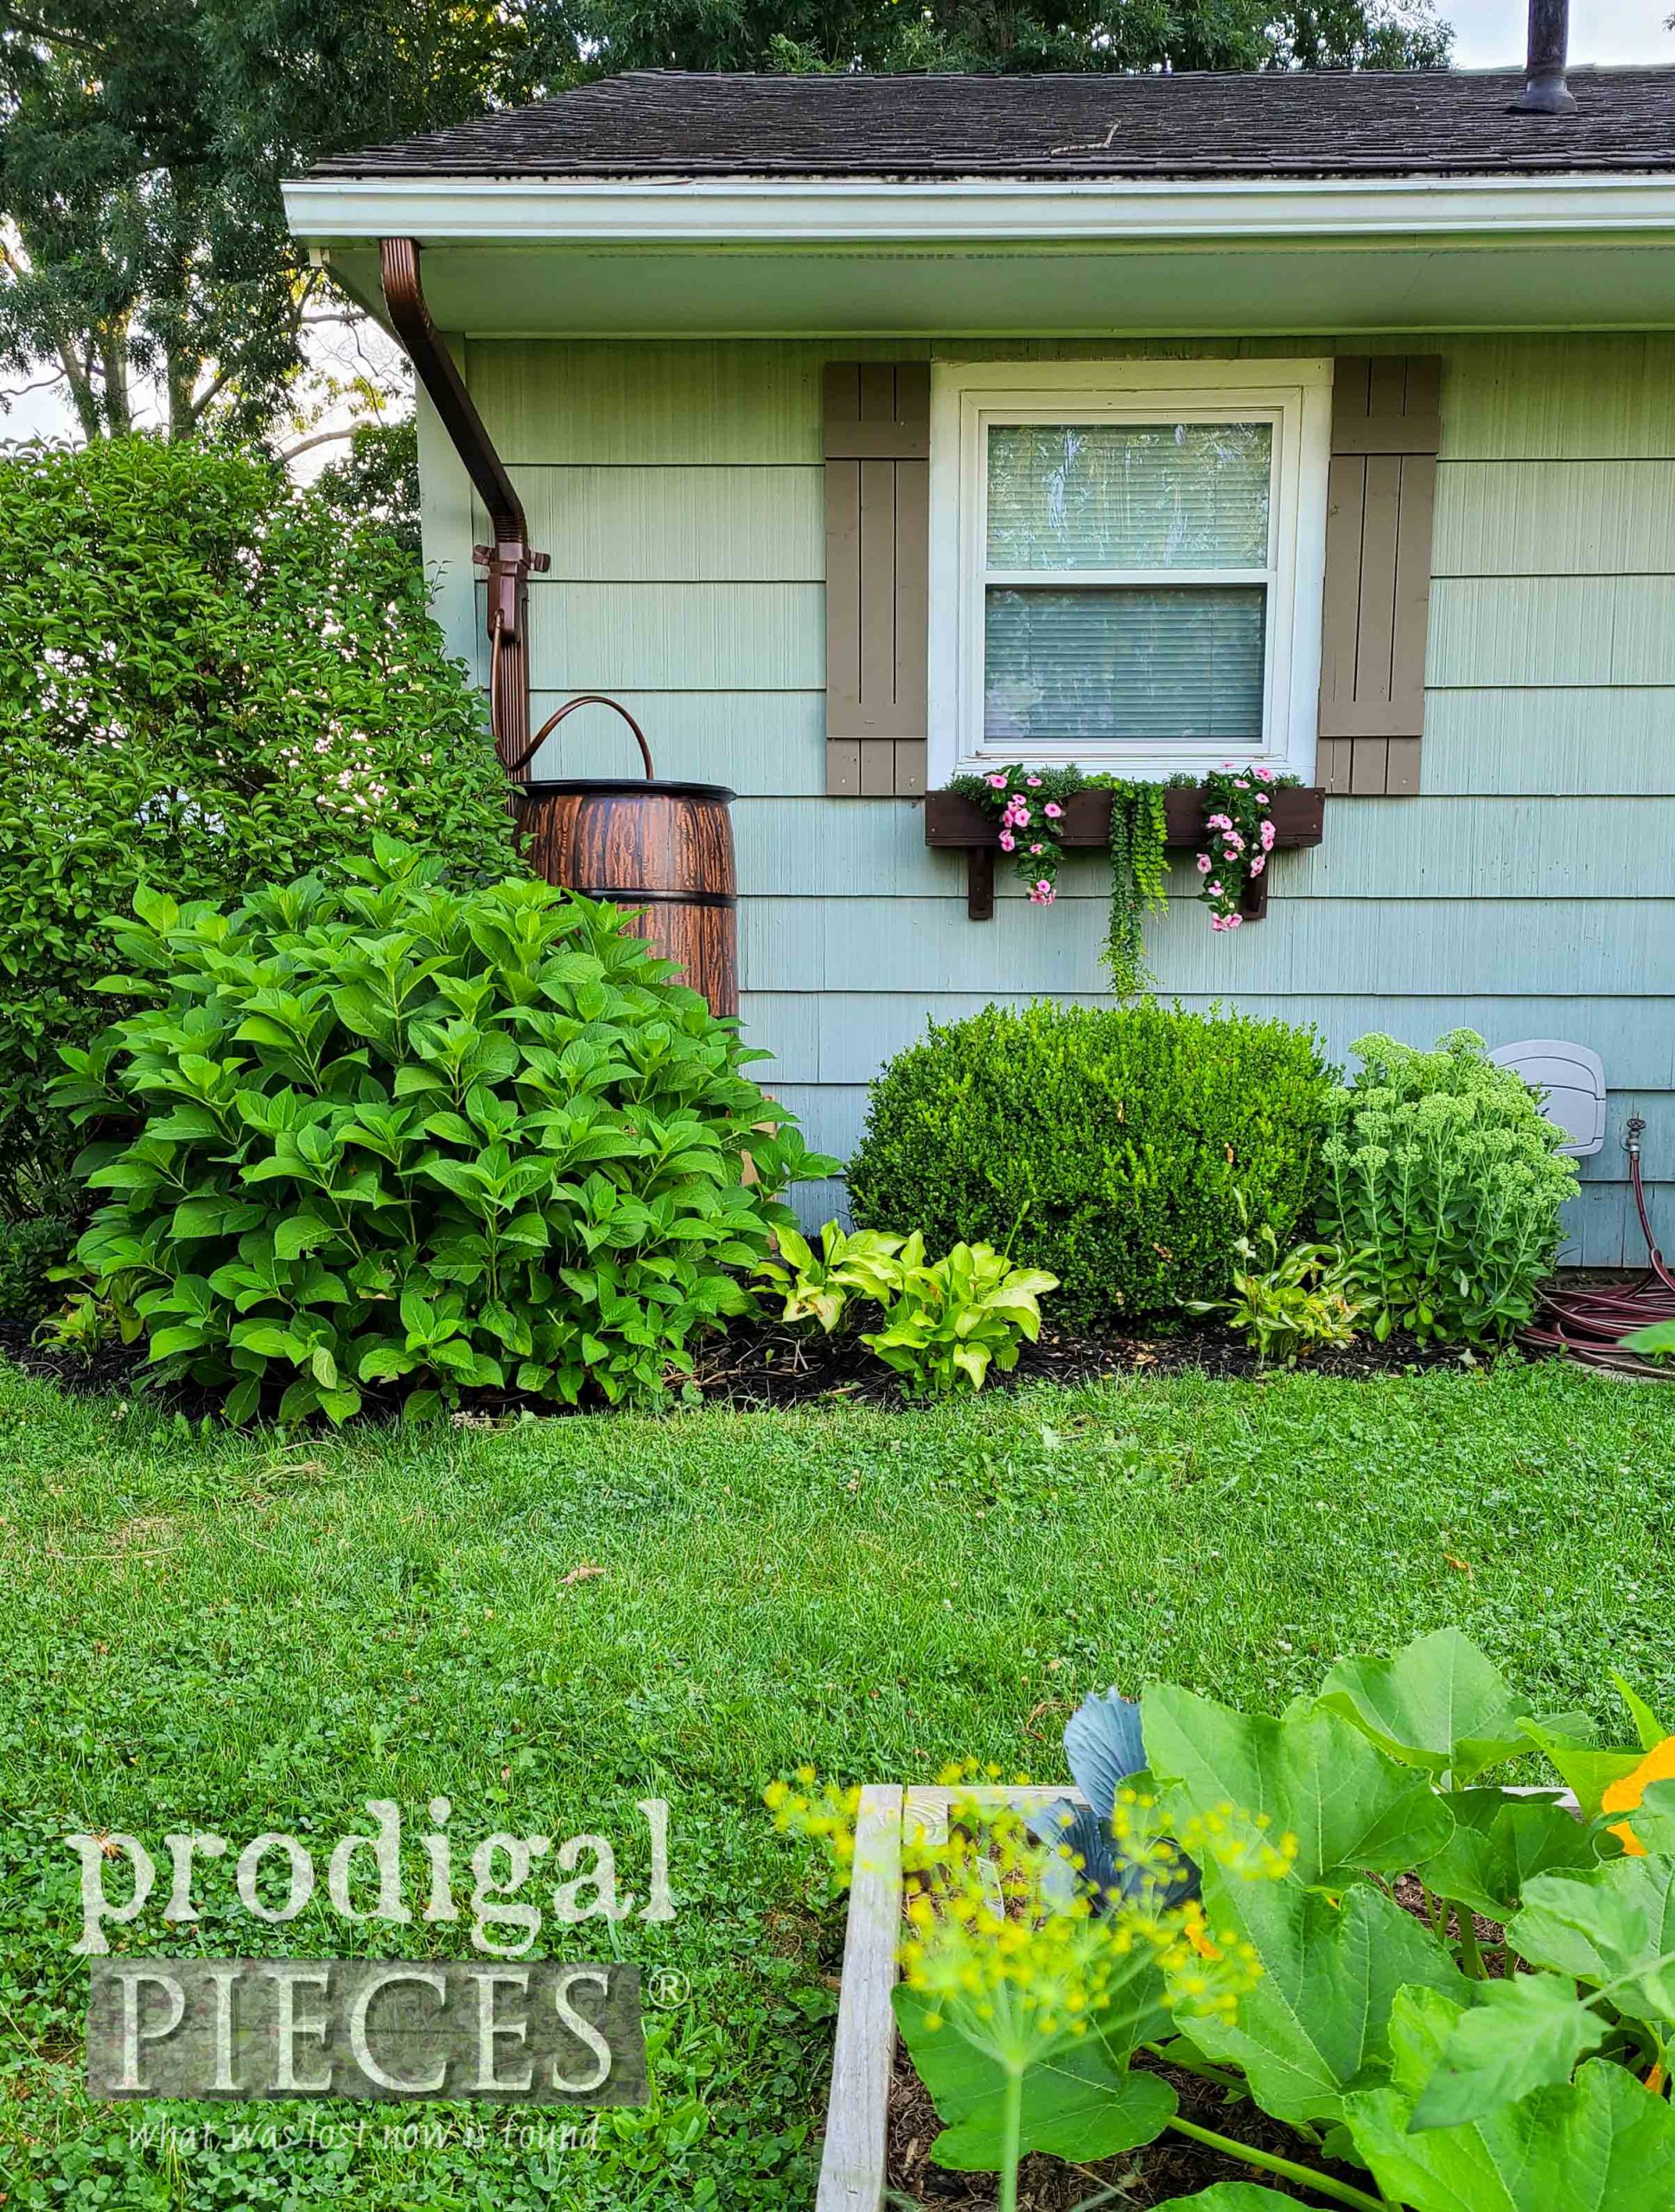
Here is my DIY rain barrel with the faux wood grain look. I love it!
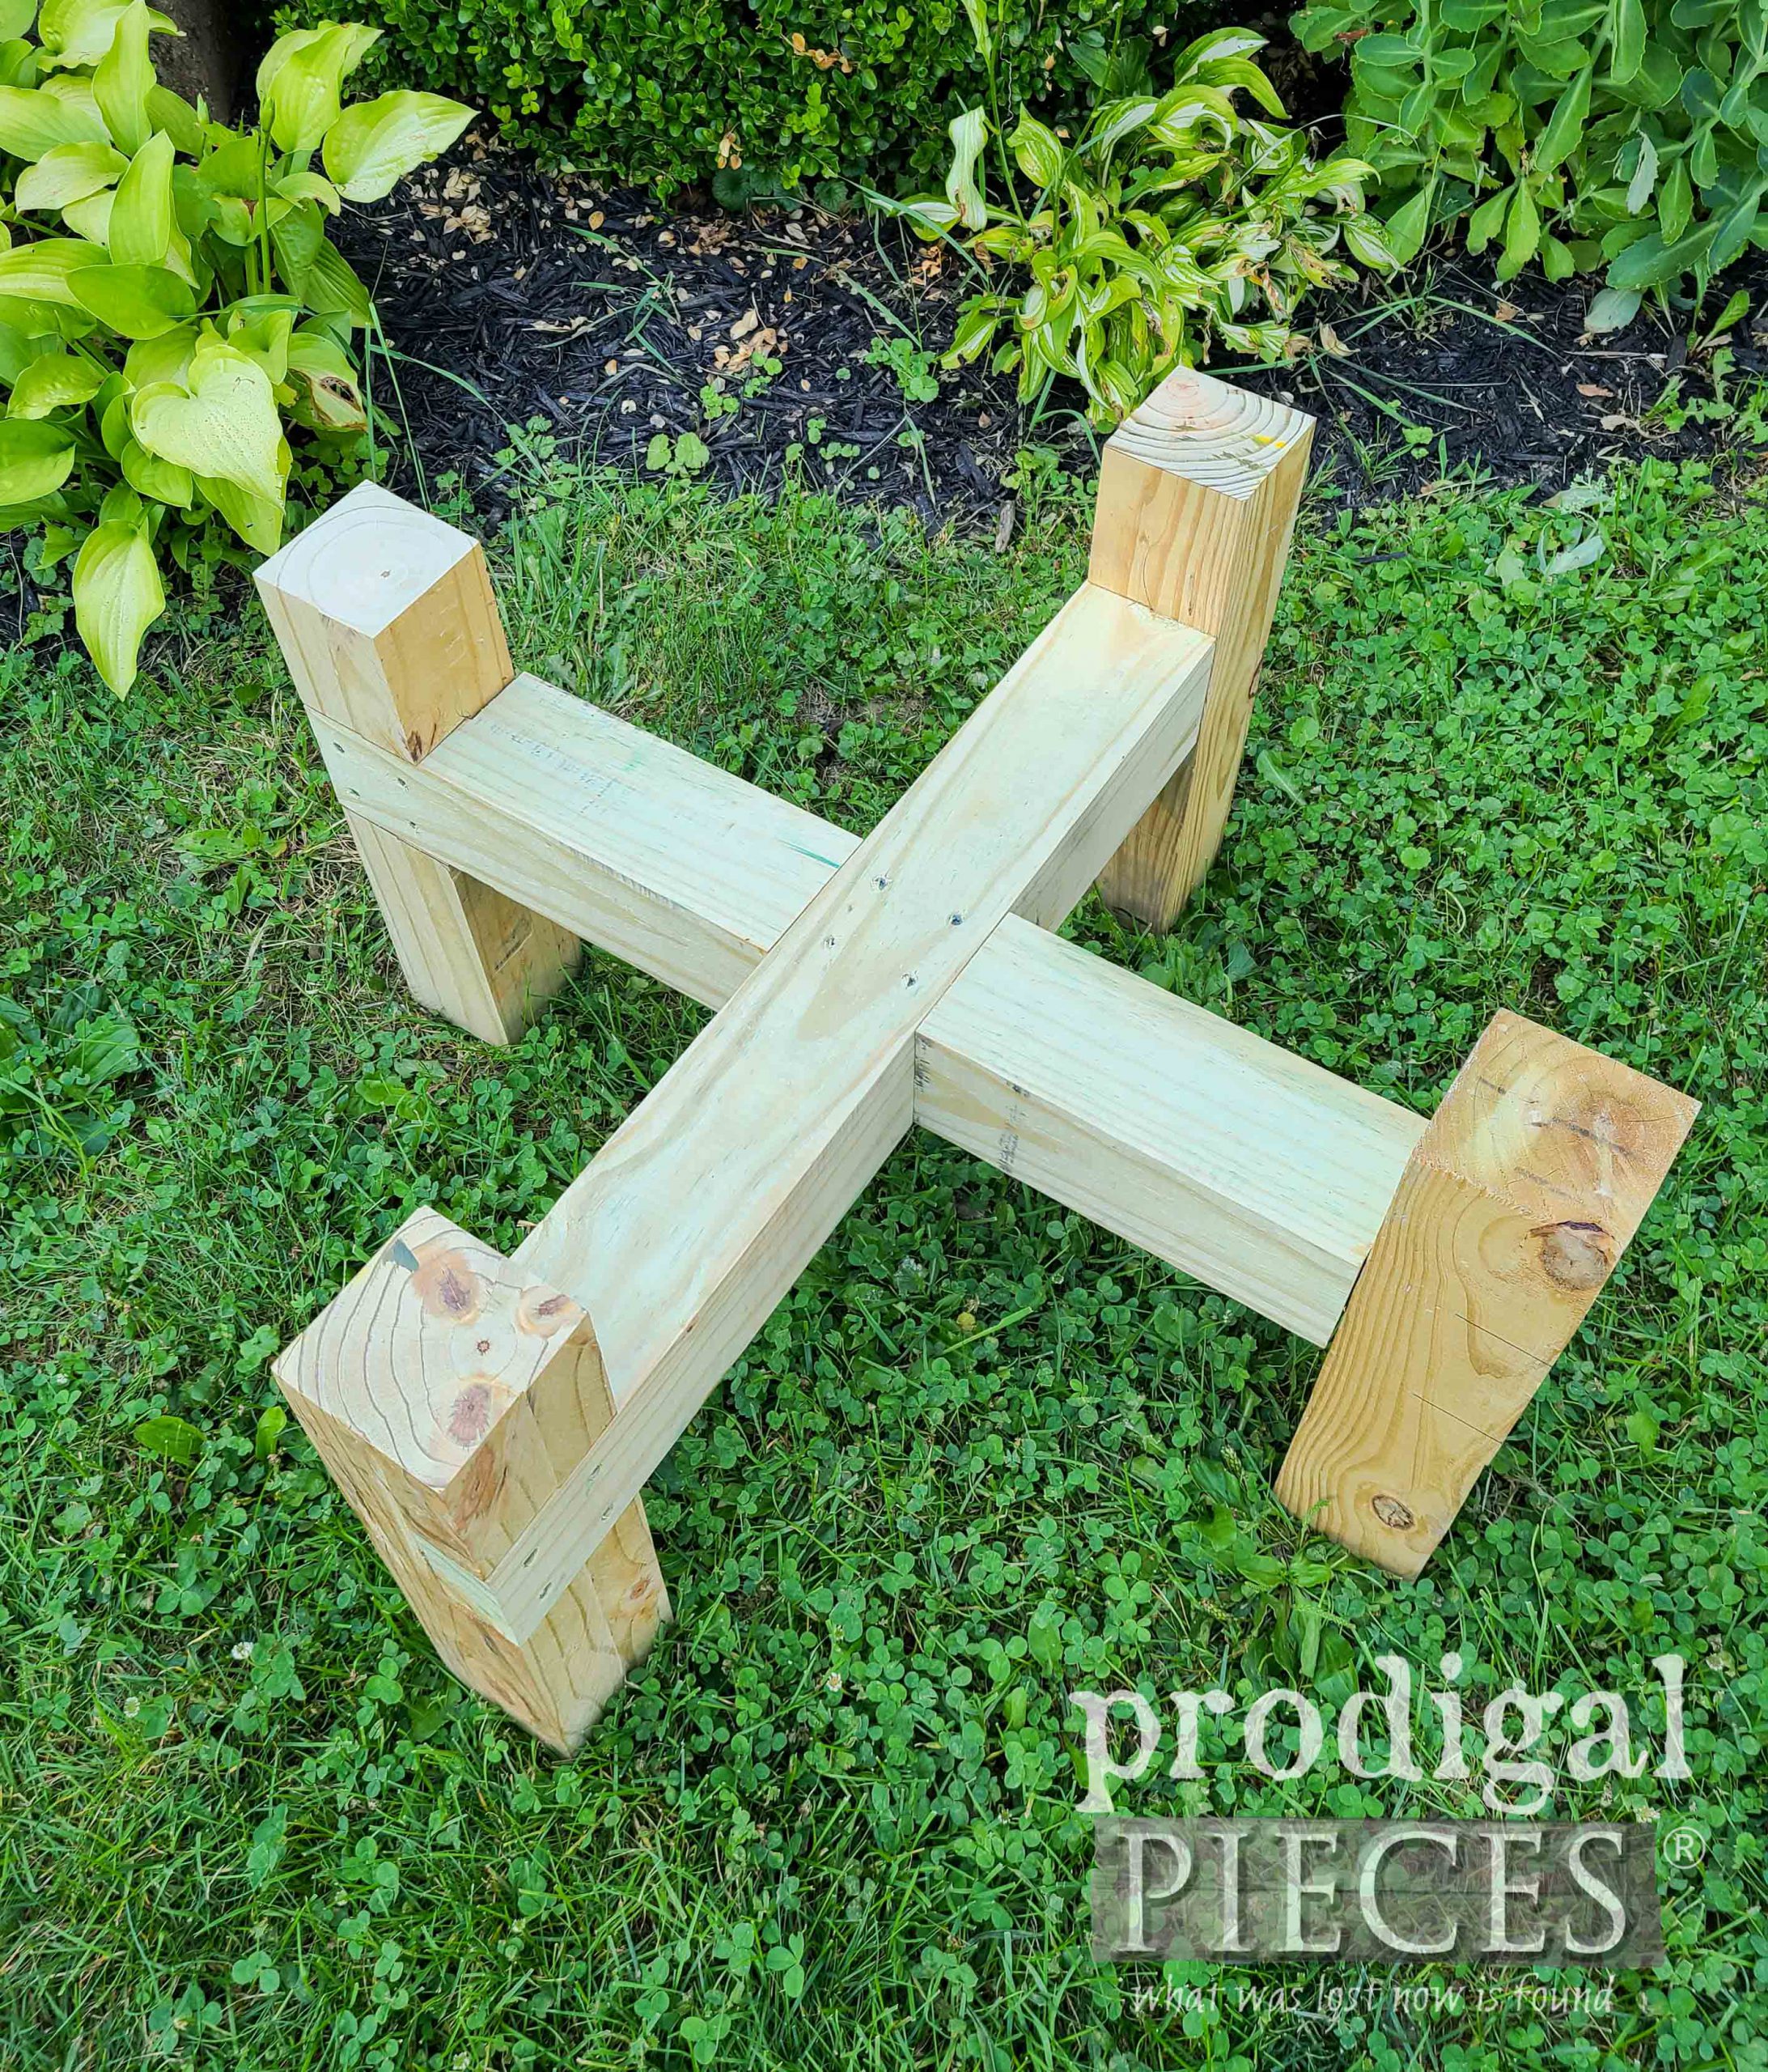
Did you notice the stand? I want our barrel to be taller to fit 5-gallon buckets under it as well as aid in gravity flow.
I got the plans for this at The Handyman’s Daughter. Their plan is easy and adjustable, so I saw no reason to reinvent the wheel. The wood is still green, so when it cures, we will stain and dress it up a bit.
Once I had it all together, I had to giggle because if I had done a different effect to my barrel, it could look like a still. haha!! Wouldn’t that make heads turn?
If you’re curious about hooking up the diverter set, just follow the instructions. It’s easy and just requires a cut in your downspout, then the hose added. You can even winterize your barrel as the season requires.
Now, my rain barrel is no longer an eyesore, but rather adds whimsy to my already fun garden. Yes, it’s in our front yard…the #mowlessgrow more mentality. 😉
Also, pin and share this DIY rain barrel project to inspire others to get into garden fun and become self-sufficient.
To get these DIY tips & tricks in your inbox, be sure to sign up for my newsletter. Until next time!





Looks amazing you did a brilliant job.x
Thanks! I’m glad it’s not an eyesore any longer. 😀
I can’t believe how well that came out!!! HUGE transformation. Just when I think there’s no way you can top yourself…. you do!! ??
aww…yay! Doing a happy dance over here. I’m so happy with it. Thanks, Rebecca!!
I’ve got a blue barrel that was my mom’s. Darn thing is an eyesore but doing the treatment you did will certainly make it stand out in a different way! Thanks for the tutorial! Oh, and the sprayer would go a long way to making this do-over soooo much simpler! Thanks Larissa!
That’s the spirit, Gail! 😀 Yes, you will love this Quick Finish. Easy to use and does a wonderful job.
Such a great idea!! Going to share with my sister, she has one of these!!
Thanks! It was super easy and fun to do. My kids loved watching and helping grain.
How creative! I don’t have a rain barrel, but now I want one! I am still wanting a paint sprayer for multiple projects. Love how you painted the downspouts too. Beautiful finish.
I had a blast with it…literally! 😀 Thank you, Susie,
What a fun update! I love the usefulness of a rain barrel: not only being wise with one’s resources, but also being able to have water access where you don’t already have a faucet. It’s been cracklin’ dry here in our area and a rain barrel would sure help with keeping our garden happier! Do you ever have to vent it or drain it regularly to keep the water from stagnating? Just curious about the upkeep of one. Thanks!
Thanks! Yes, for sure, very handy. We have the two plugs up on top we can vent with. Honestly, tho, we use it so much it rarely is sitting.
That is awesome, I love it! That sprayer would be so handy for so many projects!
Thanks! Yes, it sure is handy for paint, stain, poly, and whatever you want to tackle.
Love the wood grain effect. I want to paint my kitchen cabinets and the sprayer would make it so much easier. Thank you
It is so fun to see the grain happening before your eyes.
I have a rain barrel (in my potting shed) waiting to be installed! Not seen from the front but I may give it a new face while waiting for it to be installed! Thanx!
That’s the spirit, Shelly! 😀
I would lnever have thought to paint a wood grain and it looks Fantastic! You are so blessed with creativeness And energy. I would use a Homeright sprayer to paint a poster bed.
It’s all I could see when I looked at it. I just wanted it to be fun and whimsical. Thanks so much, Rebecca.
Wow! What a transformation. Having the right tools sure makes it for a more pleasant experience. Thanks for sharing!
Yes, tools are definitely a bonus. My signature mantra has always been #toolsoverjewels haha.
I really love what you did to the rain barrel. My rain barrels are blue like yours was and I really want to make them look better. First thing I’d do if I win the HomeRight Quick Finish Paint Sprayer would be my own rain barrels (of course!). lol
Thank you for the detailed instructions on how to re-create the faux wood look and thanks for the chance to win the Paint Sprayer.
haha…that’s awesome! If we ever get to move, I’m taking this with me and adding more. I hope you have fun with it! 😀
I love the rain barrel update. Very clever! If I had a paint sprayer, I would definitely use it on some roadside antique chairs I picked up yesterday for FREE since painting things like that with a brush can be very time consuming (as I’m sure you know, LoL). Thanks for the giveaway!
Thanks! This would be perfect for chair for sure.
Wow.
Thanks, Betty. 🙂
How creative. Love all your diys. You explain everything so clearly.
You’ve made my day, Annette. 😀 Thank you!
The rain barrel looks awesome! So creative!
Woot! Thank you so much, Pat. I’m smitten with it.
What a super cool idea! That turned out neat.
I’m ticked you think so, Donna. Thanks!
Hi Larissa! You are really good with that wood graining tool. I have one of those but haven’t used it yet. It really does look like a wooden barrel. Thank you for the opportunity to win a sprayer. That is the only way I will be able to use one. By winning.
I’m glad you think so because at the start my kids were like…what are you doing??? hahaha. I told them to WAIT.
That looks great!
Thanks so much, MaryAnn. 😀
Wow! That looks amazing! Great inspiration to do the wood graining, and painting the hoses and diverter -who da thought?! Makes me smile – thank you!!
That’s the spirit, Judy! I’m so glad to hear it. Thanks!
Absolutely love what you done to your whiskey; OOPS, water barrel. :}
What I would do if I should win the sprayer is redo our deck. It could use a nice fresh coat of stain.(would save time from having to use a brush or a roller)
Thank U 4 this wonderful giveaway opportunity.
haha. I already upcycled my whiskey barrel in my last post. haha! That sounds like a good project, Colleen.
Awesome! I always love what you come up with!
I’m delighted to hear it, Andrea. Thank you!
I love the way your project turned out. I would paint my fireplace.
Thank you, Kelly. Sounds good.
So much cuter than the store-bought rain barrels! You always inspire!
Yeah, baby! haha. Thanks for the love, Cindy. 😉
Brilliant ?
aww…thanks, Jo!
Love the rain barrel. A city near us hired artists to paint their barrels around the city they were beautiful.
I have several projects the kitchen cabinets being one.
Thank you for the giveaway.
That’s a fabulous idea. I’m all for adding interest wherever we can. You’re welcome!
Love how this turned out! You never fail too amaze!!!
Happy dance over here!! Thank you, Michelle.
What a great project! That sprayer is amazing! I’d like to try that sprayer on an old cabinet I’ve had for awhile but can’t seem to get started on it. And then I’d use it on a loft in an old outbuilding that I have that would make great guest quarters if I clean it up!
Woot! You will love this Quick Finish or their other sprayers too. That would be a fun use for it.
WOW, I love how you come up with so many good ideas to make every project outstanding. It looks so real. Great job!
What sweet words to hear, Terri. That made my smile from ear to ear. Thank you!
What an amazing transformation! You are so creative and very talented to be able to do it all yourself!! Gail
It’s so fun for me to share with you. Thanks so much, Gail.
I would use it to repaint a couple benches that we have in our backyard first.
Larissa,
I kind of wondered why you didn’t paint it the same color as your house but you turned it into something very cool and I was flabbergasted! Job well done. I hope you can create a posting for the barrel composter!!! I love this rain barrel but I live in southern Arizona and we don’t get much rain (I still think about a rain barrel though). I would really like a composter and those ones that sit on the ground will not work for me. Thanks for the great posting.
That was the original goal with the green years ago, but that was kinda boring. haha. 😉 Time to up the ante! Thanks so much, Mary. We actually sold the barrel composter because it wasn’t big enough for our crew. We built larger ones with pallet seen HERE.
Hi Larissa, me again….call me a dork but I don’t know what typing “url in ” means; I pinned this post and then posted the pin to my Facebook group also.
When I visited Homeright and read their posting about using the steam cleaner I was surprised when I tried to pull up “homeright steamer” and came up empty! I had assumed they also made a steamer??
Just copy the link from the pin up in your web browser and paste it in. Hmm…yes, they do make a steamer that I adore. I have two actually. See them in these posts.
Wow !! Great job and your and your saying “toolsoverjewels” that’s so me. Hope you don’t mind if I steal that. 🙂
Thanks, Kim! Yes, my motto since age of 13. You can use my hashtag for sure and when you do, tag me! 😀
Wow! Love this project Larissa! I have 4 rain barrels that need a redo…and I just couldn’t get a vision for what to do with them. Yay! You came to my rescue once again! Thank you – Thank you! I love too how you utilize your sprayer to all challenges of makeovers. That inspires me also 🙂 Thanks for the opportunity – again – to win one. Gratefully yours!
You are so fun! That totally made my day to hear, Mary. Thank you for the huge smile! 😀
New to your site. Love everything I see!
How sweet of you to say, Selene. Thank you!
Larissa,
You are so creative.
Thanks! I’m glad you don’t think I’m crazy. haha.
That was a lovely makeover! I am very impressed by that wood grain tool. And of course, having a sprayer like that would be a dream come true. I wish I could come spend a year with you and just learn from all your talent.
I would love to have you, Kim. It’s fun to share a passion with someone who gets it. 🙂
Wow!
I actually HAVE all of the items needed (except the HOME RIGHT SPRAYER ?), having just received my woodgraining tool! A friend of mine had several food-grade barrels and saved one for me to water our gardens. As soon as the new roof over our patio is finished and the gutters get put back up, it’ll be ready to go…now, with a diverter. Thanks for that information! Curious to know if you installed netting at the top of your barrel? Apparently necessary to stop the successful breeding of mosquitoes; maybe that’s just a Southern thing?
Thanks for being so timely with this project! Now, would you like to come down and help me prep and paint 12 beadboard panels (Haint blue) for the ceiling??
Sweet! Sounds like you’re ready to go. I have not installed netting, but do you mean in the gutter? I will look into that because we do have mosquitoes, but not horribly so. If you win the sprayer, you’ll have those panels done in no time! 😀
I’ve always wanted one of these! You’ve inspired me for a fall project!
That’s what I love to hear, Rachel! 😀
Love the barrel- my first project would be updating the doors to my laundry alcove. The previous owner left a hole and a really poor patch job.
Thank you, Deena. Ugh…I hate when that happens. We are always fixing things like that here.
That is so cute!
Thanks! I’m smitten with the outcome.
Looks. so much better. I need to get me a wood graining tool, and could use a sprayer too!
Seriously do! The set is less than $10 and so worth every penny. Plus, it’s fun! 😀
It is so cute now, I Love it!!
happy dance!! Thanks so much, Mary!
Saving your rain water is such a great idea! I never knew you could buy apple juice barrels! I may have to look into purchasing one! I have a stool that needs painting and a sprayer may make this project so much easier! Thank you for the opportunity to win this giveaway!
Oh yes, just makes sense, right? There are many places that have the food-grade drums. Most often you just need to ask. Thank you for the love, Ginny!
Very clever! ….love watching your creativity! I’m looking for a new sprayer to paint a hutch. What do you like the most about this brand?
Thanks! That would be sweet to have a sprayer for that larger pieces. The sprayers are lightweight, easy to use, easy to clean, and the company is super helpful.
That transformation is absolutely awesome! I have seen a wood grainer used for many projects, I have never seen one used on plastic, but what an inspiration. I would love to win the sprayer! I recently had major heart surgery so I am unable to go back to work right now because of it and the covid risk, but it doesn’t mean I can’t keep busy with some renovation projects. The sprayer would make them so much easier.
Wahoo!! Thank you, Michele. I’m glad you like it. Yes, that tool is so fun. Plus, the sprayer knocks out my time in less than half. I’m sorry to hear of you troubles, but am glad you are not quitting. You go girl!!
I have to admit, I had my doubts about the faux woodgrain but it looks amazing, Larissa! I wish we could have used the diverter on ours for the filtration. I bet you’re enjoying having the stand. It sure helps with the water flow, eh!
haha. It was looking pumpkinish! 😀 My littlest told me she didn’t like it when I started. I had to laugh. Yes, loving the stand for so many reasons! Thanks so much, Marie.
Great rustic look! I love it. 🙂
Thank you. I’m must glad it doesn’t look like a smurf hiding out in my garden. 😀
What a great redo of a very industrial item! you always have such amazing ideas/
Thanks! Those barrels are handy for so much.
Wow that rain barrel is so cool! It really fits in with your garden! I would love that paint sprayer for the kitchen re-do I’m going to be working on! Especially for my table and chairs. It would make it easier and so much fun to repaint. Have a blessed day Larissa!
It was fun to take it to a new level in many ways. Thanks, Patti. You will love this Quick Finish for that project.
Hi Larissa, this is the best looking rain barrel I have seen! The wood grain looks so realistic and I love the way it looks in your garden. You built a nice wooden stand for it too.
I have several projects that I could work on with the HomeRight sprayer, but my first Project would likely be wooden chairs that need an update. Have a great weekend and thank you for the opportunity to enter.
Sweet to hear, Kaycee. Thanks! Sprayers are the ultimate for chairs…no drips, no hours of brushing, and smooth finish.
WOW. I just love all your makeovers. I have so many i don’t know which one to do 1st!!! Thanks much
You’ve made my day, Sally. 🙂 Thank you!
i do love your project! I wouldl love to makeover my kitchen table.
Thank you. Sounds good!
Oh my goodness! You did a fantastic job on this one!!! Totally WOW!
I’m so elated to have it done and UP. Now…I just need some rain. haha.
Can I ask you to post the barrel stand plans? I can find them on Handymans Daughter site anymore.
I just tried the link in the post and it’s working, so maybe you need to clear your cache or browser history?