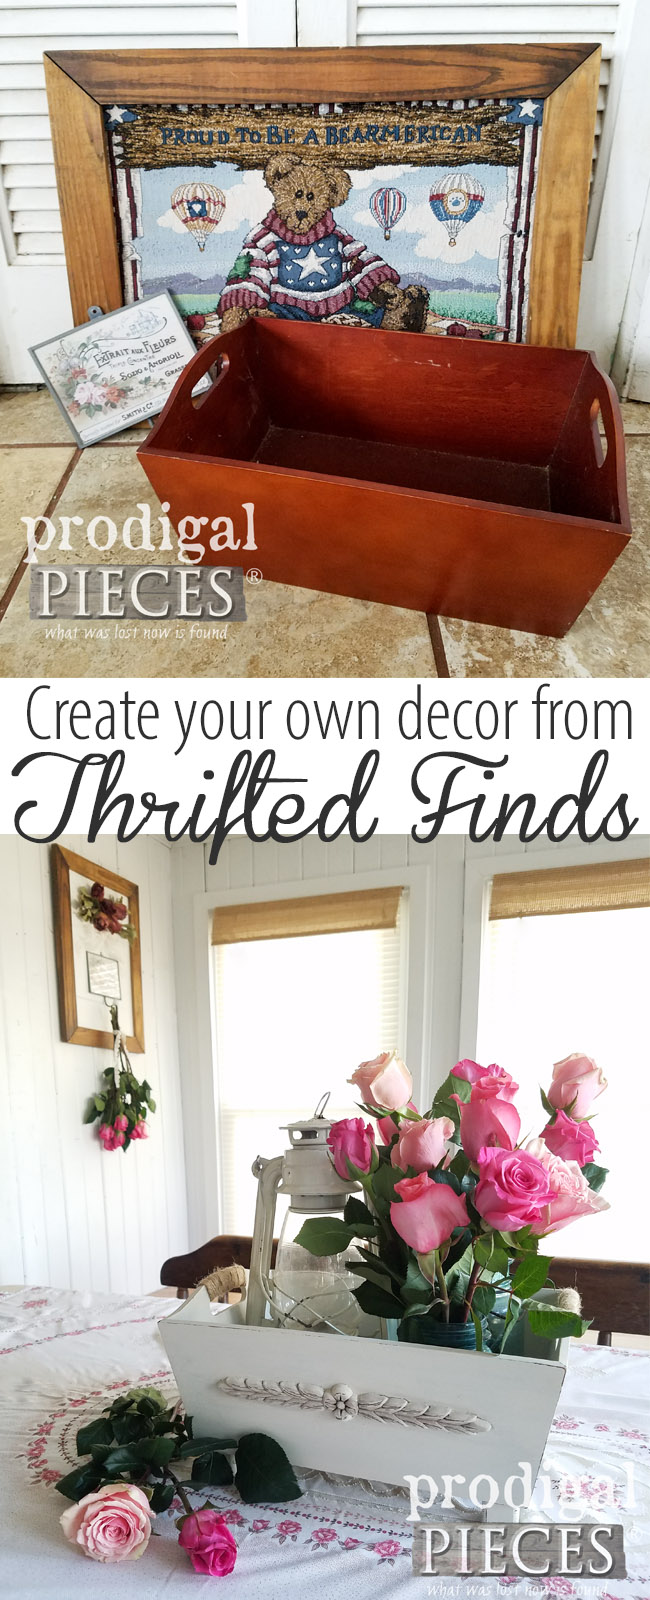
As I was perusing the wood section of the thrift store, I come upon this thrifted prim tote. Let’s just say the first words to pop into my head here, “hot mess”. ahem.

After chuckling to myself as I picked it up, I look to my daughter and say that the filling on top reminded me of 80’s hair. Ya know, the kind that was teased to no end and finished with Aqua Net? bwahaha!!
Okay, so I’ve established that I’m not in love with this thing as-is, but in its potential. I mean, we’ve got a solid wood piece that is just waiting for revival, right? Plus, I have a thing for totes as demonstrated in these past posts:

CLEANING UP
First, I can’t believe that electric candle and the metal mess are all stapled into a board mounted inside the tote. Not only stapled, but they used 1″ long staples to do so! Talk about overkill.

So, once I get the sides off, I can see what I’m up against. Do you see how it’s built in? I remove that platform and then disassemble it so I can put the sides back on.
To show you exactly what it took to get this thing down to bare bones and finished, here’s a video on my entire project.

As you can see, it took some elbow grease and just a bit of DIY to get it looking brighter and better for use.


Then, after I have two coats of paint curing, I create a couple of twine tassels as an accent. If you’ve never made tassels, let me tell you they’re super easy and can be fashioned in any way your heart desires. I’ve outlined the steps below in case you’d like to give it a try (psst… you can also use these steps to make doll hair – just stop after you trim it open). However, the video demo above shows it best.

How to Make a Tassel
- Cut a piece of cardboard (or similar) to the width you want your tassel to be (mine is approx. 6″ L x 4″ W)
- Using twine or yarn or cord, wrap around the cardboard on the short side about twenty times
- Cut a length of twine the length you want your tassel to hang plus extra for trimming
- Thread the cut piece into the “top” of the tassel and double knot it off.
- Cut the bottom of the tassel to open it up. (again, see video for demo)
- Cut another short length of twine to make the tassel “head”. Double knot to secure.
- Thread a bead or a dozen onto the top length, if desired.
- Trim bottom to square it off. If you want to create a frayed look, use a comb or pet brush as I demonstrate.
STYLIN’ THE TOTE
Last, here’s the thrifted prim tote no long prim, but proper fixed up for a minimalist style.


Clearly, I staged this in my kitchen, but literally the sky is the limit for where you can use. Tuck it in your bathroom with essentials, use it as a remote caddy in your family room, or in the bedroom with books and fun reads. Where would you use it?


My DIY tassels are not attached, but a rather decorative accent that can be removed on a whim.


SHARE
As always, my goal is to inspire you to take a second look at those finds or your own items you already own. Likewise, make it yours and create your own home story. What is more, pin and share to inspire others too.

Before you go, be sure to sign up for my FREE newsletter to see what becomes of this other gem that tagged along too.


While you’re at it, check out these other revivals like this thrifted prim tote:

haha 80’s aqua net hair…yessssss🤣 Great new look and the tassel is adorable!
right?? hee hee. Thanks so much, Denise!
I like this! I love the clean lines and minimalist look. The tassels add a fun boho feel to it, as well.
It would be a great caddy for art supplies!
Another great upcycle, Larissa!
ooh… I like your thinking. I would love a studio for all my artist stuff and a place to just create and leave it be.
SO much better! That was 80’s primitive at its best lol! XOXO
haha. It was just such a mess. And fun to redo. 😉
That old thing needed some love and you gave it!! So much better! xo
It felt good to relieve it from that mess. haha. Thank you, Nancy.
Those tassels are adorable ! Thanks for sharing your process.
Such a cute tote now.. I can see it going lots of places !!
I really like it’s simple lines.
I’m so making my life simple in all facets and it’s been long overdue. Part of it is due to kids growing up and entering a new phase.
These little pieces have so many uses. It looks so nice now instead of ready for a fireplace lol. I happen to love it the way you’ve shown it on your counter.
bwahahaha!! You put it so aptly, Debra. 😀 It felt good to free it from the mess.