I can’t believe I’m actually getting to write this post. Seriously! It has been over a year since we started our farmhouse master bedroom finale makeover, and because of that I’m sure that most of you have no idea what I’m talking about.
You see we were ambitious and ready to have this project done before our new baby would enter the scene so we could have her delivered at home like her siblings, but she wasn’t having it. Right as we were about ¾ of the way completed, our little bundle came 6 weeks early and required 3 weeks in the NICU. Yeah, that’ll throw you off a bit.
Not only did put a kink in our plans, but the hospital bills kept us from being able to put many funds in to completing it. My whole family and I busted our behinds to make those payments and get rid of that bill within a year, which meant a whole lot of furniture was being done. whew!
Here’s a look at the awful before of our room.


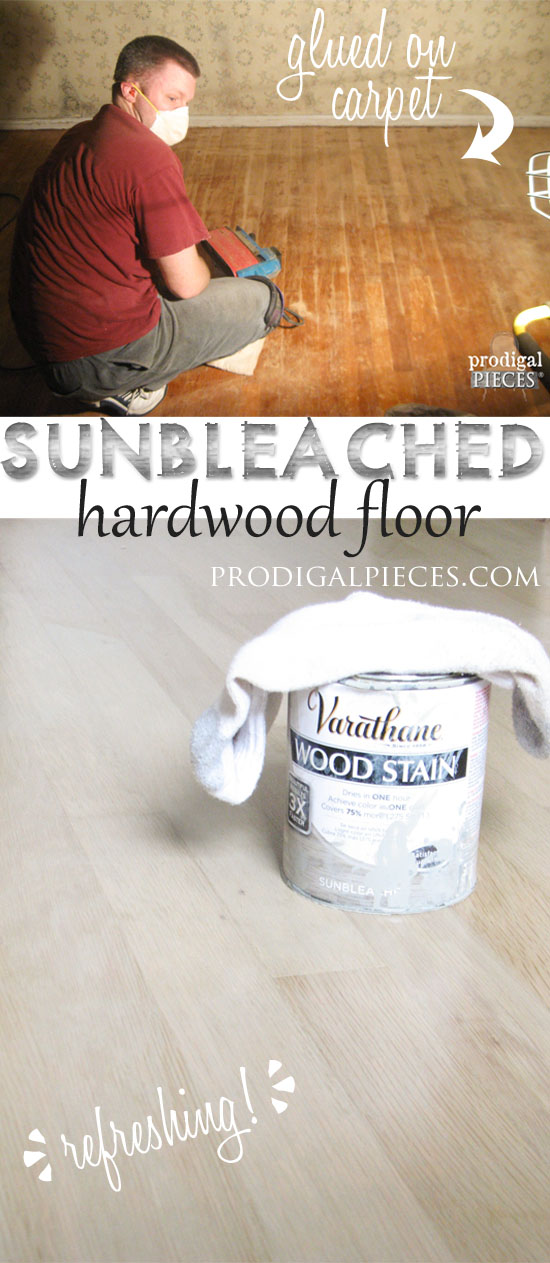
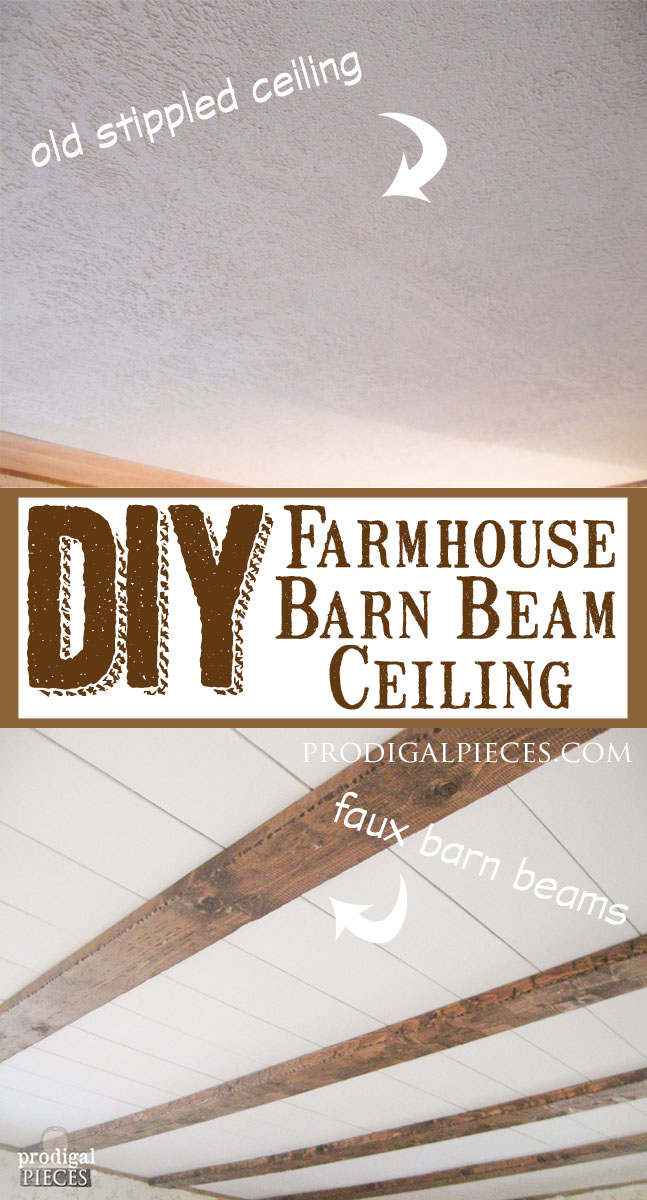
As a refresher, you can read the beginnings of our project with the floors, and then the ceiling in past posts.
GET PLANKS
Before having our little girl make her early arrival, we put the plank walls up, but they’re still needing finishing.

We had taken luan and had Home Depot cut it into 6″ strips for us (FREE!), and then nailed them up, spacing them using a scrap piece of luan.

See the wallpaper peeking out? So thankful I didn’t have to peel it off again. Once the planks were up, we just had to hit each nail haid with a bit of wood filler. After that, we sand and then sand some more.
Painting was pretty straightforward. I wanted a mix of white in creams in the room, so I just a lovely shade by Glidden called Swan Wing.

Since the planks had that space in between, I need a smaller brush to get in the gaps.

Doesn’t a room always look glamorous while in the works? I can’t tell you how cluttered and messy feeling my house was for waaay to long. That alone can unnerve you!

I love the soft white tones and can see how everything will be coming together…eep!!

What a transformation already! After we paint the walls, we add our baseboard. A nail gun is my best friend!
 Then it’s just a matter of giving our closet some much needed dressing up. In addition, adding our ceiling trim, and then our window treatments. Ooh…and I have blingy surprise too!
SHARE

More of the bedroom reveal coming next week, so be sure to sign up for my FREE newsletter. Until next time!

Also, check out these other parts of our farmhouse master bedroom finale remodel:
That wall looks gorgeous. Glad everyone is home safe and healthy, you’re able to concentrate on fun things like getting your room done! Can’t wait to see the rest!
Thank you, Jen! Yes, we’re all good and completing our bathroom hopefully this next week…whew! More to come on the bedroom next week. 😉
That is looking awesome!!
Thank you, Kim! It feels so good to be done, even though we’re now working in our bathroom…sigh…it’s always DIY time around here. 🙂
Looking good, hurry with the ending, can’t wait to see your finished” to dream in room”.
I really need to do this in my bathroom! That came out beautiful Larissa! Nice job!
YAY!! I love how clean and bright it all is. That will be so refreshing after living in a life of chaos for so long. It’s amazing the things we endure to make our homes functional and beautiful!
The walls look gorgeous, I’m sure you are so excited! Can’t wait to see more!
Thank you, Kim! We are excited too and the Part 2 is live if you want to stop by. 🙂
First I have to say Wow Wow Wow! Being pregnant can become very delicate sometimes along with harmones going crazy, I applaud you in taking that on!! The walls, ceiling and floor are beautiful!! Love the plank walls!! I am very anxious to see how you dress the room. The chandelier is fabulous so it really ignites the can’t wait to see senses. Happy Decorating!!
Thank you! Yes, we had a do or die choice as far as getting it done since tearing up the carpet and left with that residue. We just decided to go for it in hopes to have our new baby delivered at home like our others. Ah well, she came early and we love having her!
This is amazing! Can you please share which paneling you selected at Home Depot for the walls and ceiling? Are they the same or different?
Thank you!
Thank you for the compliment, Laura. Both were made by using luan cut in to different widths. Home Depot will even cut it for you to make transportation and installation easier. 😉
Can you stain the paneling? I’m going for a lodge look and white walls are not going to work
Yes, absolutely. I would do a test run on some though to see how it accepts the paint. It’s all about how you sand to keep the grain open.
Hi there! I LOVE THIS!! I’m curious now that some time has passed if you’ve had any warping or buckling with your panels? Also, I assume that you’re just nailing these at the top and bottom and maybe midway point? Does the absence of being on studs make it more likely to bubble up?
Thanks! No issues whatsoever. 😉 We nailed all along the edges and center in increments and then used wood filler to fill the nail heads, sanded, and paint. As for the studs, it depends on your ceiling surface. We have wood panels in our ceiling, so there is no issue.
Are you putting anything for the ceiling trim? I’m thinking of doing something like this for my mudroom/pantry but have an angled sealing and not sure what to put along the trim?
We just cut and reinstalled the trim that was there to fit between the beams. You can see it in our final reveal HERE.