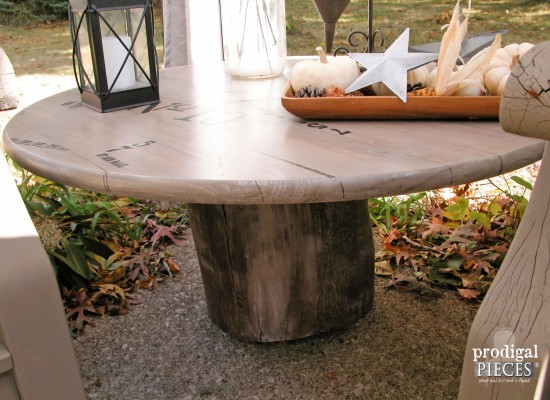
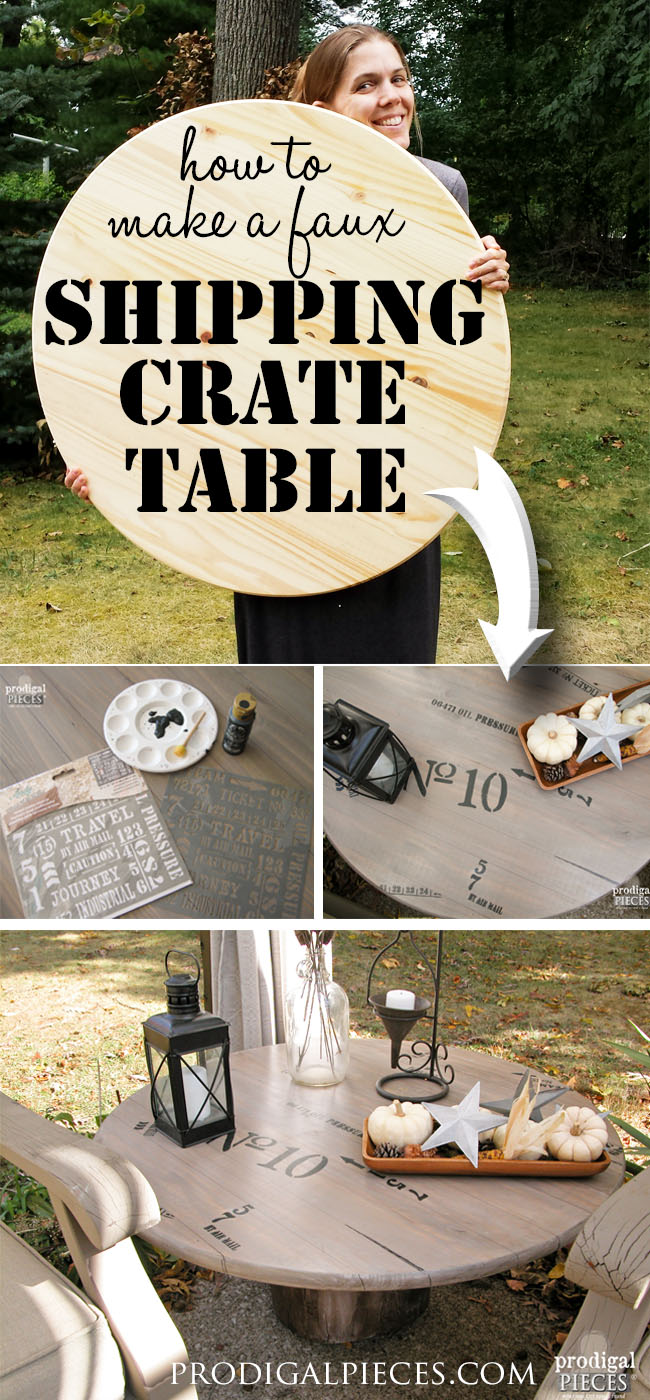
A couple of weeks ago we revealed our patio makeover complete with pergola, 10 ft. dining table with benches, a faux fireplace (get the tutorial HERE), and a faux shipping crate table. Today, I am sharing how to create that industrial style crate table with a wood round and a tree stump.
When working on our patio makeover, I needed to fill in the big gap that lay between the bench and chair. I wanted to create a piece that had character and also functioned for our family. I originally intended to just do a weathered look to the table, but after we started our patio, I found out I was a runner-up in the DecoArt paint finishes challenge for this dresser and won $250 of product. (wahoo!!) At the last minute, I decided what better way to put all my fun stuff to use than in a funkified table! Follow along as I take you through the steps to create your own faux shipping crate table for around $50.
TOOLS & MATERIALS:
- 36″ solid wood round
- 12″ diameter or larger tree stump that is approximately 2′ long.
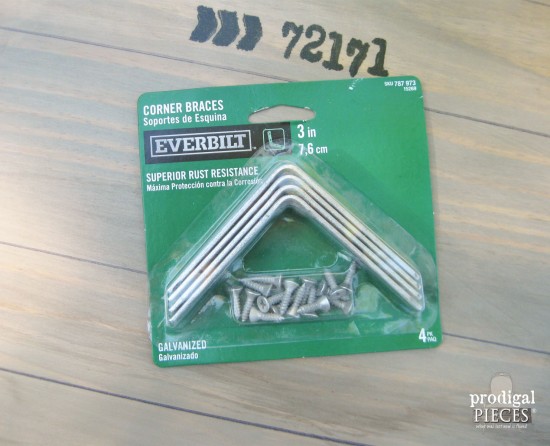
- 4 – 3″ corner braces
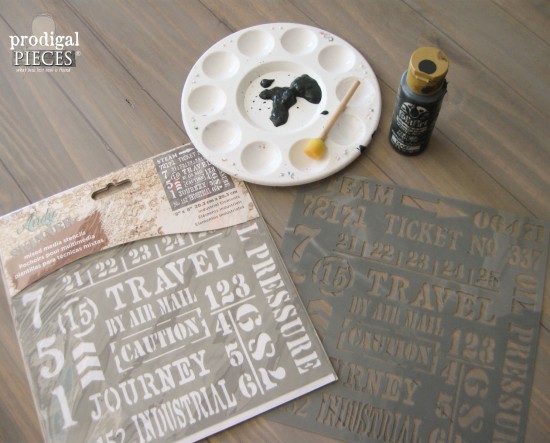
- DecoArt Andy Skinner Industrial Elements stencil
- DecoArt Americana Decor Olde World Numbers stencil (optional)
- ½” round foam brush or small stencil brush
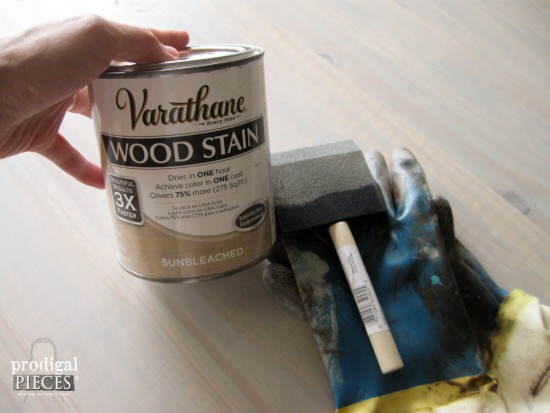
- Varathane Sunbleached stain
- Varathane Early American stain
- 2 – 3″ foam brushes
- paint tray
- old cotton rags (or t-shirt)
- DecoArt Wrought Iron Black paint
- charcoal glazing (or homemade glazing – see below)
- flat white paint for whitewash (see below)
- Polycrylic (or other preferred topcoat)
- high-density foam roller and tray
- neoprene chemical-resistant gloves
- medium black Sharpie marker
- planer (optional for the tree stump)
- safety goggles
- drill
- sander
- 150 grit sandpaper
- level
- 4 – 1″ or larger swivel casters (optional)
As you can see, those wood rounds you can find at home improvement stores are in the raw and perfect for creating some fun furniture. This shipping crate table is perfect for indoors or out, so don’t limit yourself to location or design.
DIY TIME
To get started, lightly sand down your surface with your orbital sander and 150 grit sanding disk. This will help open up the grain and get rid of any unwanted burrs.
Next, using your 3″ foam brush, give one surface an even coat of the Varathane Sunbleached stain and let dry. We used this stain in our master bedroom makeover and it’s one of my favorites!
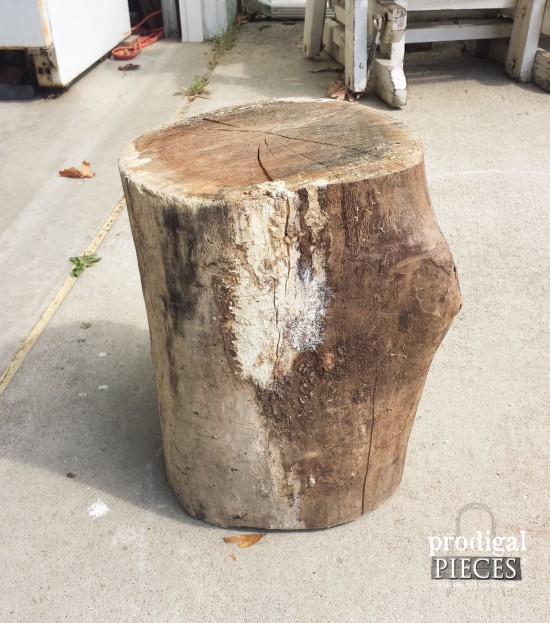
Once dry, flip over and stain the other side. During those drying times, let’s work on our tree stump. I seriously just grabbed a chunk of wood from our wood pile that was about 2′ long and had about a 12″ diameter.
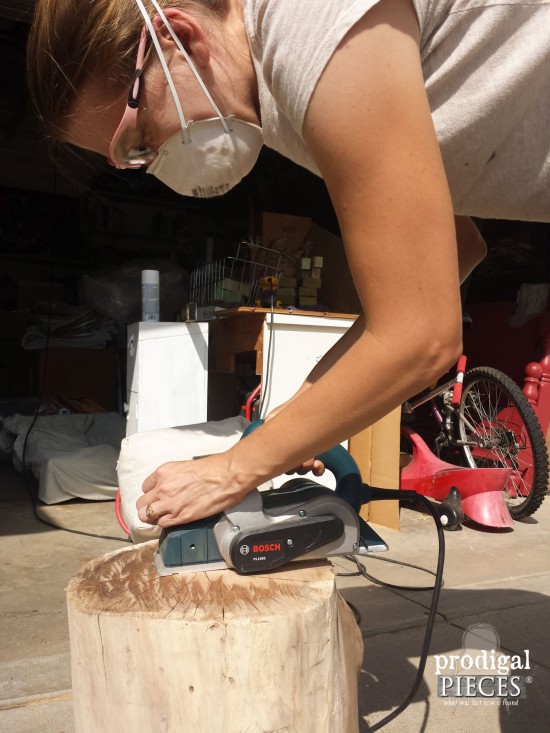
My stump was in need of cleaning up, so I got out my planer and gave it a few passes to make it level.
After that, you will want to sand down the sides just enough to get rid of the weathered and dirty exterior, but leave some of the character marks for fun.
NEXT STEPS
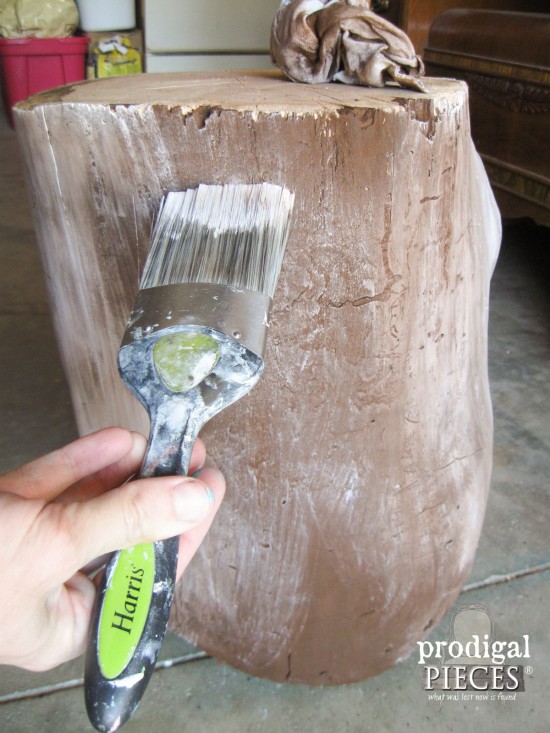
For my table, I wanted to create age and since sanding makes the wood look new, I wanted to make it look old again. So, in order to replicate that you will need to stain the stump with your Early American stain. Let dry. Next, you’re going to whitewash the stump. With a little bit of flat white paint that’s been slightly watered down (or use cheap ceiling paint), brush the stump in small patches in vertical strokes, then quickly wipe off to create a washed effect.
See how it allows the nooks and crannies to pop out creating a fun texture? Once your whitewash has dried for about a half-hour, go ahead and give your stump a good coat of polycrylic to keep it weather-proof.
Now, back to our wood round for our shipping crate table. After the stain has cured for about 2 hours, you’re going to give the top a wash using a charcoal glazing. (I make mine with a bit of charcoal colored paint mixed with a little water – about 1 cup paint with 2 T. water) You can see how I made my garage door glazing in this post.
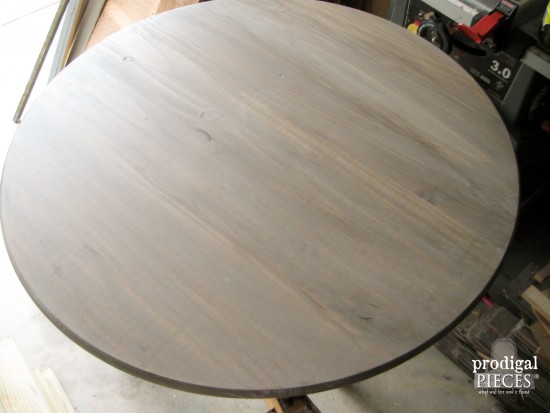
Again, working in small batches, apply the glazing across the round following the direction of the grain. Quickly wipe off the glazing leaving some behind to catch the grain. This will make the top have some depth.
Here is the round after glazing…
PAINT TIME
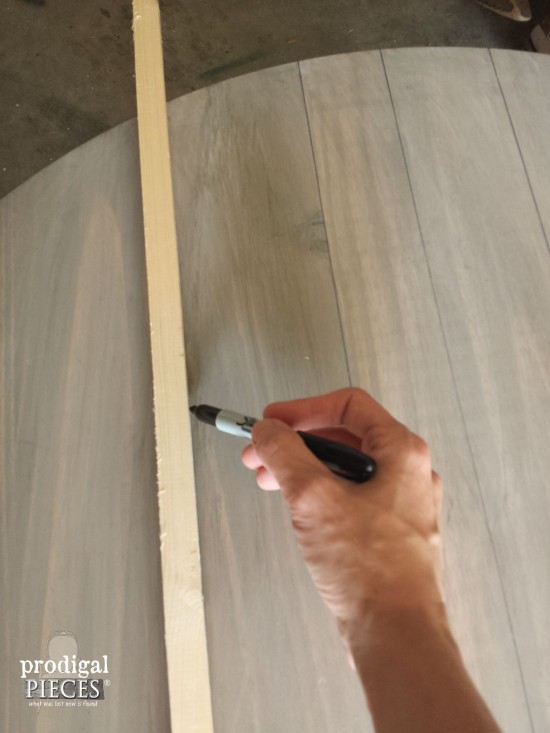
Now for the fun part! Grab your sharpie marker and a strip of wood or yardstick. You’re going to draw your shipping crate marks by making randomly space lines across the round.
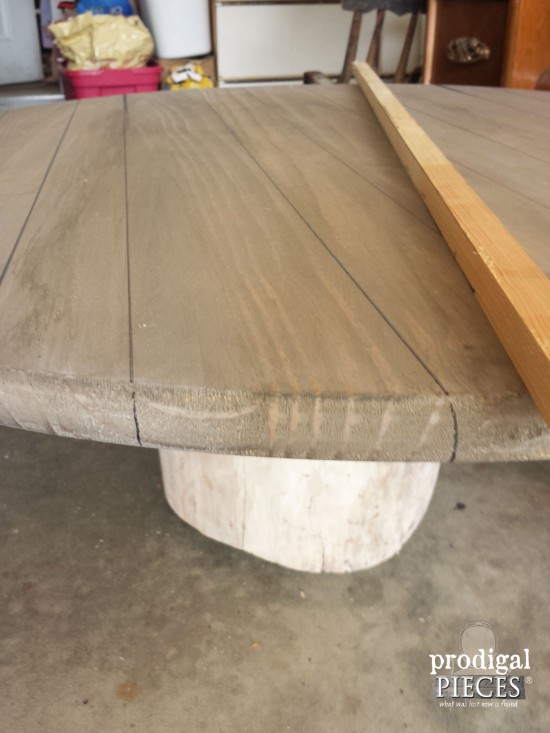
Make sure to continue your strips over the edge of the round.
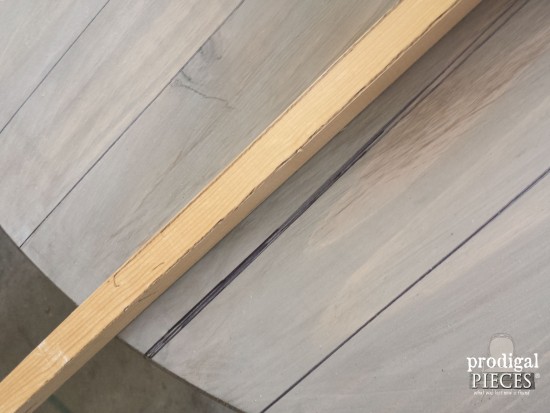
To create some texture, make a few wedged drawings at the end of your strips to create the look of gaps and spaces in your “boards”.
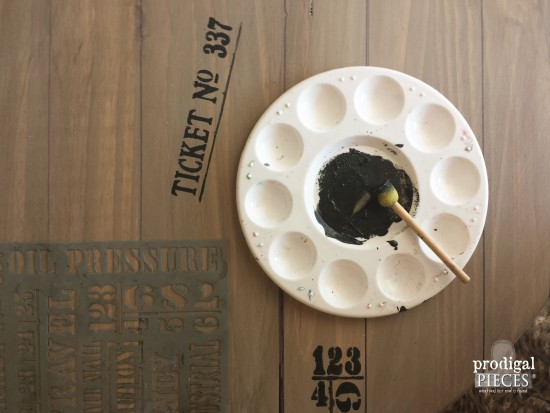
Now you will need your stenciling materials: pouncer, stencils, tray, and iron paint.
STENCILING
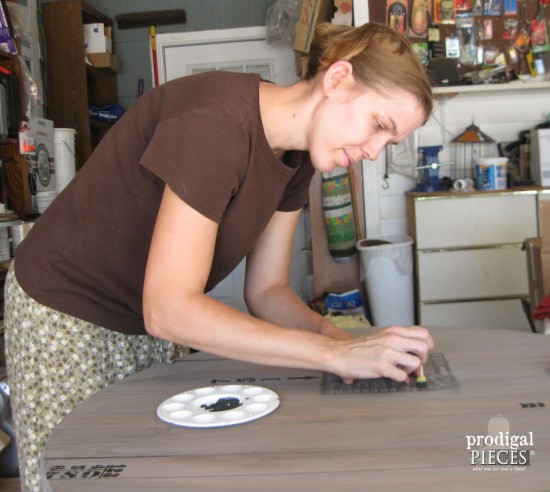
Start to apply your stenciling by pouncing the round foam brush into the paint then dabbing off a bit to create an even coat on your brush. Less is more when you’re stenciling so that it doesn’t bleed. Make sure to wipe down your stencil with a damp cloth between each application to prevent unwanted transfer of paint. I find it hand to have a bucket of water nearby so I can wipe it off easily.
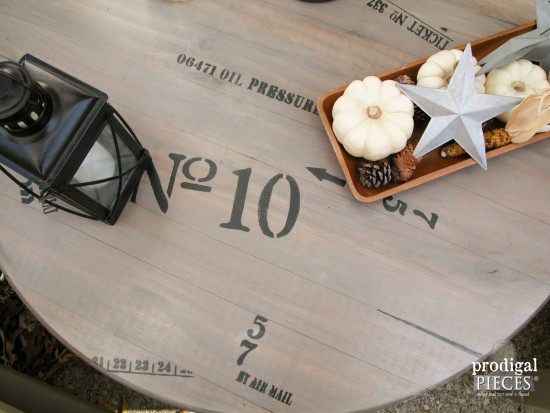
I encourage your to mix up the stenciling a bit. Use one set of numbers with different text. Feel free to change it up and have fun with it. Twist the stencil, run it into a line to look like a piece was cut off…just experiement and make it funky.
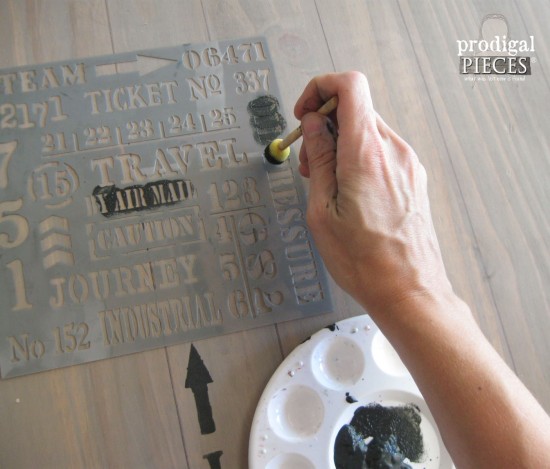
I even used my Olde World Numbers Stencil to create more dimension.
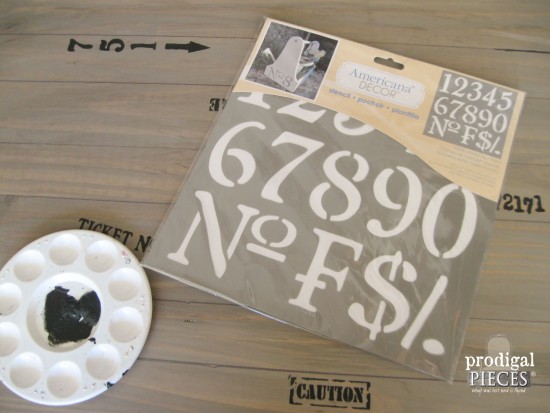
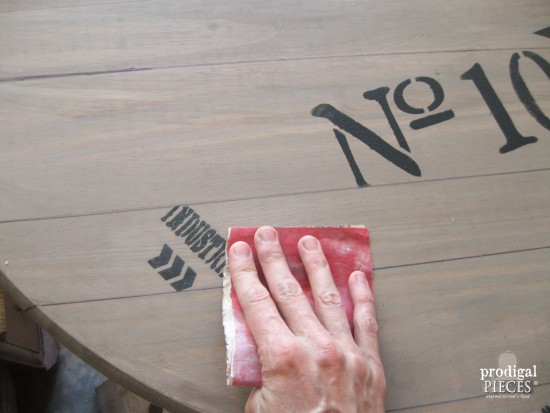
Once you’ve allowed your stenciling to dry, give the text a light distressing to create a time-worn effect.
Then, it’s time to add your polycrylic topcoat. Use your high-density roller and apply an even coat. I like to run a dry 3″ foam brush in one direction after the roller is done to get rid of unwanted bubbles and create a desirable finish, like I mention in my furniture essentials post.
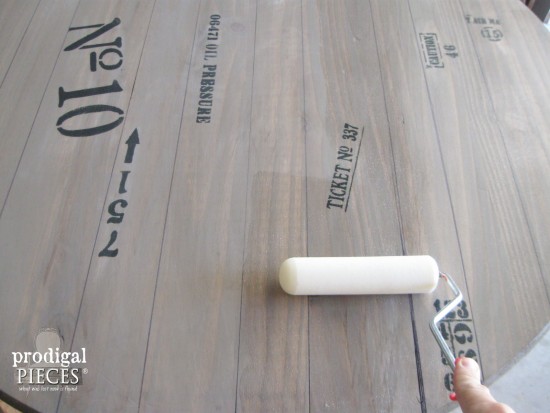
For added protection, let the coat cure for a two hours, then lightly sand with your 150 grit sandpaper and add a second coat. This will give long-lasting protection.
LAST STEPS
After the second coat has cured for another two hours, it’s time to attach the stump to the top. For my table, I added 1″ swivel casters to keep the stump off the ground because we have a downspout that runs onto our patio, and I didn’t want the stump to rot out. You can add your casters to the bottom or leave them off – it’s completely up to you.
To attach the round to the top., you will need your 3″ corner braces, a level, and drill.
Since a stump is round and random, just begin by attaching one of the braces with one screw, making sure it’s as level as possible to the surface of the stump as well as vertically. Attaching only one screw initially allows you to make adjustments.
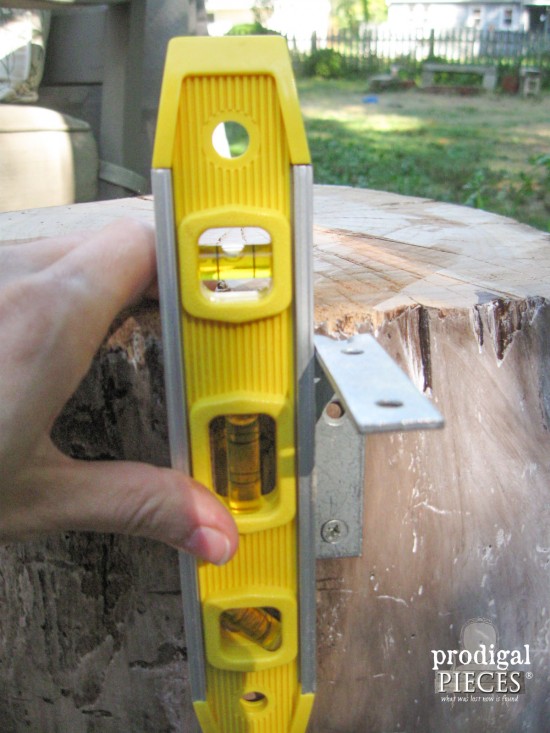
Once you find the level spot, attach the other screw through the brace. Continue to work around the stump until you get this pattern.
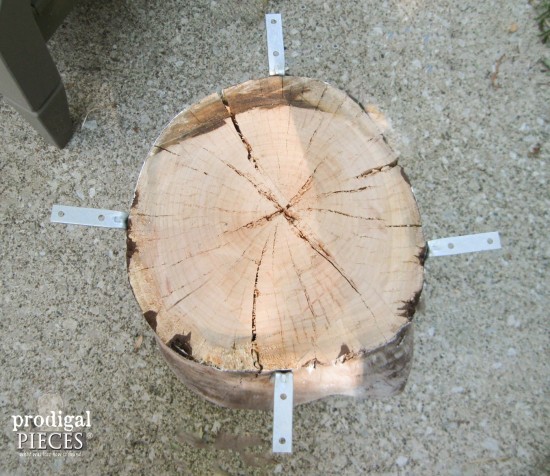
Now place your round on your stump and check for level. The nice part is you can bend those braces by tapping with a hammer to get the table level. When you’ve got it where you want it, attach the top to the braces. (a helper will come in hand to keep the table from shifting while you’re drilling in the screws)
THE REVEAL
And…now you’re done!
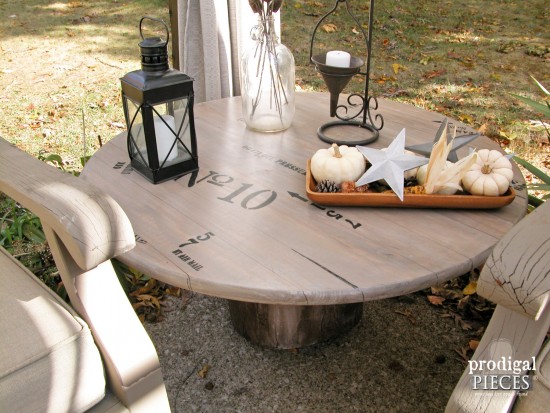
You’ve got an awesome new piece of furniture that looks as if it’s been created with loads of work by putting together shipping crate pieces. It’s full of character and will be an awesome conversation piece in any decor. Since these wood rounds are available in numerous diameters, you could even create a small stand or table too. Fun!
Don’t have a tree stump to use? Then add any style of table leg, like hairpin legs, or spindles…be creative and make it suit your style.
I hope you’ve enjoyed this tutorial and I’m so excited about the versatility of the industrial stencil, I’m going to give one to one of you! To enter this sweet giveaway just leave me a comment telling me what other kind of project you would do with this stencil. Want an extra entry? Pin this project and tell me you did so in a separate comment.(it’s on the honor system here – the idea is to empower others to create their own budget-friendly decor). Winner will be announced on Thursday when it’s Themed Furniture Makeover Day.
Pin and share! ♥
To get these DIY tips & tricks in your inbox, be sure to sign up for my newsletter. PLUS, you will get your FREE Furniture Buying Checklist and special discount to my shop. Until next time!



Love this. This stencil would look great on a crate style end table or a large tote bag.
Thank you, Joan. 🙂 Yes, you could use it on most anything and with Christmas coming it would be fun to use in gifts.
Pinned,
Love your stuff as always !! Of course I pinned it 🙂
You are too sweet, Jan – thank you!
This is the stencil I would use to renew my wooden perpetual calendar…it’s over 30 years old & needs a face lift!! Love your work Larissa! ?
Thank you so much, Lynn! That sounds like a fun project.
Liked,Loved & Pinned!! ?
I love your table. I think the stencils would look great on an old trunk. I have one in my sewing room , that belonged to my Dad is college and I use it to store fabric. I painted it white years ago , maybe time for a cute makeover! I am definitely pinning this idea!
Thanks!
oh my YES! Or a new trunk made to look old too. Great idea!
I would use this stencil to create some wall art! I have an adult daughter that would love this for Christmas! 🙂
Yay!! So many possibilites for this. 😉
I would love to win the Deco art Andy Skinner Industrial Elements stencil! As soon as I saw your project I had an idea. I saw the words travel, ticket, & journey and now I want to use that on an antique suitcase. Fun!
I pinned your shipping crate tutorial as well as your crate post. Thanks for the inspiration!
Thank you!
I think this stencil would be great to use on a horizontal coat rack with industrial style hooks
I like it! That would be so fun and a conversation piece, Terie.
I’d love to use the stencils on other old wooden storage containers, to have IN the house.
I’ve thought the same. It would be rustic and functional. Great idea!
Love the table. I would use the stencils on a new bar top that is being replaced.
Saweet! Hope you win!
Having 7 sons and 1 daughter, I’m always looking for decorating ideas for the boys’ bedrooms. Industrial would be so fun for my older son! I would use these to redo a chest of drawers for him. Or make an animal safari room for my nature son and use your idea with the stump and small round for a nightstand and his dresser would be a shipping crate for some wild beast! Thanks for the ideas!
I hear ya. Never enough time to do everything I’d like to. 😉 Sounds like a wonderful room!
Also pinned your great idea!
Thanks!
So loved this it will make a wonderful addition to our patio along with alot of other ideas you are sharing with us!…Thanks so much and I made sure to PIN it on Pinterest to share with others!
Awesome, Brenda! I’d love to see what you do with it.
I immediately saw a rustic laundry room countertop. Oh my, that would be an awesome place to fold clothes.
Ooh…I like how you think! Fun!
A really cool and funky piece, love that you were able to make it look like a whole bunch of different pieces put together. . Thanks for the great tutorial. I had a stump and last year got tired of it and threw it in the fireplace…. time to look for a new one. 😀
Isn’t that how it always goes? Once you get rid of it, you find a project. 😉 Thanks for stopping by!
I would use this industrial stencil to make beachy (journey, travel, etc.) table runners and placemats. They would look great in blue on sailcloth or drop cloths.
Yes, a travel piece would be great and you can use it on most anything. 😀
Love this… Pinned to my Pinterest … May add destinations like Paris, England to it also
I love the idea of destinations. Thought about it for mine, but ran out of time.
Pinned
Great project! Of course I pinned this onto my board “Furniture Fix”, thank you!
Thanks!
I would love to use the stencil set on my industrial foot stool/step ladder. Plus many other places! Thank you!
That would be sweet!
Your crate table turned out looking amazing! I would make a shadow box frame with old wood and use the stencil on the background. It would be great to keep ticket stubs or special little mementos from your travels in.
Thank you, Paula! That’s a fantastic idea. 🙂
That would make a cool coffee table or to decorate a mailbox.
So many possibilities, isn’t there? Fun!
I pinned it to my DIY page, to great not to share.
I love the crate table, I have to make one or two.
Go for it and show me when you do!
I would use it to make some awesome wrapping paper — for Christmas and birthdays!! I would also like to use it on a piece of furniture in my family room as I have a travel/antique camera collection themed room.
ooohhh…I like that! We make our own wrapping paper every year. Can’t stand the store-bought stuff!
I would use these stencils to add detail to any room in the house. They would also be good to use on glass jars. Or how about a box to store shoes by the back door?
Excellent ideas, Maria! You can use this stencil just about anywhere and people will think it’s a high-end item. tee hee.
LOVE this idea! My girls are both painting their new bedrooms (they hate the color that was chosen throughout the entire house), and they would love these stencils to use on their walls. So many ideas from simple stencils!
My kinda girls! 😀
Love the table! A rustic sign would be awesome using this stencil.
Thanks, Cindy! Yes, that might be coming out of my stash soon. 😉
Pinned! ❤️
Needing to replace my mailbox (thank you Michigan snow plows) and our house number is long. so I would be using it to create a shipping crate look on the side of the mailbox. Love the table!
I hear ya… do you think they aim for them? 😉 That’s a wonderful idea and thanks for the love!
Pinned❤️
I would use the stencil on my pantry cupboard that I recently stained with my homemade vinegar steel pad blend, it would make it uniquely SPECIAL!!! I would also use the stencils on a wall hat rack to give it a unique flair!
I will use the stencil on two end tables I have in the works.
Ooh…I’d love to see what you do!
PINNED!!
I have an old HOOSIER TYPE KITCHEN CABINET that I am dying to re-do. I would use these stencils to make it look like it was made out of old shipping crate pieces! LOVE IT!!
That sounds like a wonderful project! I would love to see what you do with it. 😉
I’ve pinned your lovely table, Larissa! I want to do this to my square pedestal table in the kitchen–the pedestal base is a gift from my previous neighbor married to a top that is a Freecycle find that needs some lovin’! The stencils would look great on my table!
(Thank you for offering to copy and paste for me. It seems after a few more tweaks and some time away from the computer, everything is working “almost properly” again.
Yay!! It worked! I think your table will be the talk of the town with all it’s stories. How fun!
It’s absolutely PERFECT!!! You’ve inspired me. I’ve been wanting to build a desk for my son and this stencil would complete the look ?
Thank you, Debbie. 🙂 Sounds like you’re ready to get your DIY on!
Pinning and sharing!!!
It would look great on a storage chest! Pinned it
Absolutely! I have my wheels turning on ideas…so fun!
I would use this stencil on an old tool box that I’ve chalk painted. I love the shipping crate table!
Thank you, Lori! Gotta love those old tool boxes…so many uses for them.
I made a wooden airplane for my daughter when she was a toddler. It was pretty in purple and pink. She now has a son and the colors need to be changed. Stenciling it in blues and browns would be oh so much fun.
Sounds like a change-up is needed. 😉 I’m sure he will love it.
Definitely pinned it. I have an old crib I found. I have been planing on making it into a bar type table. I think the stencil would give interest to the pallet wood table top that I plan to install.
You go girl! That sounds like a sweet project. 🙂
You, my dear just gave me a HUGE lightbulb moment and saved me hours of work! I have a project churning around in my head and thought I figured out exactly how I’m going to build it…until I saw this. Woot woot!
I love your crate table, especially with the tree stump post!
That’s the best, Marie!! I can’t wait to see what you do.
As usual, Loooove it! I pinned on Pinterest.
I would make it into a large wall clock, and donate it to one of our single moms at church, that is striving to become a Proberbs 31 woman and pursuing God for His guidance in making her home a haven for her two little ones. I love making projects for her and with her, as I take the opportunity to sit with them and teach them the Word of God.
The stencil…well the ideas are endless! But I would use them for my husbands very industrial “he shed” that he’s planning to build for himself in the new year.
Thanks Larissa for always sharing your ideas and creations.
Thanks for the giveaway!
Blessings,
Yolanda
You got it…endless! You are a lady with a wonderful heart, Yolanda. Bless you!
Tk you so much. I have pinned it also. This time it is allowing me to post. We went from a 2 story 2300 sq ft house to a ranch 1400 sq ft. Due to a bad back surg. I am using all the special pieces I could keep but changing the look of them. Some I have painted. Tables I would like to stencil like this shipping crate style. Everyone loves the paint I used on old kitchen cabinets but u inspire me and I want to try it all Thank u so much. So enjoy following you.
Thank you for the love, Joyce. 🙂 Sounds like you have a plan!
That’s pretty much brilliant! I love how it turned out! I have a 36″ round that I’ll be turning into something… soon. At least that’ s my hope. 😉
My husband was cutting a load of wood and chopping trees. He brought home a heart shaped log. Was thinking about stenciling our initials and wedding date. This got me thinking abput turning it into a table top.
That would be AWESOME! How sweet is that? I love those random piece of wood…so fun to work with. 🙂
i would use them on canvas fabric and re cover a chair or two!
That’s a great idea!
pinned it!
Thanks!