Today I’m excited to be able to show you a project that has been brewing in my mind for about 2 years, until this month’s themed makeover assignment was “chairs”. It’s safe to say that to get something done for myself is never at the forefront of my agenda, but this time I FINALLY got a piece of furniture done for me!! This is my first makeover for myself since my free TV armoire 3 years ago, which brings me to a total of 2 pieces for us. Enter in this vintage channel back chair.
DIY TIME
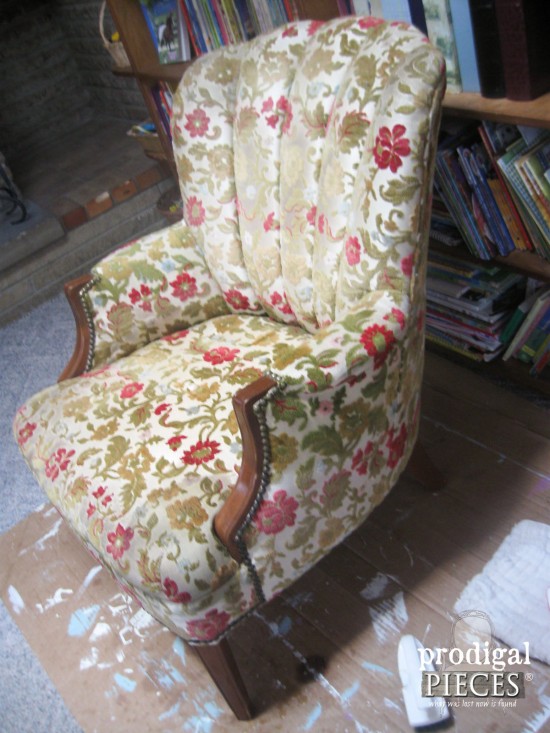
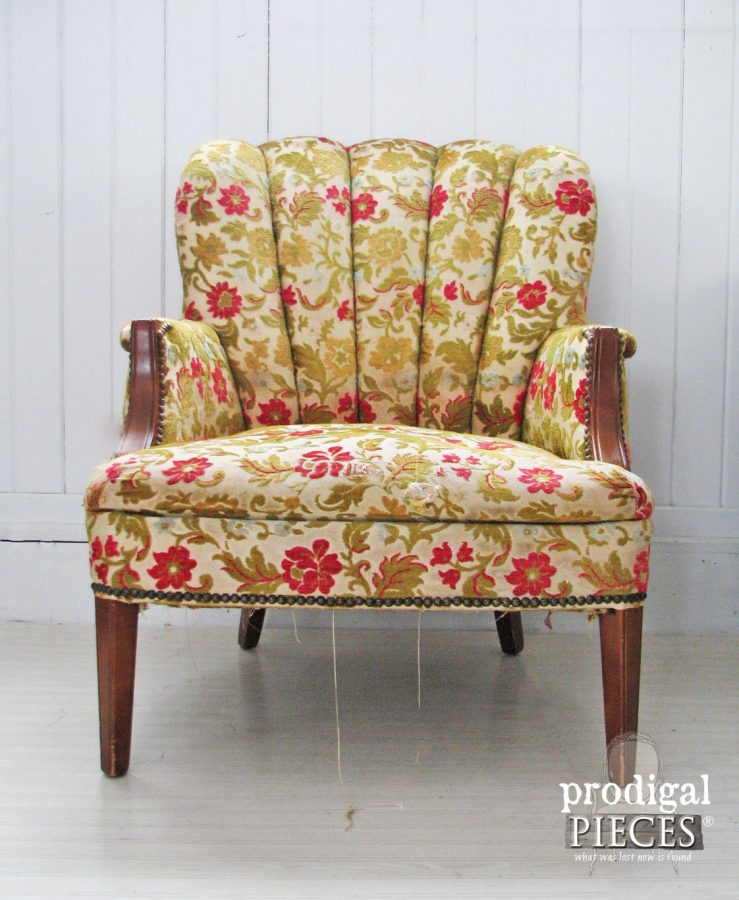
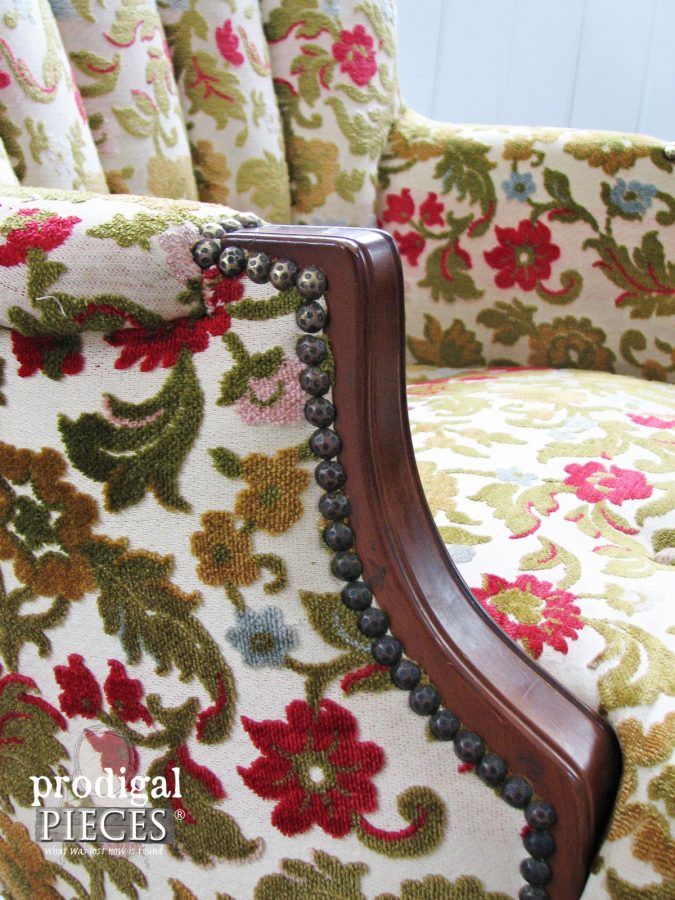
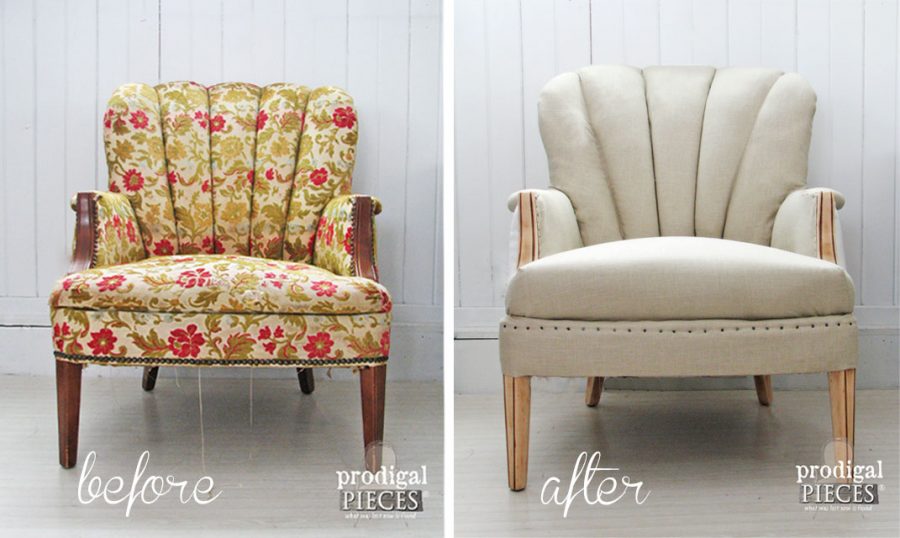
I picked up this sweet piece at a garage sale for $3…eeep!! It wasn’t something I had planned to tackle at first because I loved that original fabric. I even tried to clean it – mistake. It made the color bleed and it looked even worse. After that, I stuck it in the corner of our bedroom and used it quite frequently.
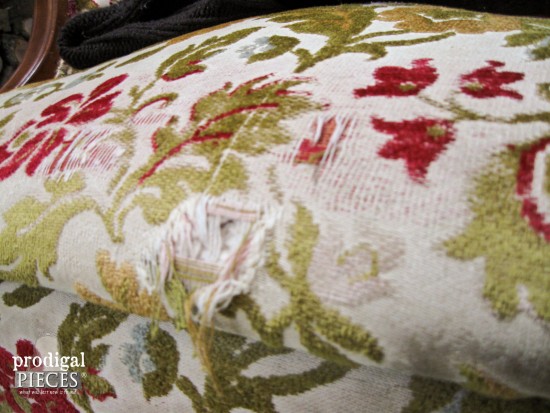
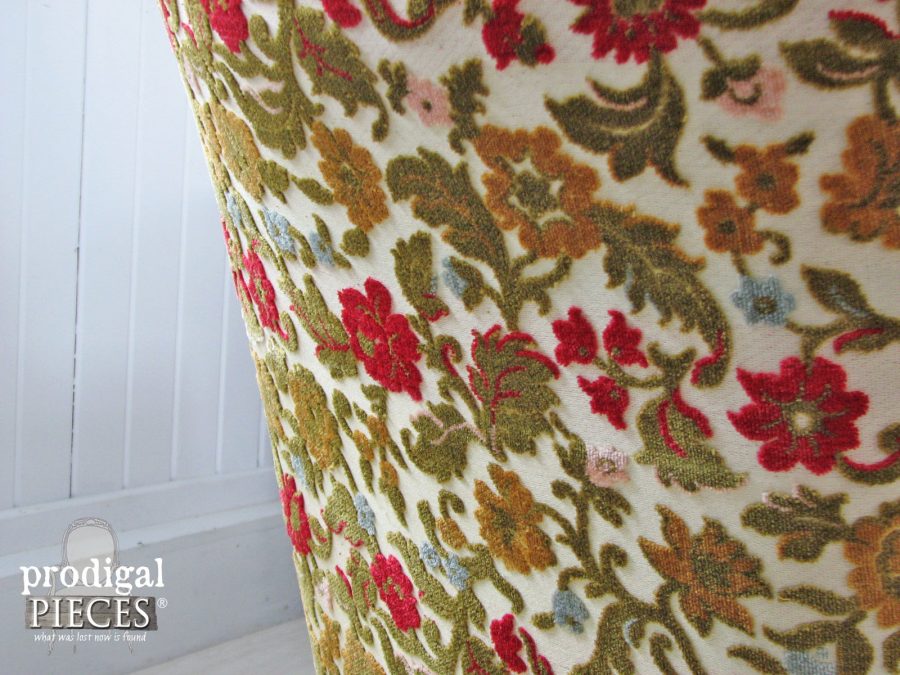
That gorgeous chenille fabric was so utterly dirty and had been worn with love all over. See those holes in the seat up above? The seat was originally tufted and missing several buttons, and my kids and cat also had a hayday with this chair.
The back panel was the only part in decent shape. My kids loved to crawl behind it and rub the raised surface of the fabric because it was so soft.
I told my husband that this winter when the snow was flying outside, my little ol’ self was staying inside to work and planning to tackle two chairs. One of them was this one, a channel back chair.
UPHOLSTERY
Mind you, I have no formal instruction on upholstery, but somehow it just makes sense to me. I’ve told the story before of my great-uncle, a renowned upholsterer, who was requested at times to be flown to different cities to do custom work. My grandfather would help him, and I wish I could have picked their brains on tips & tricks, or better yet, watch them work. That’s where I claim I got my passion for it. I mean, who else would make their hands look like they got in a cat fight for a piece of furniture? tsk.
My inspiration for this chair came from my love of deconstructed chairs, particularly the ones I found on Pinterest. Hmmm…what do I mean by deconstructed? Well, just that…a chair that’s pretty much down to bare bones, looking well-loved, rustic, and oh so full of character. My pinterest board has oodles of examples for you. Take a look so you see what I was after.
NEXT STEPS
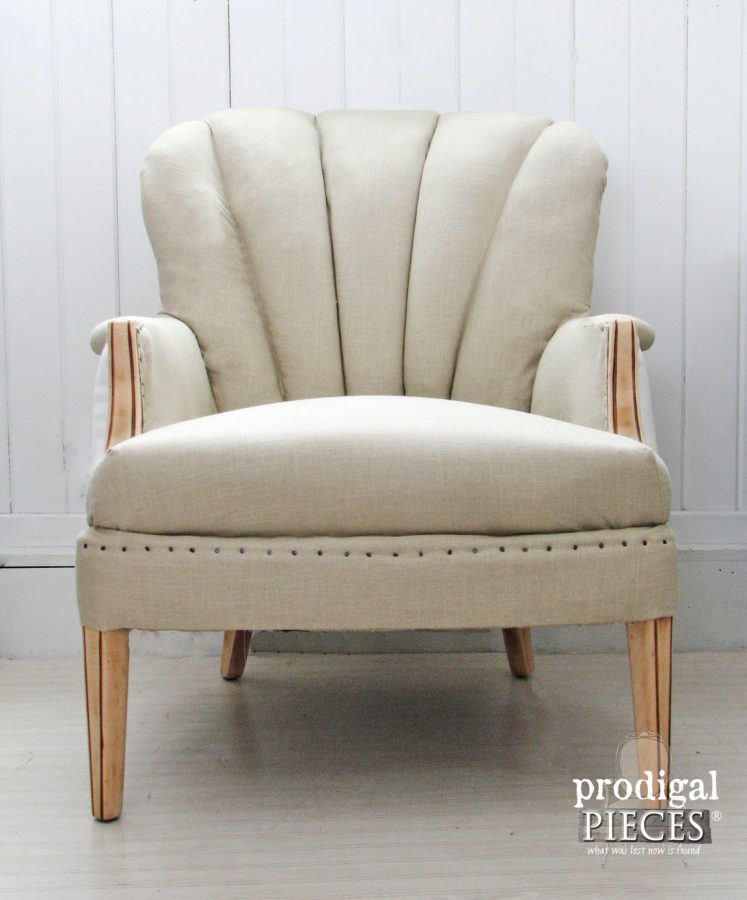
When I purchased my yardage, I had every intention of selling this chair in my shop and doing a white linen front with beige back to create a light, airy feel. However, I just couldn’t get myself to do the white on front because nobody who owned children or pets would purchase something like that. I switched it up and went with beige on front.
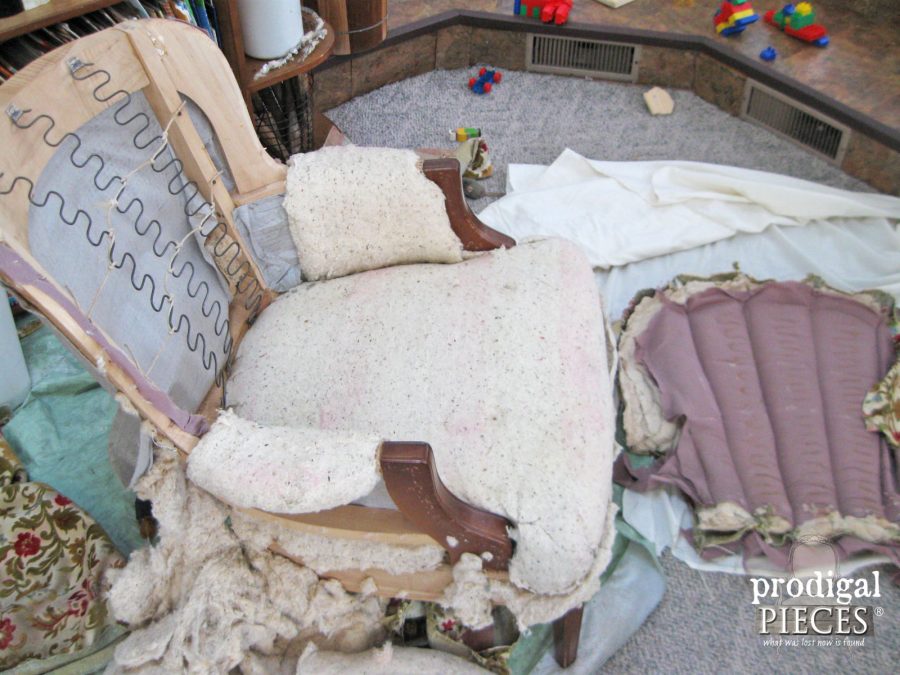
Off goes the old and on with the new! This is reality…big mess. Toys everywhere, tools and batting strew here and there. That’s all part of the fun!
It wasn’t until halfway through that I reasoned with myself that I just couldn’t sell this chair I had come to love. It’s so comfortable and the lines just draw me in. That’s when I got a little more relaxed and started to enjoy myself. By the way, did I tell you I had to have this project done in two days in order to meet this month’s themed makeover deadline…whew!!
THE REVEAL
I can’t tell you the number of times I made mistakes that were easily reversed. sigh. I am living up to my mantra, “Haste makes waste”. However, I’m so stinkin’ excited that I can keep this chair.
It’s original place is in the corner of our bedroom, so that’s where I put it, but my intention is to have it in our family room once it’s done. I’ve already told the cat I will wipe out 8 of her 9 lives if she touches it.
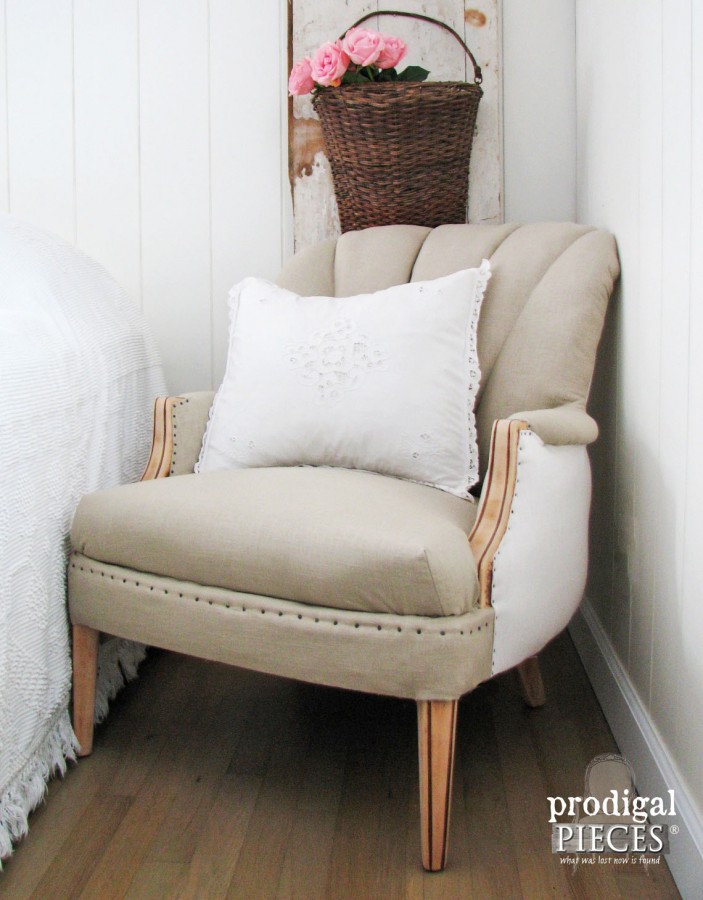
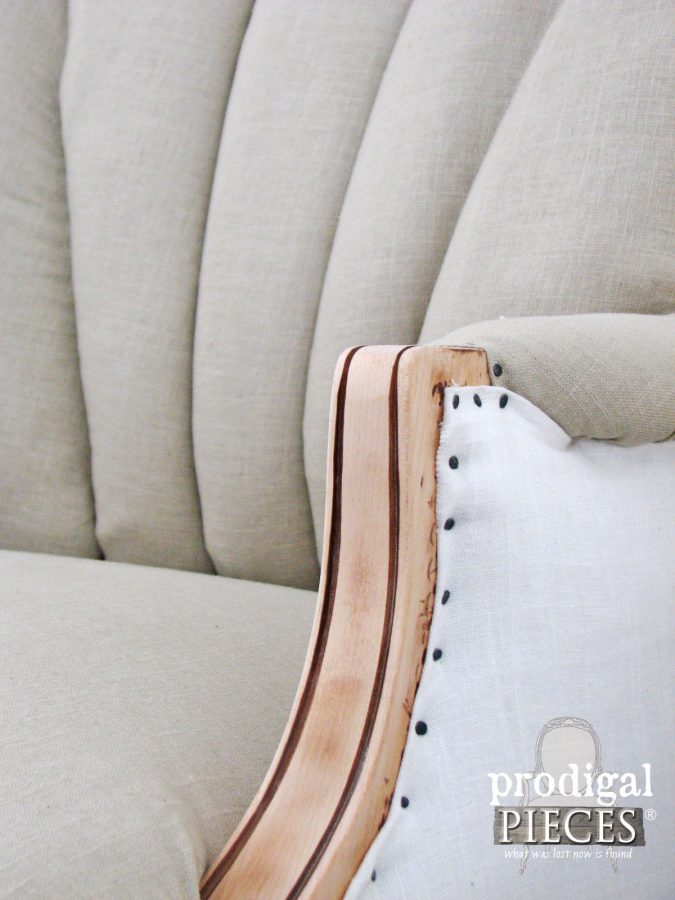
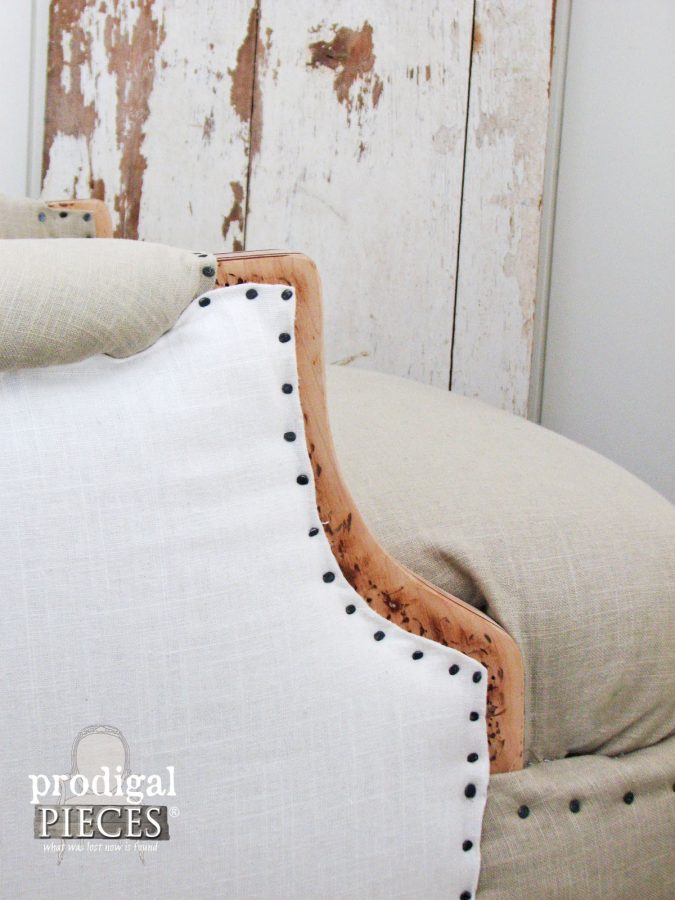
The legs and arms are fresh, but I’ve left them with all their quirky marks and a hint of stain. I like the aged look and it adds character, as well as tells a story.
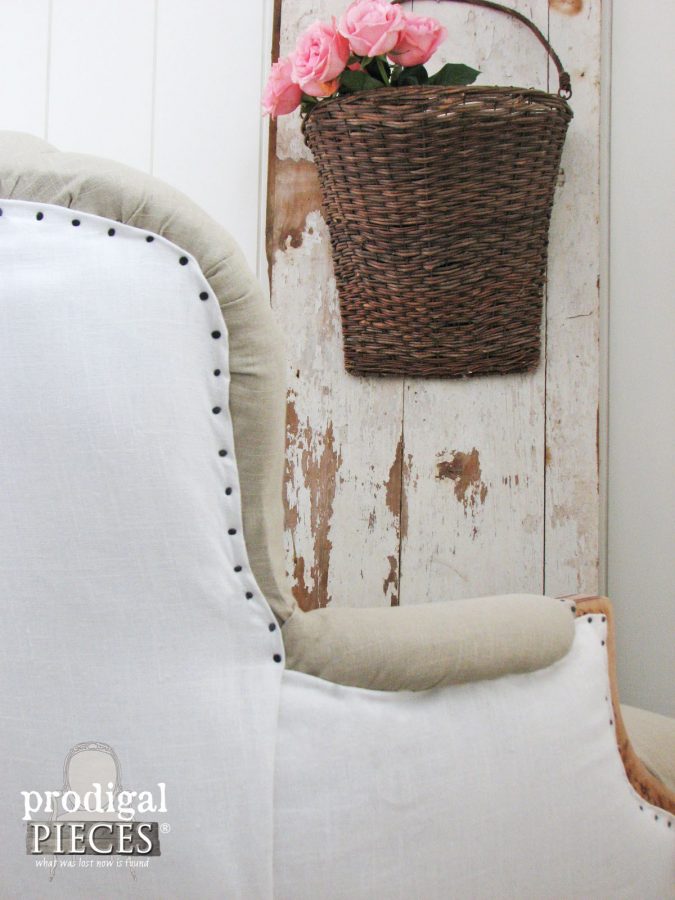
The white back really adds dimension and gives that eclectic feel as well. The upholstery tack trim was a must in my book because I didn’t want too clean of chair. Most deconstructed styles leave ragged edges and as much as I would have liked to do that, I wouldn’t want to tempt my kids (or my cat) with unraveling.
UNBELIEVEABLE
Can you believe the difference?? Just look at the seat height. If you sat into this channel back chair, you would have a near heart-attack because it sunk. I would warn my guests to be careful when sitting in it for fear they would freak out.
With new padding, batting, and the complete works, it is now the most comfortable chair in my house.
I adore my channel back chair and can now say I’ve reupholstered something for myself and my family. For those of you that loved that original fabric as much as I did, never fear! I’ve saved the salvageable remnants for another project for me – I couldn’t throw it away! I’ll give you a hint…I love to sew. {wink,wink}
MORE FUN
This was a fun themed makeover, and if you’d like to see the past month’s posts, just click below.
To get these DIY tips & tricks in your inbox, be sure to sign up for my newsletter. PLUS, you will get your FREE Furniture Buying Checklist and special discount to my shop. Until next time!
Before you head out, I would love for you to enjoy more chair eye-candy from my friends also participating in the themed makeover.


I am amazed at your skill! You did an incredible job on this piece and I’m so glad that you are keeping it for your own home instead of selling it.
Thank you, Paula! It was quite a chore because of my lack of time, but I am very pleased with how it came out. 😉
I’m a follower from IG and had to come take a look. I have a very similar chair I’ve been wanting to redo but I’ve never upholstered anything so I’m scared 🙁 especially with the grooves in the back. Do you have any videos with a general step by step or could you point me to something to watch. I’m a visual learner so maybe watching how to would scare me less 😉 This looks beautiful so I’m inspired to do something similar with my cat attacked chair I got from a friend. It’s got such good bones I won’t let my husband make me part with it!! Thank you, fun to Ollie you for inspiration!!
It can be daunting, but tearing apart is how you learn it’s put together. I’m very visual as well and found when I was learning to take pictures during disassembly and make notes to refer back to when putting on new upholstery. One book I love (and have yet to fully read) is Spruce Step by Step Guide to Upholstery and Design. I’ve added the link above. 😉
Thank you!!!
How did you get the rolls in the back of the chair, are the sewed or just tucked in Love the chair! Great job!
Thank you, Ellie. If you look at the photo where it’s torn apart, you can see the back laying on the floor. It is sewn in compartments then stuffed. I need more practice on getting it even. 😉
It turned out wonderful and I’m glad yu’re keeping it for yourself
My grandfather was a furniture upholsterer too. I have a pair of his cutting shears. What a treasure to me..
That is aweswome you have such a treasure. I just have stories that I love to hear over and over.
You have my respect for tackling this project! I started a similar reupholstery project and never finished it because it was taking forever to get all the old nails out. Any tips for a novice? Maybe just lots of patience? This one turned out great!
That’s why I pondered over it, Angie. After doing my earlier chairs, I knew the channel back would be a challenge. I couldn’t believe how ridiculous my mistakes were – all because of rushing. At least it’s done!
You are so talented! Love your vision and the results of your hard work! I wish it was in my house! Love it!
Debbie
Thank you, Debbie! Now I just have to redo my tufted couch and chair. 😉
Oh my gosh, you should be so proud of this! I’m so impressed!! It looks amazing and you deserve to keep it for yourself 🙂
Thank you, Bre. You girls have no idea how much this means, because my hubby was just like,”That’s nice.” (in a heart-felt way – he’s not a man of many words). I’m so excited to keep it.
Girl…..this is AMAZING! I loved the before fabric, but what you did with this chair is breathtaking! I’m happy you’re keeping this beauty!
Aww…you made me blush! Yes, I would have loved to save the fabric, but holes everywhere from lost tufted seat buttons, etc, just made it impossible. I can’t believe I’m keeping it, but giddy to be doing so.
Fantastic job – I love it.
Wow, I am impressed! I have not tackled upholstery like that yet!! Not sure I will! 😉 You did a fabulous job. Very pretty!!
Nancy
Larissa this is absolutely beautiful! I love that you have no fear when it comes to projects of this magnitude, very well done!! XO
Kudos to you for having the courage to reupholster this chair. I’ve got one sitting in my living room that I’ve been afraid to tackle but desperately needs a makeover. You did a fabulous job! Good for you for FINALLY doing a piece for yourself. $3.00 – wowsers!
Larissa,
You have done a wonderful job on the chair. Love the way it looks….glad you are keeping “her”….Do you have a name for “her” yet??
Hmmm…not as of yet. Any suggestions?? I’ve named my dressform Vivian, so maybe something sisterly to that…
I am so jealous of your talent! That is amazing!
Greeat Job!
Hugs,
Karin
You are too kind, Karin. Your talents are irreplaceable and I thoroughly enjoy your art work. 😉
Incredible! Absolutely incredible, Larissa. You simply amaze me. This is one makeover that will go down in the history books. Pinned so all of my friends can see your amazing talent.
Blushing, Meegan!! Thank you for making my day (and for pinning!)
Your chair looks amazing! I’m sitting here staring at a half finished mid-century modern chair that has about 1/10th of the upholstery work as that one. And I just can’t finish the stupid thing (that I’m sure I will love once it gets done). You’re pushing me to actually finish it though!
You’re too funny Pam! I’d love to see your completed project when it’s done. I’ve got a tufted couch and chair set that I plan to redo when our living room is done, and I lost count at how many buttons I will need to replace. My hands already ache just thinking about it.
Wowsa..wow, wow! LOVE! Like you I’m smitten for deconstructed furniture. You outdid yourself friend! It’s stunning. Glad you’re keeping it for yourself, it’s good to keep the spoils for yourself sometimes:)
Thank you, sweetie! Yes, I rarely allow myself treasures and this one is a keeper. 😉
You chair is absolutely beautiful! I am amazed. You make it look so doable. I just ordered the book as I have a few pieces needing reupholstery! Excellent work!
Doable, yes. Loads of work, YES! Let me know what you think of the book, it’s so well-reviewed and I really enjoy some of the projects in there. I plan to reference it when I do my tufted sofa & chair pair.
It sure doesn’t look like a $3 chair any more. I would be so afraid to tackle a project like that. You make me want to though!
Thank you, Kathy. You should give it a try sometime because it’s a great learning experience. Just some forethought and GLOVES are all you need. My hands are still raw because like a kid who has to go potty, but refuses to stop playing long enough to go, I should have stopped and got my gloves instead of getting carried away. I knew better. 🙂
I have yet to dive into reupholstering my first chair (need to find a good victim..er..piece, first), but I’m itching to do so every time I see such an amazing job like this! Love how it turned out!
Victim is right, at least in my case, because each one I do so far is “new” to me and I never know how they’re going to turn out. You just don’t have a quitting spirit and all will be fine. Thanks for your sweet words!
Wow, beautiful work!! I love the contrasting white and beige, and completely agree with your decisions to put beige on the seat and back (kids are so dirty!) AND your choice to keep the chair. I wouldn’t be able to part with it either. Nice job; I’m so impressed!
Thank you so much, Jenny! I find myself second guessing keeping it because I haven’t been able to before, but I’m not changing my mind. tee hee.
Great job Larissa – You know I’ve been dying to do a big reupholster job like this! I’ve had the chair for like 2 years and just got the fabric last week. Hopefully I’ll get to tackle it in March! 🙂 And I might be in the minority, but I do think the previous fabric was kind of fantastic – even a square of it framed would be beautiful art!
Kind of fantastic? ABSOLUTELY! Believe me, that’s one of the reasons I kept it as-is for 2 years before touching it. I couldn’t decide whether or not to get rid of it. I have plans for the portions that were salvageable, so stay tuned. Hint, hint…I love to sew! Can’t wait to see your project.
YOUR chair is FANATIC Larissa! Amazing transformation! You tell your husband that’s waaaay more than “That’s nice!” 😉 So happy you get to enjoy it for yourself.
Hahahaha….thank you, Therese! I have a hard time treating myself to something special at times, but once we took care of our medical bills from our preemie, I promised my family I would finish working on this to complete our home. 🙂
Stunning! You did an incredible job and I want one!!! You inspired me to keep my eyes open to a chair to deconstruct. I also drool over the expensive ones in catalogs. Jeanette
You’re the best, Jeanette! Thank you for your sweet words. You’ll have fun if you give a chair a try. Nothing better than having something of your own. 🙂
Woweeeee! What an amazing makeover. So happy you are getting to keep it.
tee hee – thanks for the giggle. Yes, very happy it’s staying here. I still have a couch and chair, a hutch, buffet, and my dining room table that all need done. One day!
Larissa, wow you are so talented and I wish I had your furniture makeover talent. Ahhh mazing. Thank you again so much for sharing and linking up to our Something to Talk About Link Party and I hope you join us again tomorrow morning. hugs, Lisa at Concord Cottage
You’re too sweet, Lisa. Thank you!
Larissa, LOVE the chair. I was SO excited to see something on a ‘channel back’ chair. My grandmother’s chair was originally channel back, but when she had it re-upholstered back in the late ’60s they didn’t put in the channels. I’m about to do this chair myself, but haven’t found real instructions/hints/tips on doing the ‘channel back’. I’ve bought more thank enough fabric, but it’s sitting in the fabric bin waiting for me to figure out how to do this.
Do you have any photos/suggestions of that part of this project.
THANK YOU!
Hi Kay! So glad to have found a kindred upholsterer. 😉 Those channels are what drew me to the chair in the first place (as well as that original fabric). The book I mentioned in the post, Spruce: A Step-By-Step Guide to Upholstery and Design, has a detailed tutorial, but honestly I’ve yet to read it through. I just kinda dive in. 😉 You can find it by clicking the link. Let me know how it goes!
Larissa this is so beautiful! I’m in awe. And so grateful to have found your blog! I’m curious to know where you buy your fabric. I adore the linen you’ve used, everywhere I look it’s so expensive. So any tips on great places to buy quality but affordable fabric would be much appreciated! Thanks for sharing!!! Keep projects like this coming 🙂
Hi Sarah! So glad you stopped by. I found the fabric for this chair at JoAnn and it was 50% off. I typically like to use 100% linen, but with my 6 kids I didn’t want to go that route and chose and linen/poly mix. (55% linen, I believe) Can you believe it already has been attacked by a crayon…so sad. I got most of it off, but alas, I should not keep such things for myself. 😉
So sad about the crayon! Thanks for sharing the fabric details 🙂
Hi!! Beautiful work and what a gorgeous chair. Where did you get your upholstery tacks? What size did you use? Any particular techniques when you applied them? Thanks!!!
Thank you, Abbie! The tacks can be purchased online or in JoAnn and other stores similar. The lenth you need would depend on your chair and which upholstery you were using. I used a half inch size in this instance. Hope that helps! 🙂
Is there anything you can’t do!? You amaze me! Everything you do is beautiful. Great job.
Maybe know when to quit…hahaha! Just kidding. Thank you so much for the encouraging words, Janice. They mean so much.
I read the comment about naming the chair. Since you named the dress form Vivian how about Lucille? As in Vivian Vance and Lucille Ball who were best friends on I Love Lucy. By the way, the chair is fantastic! Your talent always amazes me!
That’s perfect! I love those two ladies. 😀 Thank you for the love.