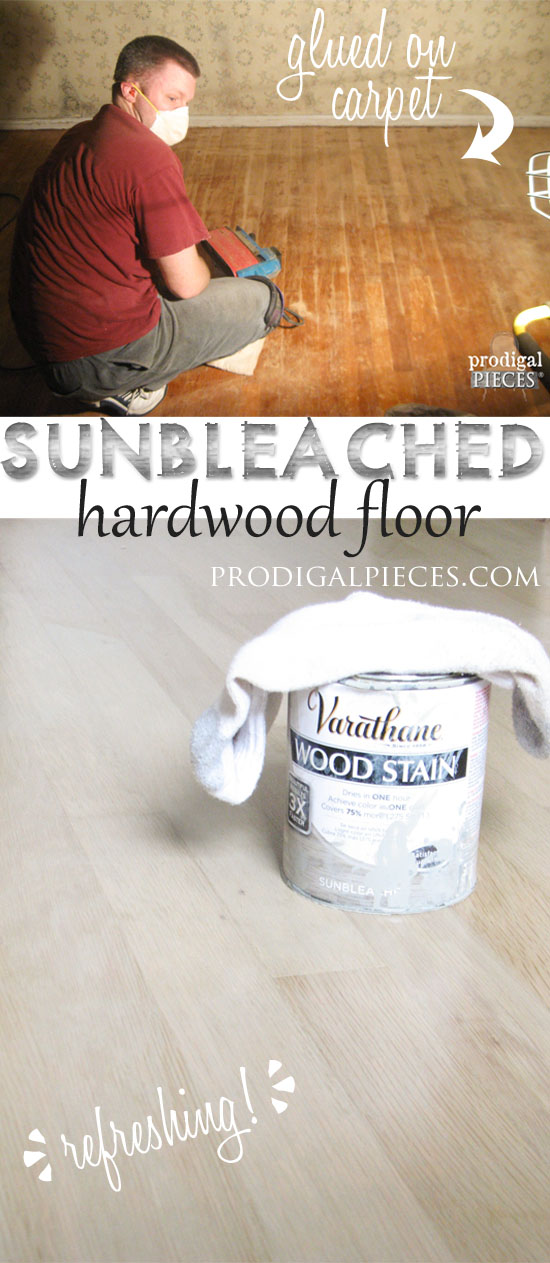
Do you love the look of farmhouse barn beams, but lack the barn? I have a trick up our sleeve to show you how you can make your own faux barn beam ceiling. As we continue to make progress in our master bedroom remodeling project, I will be sharing details along the way. You can see read about the beginning of the story in Part 1, where we tackled our glued-on carpet. ick.
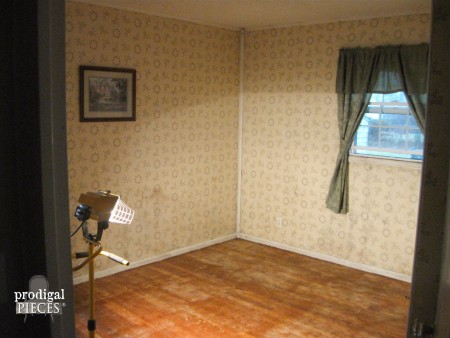
This is the before…
 …floors are beautifully finished. Yippee!
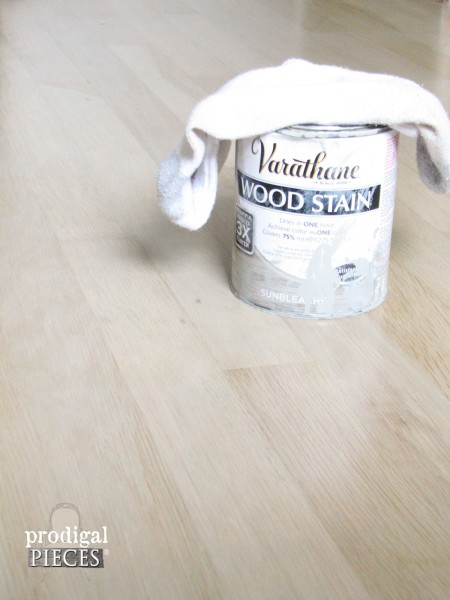
Now, on to the faux barn beam ceiling. Remember we live in a 1952 Gunnison ranch home, which offers some quirky building features that we have tried to deal with in different ways. When we bought the home 13 years ago (yikes! has it been that long already?), we did major renovations ourselves, like doors, windows, roof, etc. Even hit most every room with upgrades except our bedroom.
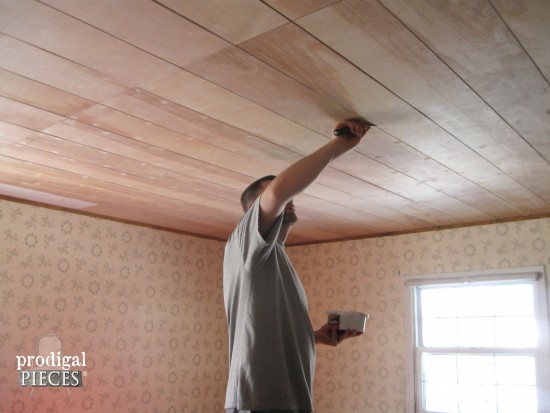
Originally, the ceiling has a popcorn-type texture, and I decided to stipple the ceiling to give it a textured effect while huge pregnant with my second child. That worked fine but really bothered me that the ceilings were still slightly uneven because of the wood panels that were used.
DIY TIME
Fast forward 13 years and here we are:
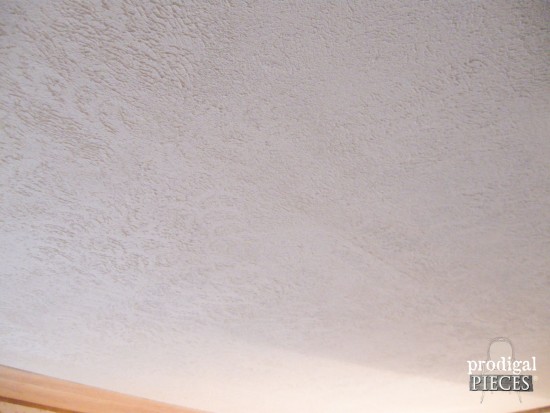
Do you see the seam in the upper right corner? Stippling just didn’t hide it like I wanted, even though it looked much better than its original state.
Our solution was to take 1/4 luan (plywood) and rip it into 8″ pieces to simulate an old-school planked flooring above. Thankfully, the wonderful guys at Home Depot made the cuts for us at no cost. (originally quoted .25 cents per cut – cha ching!! Saving!!) It took us four 4′ x 8′ panels to do our 12′ x 12′ ceiling.
The only prep work for the wood was hitting the cut sides with my sander to remove the rigid edges.
NEXT STEPS
To install the strips, we used my self-given birthday gift, my pneumatic nailer to quickly get them up. To create the gap, we just grabbed a scrap piece of 1/8″ thick pressed board, and it worked great.
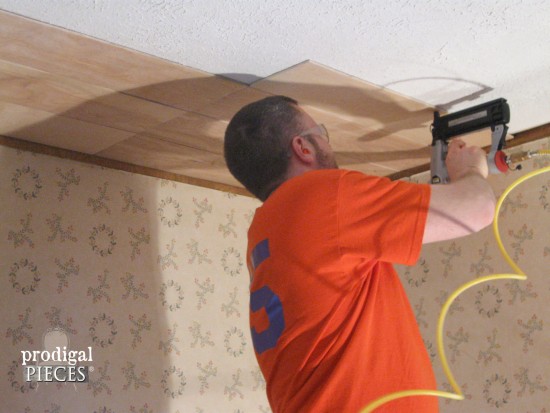
If you notice in the picture above, we were going to end up with seams at some point across our ceiling because the 8′ panels won’t cover a 12′ ceiling. Don’t worry, we had a plan.
We intended to have the seams land in a spot that would be covered by the faux flooring beams we were going to add at a later point. Otherwise, we would have staggered the joints.
Once the panels were up, we just needed to hide the nail heads with a small swipe of wood filler. Looking better already!! (Thank you, JC!)
 Then, we just hit those puttied spots with a light sanding to create a smooth surface.
We wanted to keep with the idea of creating a light, relaxing space, so we painted the ceilings in one of my favorite cool white paints by Behr, Dove White. (sorry, no pics of the painted part before beams) Just a couple coats with a roller and a bit of touch up with a brush to the seams.
BEAMS
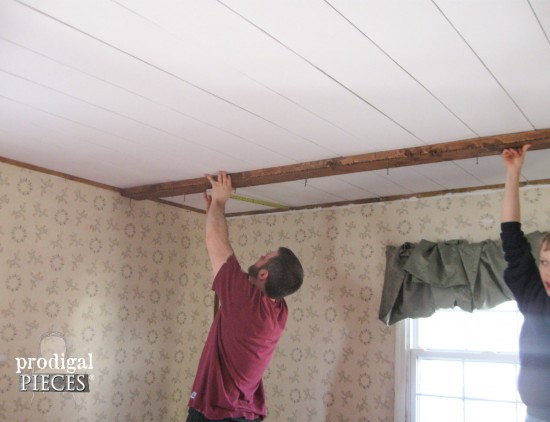
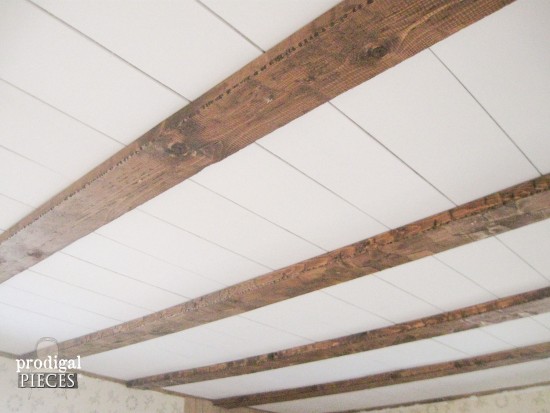
Now for the beams. We distressed four simple pine beams (1 – 2″ x 6″ x 12′, 3 – 2″ x 6″ x 10′) to give them to get that rustic hand-hewn barn beam look.
JC took a hatchet and went down the out edges hacking away in random motions. (Yes, he is out on our heat-wave day of 20 degrees – seriously, we were happy to have that temperature!!)
 Then, to get the face of the beam roughed up, he took his planer and hit it in random points while on it’s lowest setting. You could use a hand planer as well, if you don’t have a tool like this one. (You really should get yourself one of these, they rock!)
 We choose to use a nice contrasting stain from Varathane, called Early American. I use this stain in many of my projects…see them in these posts.
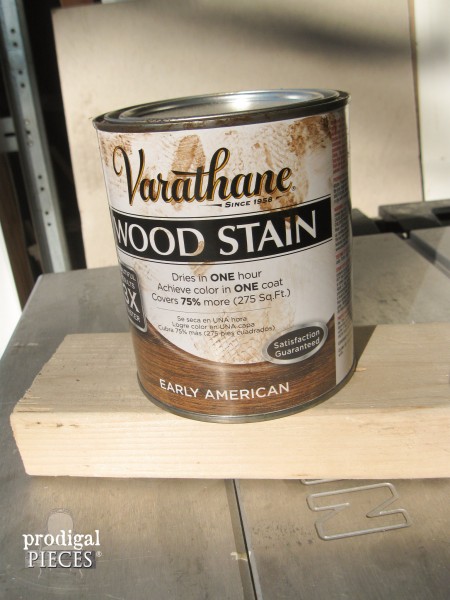 Next, to mount the beams, we ran them perpendicular to the seams of the wood strips to get the feel that they were supporting the faux upper floor.
MOUNTING
We located the studs in the ceiling and measured their layout. Then, we copied that pattern onto the beam and pre-drilled holes so we could easily screw them in while holding them up. (So thankful our 11 yr. old is big enough to help because my pregnant self can’t do much!)
 Here’s a closer look of the hand-hewn effect.
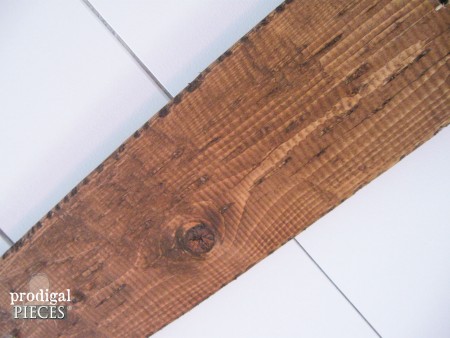
At this point I’m starting to swoon because I can see our plans coming to fruition.
 So there you have it, not in it’s complete state because we’re still going to add a couple of 2″ x 4″ to the outer sides to finish the faux upper floor look but need to tackle the walls first.
Do pin and share to inspire others to stop wishing and start doing. It only takes a little DIY, and you can have the look you’re after too.

Before you go, be sure to sign up for my newsletter. Until next time!

Likewise, our floors and then how we planked our walls after our faux barn beam ceiling.

Absolutely gorgeous! Pinning!
It. Looks. SO. Good!!!!
Your new ceiling is gorgeous! Y’all were wise to use narrow profile beams. The deep beams can really make a room feel closed in. Love the rough texture. Great job, you two! 🙂
His blessings,
Kim @ Curtain Queen Creates
The ceiling looks amazing! We have a lot of textured ceiling in our home rehab to deal with and I’m not sure what route we’re going to take. We talked about planks. I’ll have to show my hubby your gorgeous work!
Looks really good!
Larissa this is awesome. I love to see home renovations. What a great solution for your ceiling!
I had wood beams in the home I grew up in. I would love to have something like this in my home now. This looks just amazing! Sharing on my FB page later. Love it!
Your ceiling redo is just amazing! I really love it, and it truly looks as if it’s been there forever. Straight out of a French country farmhouse for sure! Great idea!!
This looks really fantastic and cool….and so doable! My kitchen ceiling could use this treatment! And it just might get it this summer.
[email protected]
Your ceiling looks so great! I can imagine how exciting it must be to see your plans come to life.
This is gorgeous! I am dying to do this in our living room now! Can I ask how much it cost approximately? Just so I have an idea so I can convince the hubby. 😉
After I read this I was positive we could do this. We have the same stipled ceiling with seams showing from the drywall. We started in our bedroom, 8″ luan like you. However there is some bowing/sagging in some spots. Not a huge amount but my old notices it. Hubby says it’s cause the stippling is uneven. Once we paint I’m hoping it won’t be so noticeable. Did you have this issue?
How long of strips did you use? That can cause the warping, but like you said, our ceilings were stippled too and cause a bit of unevenness. I just chalk it up to character. 😉 You could always fill the gaps or try to nail/glue down the most noticeable spots. I hope this helps!
Hi. Adore the ceiling. Fantastic job! I am planning to do exactly this over my popcorn ceiling. Two questions: 1. Now that it has been a few years, are you having any sagging? 2. Since your strips are 8” wide, I’m assuming you were doing them in the opposite direction of your beams so they can still be nailed? My dilemma is that the direction I need to run the boards is the same direction as the beans… so with 8” strips, some would have to be glued to the popcorn instead of nailed. (Worried that the popcorn could start to pull down from the ceiling.) Any ideas?
Hi there! No sagging and still going strong. I think you will be fine as long as you nail it up really good. It shouldn’t pull it down if you are nailing past the popcorn into the ceiling wood. Make sense? Hope that helps! 🙂
How tall is your ceiling? I love it!
Thanks! We have 8 ft high ceilings. 🙂
Hi – I love your beams and the color is magnificent! How many coats of stain did you use, and did you use a poly? If so, which kind/sheen? I’m loving the not too light/not too dark or red hue and am drying to do it on my own beams! Thanks!
Hi Aly! 😀 Just one coat of stain on ours, no topcoat is needed unless you want a sheen. I’m sure yours will look beautiful! Have fun with it.
Hi. I want to do this to my den/kitchen ceiling which is vaulted and about 16’ at center. I really like this better than the faux beams built from 1x’s. Do you have any additional pictures after you added trim around the sides of room? Thank you so much!
You are welcome. That sounds like a lovely space. We have the final reveal HERE or see link in post.
This looks great! I’m in the process of doing something very similar. What is your spacing on the faux beams?
Thanks! From beam edge to beam edge, it measures 21.5″. Hope that helps!
After searching online for a long time for a ceiling project we wanted to do in our vaulted living room, I finally found your site. I love how you made that room look! Can’t wait to get started!
Shelley, you just made my day!! I hope you have fun with it.