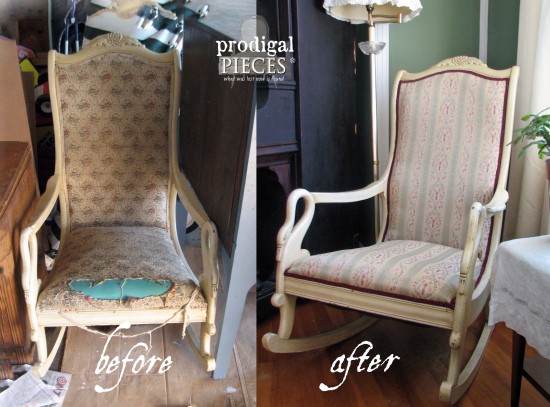
When I found my first upholstered rocking chair face down, curbside, and broken, I had no idea how popular my rockers would become. This first one was a gorgeous antique with swan’s head arm rests and intricate carvings. My husband perfectly remade the back leg, and I upholstered the chair, making it as good as new. The original finish is already perfectly distressed and needed nothing.
NEXT
My next rocking chair was from a garage sale where the curves are what beckoned me to bring it home and rescue it from the fabric it was wearing.
 Using this rocker, I wrote tutorials on how to reupholster & paint a rocking chair. Check them out if you’d like to know some basics!
This particular rocker sold within a couple of hours of being listed in my online shop, and I have had over 20 requests for another. So, I am constantly looking for another candidate because there are a ton of mommies-to-be that are asking for one.
Also, do you know how hard it is to find an antique upholstered rocking chair? If I was looking for a solid wood one, no problem. The upholstered part is the key. Every mom knows how important a soft, comfy chair is a need to rock that new baby in.
DIY TIME
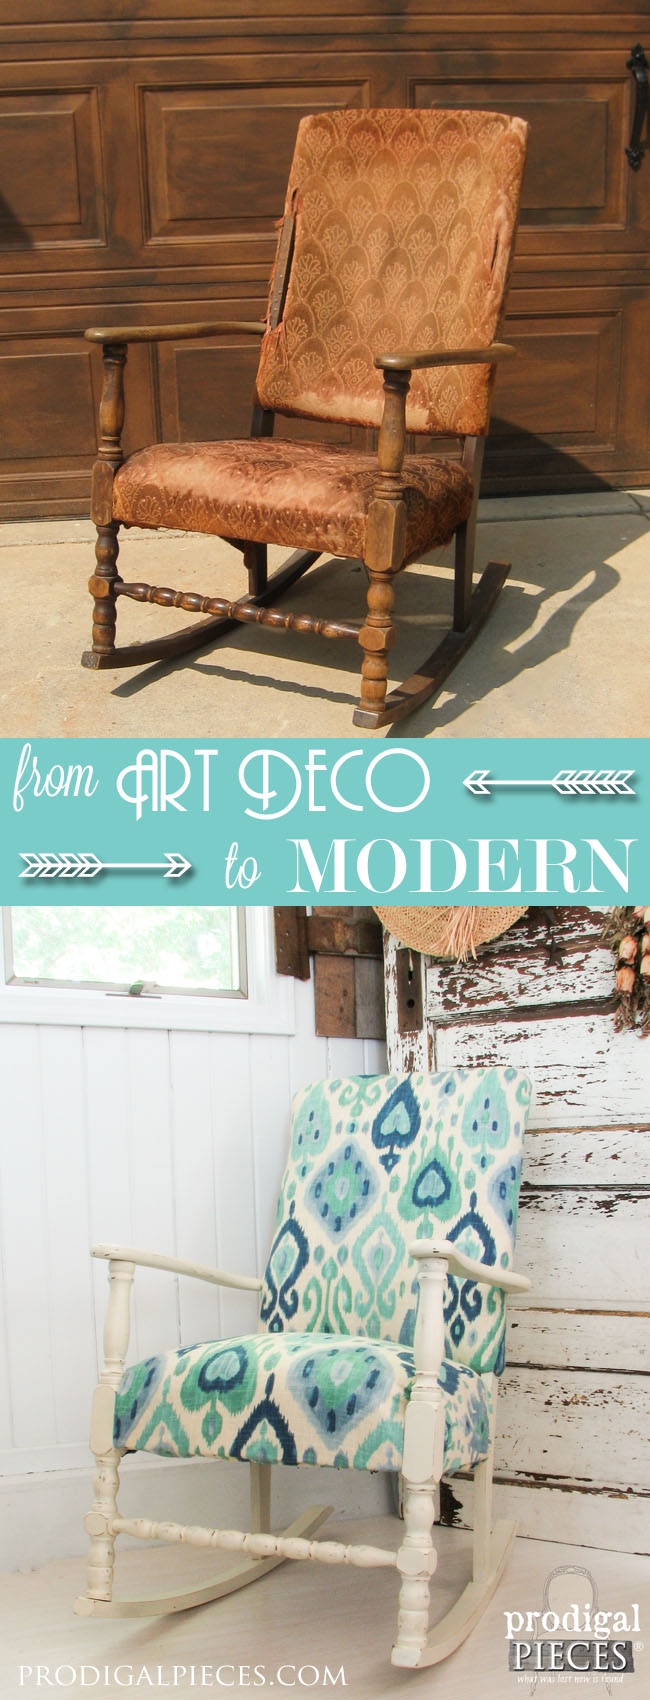
After getting another request, I went on a hunt and found this beauty on Craigslist.
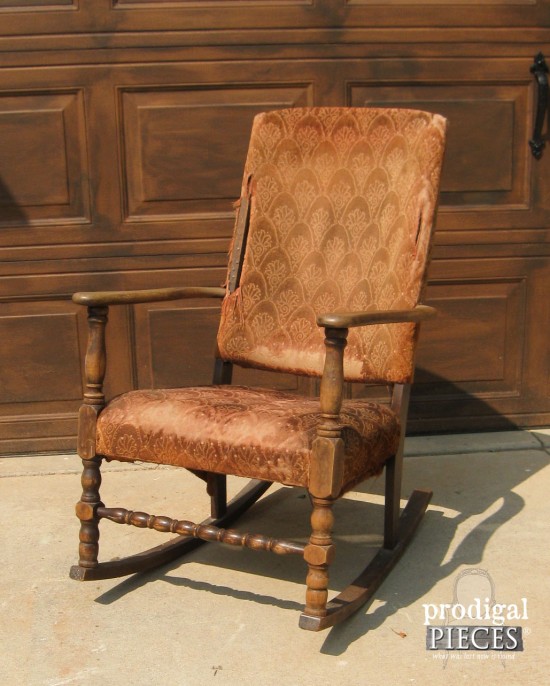 The original fabric was faded and worn, but was gorgeous in its own right with the Art Deco design. The spindles were the draw for me, and most importantly my client loved them too.
The story behind this rocker is the lady who owned it bought it from an estate sale from a grand home in her neighborhood. Although she owned several rockers, this one was her favorite because her colicky son would only be calmed by the rocking of this chair. You see, the rockers are smaller, creating a shorter rock, which soothed the baby like none other. She even said she would have strapped it to her car and taken it everywhere with her if she could.
He’s in college now and it was time for this chair to belong for a new little one and the mommy-to-be.
REPAIRS
Time for the face lift!
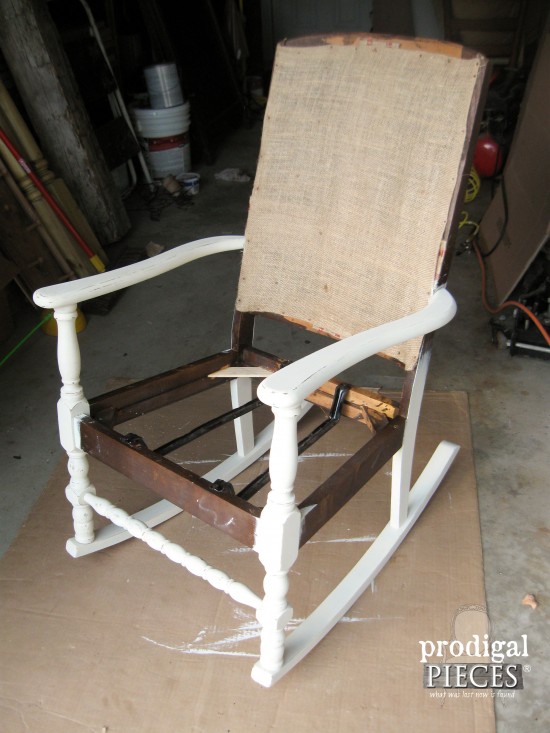
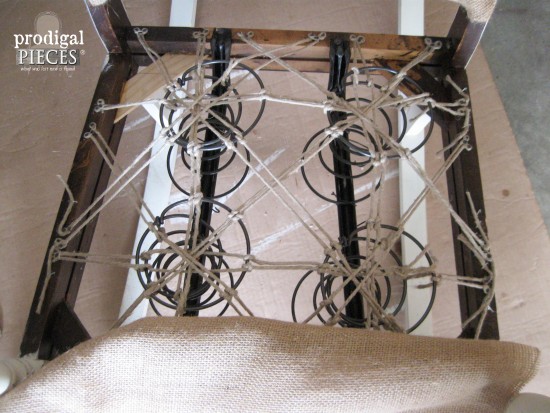
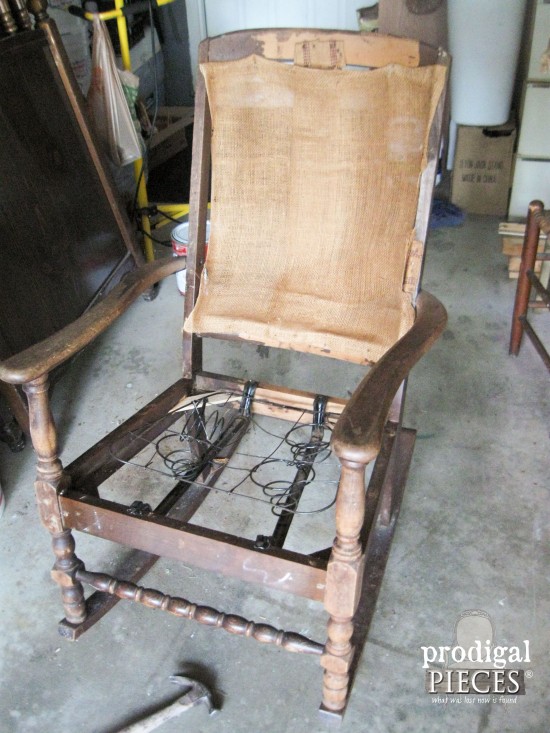 A couple of broken springs, but overall just needed some love. So I replaced the webbing and burlap, and gave it some antique white chalk paint topped with a hand-rubbed wax.
 Don’t you just love how distressing brings out the detail?
 Next, came the springs. Originally, tried to find replacements online and even asked on Freecycle, but time was sparse. I went ahead and purchased new. Do you know as soon as I placed my order I received a response from a lady on Freecycle with a rocker that had the exact size springs I needed. Isn’t that the way it always works?
Oh well. If you’re looking for how to replace coil springs in the seat of a chair, you need to check out the tutorials from Design Sponge on how to construct coil seats. The seat is better than ever now that its done.
Let me just say I have hard time getting my rear end out of that chair. With the new springs, foam padding, and batting, it was soooo comfy!!
THE REVEAL
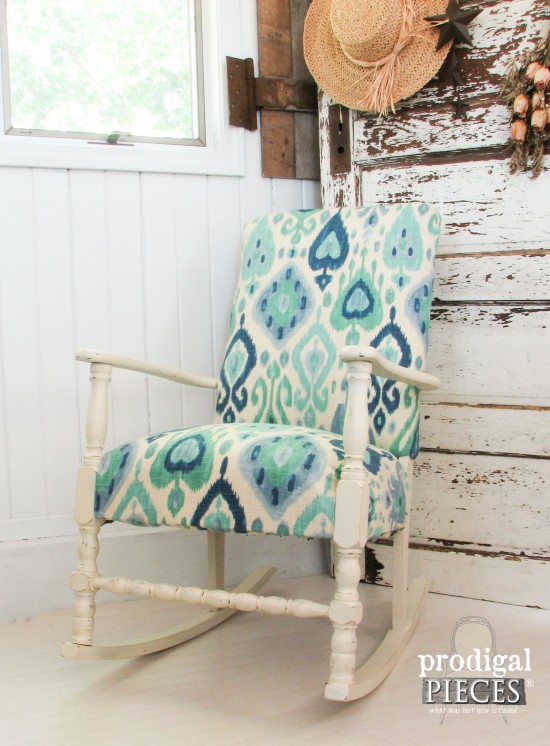
Here it is all spiffed up and ready for the new mommy-to-be.
I love the blue Ikat fabric and the white frame just freshens up the entire look of the chair. Don’t you think?
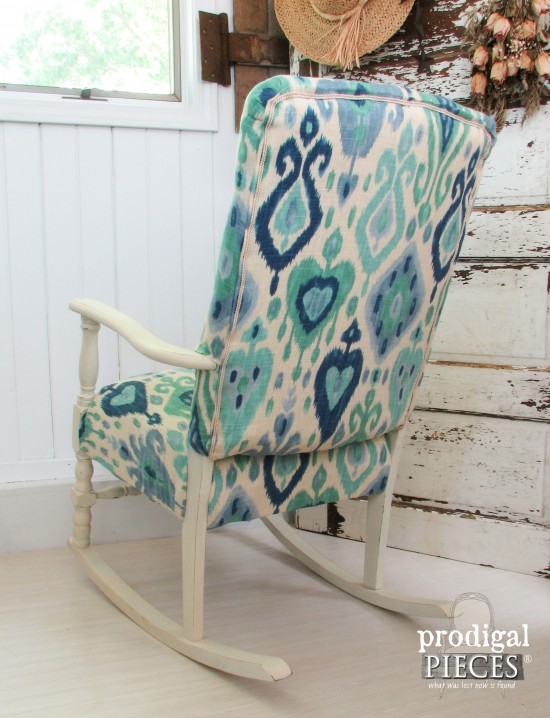 I am so excited that the reproduction Ikat fabric chosen by my client was gorgeous. Here’s what she said:
“We got the chair yesterday and everything is seriously perfect!”
One more look at the change…
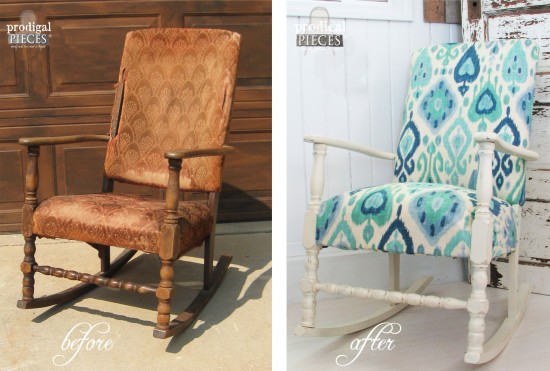 …aah…so much better. However, funny thing is I found out I am expecting our sixth baby at this time. I had no idea the roller coaster ride I was about to be on. Amazing how life changes.
In addition, pin if you loved this upholstered rocker makeover.♥
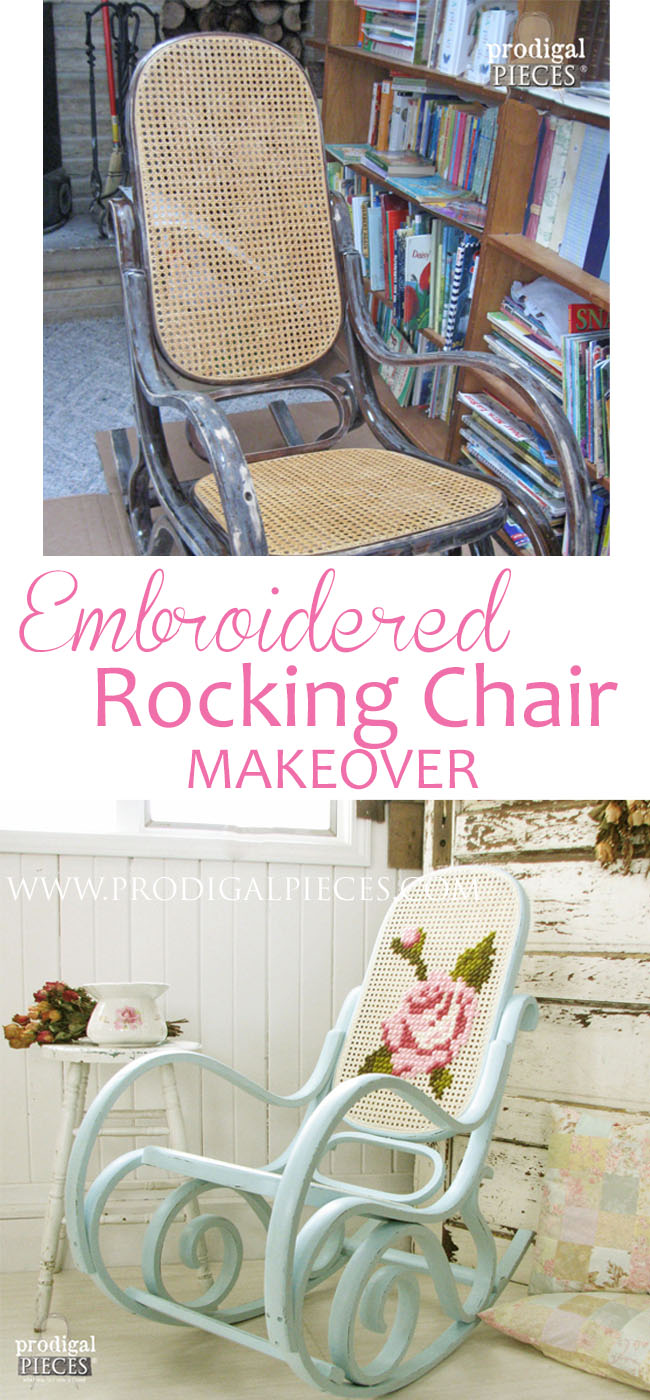
As a matter of fact, not long after I refinished this rocker, I found another candidate with this vintage Bentwood rocking chair and gave it an embroidered twist.
I currently have another upholstered rocking chair awaiting a makeover in my stash. Hmmm…what will it become?? Follow along to see. To get these DIY tips & tricks in your inbox, be sure to sign up for my newsletter. PLUS, you will get your FREE Furniture Buying Checklist and special discount to my shop. Until next time!
Also, more makeovers like my upholstered rocking chair:

The transformations of all three rockers looks great but I think this last one might be my favorite. It might be because of the fabric. It’s a surprising pattern for the chair and the colors are gorgeous! I love it! Looks comfy too! Great job!
Hi Larissa…love the new rocker. The white paint and fabric are perfect. I have an antique rocker similar to this one and one of the metal bars on the seat bottom has snapped. Do you have any resources for replacing them? Thanks!
Thank you, Laura! Ebay would be my first choice, but check Craigslist or put a “wanted” on there for rocker parts or broken rocker. Also, you could remove the other one and use this tutorial at Design Sponge to just use webbing: http://www.designsponge.com/2011/08/upholstery-basics-constructing-coil-seats-part-i.html
Hope this helps!
~ Larissa
Larissa, fabulous makeover!!! I can’t believe it is the same chair!
Thanks for all the tips for rockers. I love the turquoise fabric against the distressed white.
Lovely! That ikat fabric is so pretty on the white rocker. Nice work. 🙂
-Revi
The fresh new look on the rocking chairs look great.
Denise
It turned out so beautiful! I just love it and I am so impressed with your upholstery skills!
Great transformation, perfect colors and perfect fabric. Looks like you are getting to be quite the “Rocker Girl” So much nicer than the modern platform rocker we’ve been seeing the last 10 years! Kudos
Wow, you are extremely talented~ what a transformation! They area all lovely, great bones and you have done a superb job restoring them!
What an awesome makeover girl! I’m featuring your chair in this week’s PoPP Spotlight.
I can’t believe the difference, what a great rocking chair, love the fabric!! I would love for you to come link up at my Furniture and Paint Party going on NOW!!
http://startathome.blogspot.com/2013/09/furniture-paint-party.html
Brooke
I think this is my/your favorite rocker yet… I love the white and the fabric you choose….
🙂
hugs x, Crystelle
Crystelle Boutique
This is so fresh and modern!!! Bravo for thinking outside the box!
Hee hee…thank you for the kind words. 🙂
I have that exact rocker! It was my Grandma’s. I restored it years ago and have recovered it several times to match whatever my current color/style was at the time. It is a treasure! Now, my hubby’s grandmother’s rocker sits in the workshop waiting to be repaired and re-upholstered. You are an inspiration! Blessings!!!
Yay for you! That’s awesome it’s seen fit to be made new again and again. Enjoy!
Gorgeous, Larissa!! My inlaws gave me an antique upholstered rocker full of carved details, but it was in such poor condition and I was overwhelmed at the thought of trying to restore it that I donated it. Never occurred to me that it would be perfect for a nursery! I’ll know better next time, and I’ll find your tutorial to help me through it! ?
Oh, I’ve so been there too, Christy. It’s hard to let things go sometimes because of it. Ha!
I remember these rocking chair makeovers well. In fact, I think it was the cane back cross stitch one that first introduced me to your blog. I’ve totally missed this Best Of The Archives series and need to do some serious catching up!
How awesome! Thank you, Marie. No worries, I am never able to read anything but my own. One day!!
Do you have pictures of you constructing the seat and back before you put fabric on it? I am trying to redo one very similar and not sure what to do. Did you just staple fabric underneath for seat and right in the back side and then cover it with the piping?
I don’t have pictures other than the one in the post, but yes, that’s the basic idea. Staple and hide. ha!
I love your blog and post. Makes my heart beat fast every time I see a new one pop up. Inspiration for me every day.
How fun are you?! Thank you for making me smile. 😀
The rockers absolutely “Rock”. The transformation is incredible.
You’re so fun, Rita. Thank you!
Absolutely gorgeous! Thank you for sharing your God given talent with us!!
I do believe you just made my day, Mary. Hugs to you!