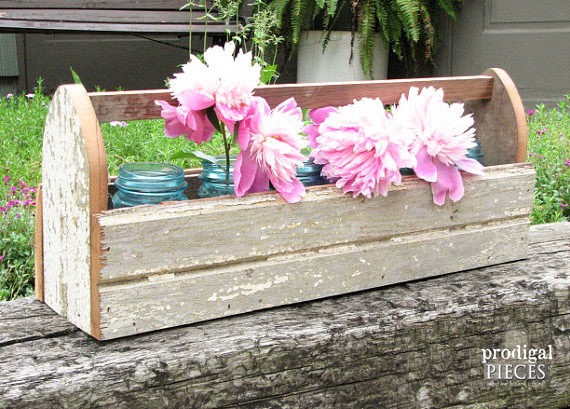
After just coming off of a long holiday weekend, it can be hard to get back to a normal grind. Sometimes though, I’m aching to do a project and it isn’t long before I’m back at just to get it off my mind and assure myself I could do what I was scheming…a wooden tote.
I’ve said it before and I’ll say it again, everyone needs a stash – a veritable selection of materials to “play” with, whether it be things like fabric, yarn, paint, furniture, or wood. You get the idea. I have a little of each, and this time I headed back to my wood stash.
MY STASH
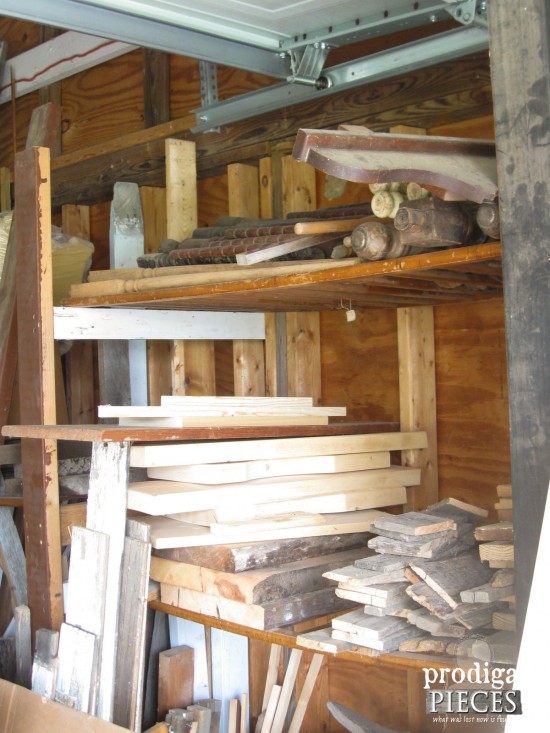
I have plenty of spare furniture legs I mentioned HERE, pallet wood from HERE, barn wood from HERE, and new wood from Home Depot, my second home. This is only a small sampling of my collection, but plenty for me to play with.
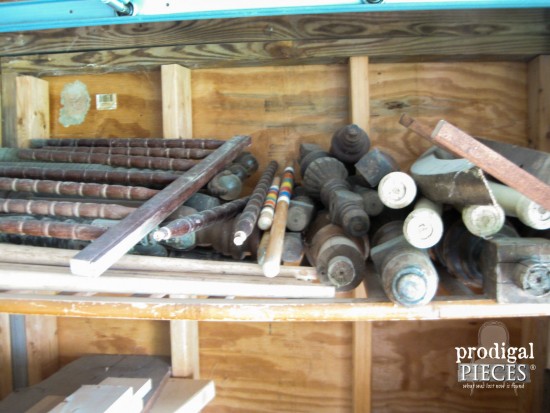
One pile of wood in particular has been calling to me, and that is because my husband can’t stand it’s chippy-ness. A couple of years ago I sent him on an errand that I have somewhat regretted. I asked him to go take the siding off an old garage wall that was left after a lady paid some demo guys to complete the job. For some reason the left one wall laying on the ground and this door was there too.
I sort of regretted asking him to do that because it was a PAIN to remove. Not only that, but it was covered in chippy white paint (which is why I wanted it) and that drives him crazy. Isn’t he awesome for going to get it anyway?
Well, I was originally going to use it to create a planked wall somewhere and make crafts, but baby came along and put a hold on that. So it wasn’t until last summer that I found this wooden tote at a garage sale for a couple of bucks. I chuckled to myself, ” tsk. Easy build.”
I purchased it and stuck it in my online store where it sold in no time. So ever since I wanted a go at it. Thankfully, this holiday weekend afforded me that chance.
DIY TIME
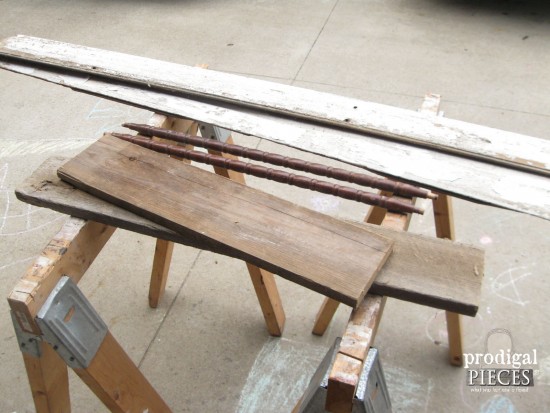
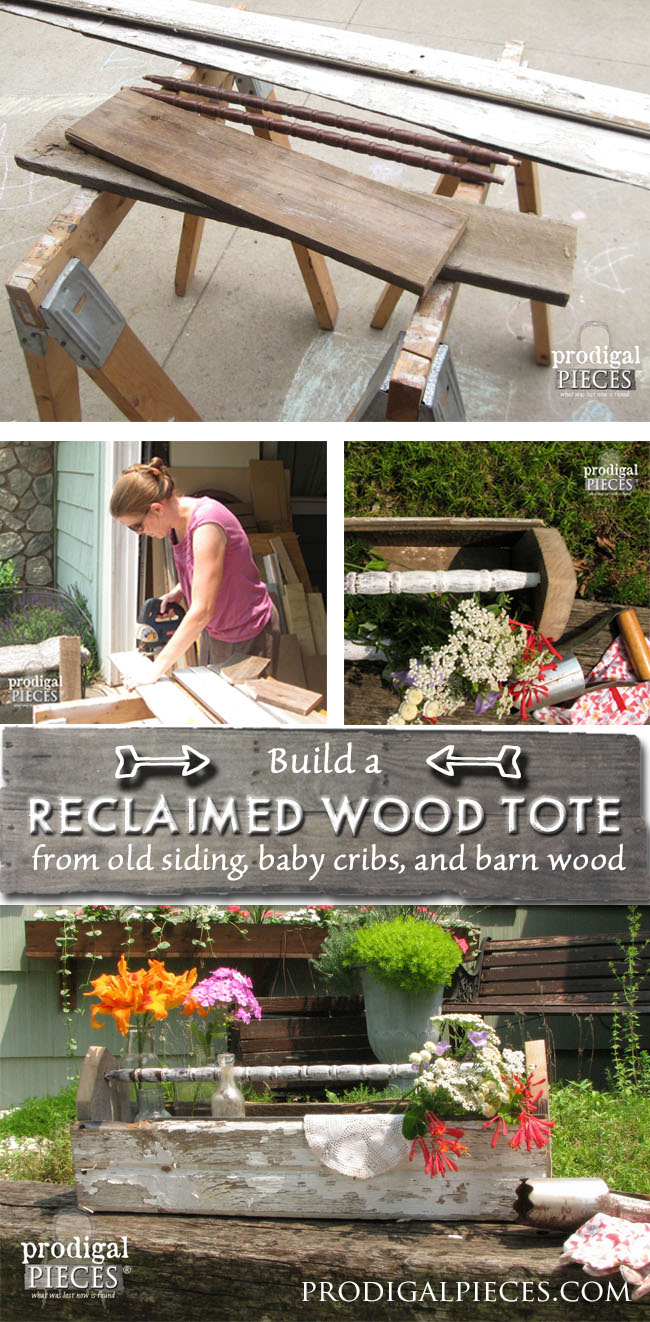
After grabbing some barn wood, siding and a few baby crib rail spindles I recently scored out of the trash, I set to work.
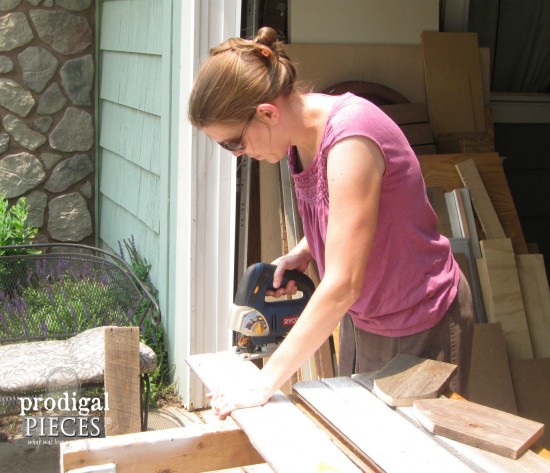
Just to show you that you don’t need a whole lotta tools to make this wooden tote, I only needed my drill, jigsaw, and brad nailer (you could even use a drill or hammer and nails too, if you don’t have a nailer).
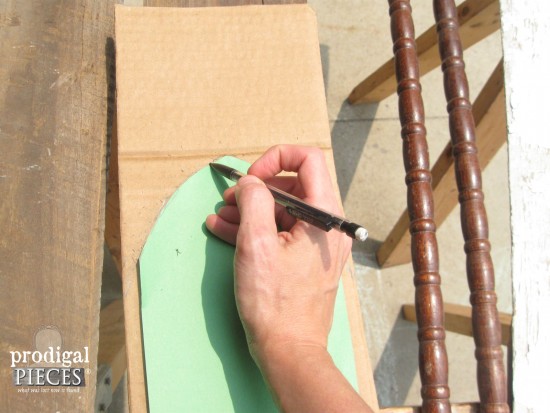
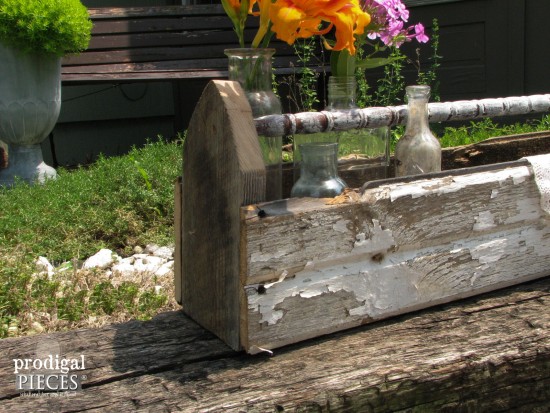
Since my handle was going to be the crib spindle, I set my measurement to be the length of the spindle. To create those peaked ends like my inspiration tote, I first folded a piece of paper in half lengthwise and cut a domed shape in equal sides. Then I traced it onto cardboard so I would have a sturdy template to use over and over – I have a bunch of that siding and spindles!
NEXT STEPS
After cutting the sides out of barn wood, I cut the siding to length. (Can I just say I am so stinkin’ excited it’s summer and I can work OUTSIDE!! Yay!)
ASSEMBLY
Since the crib rail spindles are already set to go into a hole. First, I mark center on the end of pieces and drill the same size hole so the handle will go in snug. You can also just use a piece of wood like the inspiration tote and either nail or screw it on.

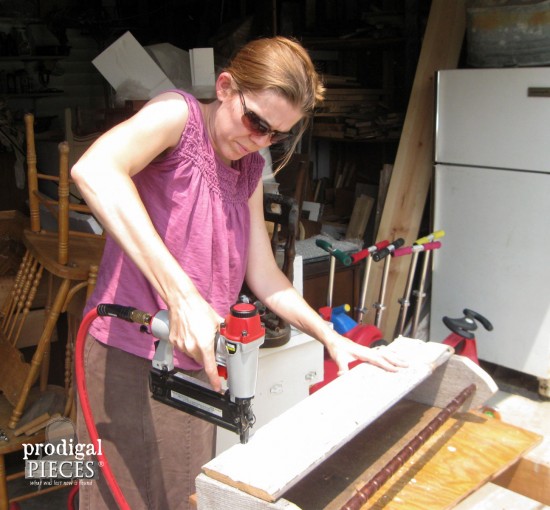
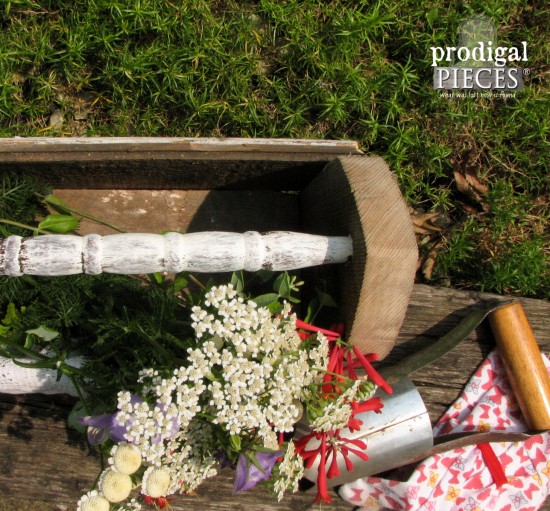
The bottom was also made of barn wood and was attached after the sides and end were nailed together. I love that tool!
THE REVEAL
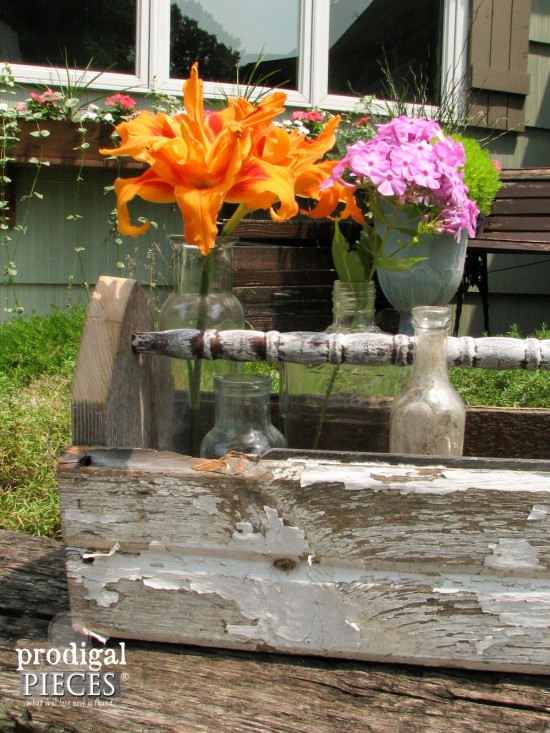
My husband asked, “Aren’t you going to take off that chippy paint?” tsk. He should know better than to ask me a question like that, right? With a little wash of white paint on the crib-spindle-turned-handle, my tote is ready to go!
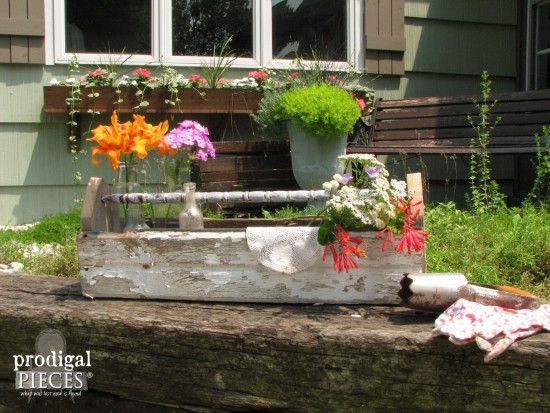
So rustically chippy, and ready for anything you can dream up. Maybe a centerpiece with flowers, a utensil holder for a wedding or party, art supplies? Can you tell I have a thing for totes and caddys?
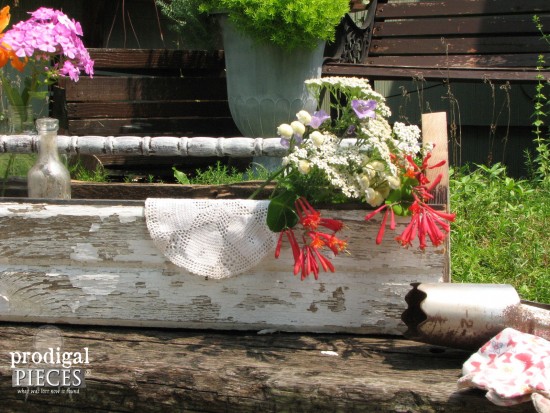
I had fun creating this versatile project and know that you can do this too. All you need is some basic wood. And just so you know, even new wood and a dowel works. Use a sunbleached stain to create that time-worn feel, then give a wash of white paint to create texture.
And if you’d rather not, you can have one from my shop, ready-made.

I hope you enjoyed this sweet wooden tote project. Additionally, I’d love it if you shared so others can find it too!
Before you go, be sure to sign up for my newsletter. Until next time!

While you’re at it, here are more DIY projects like this wooden tote:
The tote is adoable. The crib spindle is a great idea.
Thanks! I have so many ideas for my stash, it’s just a matter of finding the time. sigh… 😀
Larissa, you were supposed to be enjoying your 4th and not brain working! lol but alas, I have been doing the same!
Great caddy and tutorial!
Hope your 4th of July was great.
Have a fantastic Monday!
Hope
Girl, I need a break for sure, but it’s also therapeutic to work with your hands AND be in the sun. 😀 Thanks for stopping by!
Ahh, I love everything about it! Perfectly chippy, no matter what Mr. Prodigal Pieces says. 😉
He’s so funny and gets it, but doesn’t like it as much as he likes glitter or bubbles. tee hee.
Really very rustic and nice and handy… should I go on?? Now what about those great tools of yours, can I borrow them? 😉
Absolutely! My motto is “Tools over jewels.” 😉
love the handle especially!
So funky fun, isn’t it, Gwen? Thank you.
So perfect! And millions of uses!
Thanks, Ellen! Yes, there are so many uses for totes in general and I think that’s why I love them so.
Love it Larissa and yup, the chippy goodness adds so much character to the tote!
Can’t go wrong with chippy! 😀
I love this Larissa! I couldn’t believe when I saw it because I just finished making one of my own 🙂 http://charmingimperfections.com/2015/06/shabby-chic-tool-crate-diy.html
I love how yours turned out!
Your crate is awesome! Any wooden storage does it for me. 😉
Larissa., I couldn’t be more in love with our scrappy toolbox if I tried! Glad the hubby was so resistant to the wood! haha This project is perfection and is being featured on Party Junk this upcoming weekend. 😉
Hee hee…yes, he still shakes his head when he looks at the pile, but I’ve got more planned to convince him it’s a gold mine. Thanks for the feature, Donna!
I love all your projects! This is so delightfully chippy and just perfect!
Thanks for stopping by, Jill. You and I know chippy is best! 😀
That is great idea to use crib spindle and it must have saved your millions of hours and energy.I am sure you can use tote in many ways and with these simple instructions you can make out one easily with no time at home in an economical way.
Thank you, Richard!
Nice job I love using spindle handles too… the chippiness is perfect 🙂 You have some great stash of wood in your garage!
Thanks, girl! I just pulled a Jenny Lind style crib from the curb during city cleanup, so it looks like I won’t be running out anytime soon! 😉