Just when you think I’m crazy enough for turning pot lids and bakeware into something for birds (see last post), I whip out stir sticks. And, not just one stir stick, but twenty! Somehow me telling a certain person to refuse the free stir sticks at the store translates to “bring home not one, but two at a time.” ahem. Well, these stir sticks are getting out of my stash by becoming a DIY wall pocket.

Seriously, y’all, I love free things, but sometimes I even turn them down because I don’t want to waste. Waste not, want not, right? Well, I certainly won’t toss perfectly good wood, so here we are. This stir stick loot is not all I have on hand, but a portion that will help me achieve my creative fun today.
My goal is to not spend a penny but rather use materials I have available to create a useful decor piece for the holidays(or any ol’ time).
DIY TIME
Let’s get this DIY wall pocket party started! It’s simple with a few tools. I’m using what I have in my arsenal, but really you can use basic tools to create this too. As I go, I share what tool you could use instead of a big toy. My motto is #toolsoverjewels.
TERMS OF USE: If you want to create a wall pocket or stockings, you agree to the following: it cannot be shared or distributed for monetary gain in any way, it may not be modified in any way, and you may not claim the work as your own.
Supplies & Materials:
- 10 paint stir sticks
- 5 – 9″ slats
- 2 – 8 ½” slats
- 2 – 8 ¼” slats
- 1 – 7” slat
- scrap wood – I’m using 3 – 1″ x 4″ pine cut into 6 ¾” lengths
- >wood glue
- saw – miter saw, miter box, coping saw…whatever you want
- stapler and/or nailer
- jig saw
- paint sprayer makes it easier
- Turn Table
- sawtooth hanger
- eye hook (optional)
- paint (optional)
- stain (optional)
- linen (or similar) and twine for stockings (optional)
- fabric transfer paper (optional)
*post sponsored by HomeRight (see full disclosure)
STEP 1
First, decided what size you want your DIY wall pocket to be. I wanted to maximize my stash as well as the full amount of wood on the stir stick. So, I began by cutting 5 sticks into 9″ lengths. Then, I wanted to bring them to a raw state, so I sanded off the text. However, you could totally leave the ruler side for a fun effect. Just sand of the other text, if so.

STEP 2
Next, I use two scrap pieces of 1″ x 4″ pine to cut two pieces 6″ long with my jigsaw that have a slight taper to them. Feel free to design it in any way you like. Don’t have a jigsaw? You can use a coping saw easily too.

Also, I add a bottom pieces with wood glue and a nailer or pre-drill. Attach screws from outside into the bottom piece. The back slats are not attached yet – see next step.

STEP 3
In the above picture, the slats are not attached. There may be a better way to do this, but this is what I found that worked. First, I use my nailer and wood glue to attach slats to the bottom edge piece. You can also use a basic heavy-duty hand-held stapler with ½” staple too.

STEP 4
With those slats sort of loosely attached, we add two supportive slats to the back at the top and bottom edge. These are the 8 ½” slats you cut. Notice I use wood glue and nails to the bottom edge, and only to the outer edge of the top slat.

STEP 5
Flip it over and add a third slat 7″ slat directly in front of the upper slat on the back.

STEP 6
Last, add the two 8 ¼” slats to the front. Feel free to place them where you like.

FUN PART
At this point, you can finish however you like. For my wall pocket, I wanted a time-worn look. To accomplish that, I choose to use this aged wood reactive stain. This stuff is awesome! No stinky chemicals, no wiping off yucky, and it’s done in flash.

I then load up the canister and spray away. Can you imagine how long it would take to stain each side of every slat and corner by hand?

STOCKINGS
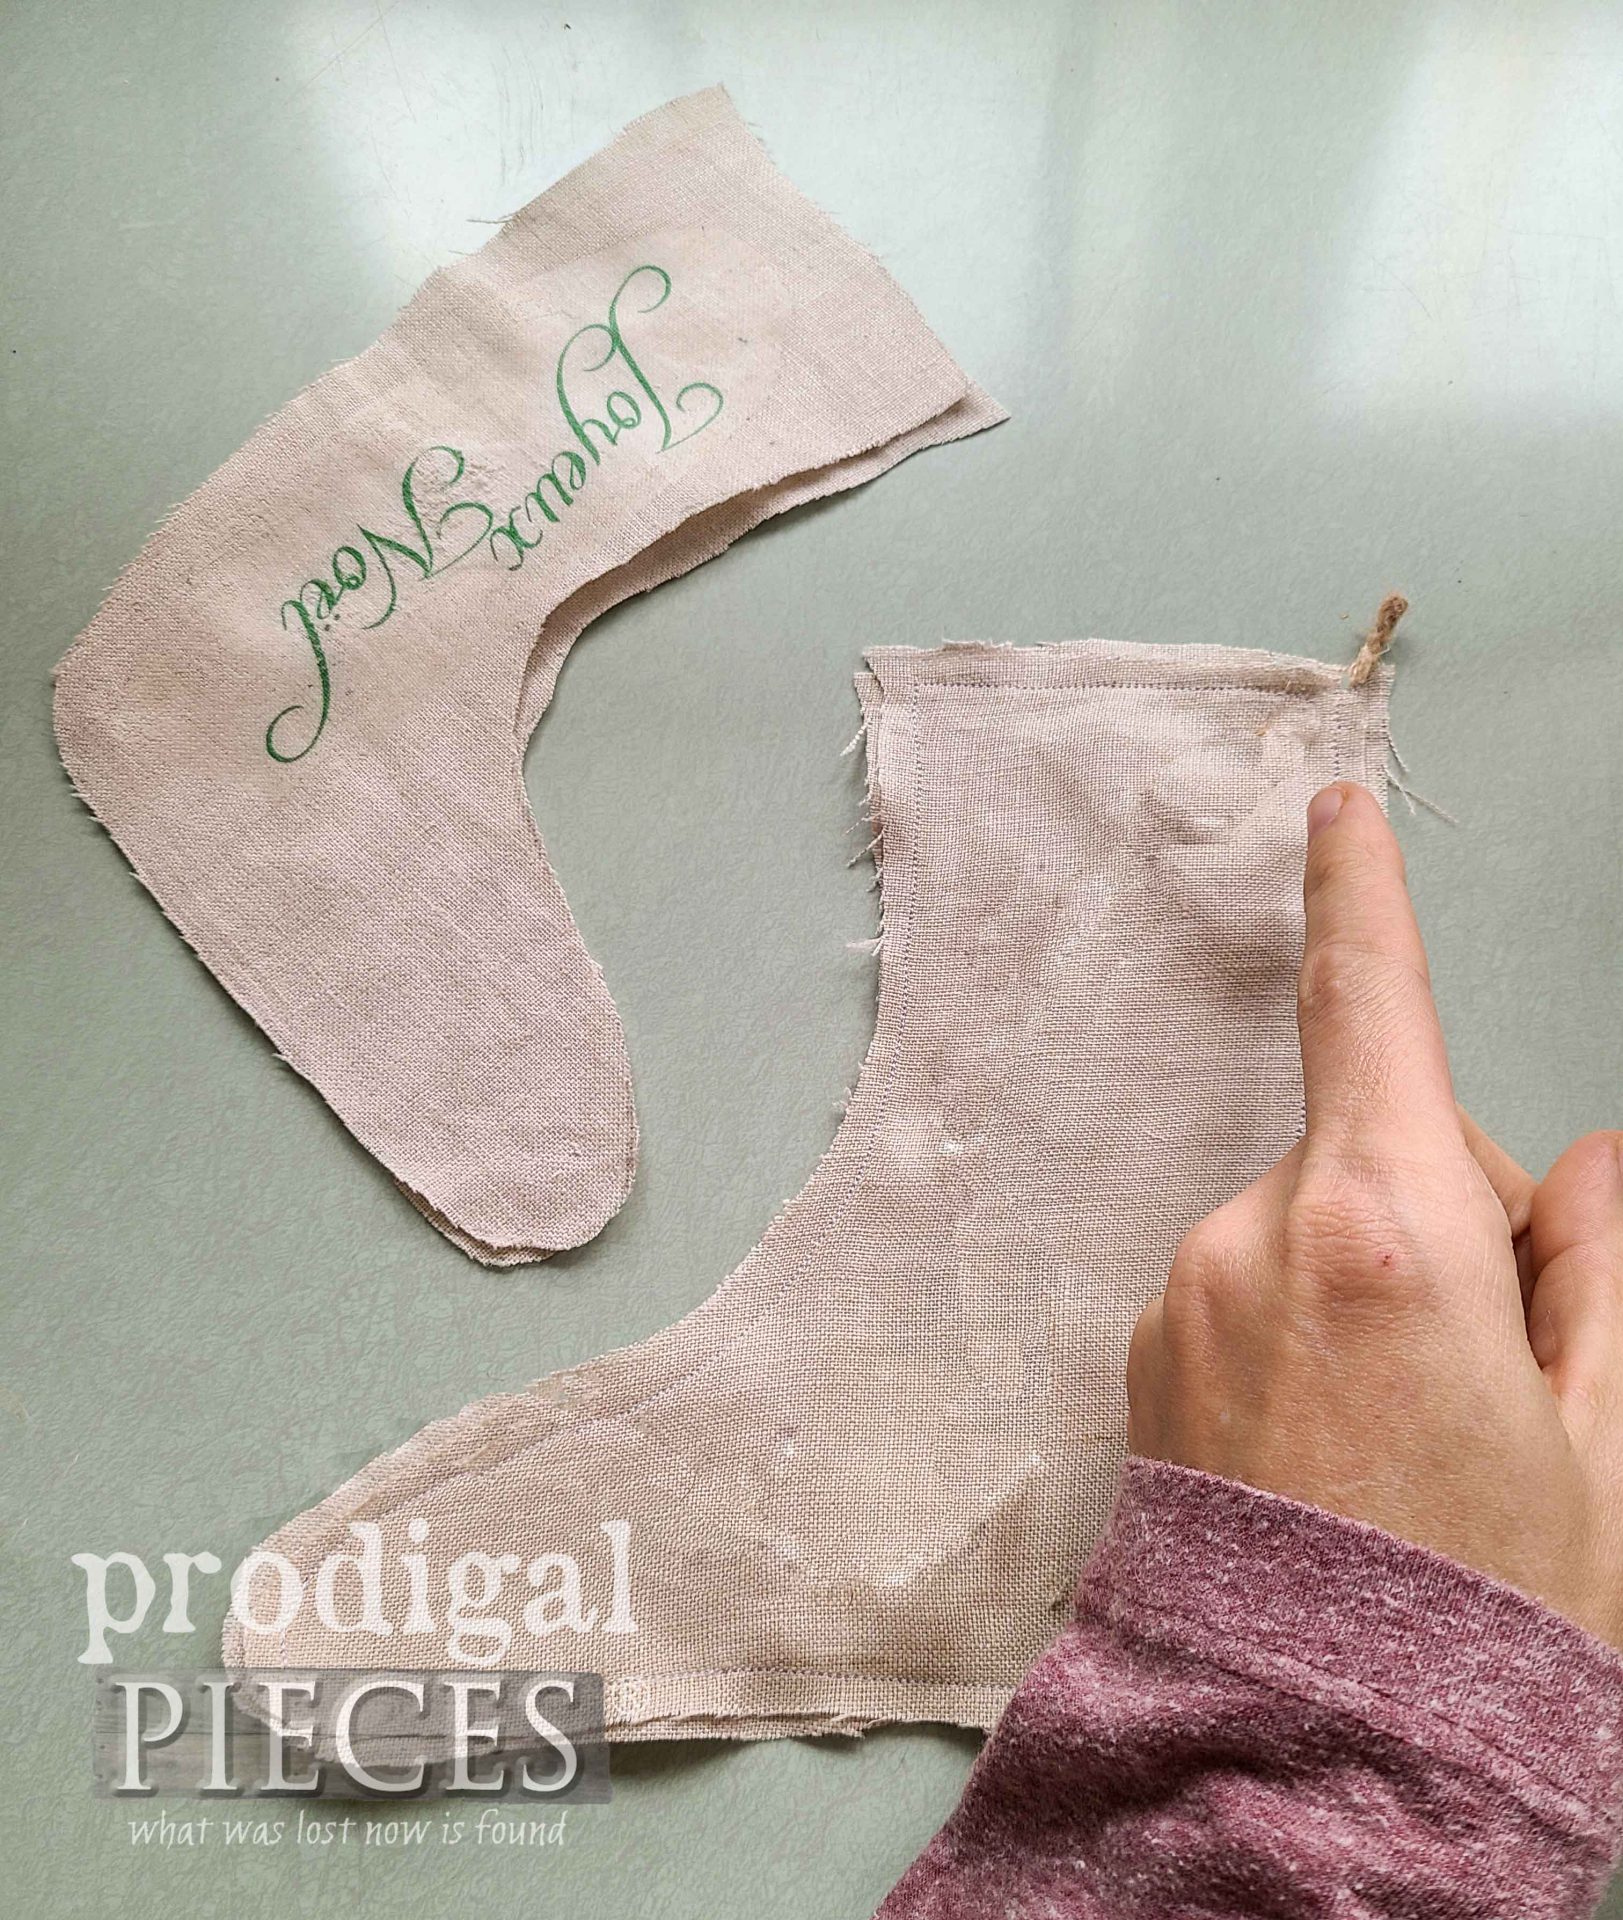
One last thing. It’s totally optional, but oh so cute! I wanted to add a cozy touch to my DIY wall pocket. So, I decided to whip up some primitive stockings using up some scrap linen fabric and twine. You could use burlap, muslin, cotton…you get the idea. However, if you’d rather not have stockings, just skip ahead.
First, print out the FREE STOCKING TEMPLATE HERE. Note: I made a template for a larger version (which I used), and a slightly smaller version. This isn’t rocket science, so I’ll keep it brief.
- Cut out the paper template with seam allowance left intact
- Trace template onto fabric for four stockings (2 for each stocking)
- Cut out the fabric stockings
- Add any text or design using fabric markers, paint, or a iron transfer
- Place stocking pieces right sides together with 12″ length of twine tucked inside and end sticking out corner. Stitch around the stocking leaving a 2″ opening on the heel side for turning.
- Turn out first stocking with twine string. Next, take first stocking and insert it between the two remaining stocking pieces with the other end of the twine sticking out top corner as before.

- Stitch around as before, leaving a 2″ opening again.
- Turn out the inside as well as pulling out the first stocking.
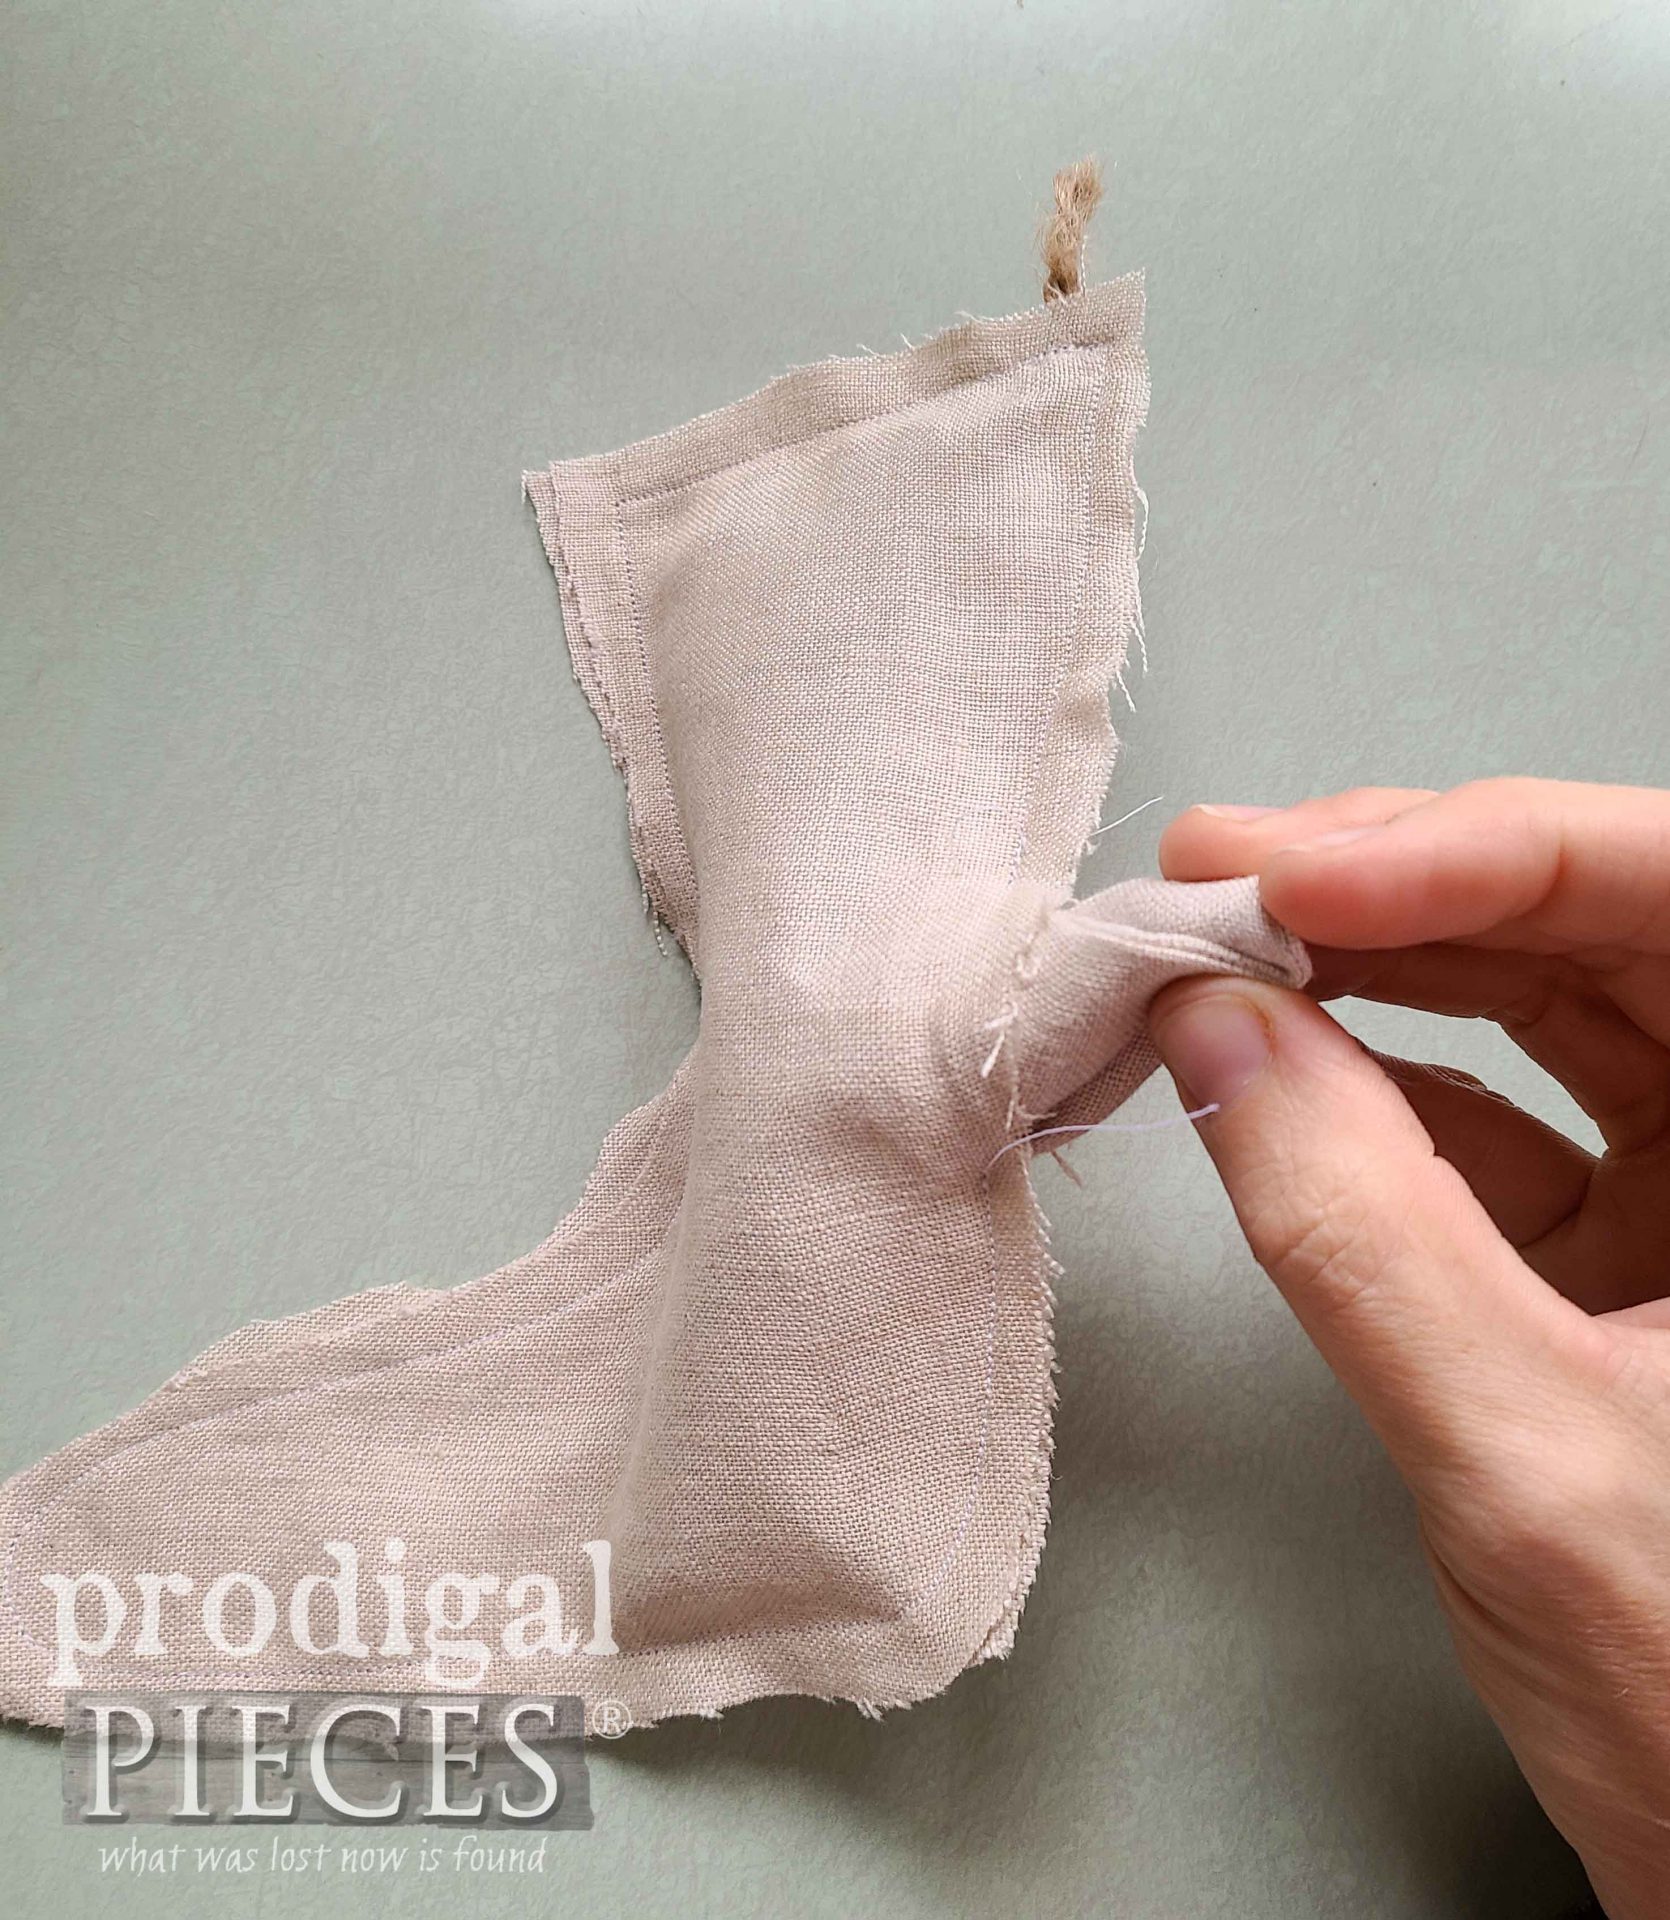
- Now you have a set that just needs stuffed and stitched closed. Yay! Last, use a hidden ladder stitch to close them up.

THE REVEAL
After our fun work, we finally have our DIY wall pocket with funky farmhouse stockings to boot! tee hee!


Also, notice I added my sawtooth hanger to the top back horizontal slat, and an eye hook to the bottom for the stockings. In addition, I tucked in a vintage apothecary bottle with linen bow. I’m super excited that I found white pine tree branches that had fallen that were a perfect fit.


In addition, the wall pocket and the stockings both received a dark wax dressing for an aged appeal. I do think I’m smitten!


So tell me…how would you decorate your wall pocket?
SHARE
Above all, do pin and share my DIY wall pocket to encourage others to have fun with their paint stir sticks. tee hee!

Up next, I’m diving into my thrifted wood decor stash to give this a fun new look. See this vintage goodie redone HERE.

Before you go, be sure to sign up for my newsletter. Until next time!

Also, more holiday fun like this DIY wall pocket:


So cute!!! Would be a great place to showcase Christmas cards as they come in!! Good luck to all your giveaway entrants. I know the winner will love this sprayer as much as I do!!! ?
Love that idea! 😀 I’m also delighted to hear you love yours too. yay!
What an adorable & easy project. Thanks for the stocking pattern.
At the moment I have nothing to spray paint; just small items at the moment using a small paint brush.
Thank you for this wonderful giveaway opportunity
Thanks! It felts so good to use up my stash and have fun too. woot!
What a cute project. That paint sprayer sure makes it easy.
Yes! Staining can be a chore, and this makes it a blast!
I’m always amazed and inspired by how you see potential in all of your projects! This turned out so cute.
Thank you for the sweet words, Jane. Hugs!
Great idea! I have my own stash of scrap wood that would be perfect for this piece! Love seeing your projects and the inspiration they give me to create.
That’s the spirit, Deirdre! 😀 Thank you.
I continue to be astounded by your vision! You truly see things as their components, and not as just their original form, then you reimagine them in completely new ways. Even the stockings’ shape was unique. You have a gift!
You’re making me blush, Amanda. Thank you. It truly is a blessing for me to be able to share my ideas and passion with you all.
Oh my! I will have to visit my husband’s shop and “borrow” his paint sticks.?
bwahahaha!! You go girl!
Larissa this is so sweet and full of rustic charm.
Thank you. So much more fun for me to create my own decor.
What a cute project! That sprayer sure did make it easier. I have just finished a couple of small projects and a sprayer would have been useful. Instead, I had to use small brushes and take a lot more time to complete. Thanks for the give away!
It literally was stained in seconds…you can’t beat that! 😀 I’m like a kid in a candy store with my tools.
You’re welcome! I wish I had one for everyone.
This is a very clever idea. Love the finish on the shelf. Those stockings are adorable
Thanks! I had to find a use for them other than my fireplace. haha.
I love your project and share your commitment regarding Waste Not Want Not. I would use the sprayer to paint a metal breadbox from my stash 🙂
Great minds think alike! 😀 Thank you.
i love the shape of the stocking and that you aged them too!
Thank you, Gwen. 😀
I love the shelf! Would also be cute in a Farm house kitchen!!!!
I have so much wall trim to paint! The sprayer would be helpful to paint what seems to be miles and miles of wall baseboards
Thanks! I think so too. You will definitely love this sprayer. 😀
Such wonderful ideas. I have a 4 car garage full of so many projects! So ready to turn battered into beautiful. Your guide and a sprayer would sure kick me into gear.
Sounds like you are ready to roll! 😉
Larissa,
The wall pocket is so cute and versatile because what is put in it can be changed all year long. I love it! I have a bunch of scrap wood and you’ve given me an idea of what to do with it. I’m about to start painting 2 large wood Christmas yard art words this weekend by hand. Ugh! I always thought a paint sprayer was an indulgence since I don’t paint that often but it sure would be nice to win one! Thanks for the opportunity and for sharing your endless creativity!
Thank you for the kind words, Jeanette. It sure was fun to create and use up those sticks. haha. You do need to indulge yourself if you save money and time by owning one. Hope you win! 😀
I enjoy how imagination and the things you create. The sprayer would come in handy for the wood projects I have planned for Christmas.
Thank you for saying so, grannL. It sure is fun to share and I know you’ll love this sprayer too!
I love your creativity! Who would ever think of using the paint stir sticks other than to stir paint lol. I would use the paint sprayer to upcycle a dining room table and chairs! You actually inspired me when you did the black dining room set! (Mine is still in the sanding stage ?)
haha! Only a nut like me! 😀 Thanks so much, Maria. Sounds like a perfect DIY project.
I’m just learning about using electric tools. I have a circle saw that I want to use but, I am a little leery about it. My husband used to cut anything I needed. Now it’s just me and I want to learn how. Thanks for all the projects I love them.
You can do it! And, honestly, once you try it’s very addictive. Consider yourself warned! hahaha!
I love the finish on this project! This would fit right in with my decor and I would decorate it just the same…greens and one of my favorite blue mason jars! Now I want to go to the hardware store to grab some paint sticks 🙂 I just may ask for tools for Christmas this year so I can work on my pile of projects! Thank you so much for the chance to win this giveaway!!!
You are such a kindred spirit, Ginny! Definitely tools are always on my wish-list…one can never have enough…right?
I love how you see practicality and beauty in random items. Thank you for inspiring others to do the same.
I’d love to try this newer finish sprayer on an old mantle.
Thank you, Rebecca. It truly makes enjoying life begin in a whole new way. Hugs!
That is so cute! I have alot of paint sticks.. I even save them after I use them! It looks like I found a project to put them to good use! Thanks!
woot! Thank you! Mine head to my fireplace. haha!
I absolutely LOVE the projects you create, you are one talented and imaginative woman! I would use the sprayer for a mid-century modern china cabinet i have that I want to use for storage in my sewing area, the wood has avery orange tone and i want to change the feel and look by refinishing.
This china closet also has a fixed glass panel in the center that I would like to remove and put hinges on so it could be opened and access to the center would be easier, I would appreciate any suggestions on how to remove that center panel safely.
Thank you.
You are so sweet, Pamela! I appreciate your kind words. It’s a blast for me to share. It sounds like you have an awesome project piece. If you want to email me, I’ll try to help.
Great idea that I would have never thought of. Paint sprayer looks awesome to help get thing done FAST!
That is so cute. And I LOVE the stockings. I want new ones this year for us.
I think the first project would be picture frames. I have some in various sizes that are all the wrong color. I want the larger one to be black the smaller one white & the smallest one green. Then I have to decide what color to do the other 3 that I need. Of course, the larger one is white, the medium is black and the smallest one is black also. I COULD use them as they are….nope, they need to be those colors so I don’t have to go to Michael’s and buy new ones. And I need to make 3 shadow boxers for my kids to mark how long they have been married. Well, not the youngest. Although i was married at her age, she is MUCH too young to get married 🙂
Awesome! I have a set of four stockings available in my shop… 😉 Your projects sound like you are such a sweet mama. They will love them!
I was use the paint sprayer for my sign business. I love following you in Facebook
That would be perfect, Tonya. So glad to have you along for the fun! 🙂
Oh my gosh that is too cute. What a great way to use those extra stir sticks laying around. I think I would tackle some of the outdoor statues that could use some refreshing
I’m so glad you think so. It’s fun for me. Those sound like a good project for the Quick Finish.
I follow your blog and always look forward to seeing what you create! Thank you Larissa for inspiring me!
Thank you for the kind words, Lori.
You are so creative!
And you are so sweet. Thank you, Janet! 😀
I would tackle painting a drop leaf table that was given to me, that needs a makeover with the HomeRight Quick Finish Paint Sprayer.
Sounds good. I hope you enjoyed my project today too.
what a delightful idea to make! the stockings make it
Thanks! You could add most anything to it at any time of year.
Very creative!
Thank you, Jo.
Gotta love free paint stir sticks!! Love how cute this turned out! I hope to win as I have a set of chairs to paint and I know that would be a lot easier with the spray painter. Thanks for having the contest.
Yes! Just not too many…haha. My pleasure to share this with you. I wish I had one for everyone.
You never cease to amaze me with the ideas that you come up with! Will have to give this a try with a large stash of paint stirrers I picked up years ago when I made some flags. I have MANY left over.
The stockings are super cute, also. And maybe they are simple enough for a non-sewer.
That sure makes my day, Michele! Thank you so much for the love. You can do it! Especially the stockings. You can even stitch them from the outside for a rustic finish and skip the turning. Have fun!
Hi Larissa, Girl, you are so creative! It’s so
Fun to see what you come up with, I do not see this coming, lol! Gotta love your HomeRight Sprayer on this project. I love the wall pocket and the adorable stockings you hung from it. The wax you applied really worked well!
woot, woot! 😀 Thank you so much!
I love it! I instantly pictured it with a live plant in it
That’s the spirit, Lori! 😀
???? Neat idea!
Thanks, Amanda!
So cute for a country Christmas vibe. I have such a stash of projects, a sprayer would make life so much nicer!
Thank you. Or for any holiday with a switch of the stockings. You will love it for sure!
Cute…as usual!!!
Thank you, Maria. 🙂
Hey there. I just found you on Pinterest. I have a question! Your stain is to give a weathered look? Your shelf looks white distressed. Is it the aging of the stain, or did you brush some white on over the stain?
So glad you found me, Vanessa. 🙂 I used a reactive stain that naturally ages the wood working with the tannins. And then, I whitewashed with a bit of white paint.