Happy dance goin’ on over here as it’s Trash to Treasure Tuesday! This fun day is for you – to inspire you to give DIY a try. You’ll see my friend’s projects below. Today is all about a fantastic haul I was gifted with recently. You know I never turn down wood, right? Well, this orphaned cupboard sample crew is about to become a repurposed cupboard door jewelry cabinet. Game ON!
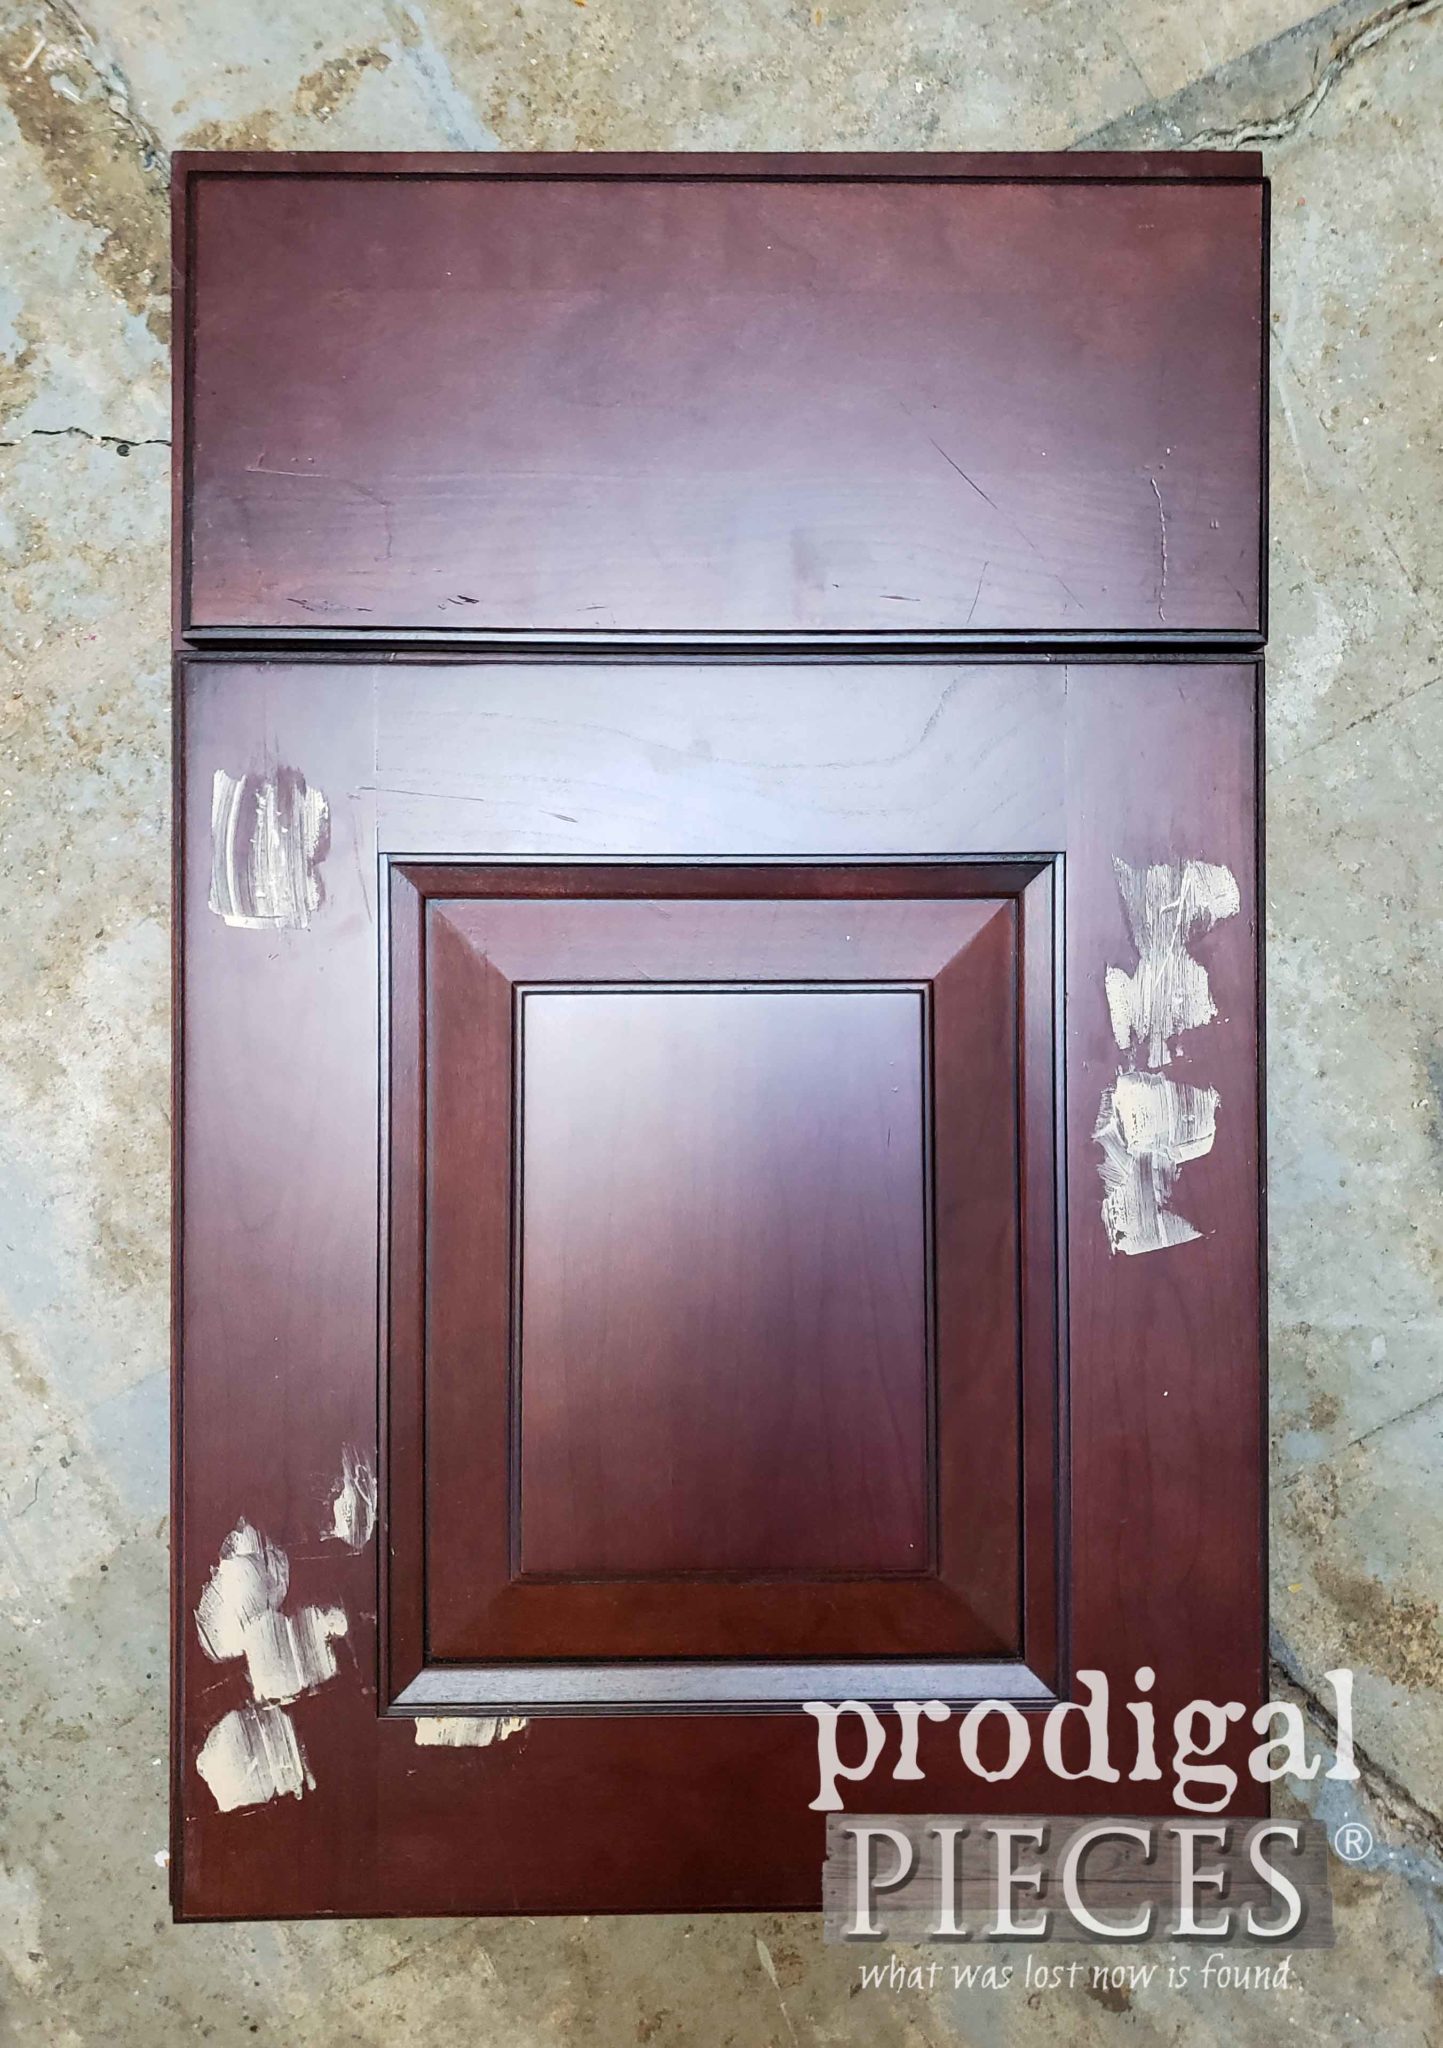
Before I show you what I did with these, first, let me tell you how I came upon them. A huge thanks goes to my friend Sue. She sent me a massage asking if I would like some cupboard doors. Apparently, her son does cabinetry work on the side and had some doors that were new, but had a flaw or two so they couldn’t be used. She mentioned he was going to burn them because he didn’t have time to make use of them. I know how he feels as I often run out of space too. Sue decided to check with me instead of letting him burn them. Whew!!
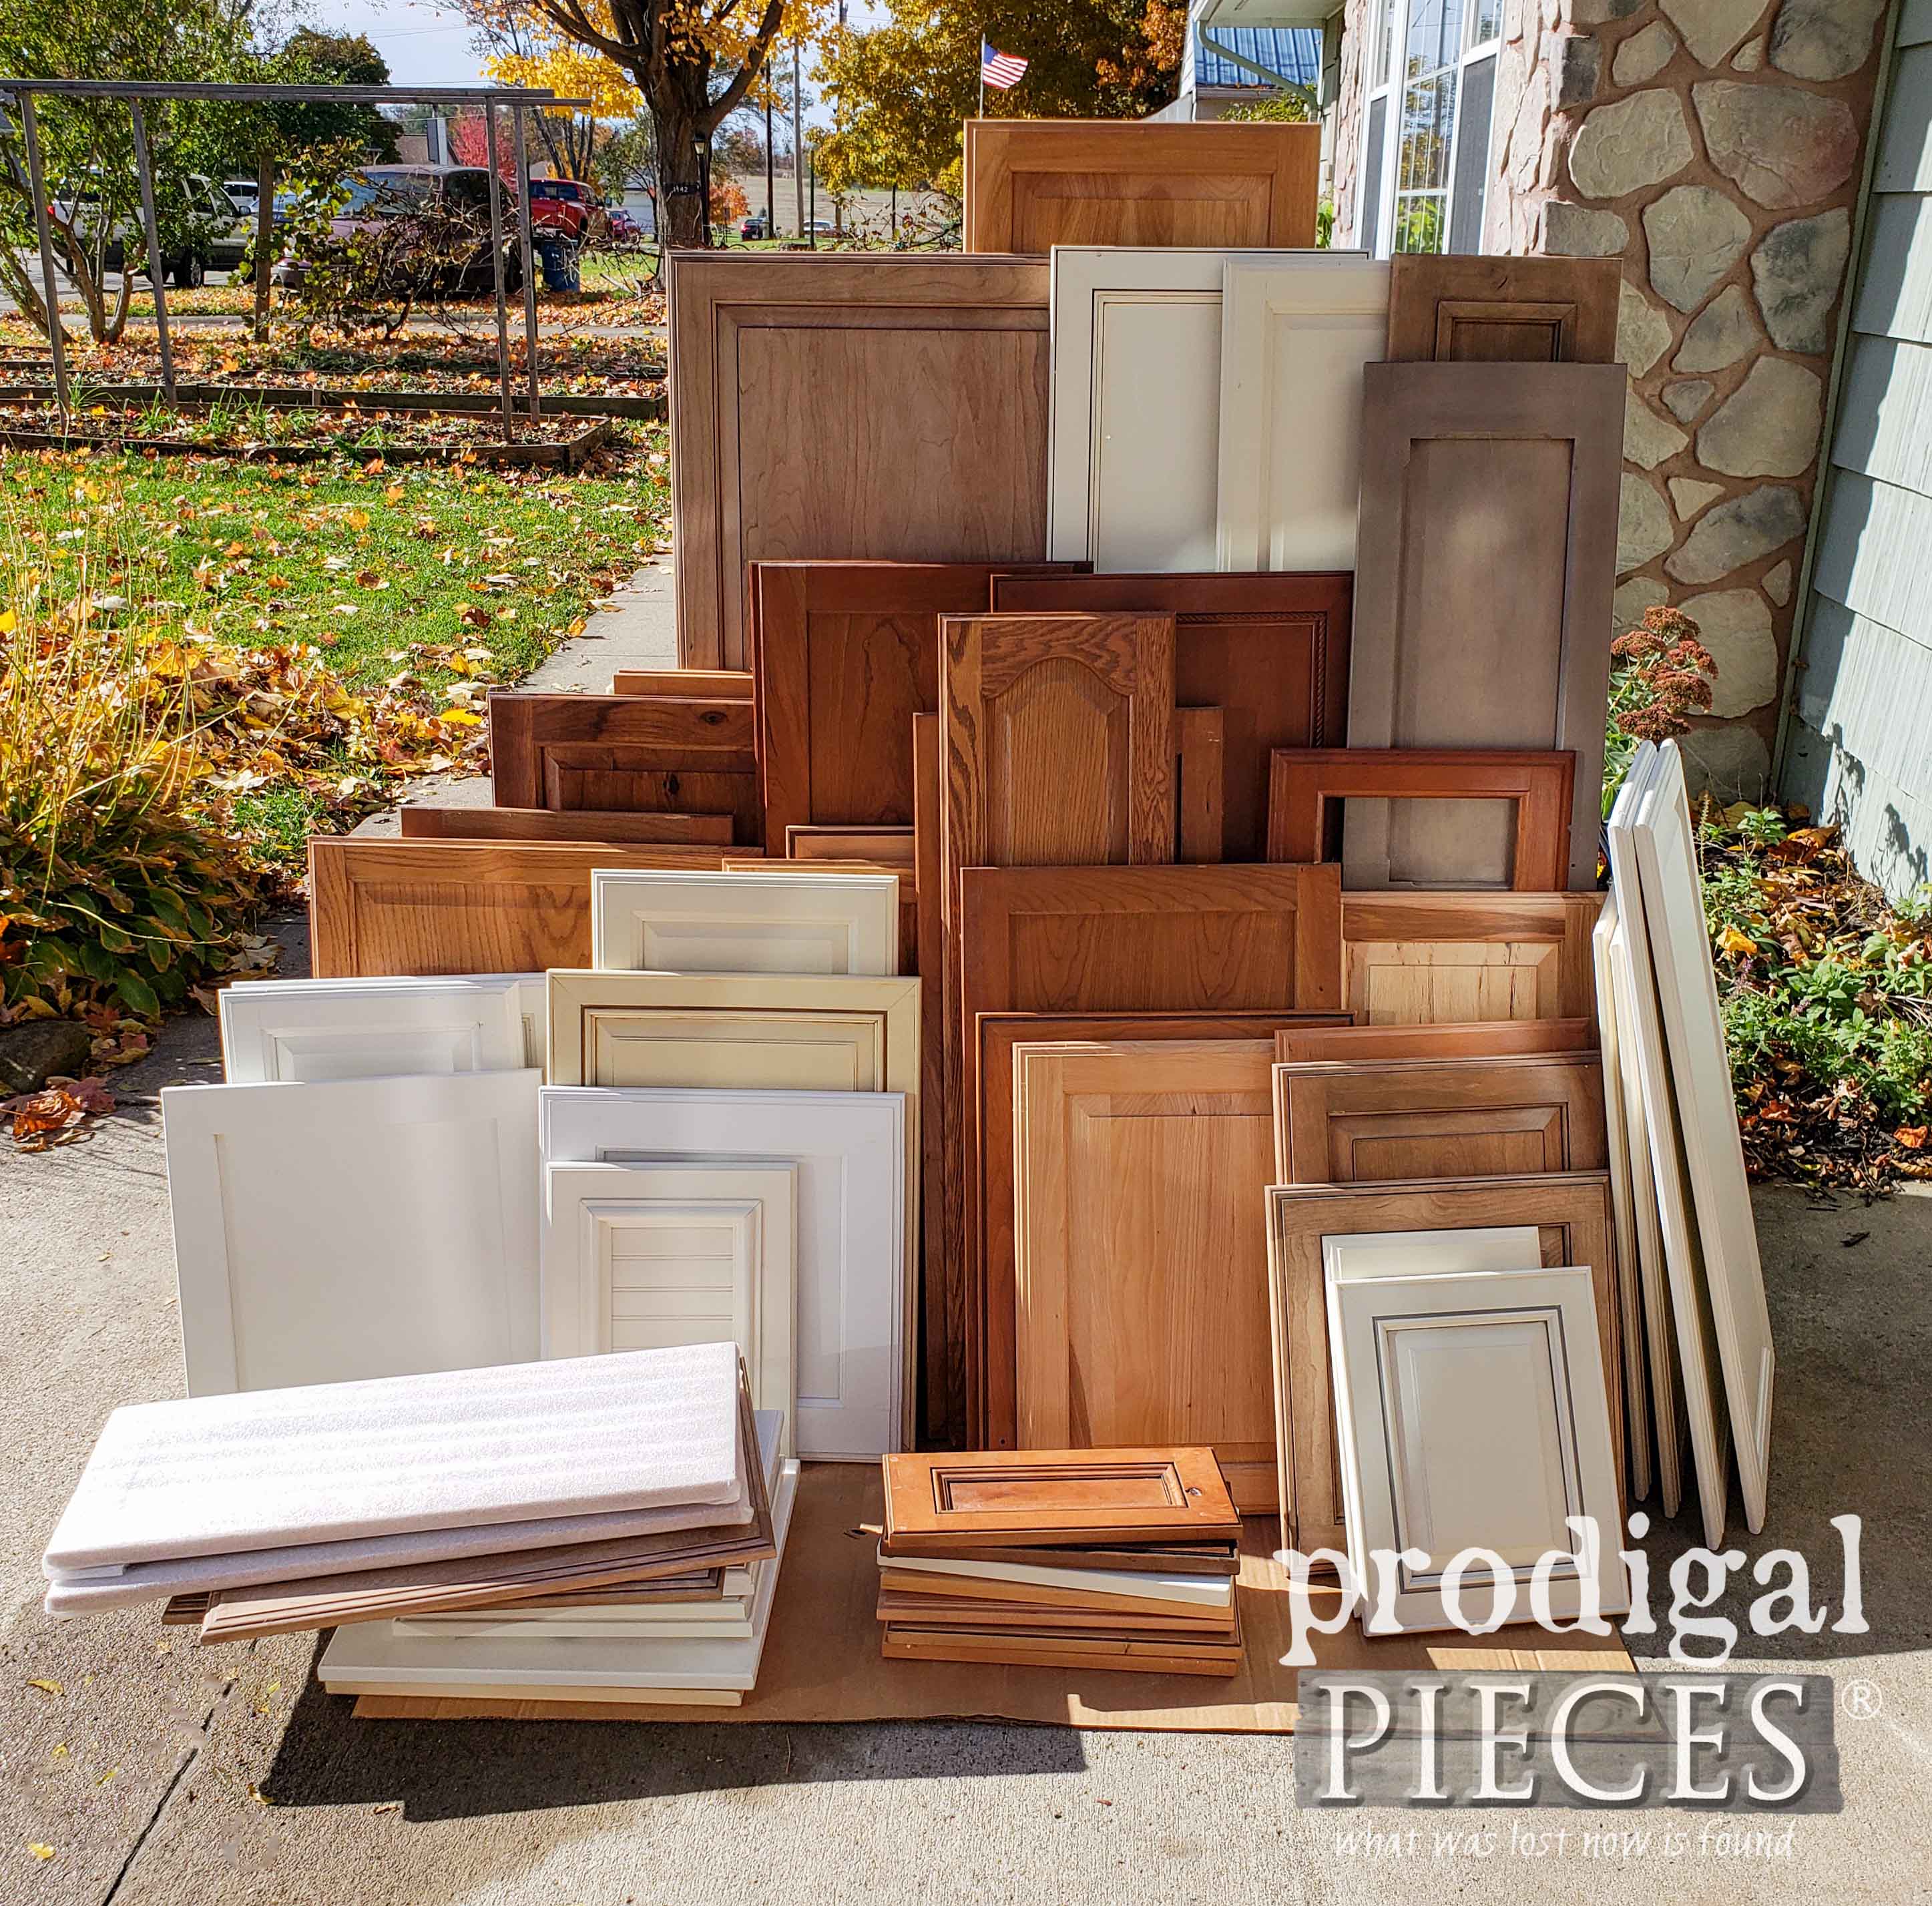
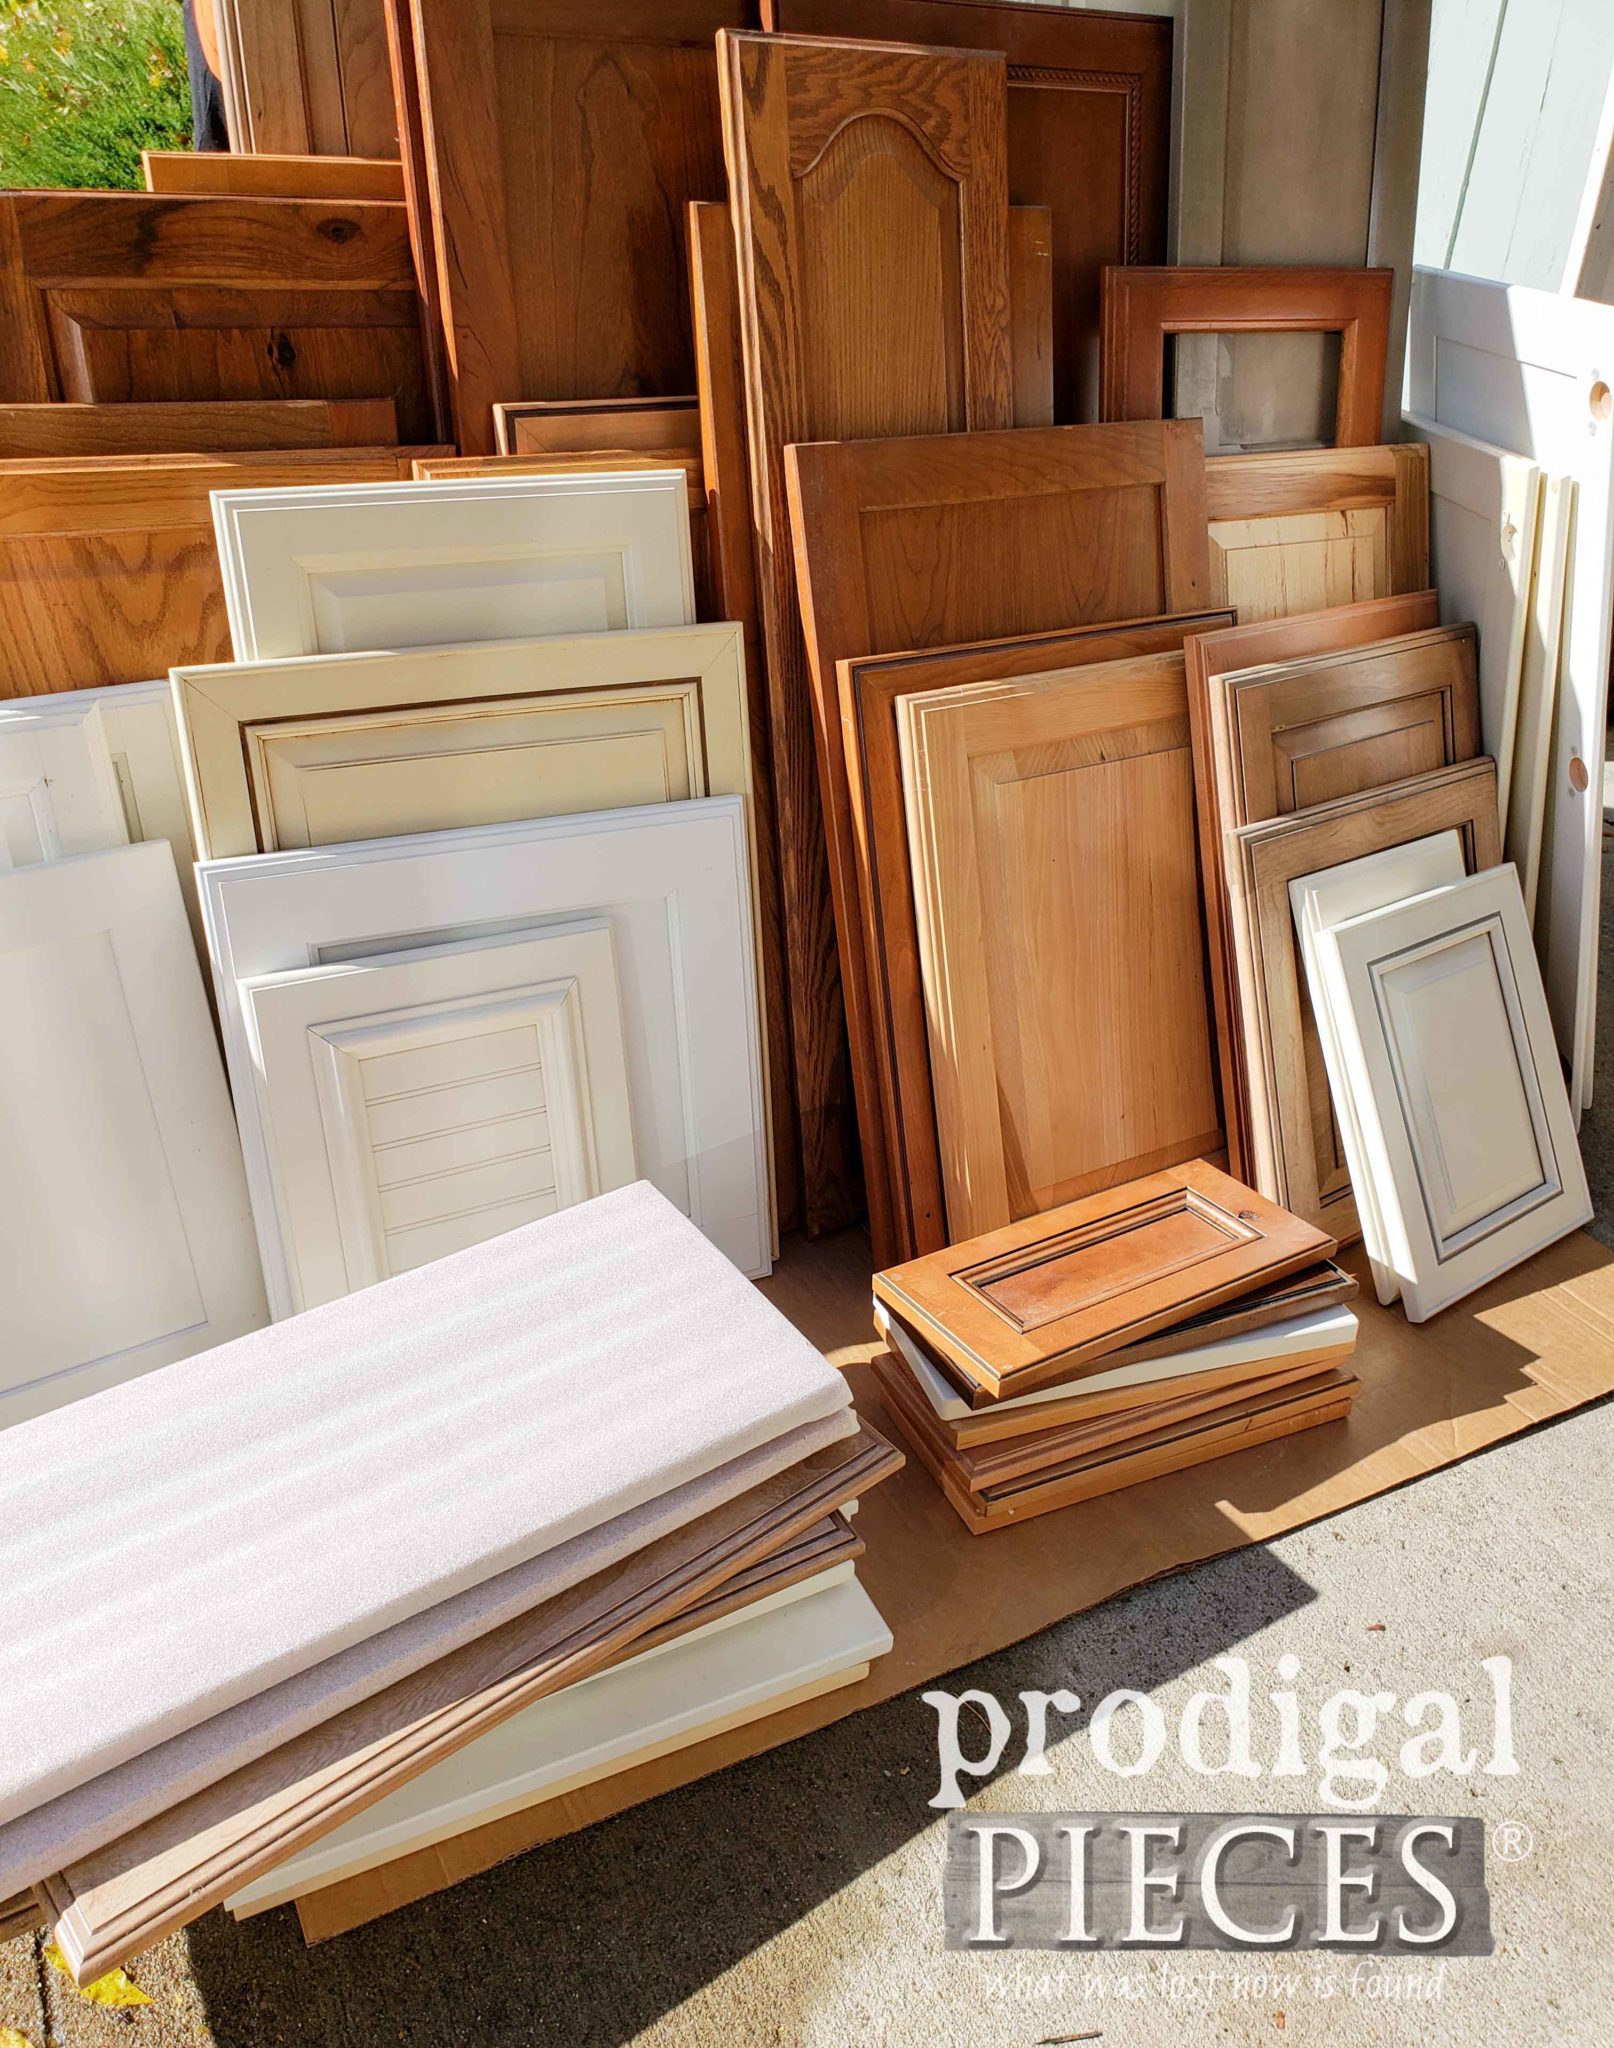
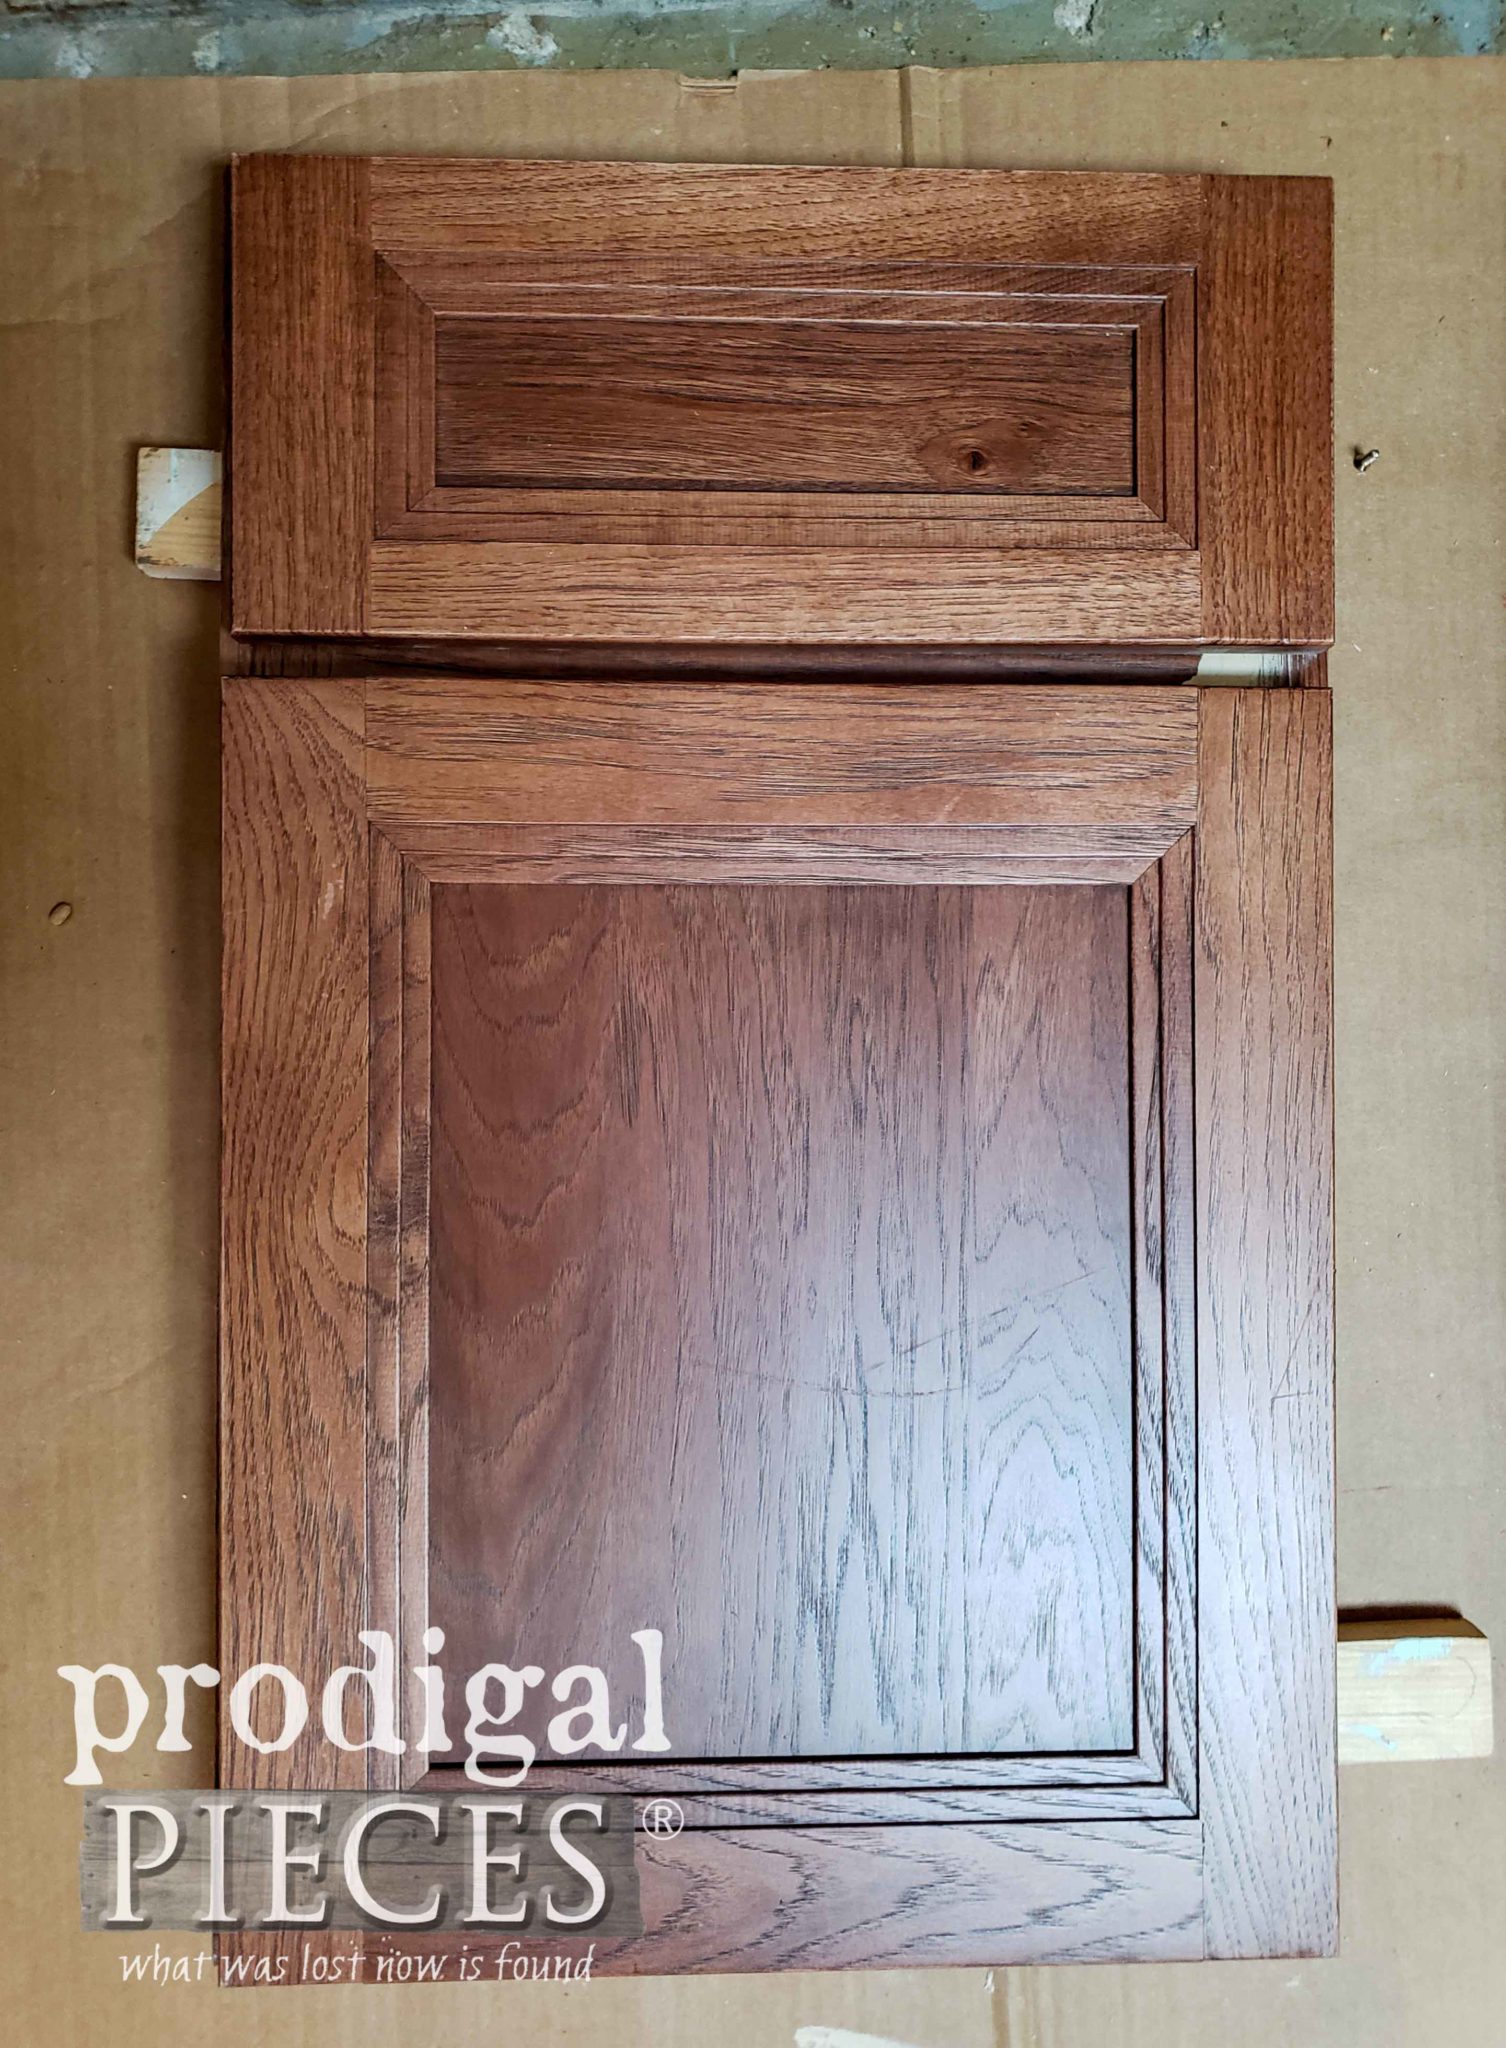
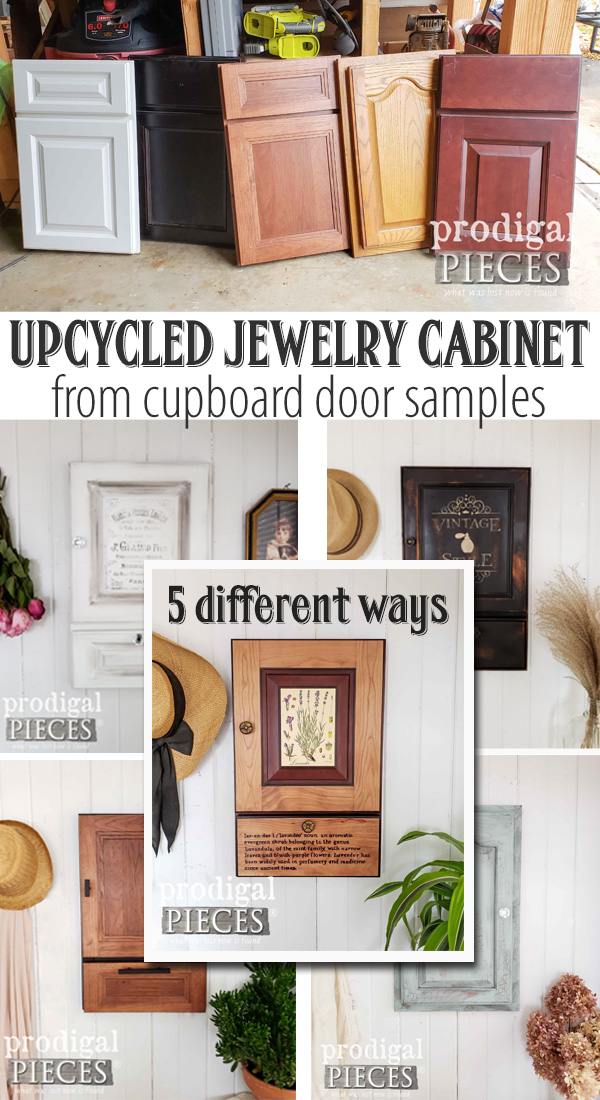
I told her I’d be happy to take them, but asked how many. Well…here is about half of what he still has just hanging around. SCORE!!
MOTHER LOAD
We’ve got drawer fronts, small doors, large doors, narrow doors, and even some new-in-package doors. Can we say I have plenty to work on for awhile? ahem. This kinda stash makes my heart pitter-pat dreaming up ideas of how to use them. Anyone with me?
I know my kids are just as excited. They have already picked out ones they want to work on, and I’m excited to get mama time with them creating. Over the next few months, I plan to show you all the different ways make use of a repurposed cupboard door. What a fun adventure it will be! The best part is you can repurpose them too since many places, like your local Habitat for Humanity, is always well-stocked in them.
READY
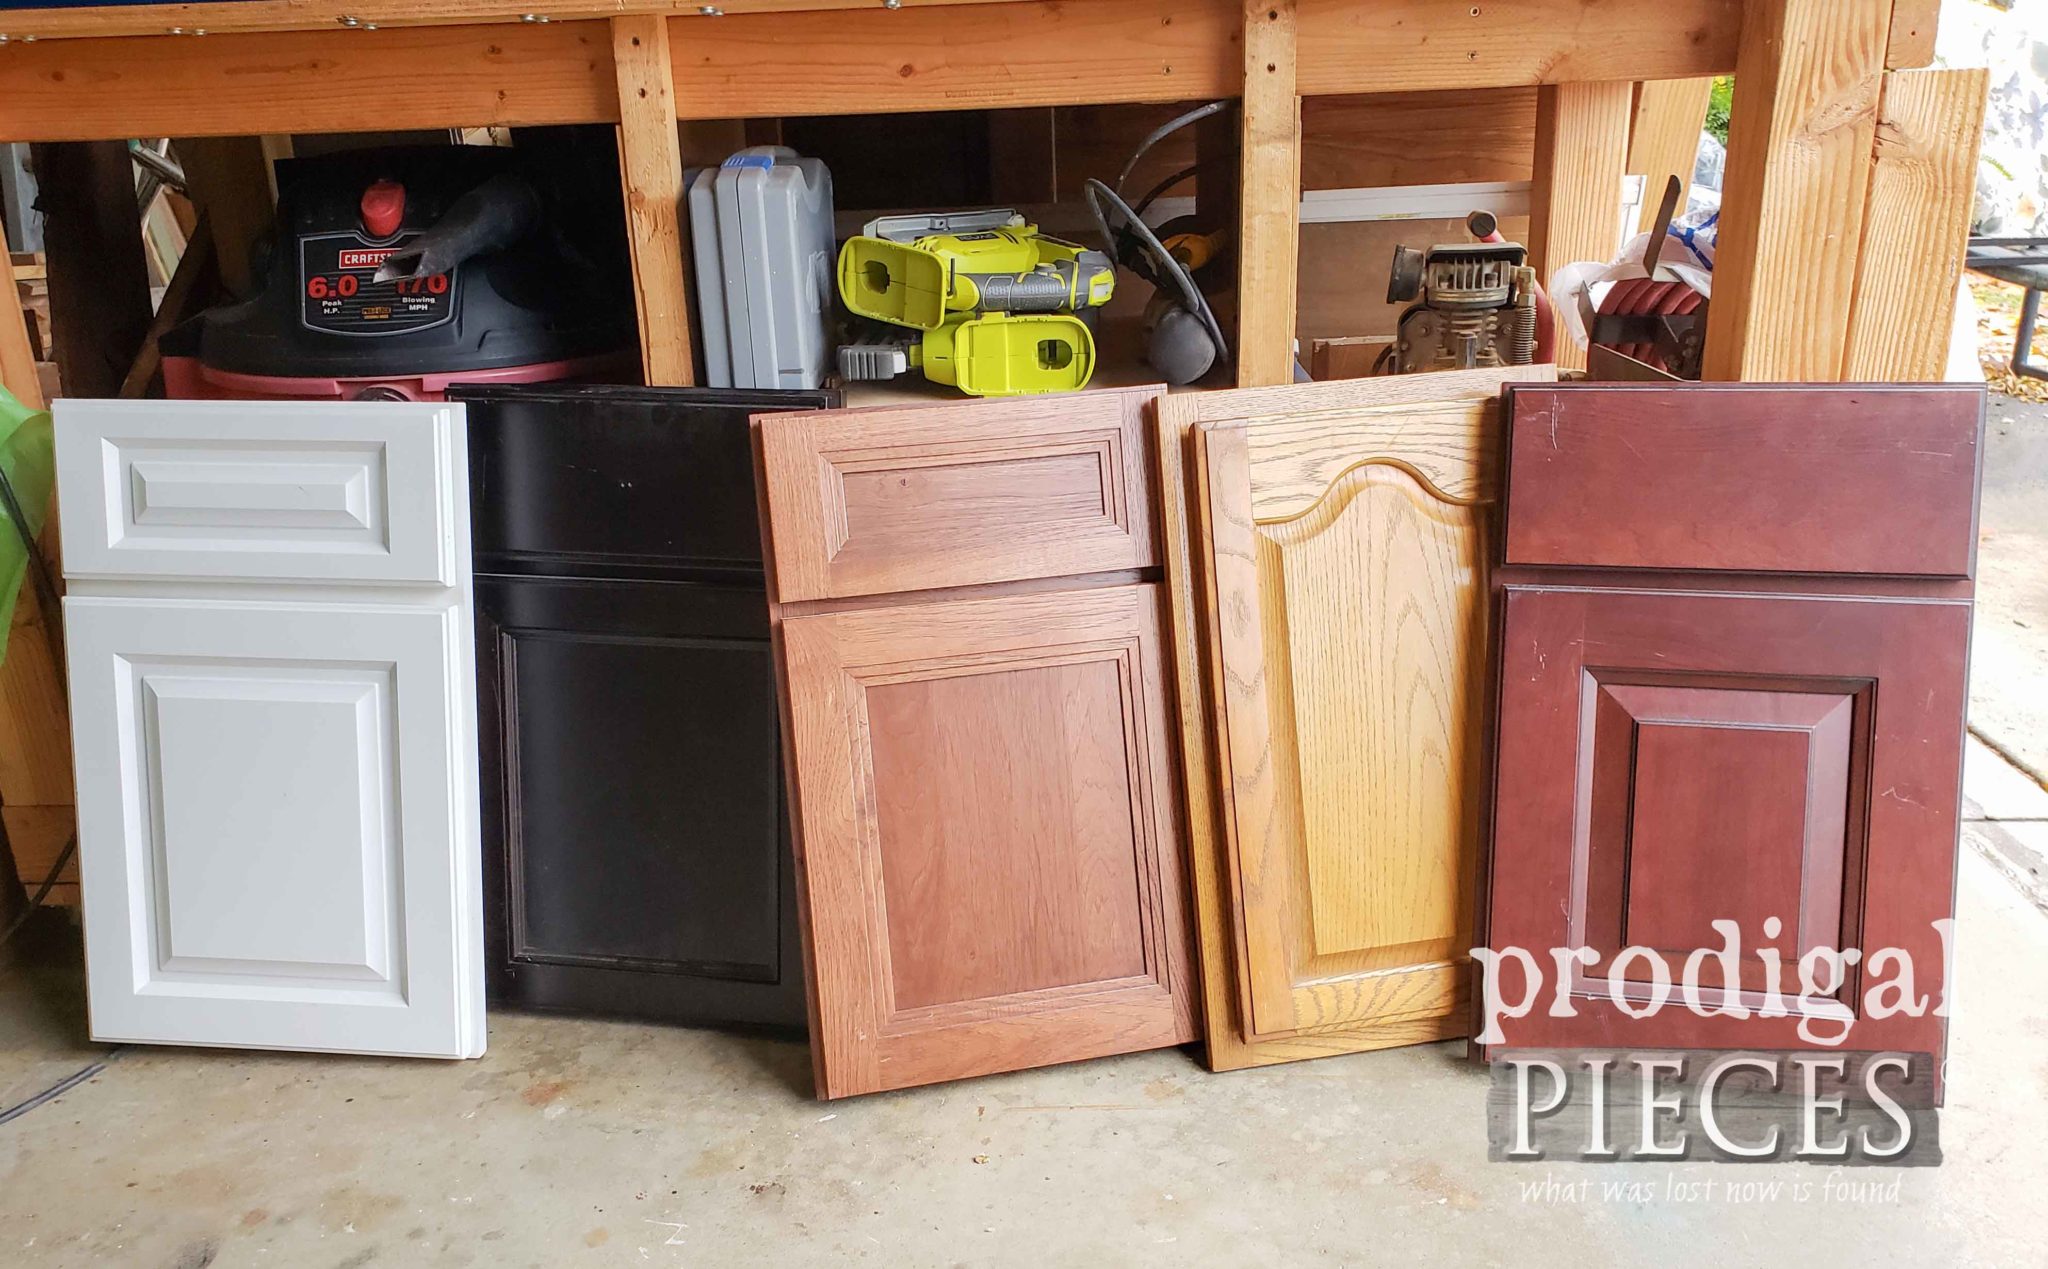
So, back to my project for today – creating a jewelry cabinet out of those cupboard door samples. The samples are what you would be looking at when choosing finishes and styles for your kitchen. Inside the door they have the design and finish described as well as the cabinet maker. I’m sure if you ask a local distributor or retailer, they would be glad to sell you old samples. Hey, who knows…they may just give them to you.
Since I have 5 samples to show you (yes, like a bozo, I decided to rework all 5 at the same time in a couple of days – {{head-smack}}), I will go over each one of them one at a time.
DIY TIME
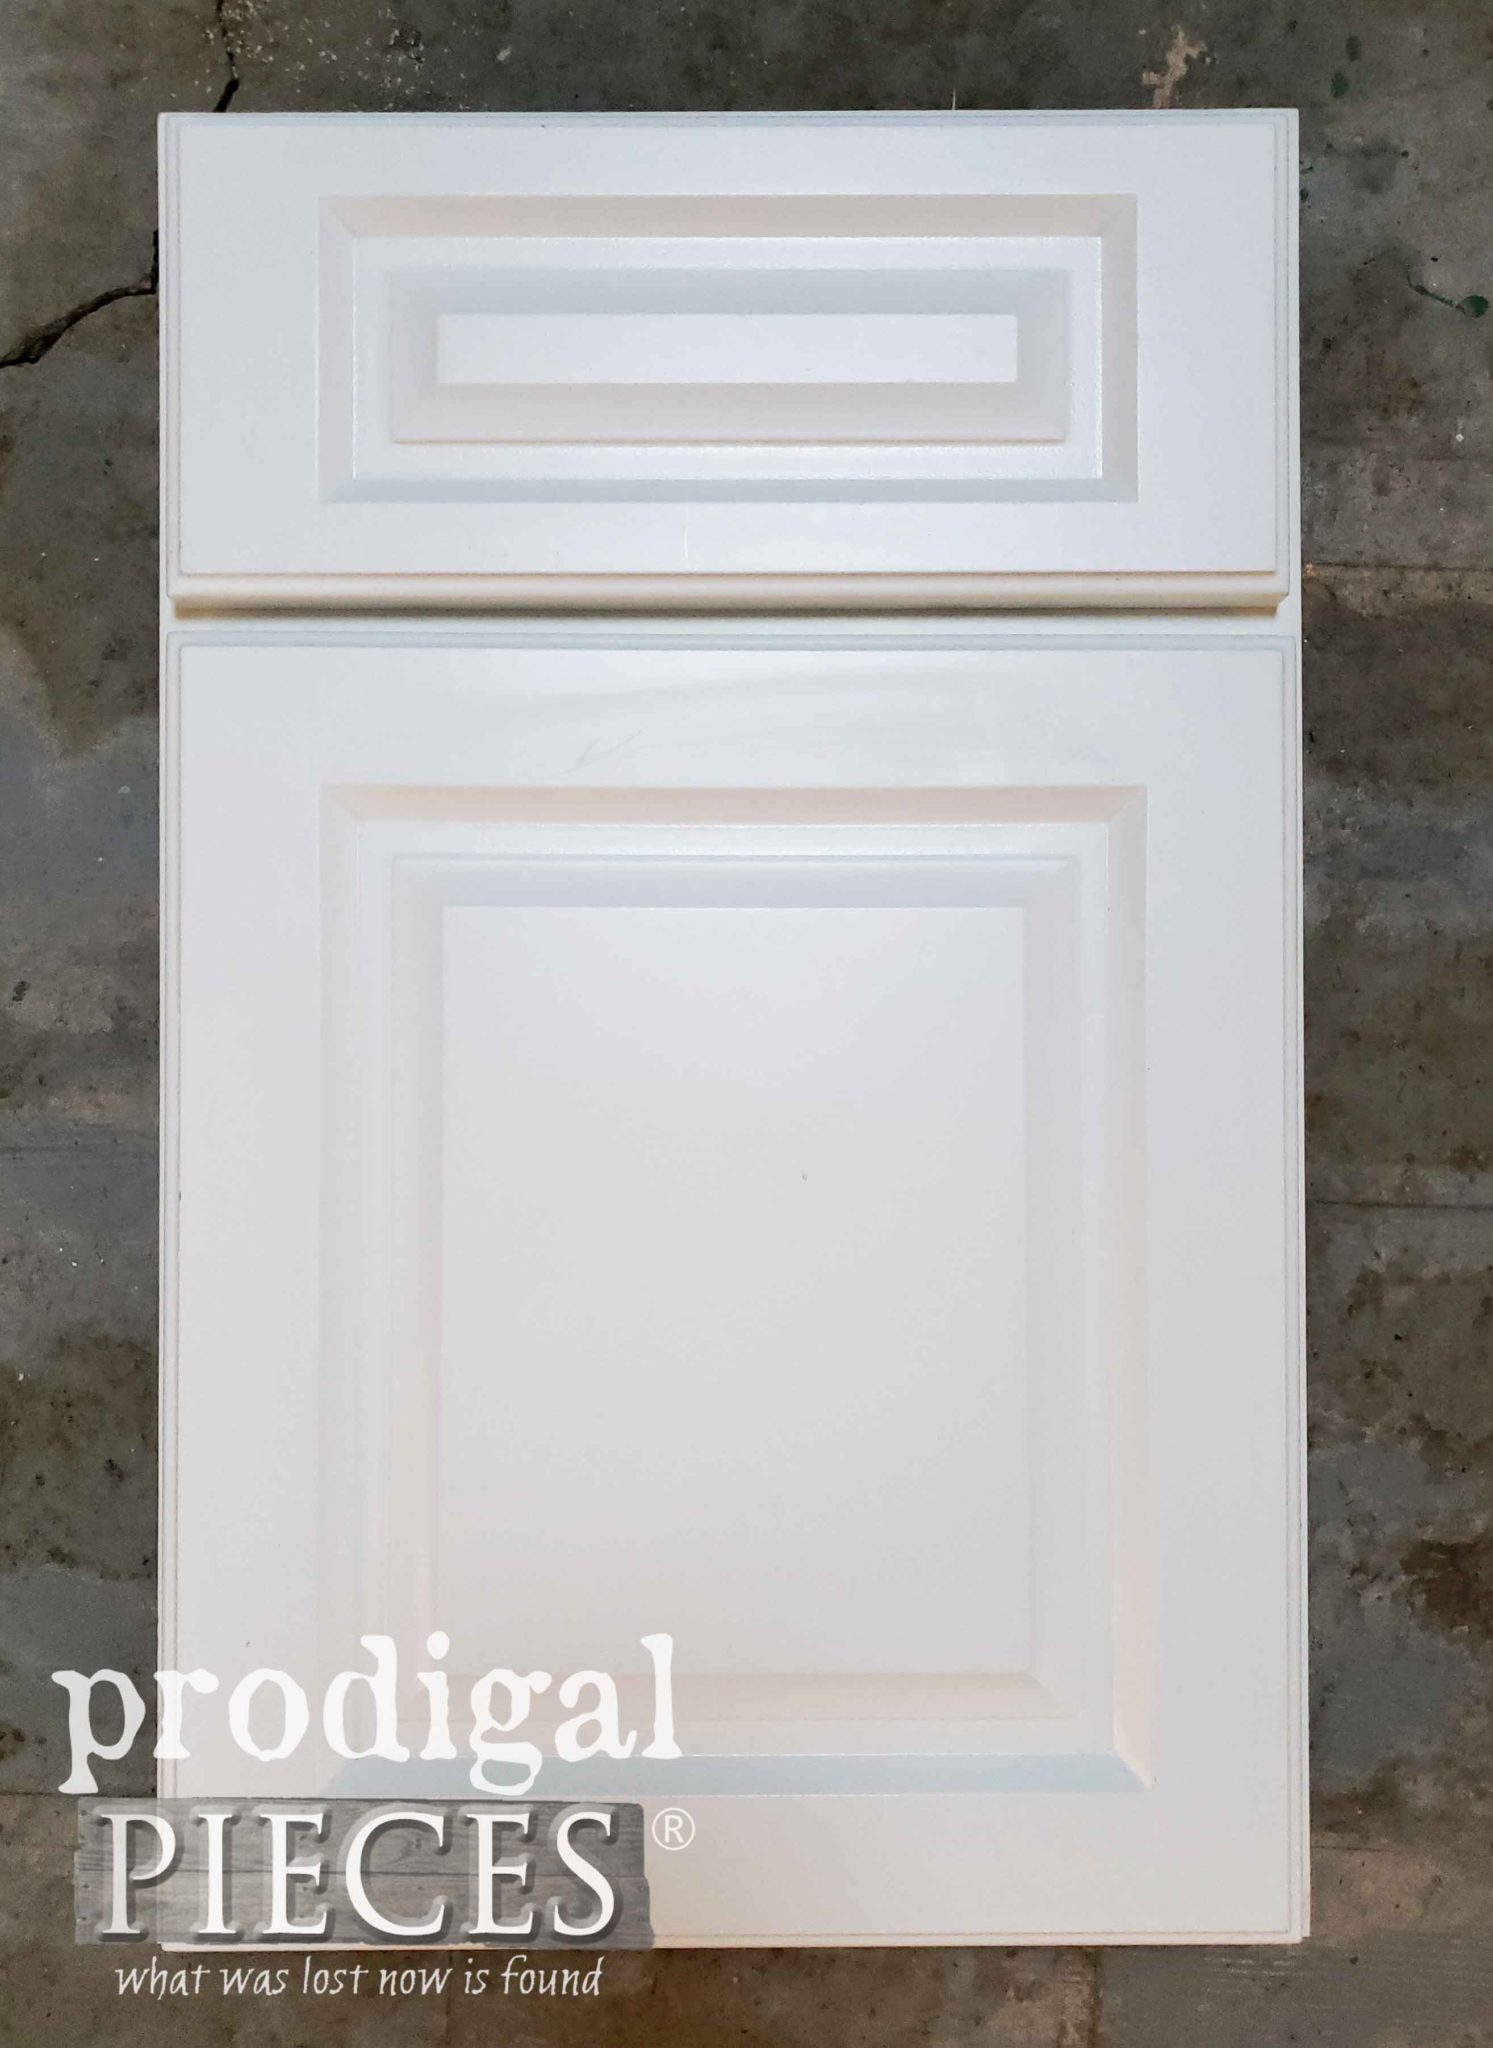
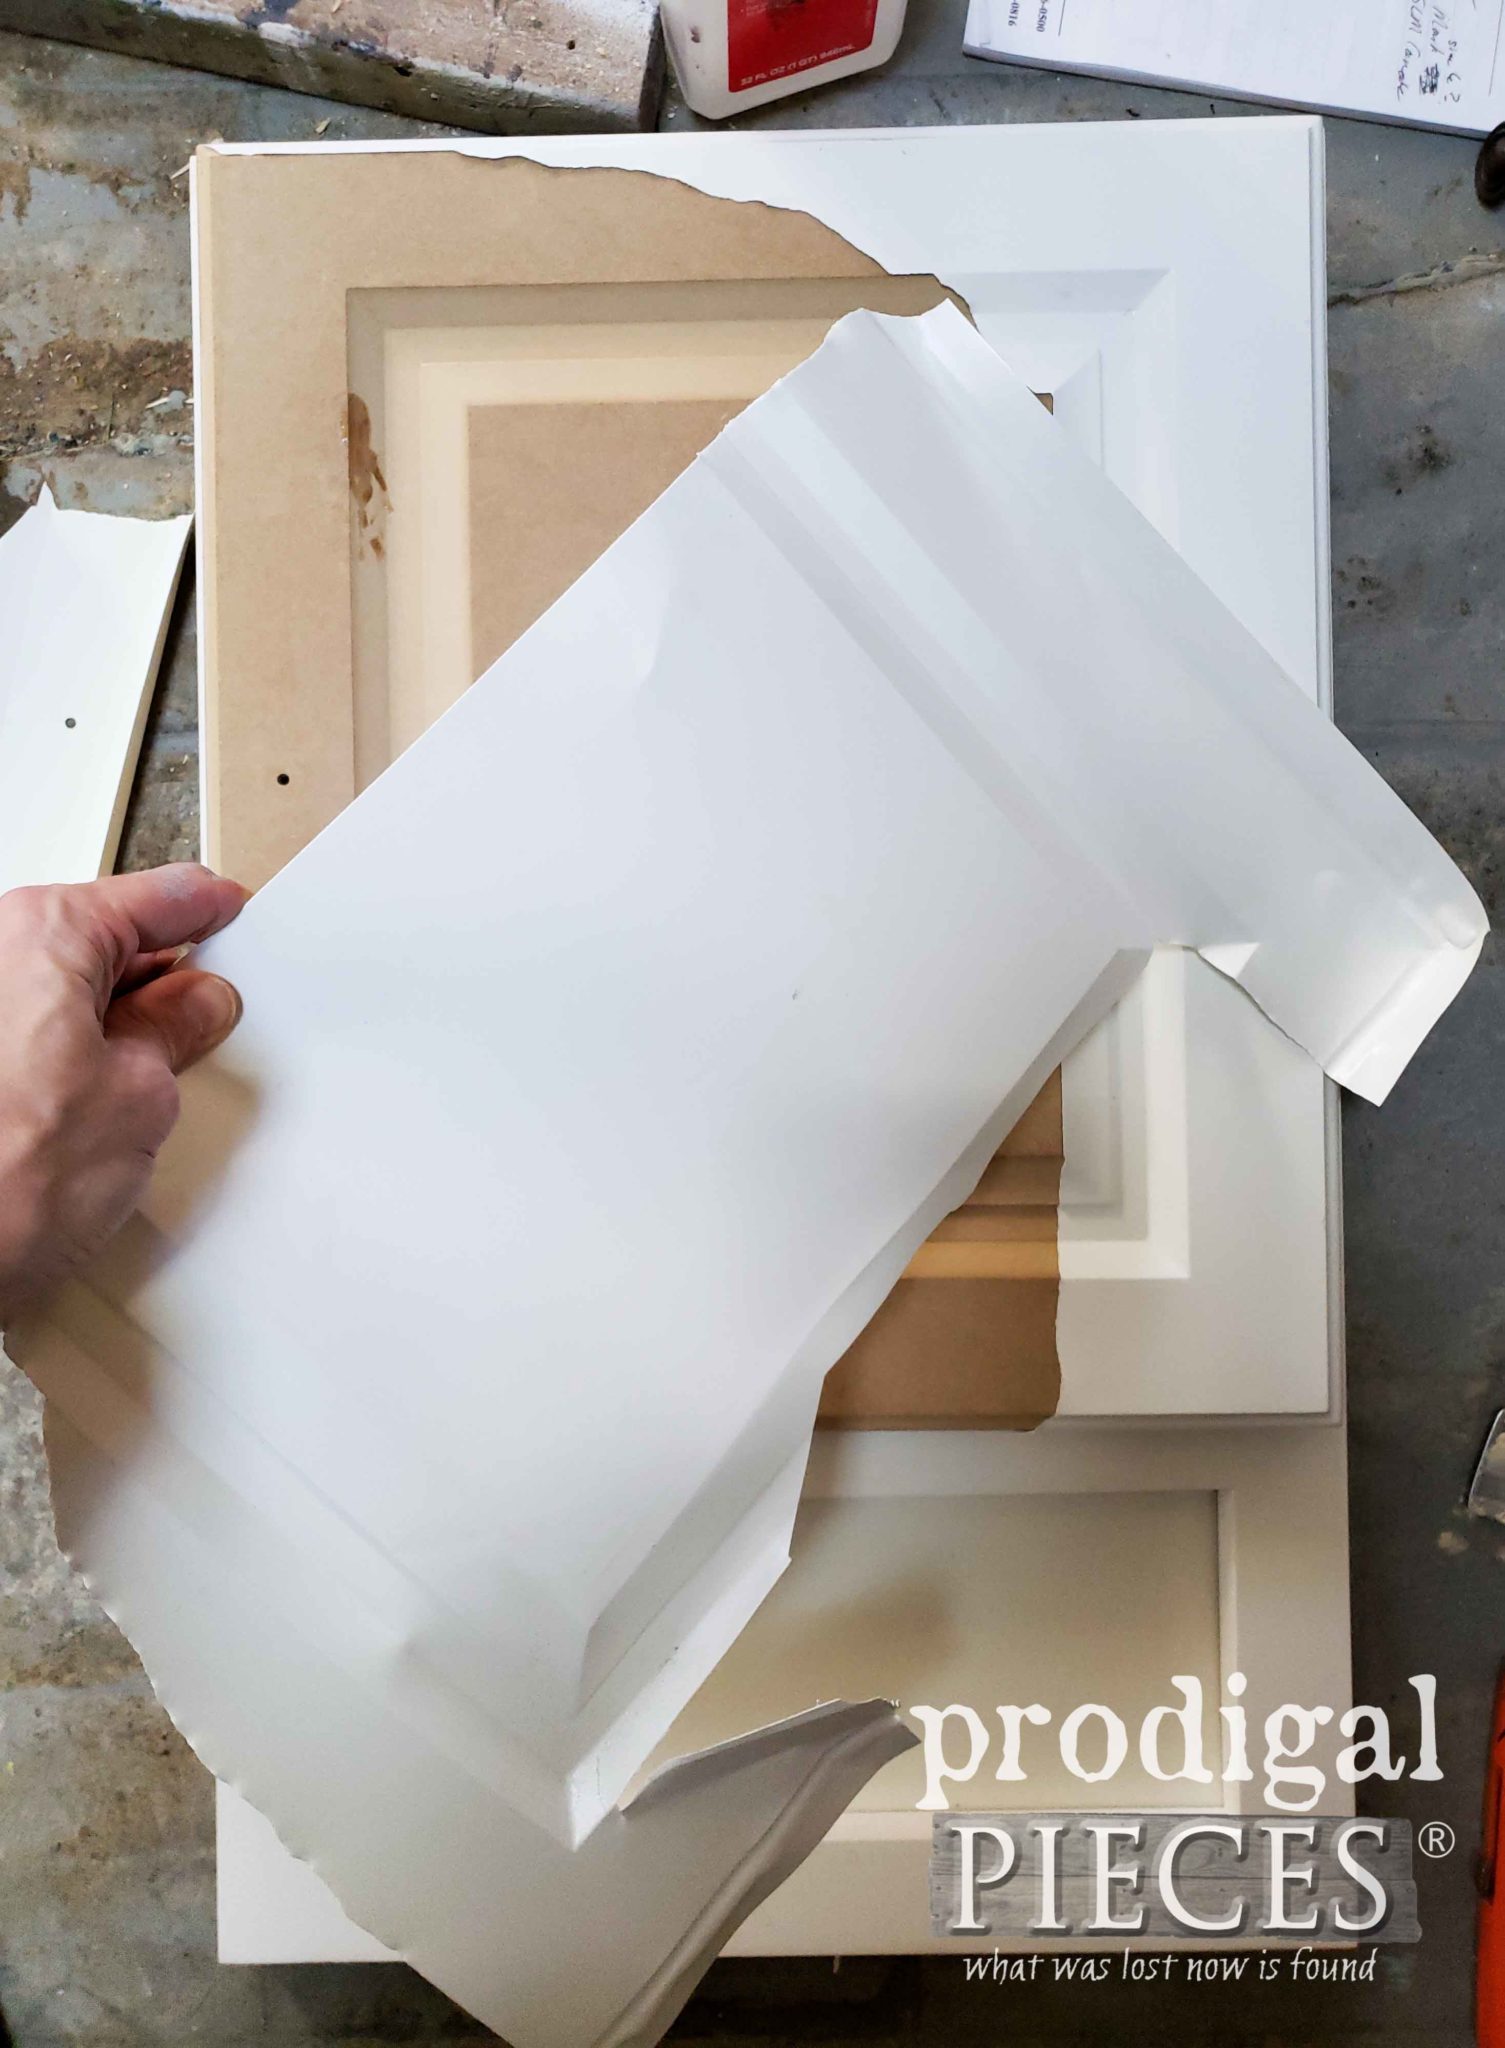
First, I’ll show you what I did with the white laminate one. If you have these in your kitchen, I feel for you. What you have is a plastic coated MDF door that looks like it would chip or fall apart easily.
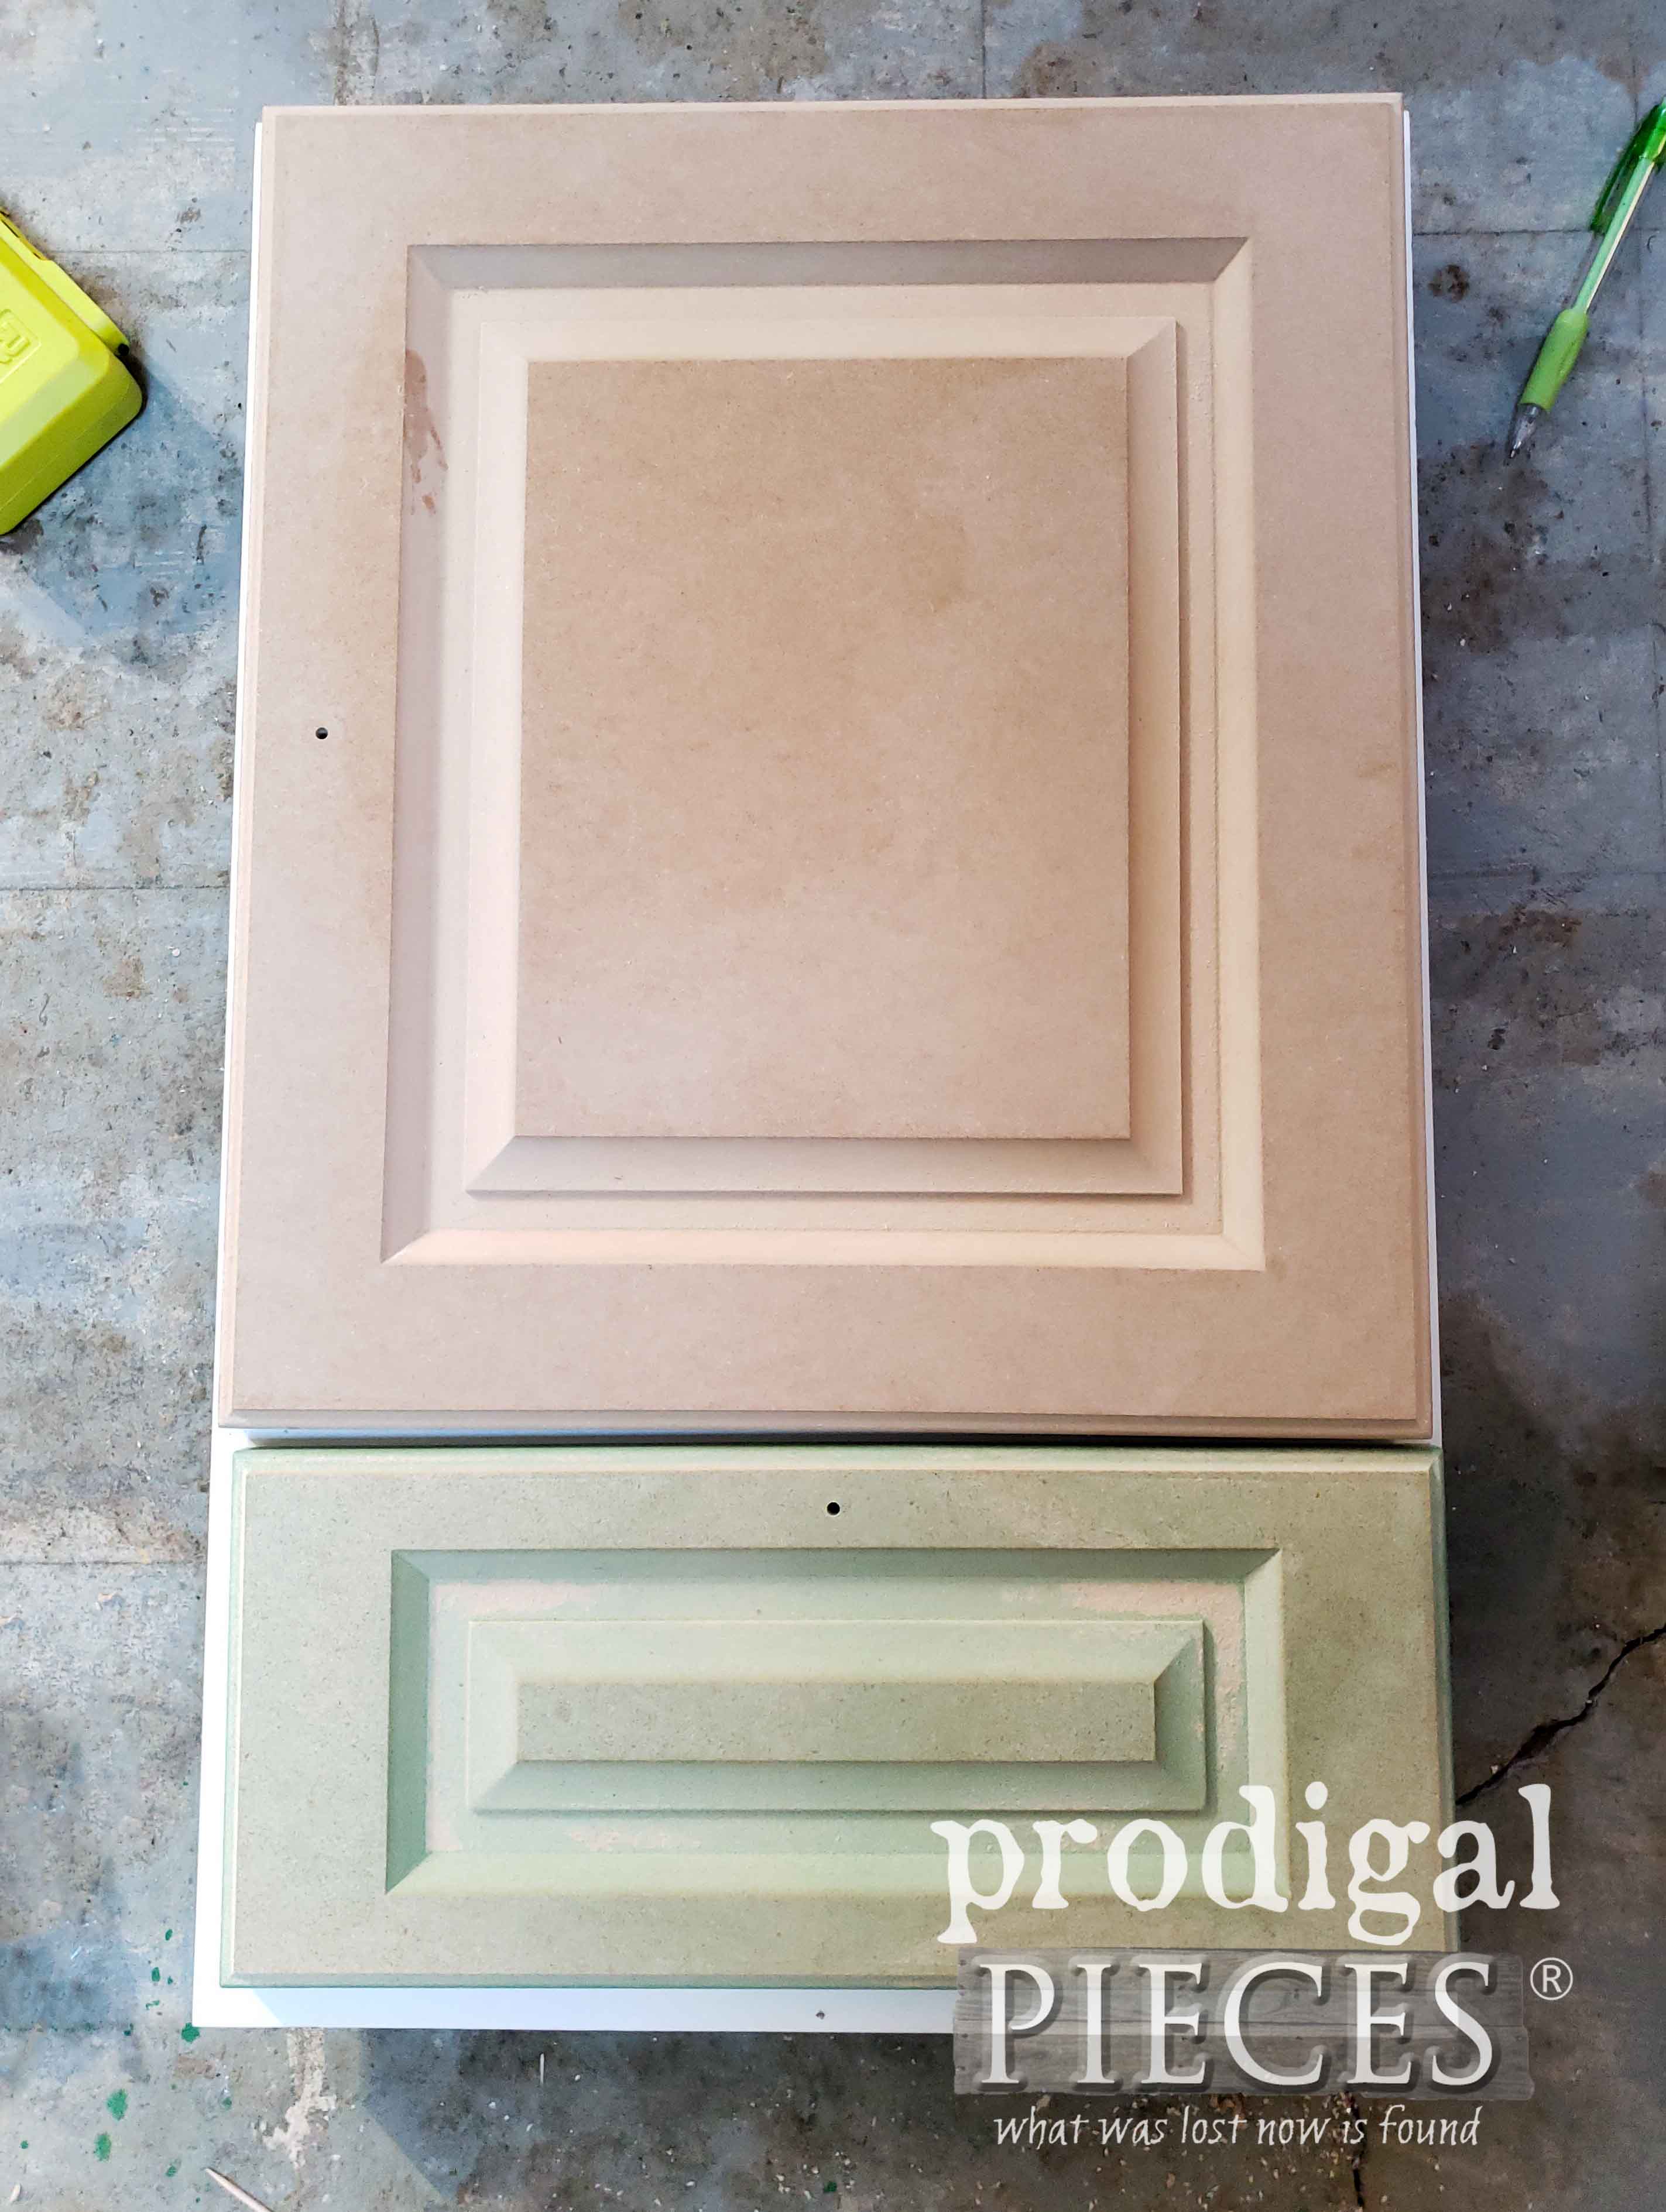
However, there’s no need to be down about it because you can give them new life! I found that a hair dryer or heat gun will suck that laminate right off and you are left with a clean slate that you can PAINT. {{happy dance!!}}
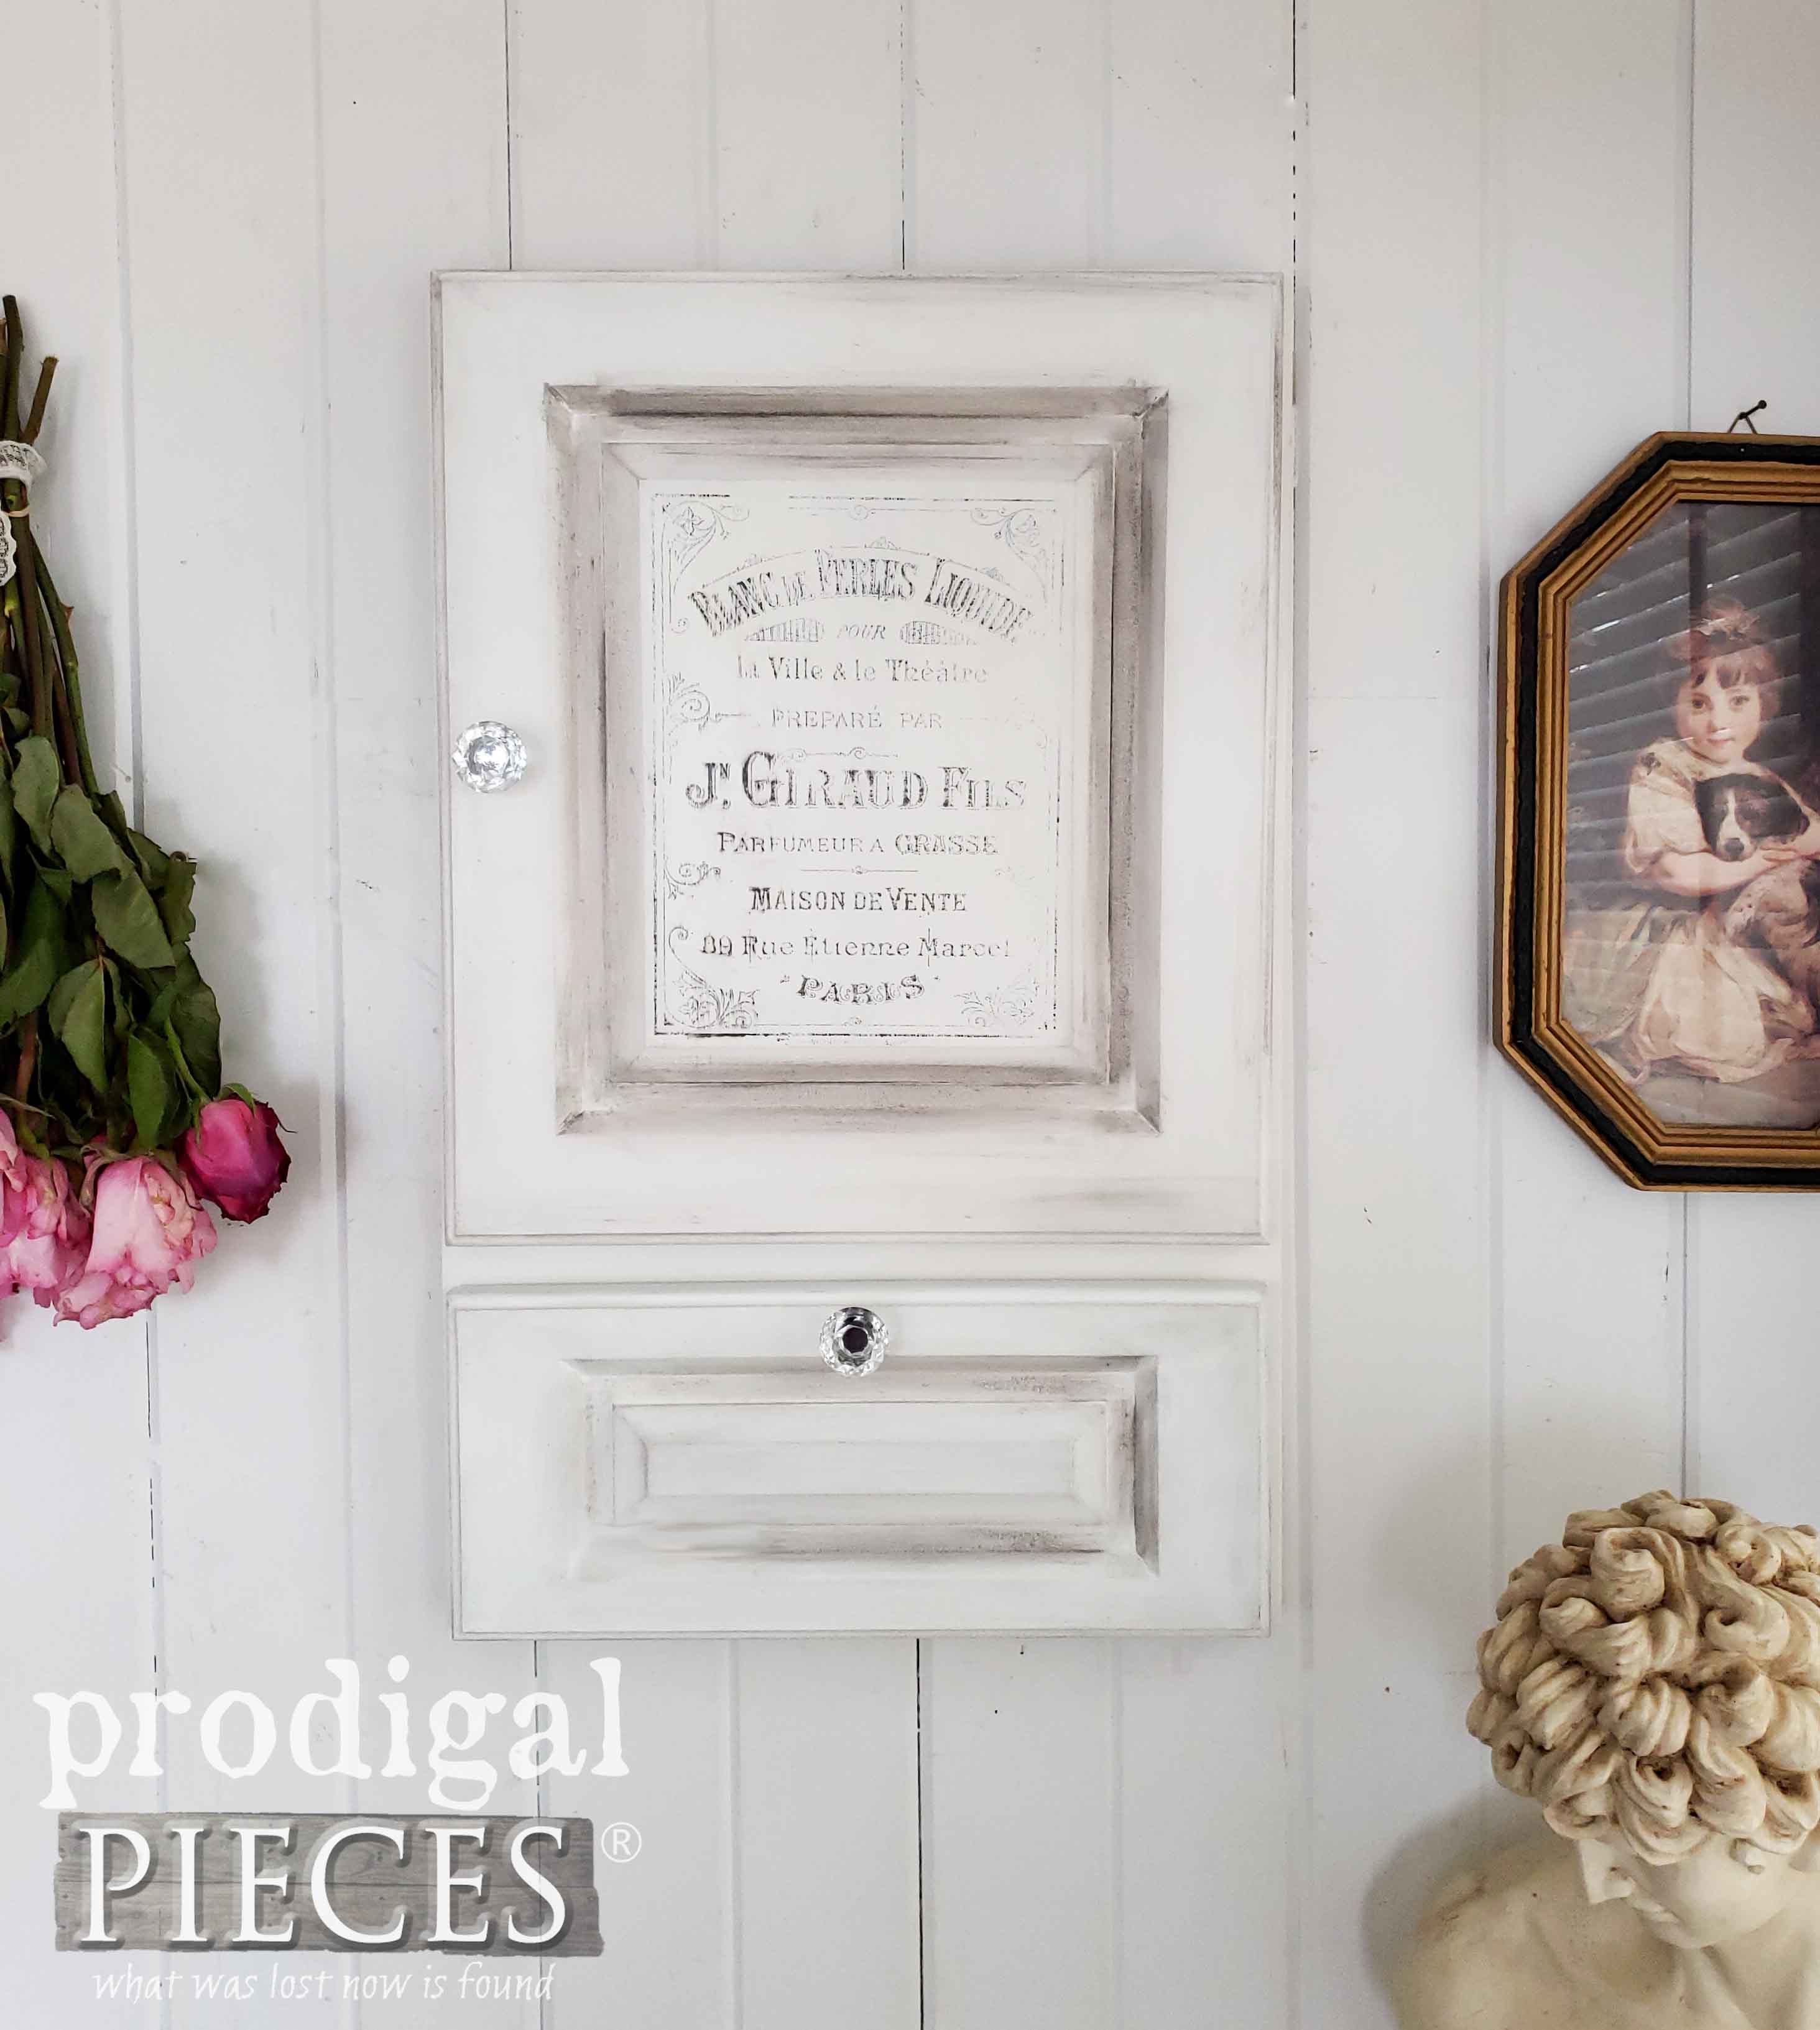
Notice that for my project I am flipping the door sample upside down with the drawer face on the bottom. Now that my repurposed cupboard door is free of its laminate straight jacket, I can set to painting. I didn’t prime my door, but you could if you prefer so that you have a base coat. All I used was a bit of white paint to give it two coats with my paint brush and we’re good to go.
MORE FUN
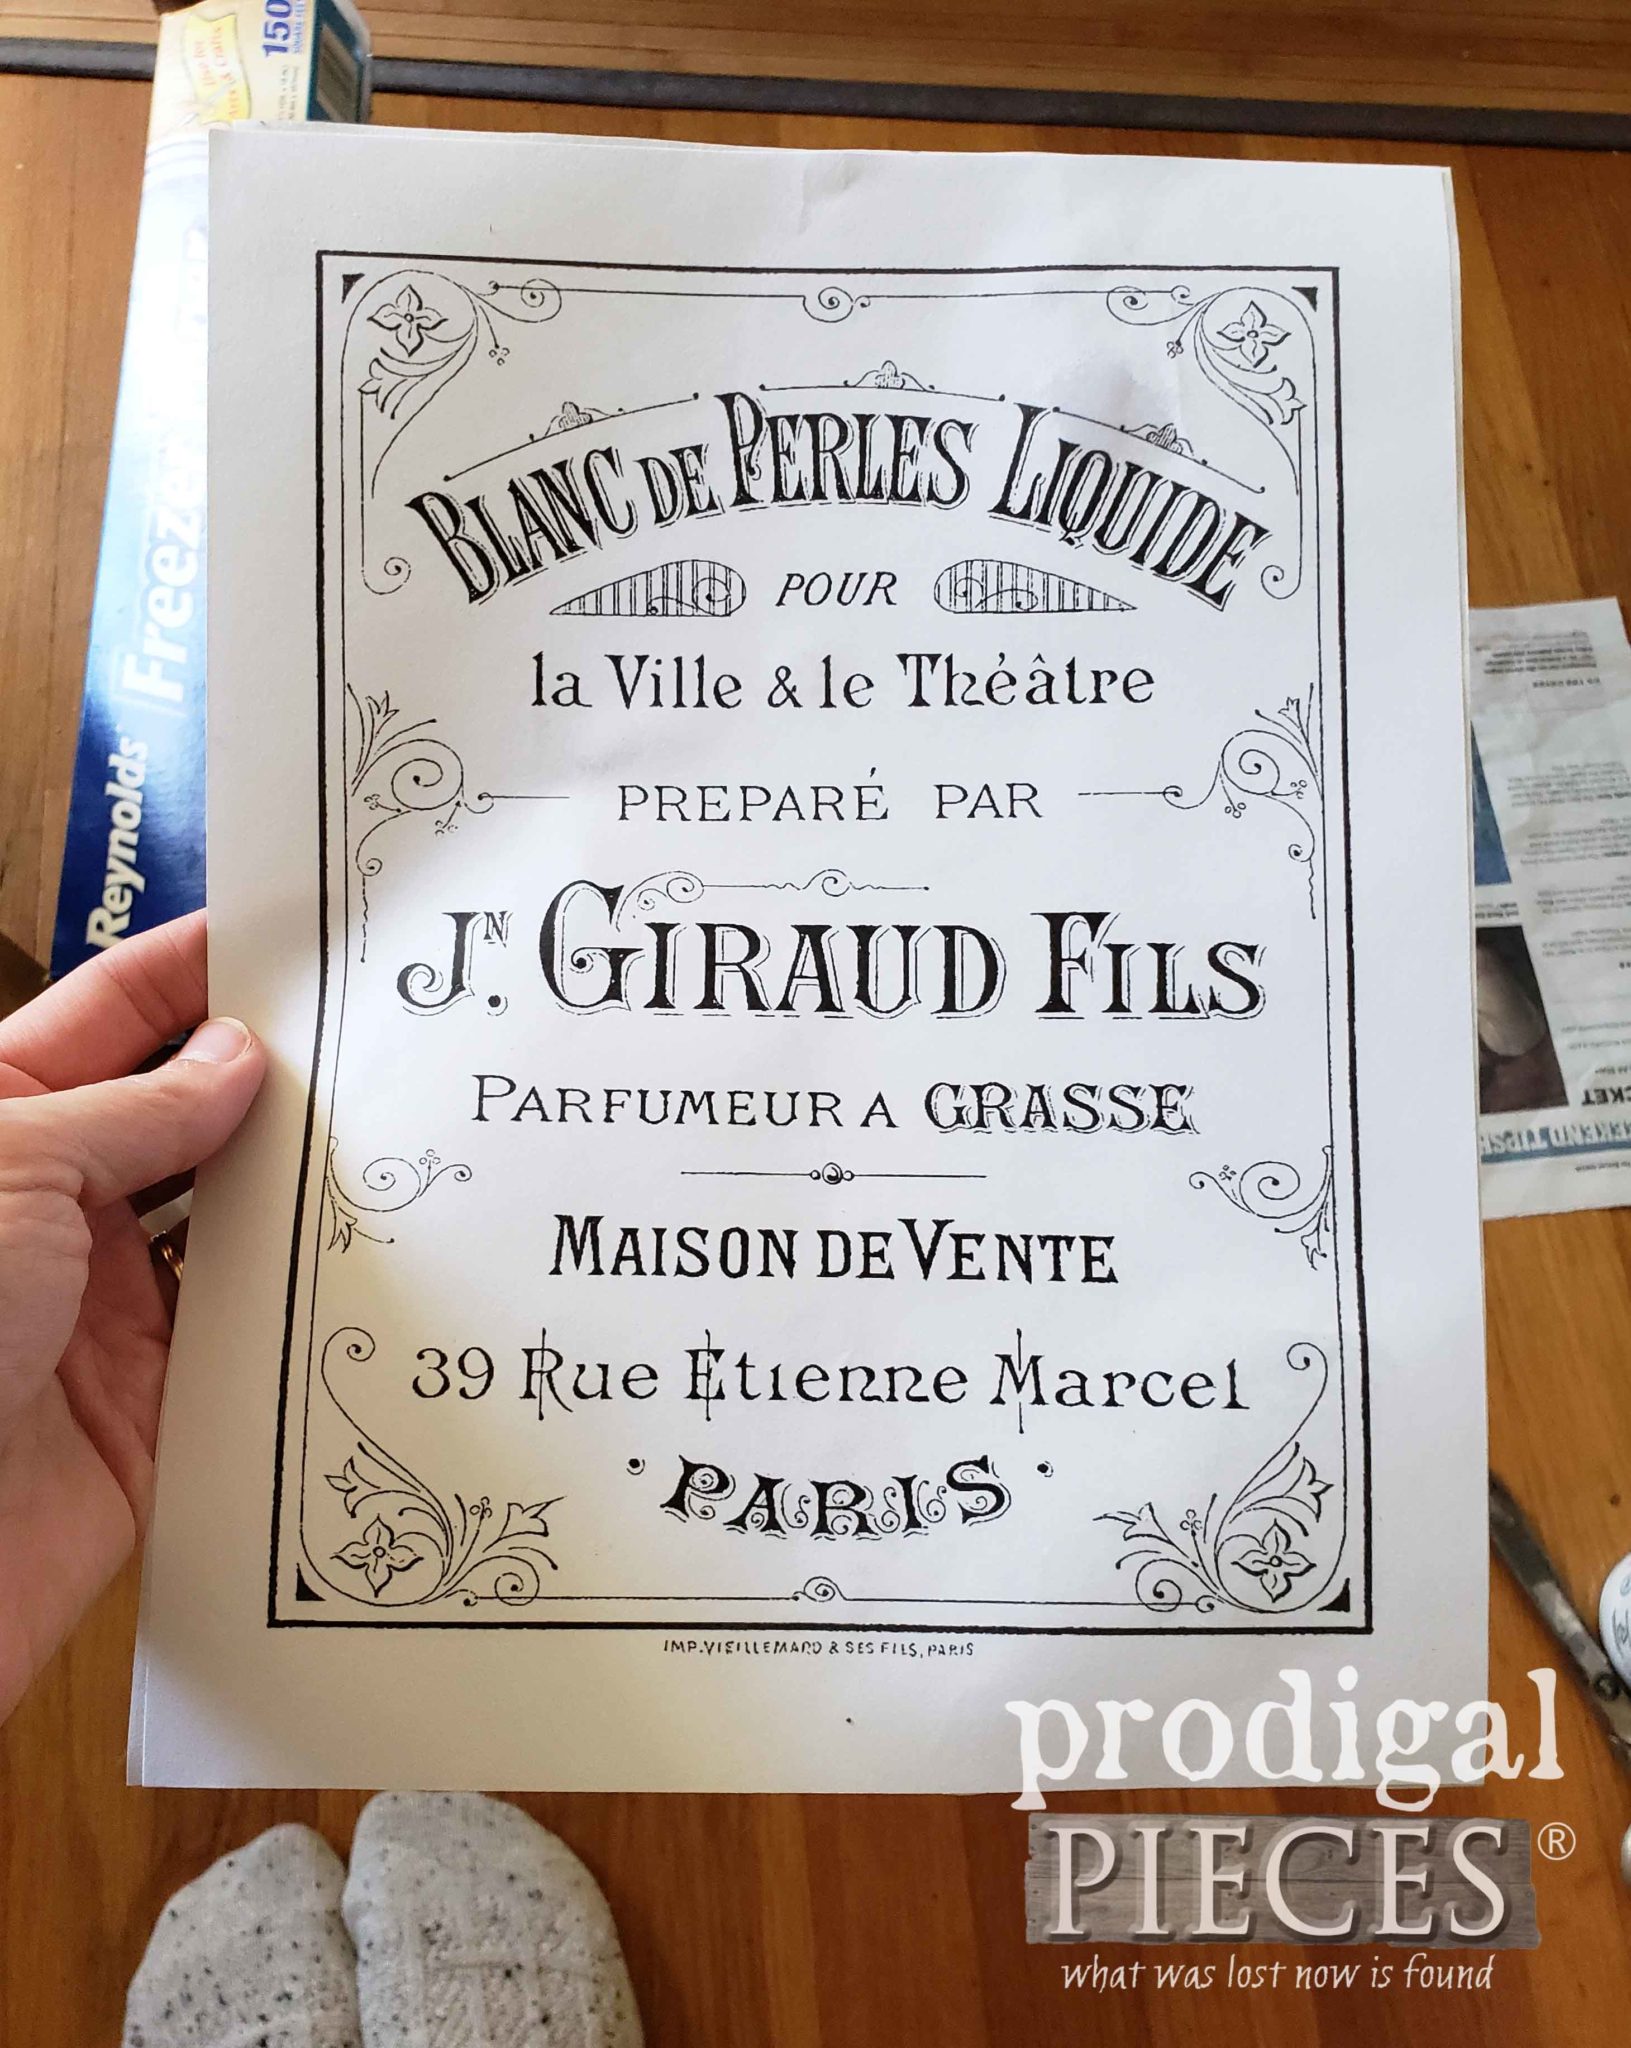
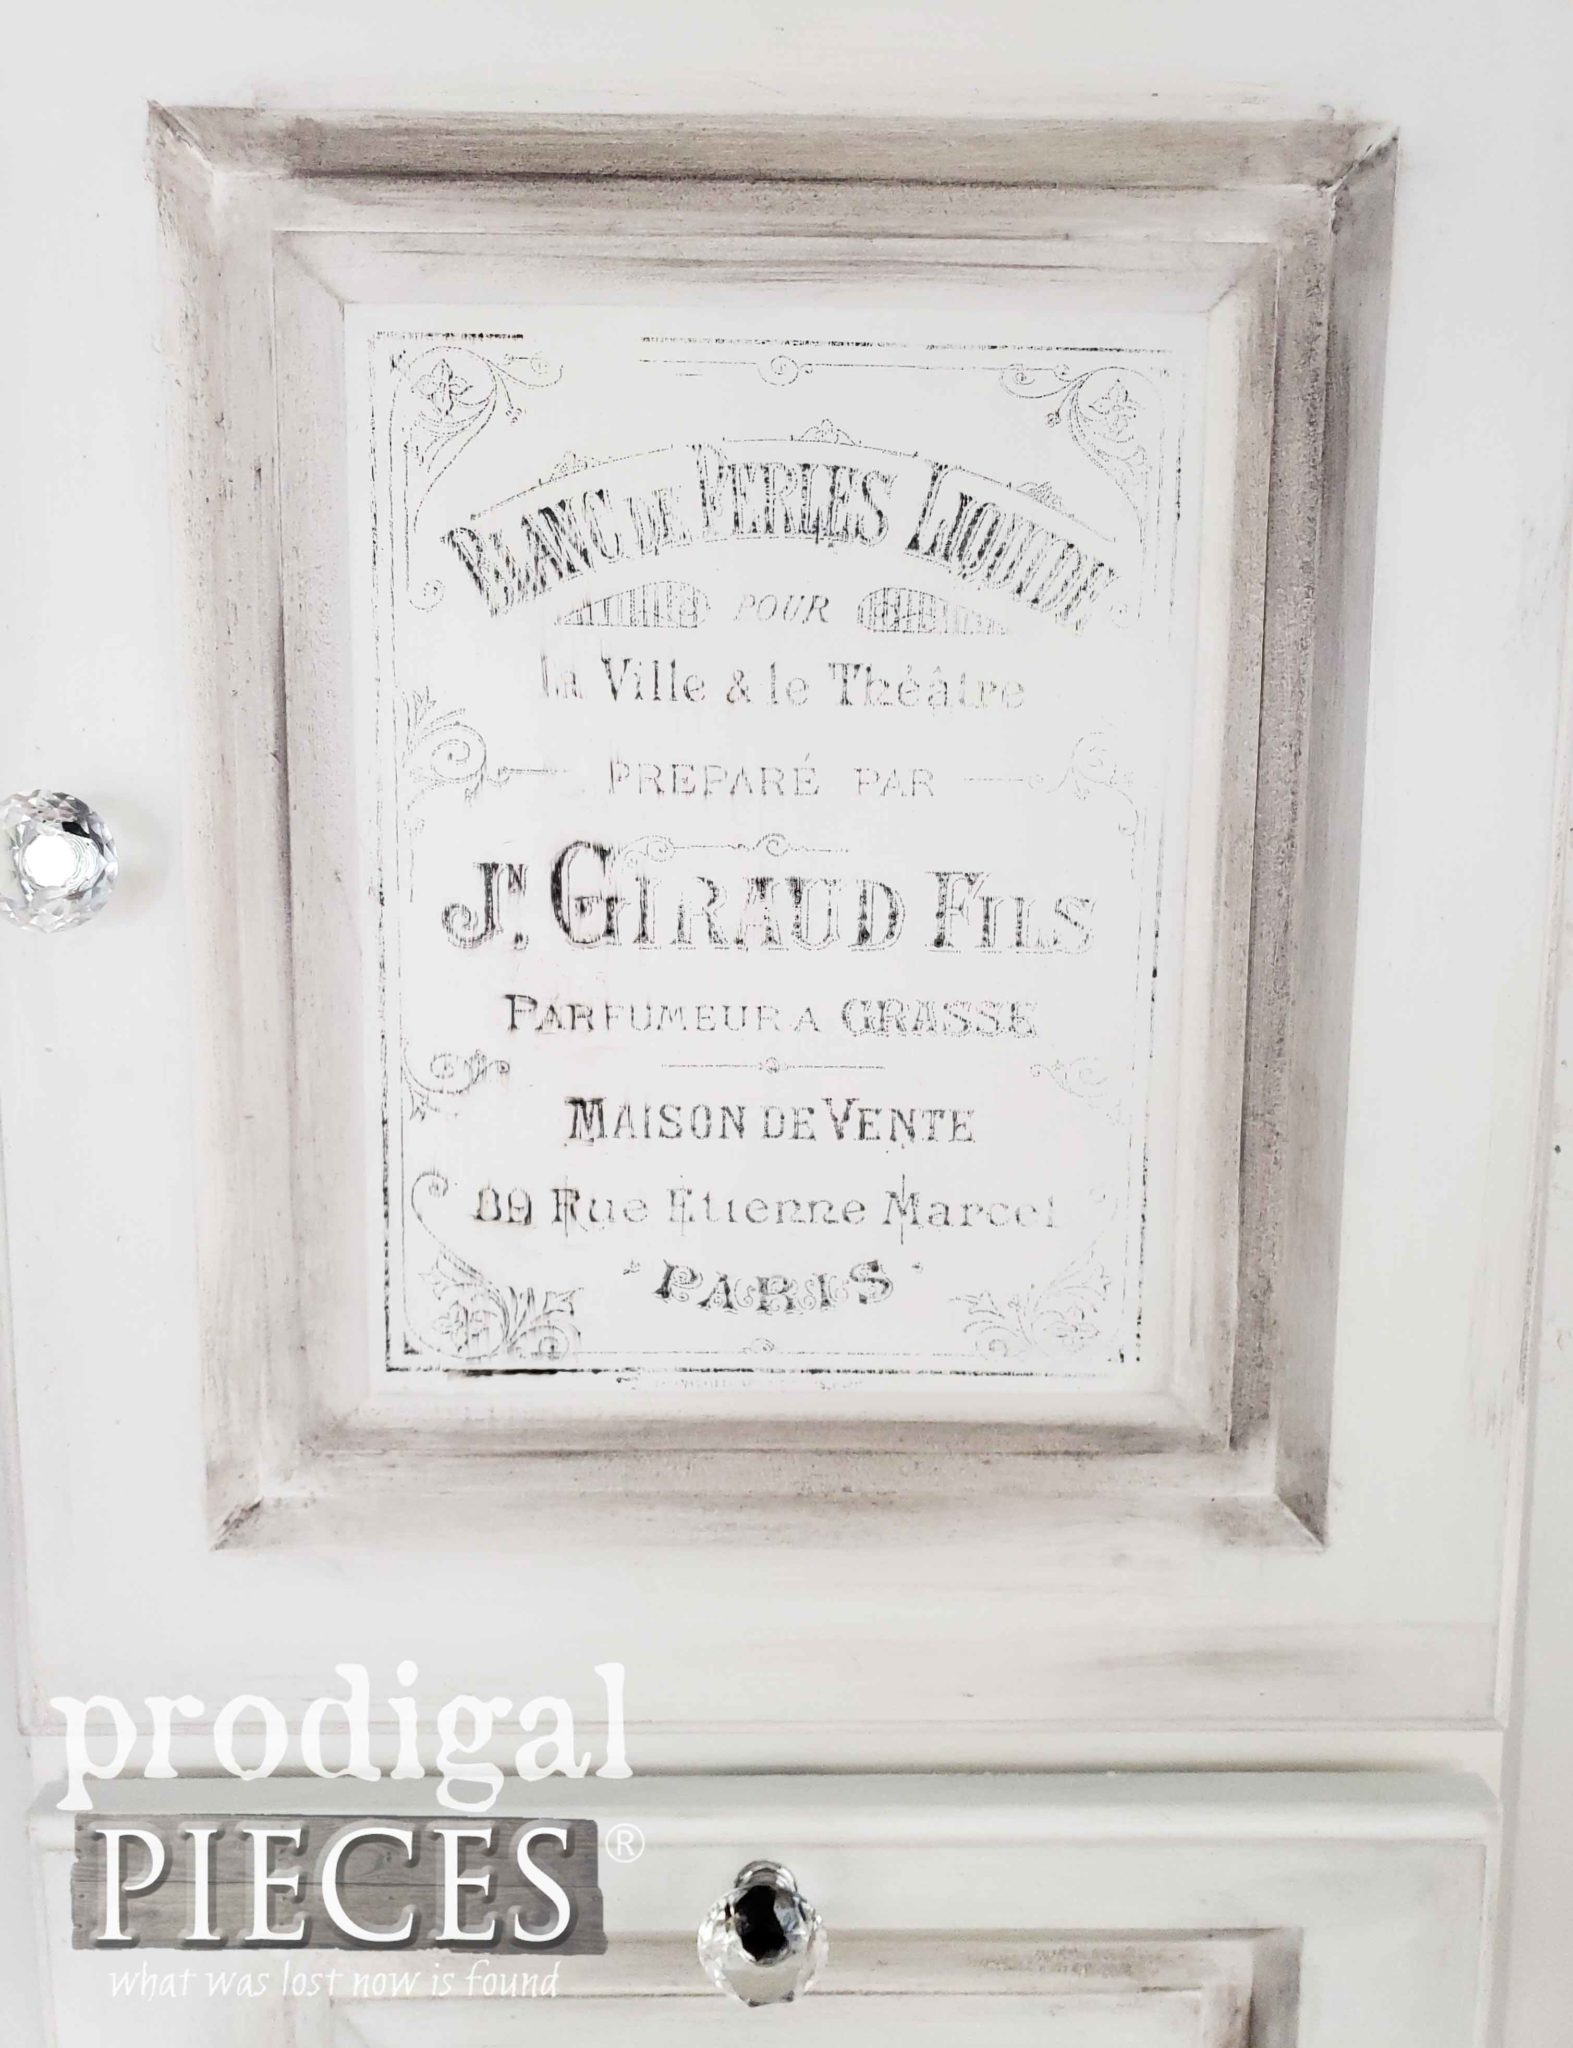
For some ooh, la, la, I wanted to add a bit of French typography to the center panel of the door. Just as I described in my side table makeover with image transfer, I’m using the same technique.
- Size the design in a software program and print it out on plain paper first (see below). This is to aid in placement of your graphic.
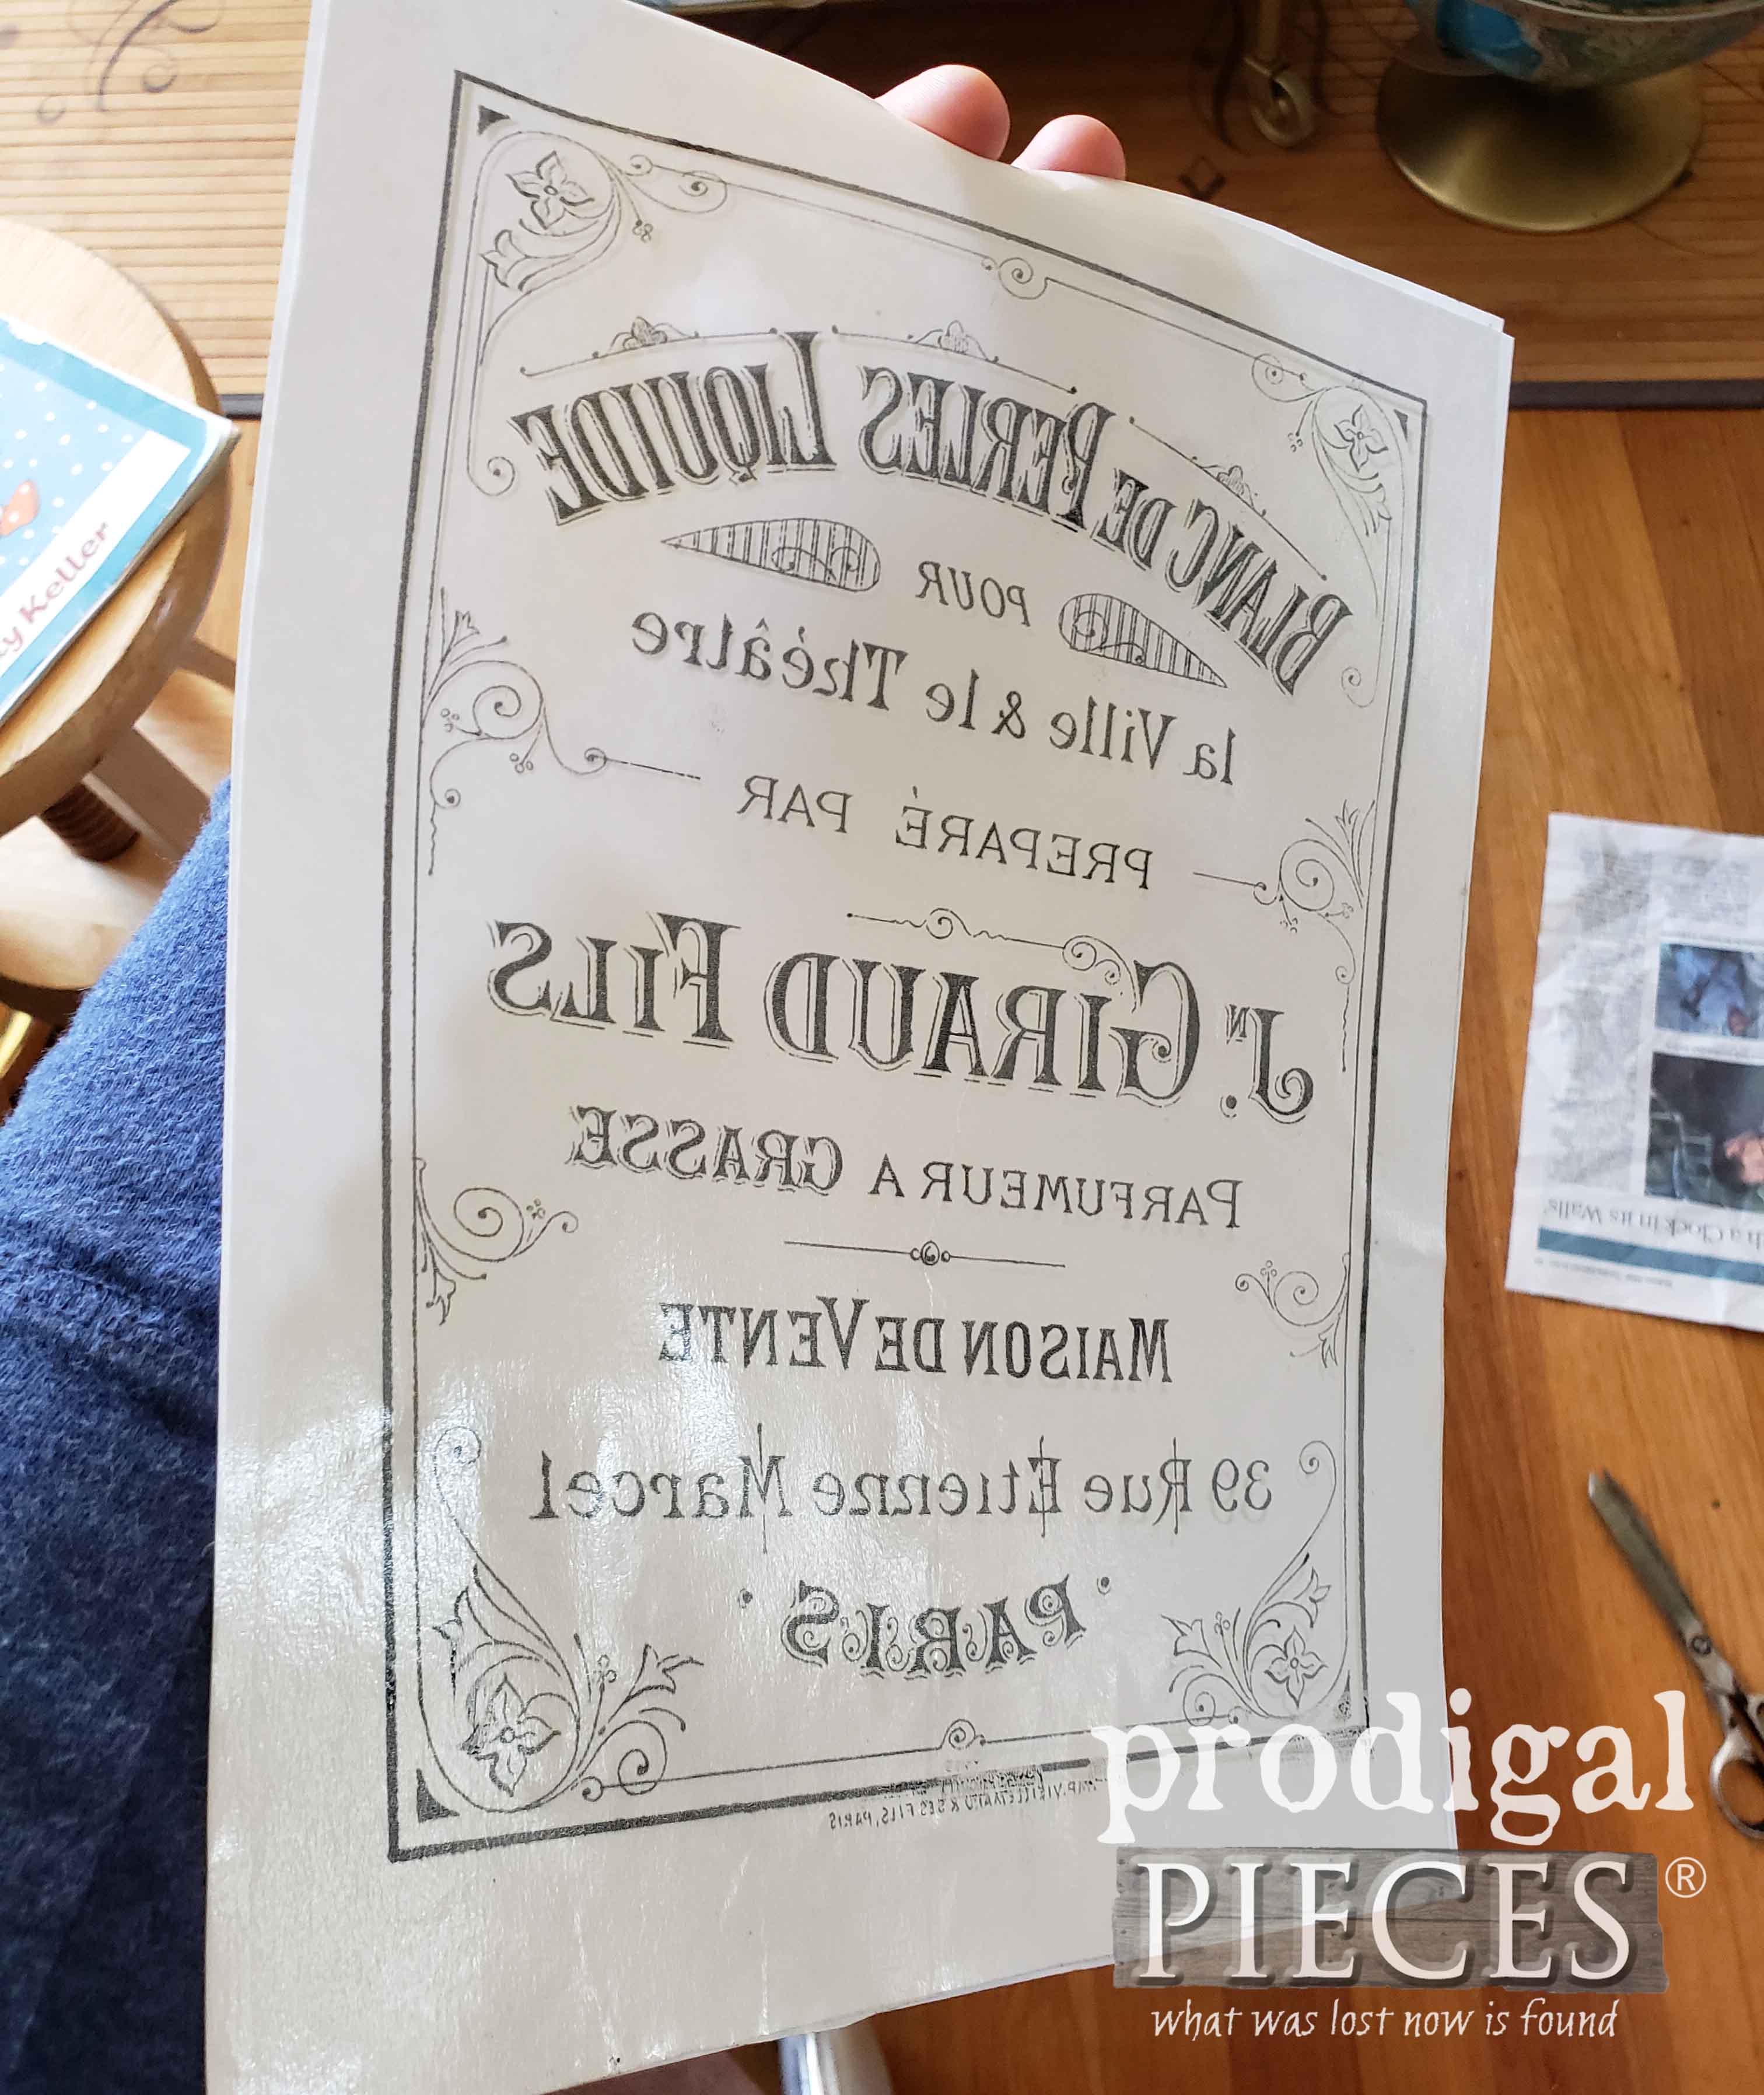
- Cut a size of wax paper the same size as your graphic paper (8.5″ x 11″) and apply to the back side with wax side out using a spray adhesive.
- Reverse your image (or set your printer to print on T-Shirt transfer setting) and place your prepared wax paper in your printer.
- Print the design in the highest quality setting. Let rest for about 5 seconds, and then apply the graphic by using a stiff edge like a bank card working from the center out. It’s key to keep the image still while working so go slow and steady.
- Slowly lift up design beginning at one corner or side and then let your image dry.
IMAGE APPLICATION
Once my image had cured, I used a satin spray urethane to give it a few light coats to seal it in. In addition, for added punch I used my gray wax to highlight those beautiful beveled panels on the door and drawer face. Here’s my first repurposed cupboard door turned jewelry cabinet.
INSIDE TOO
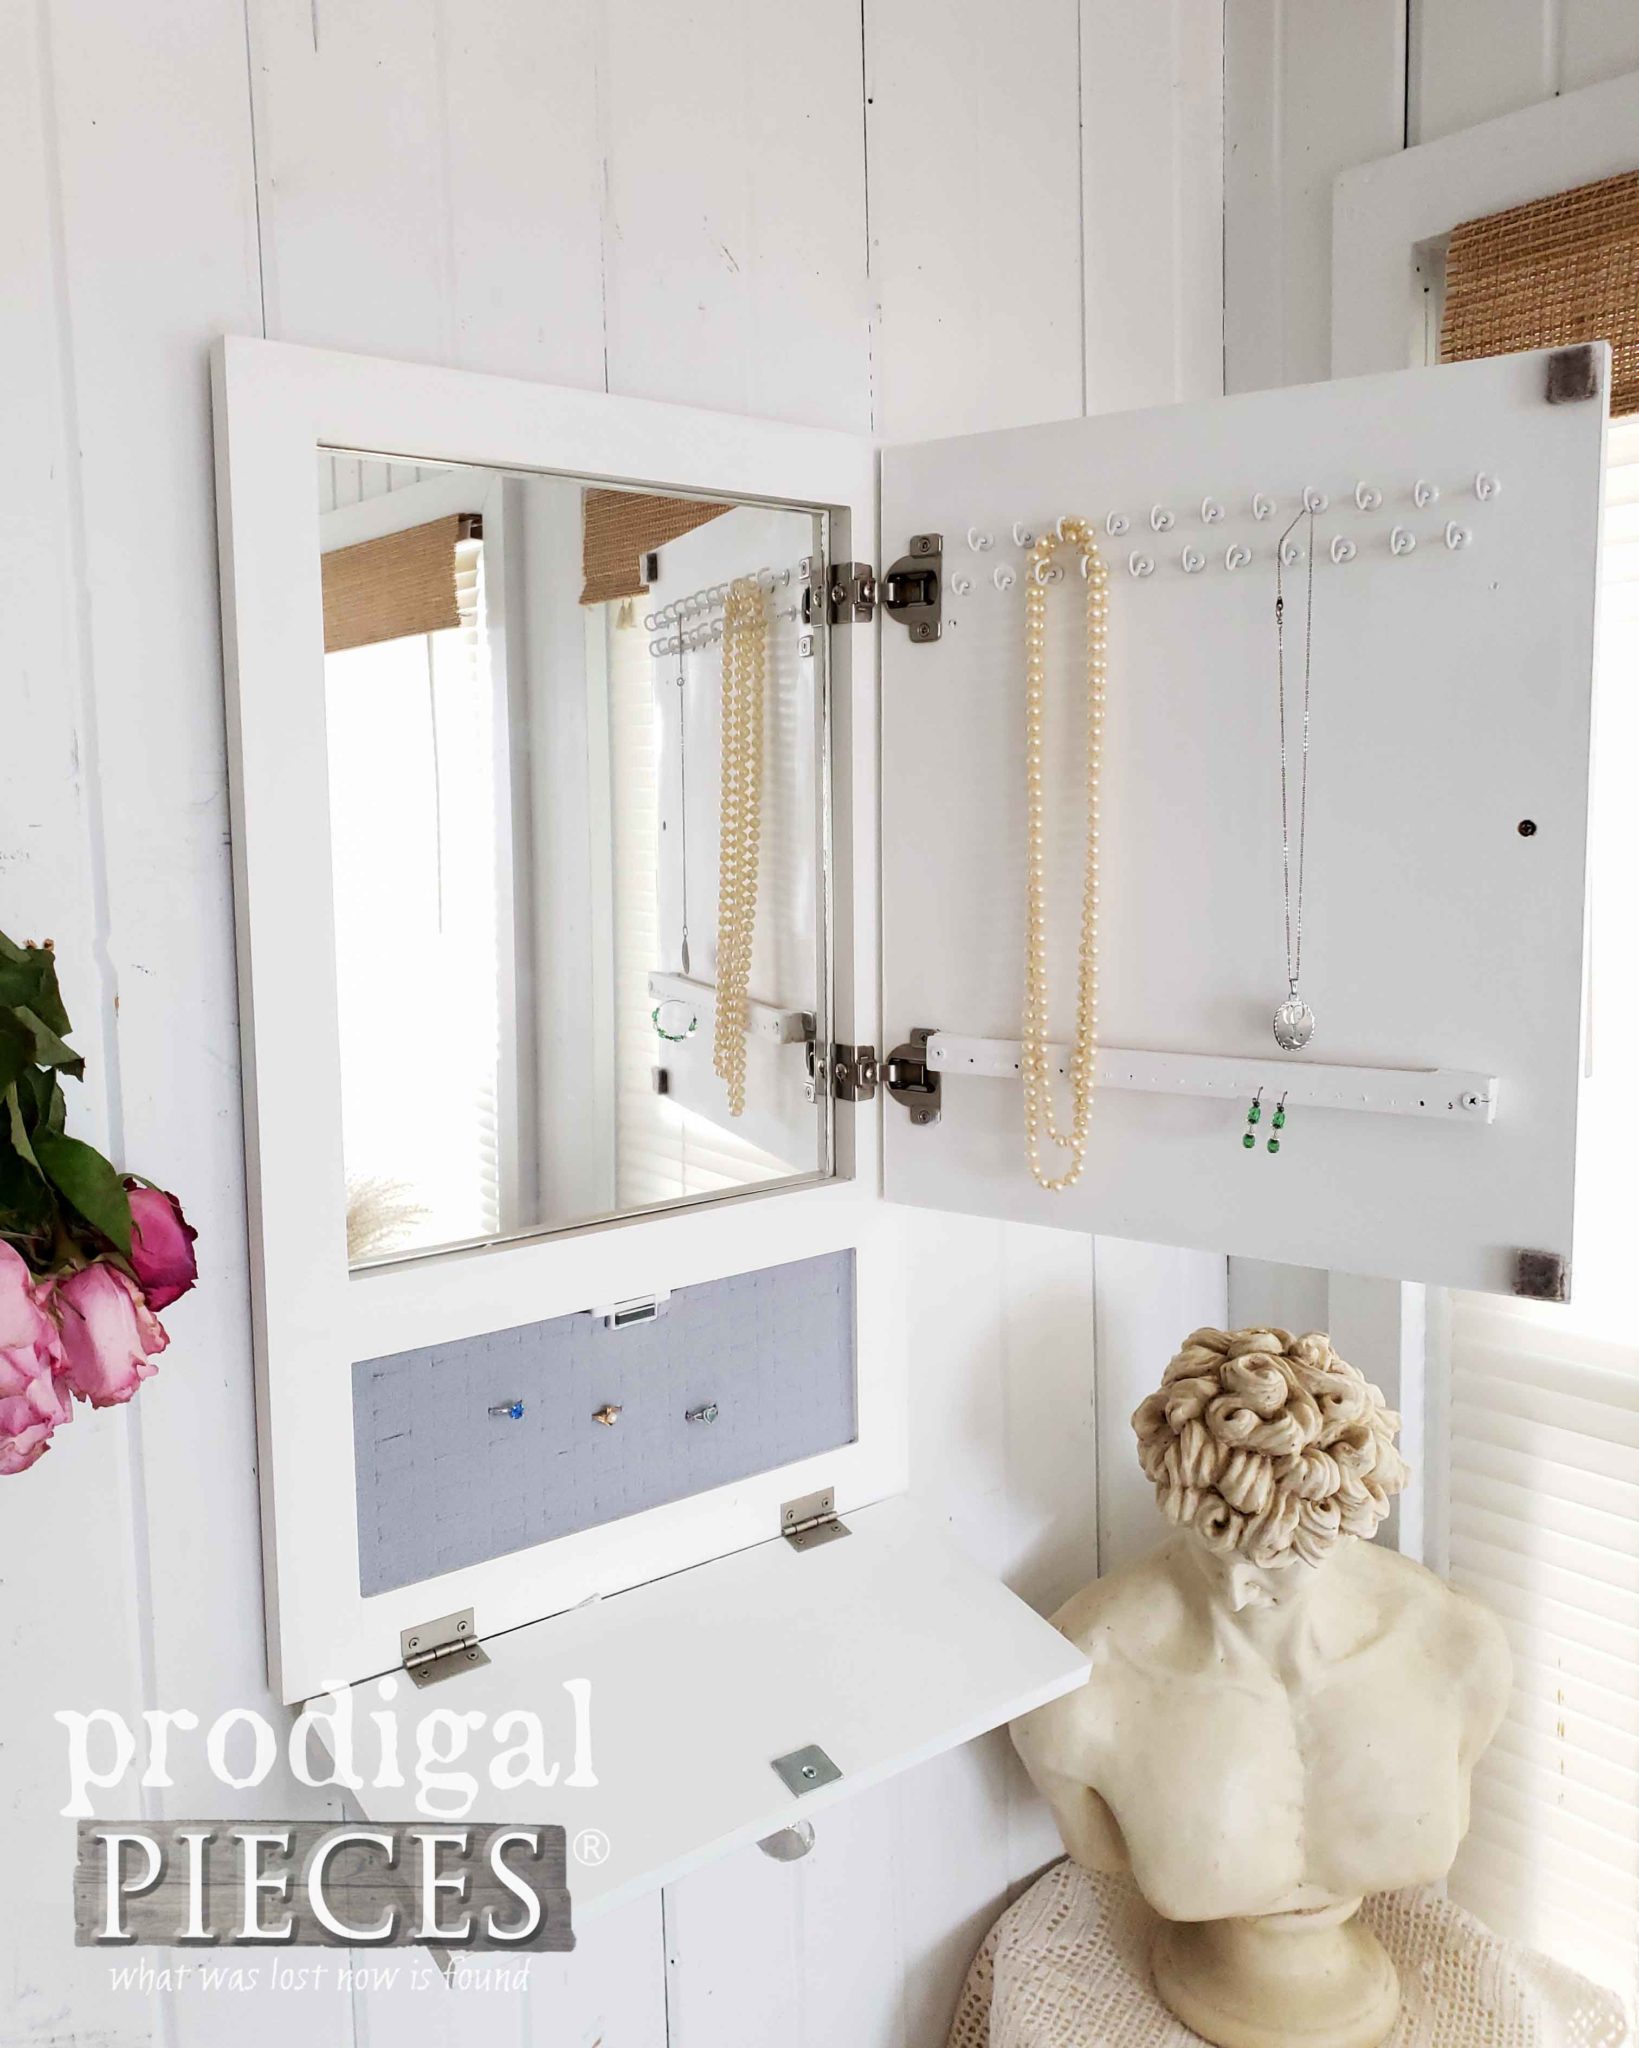
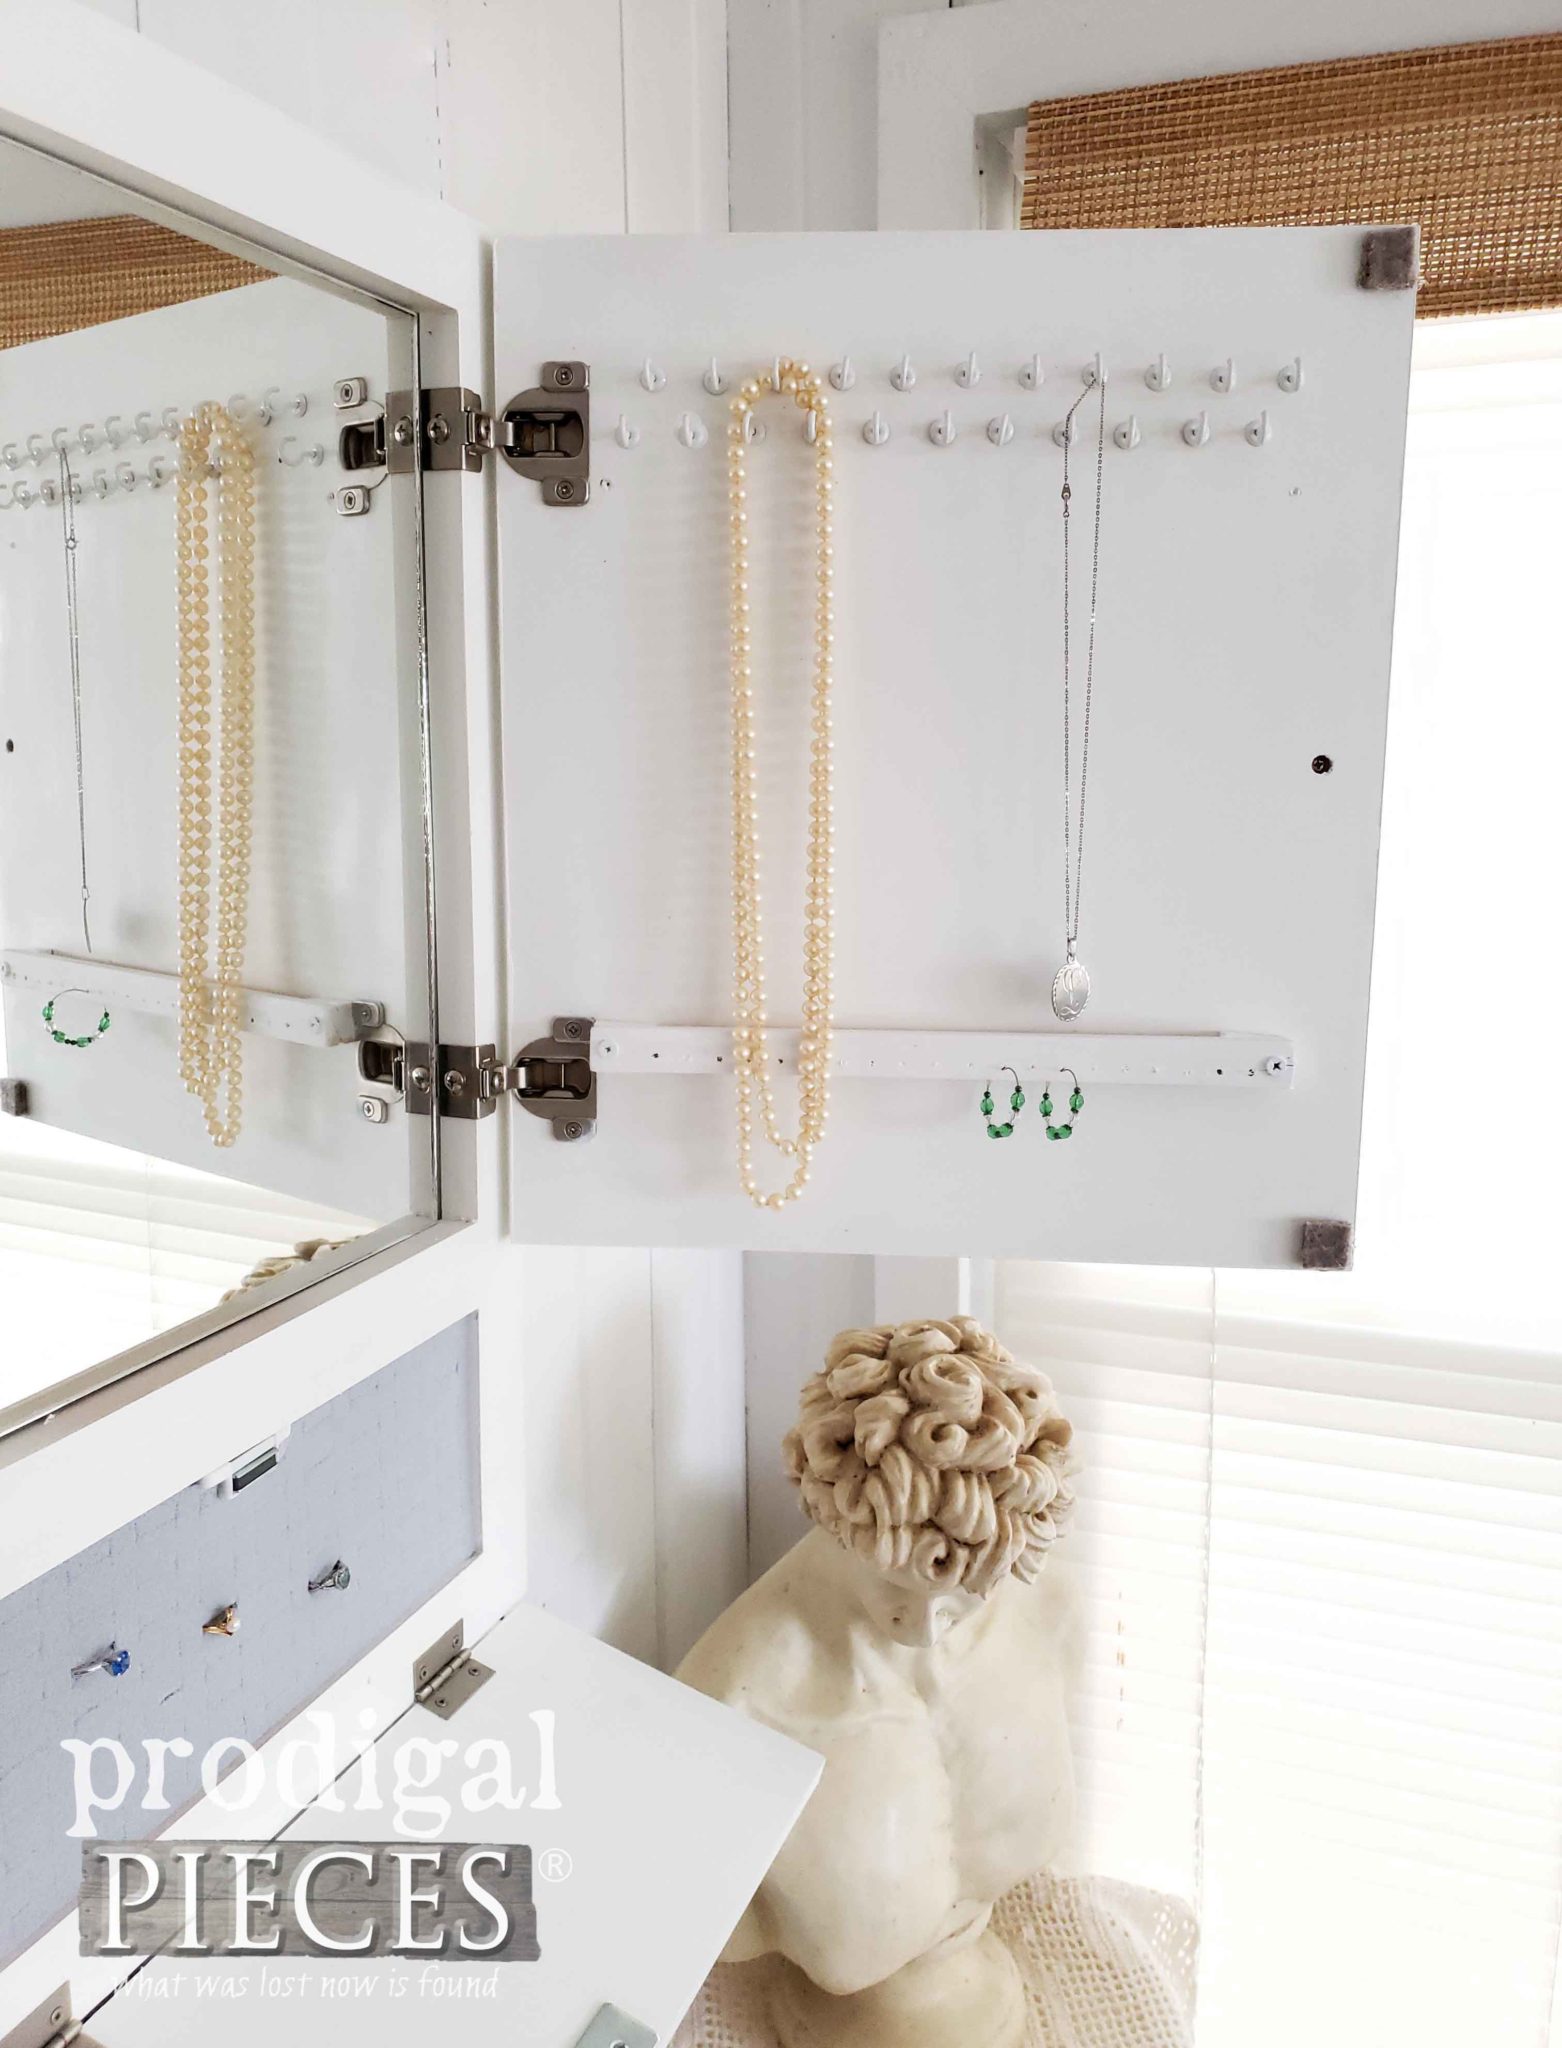
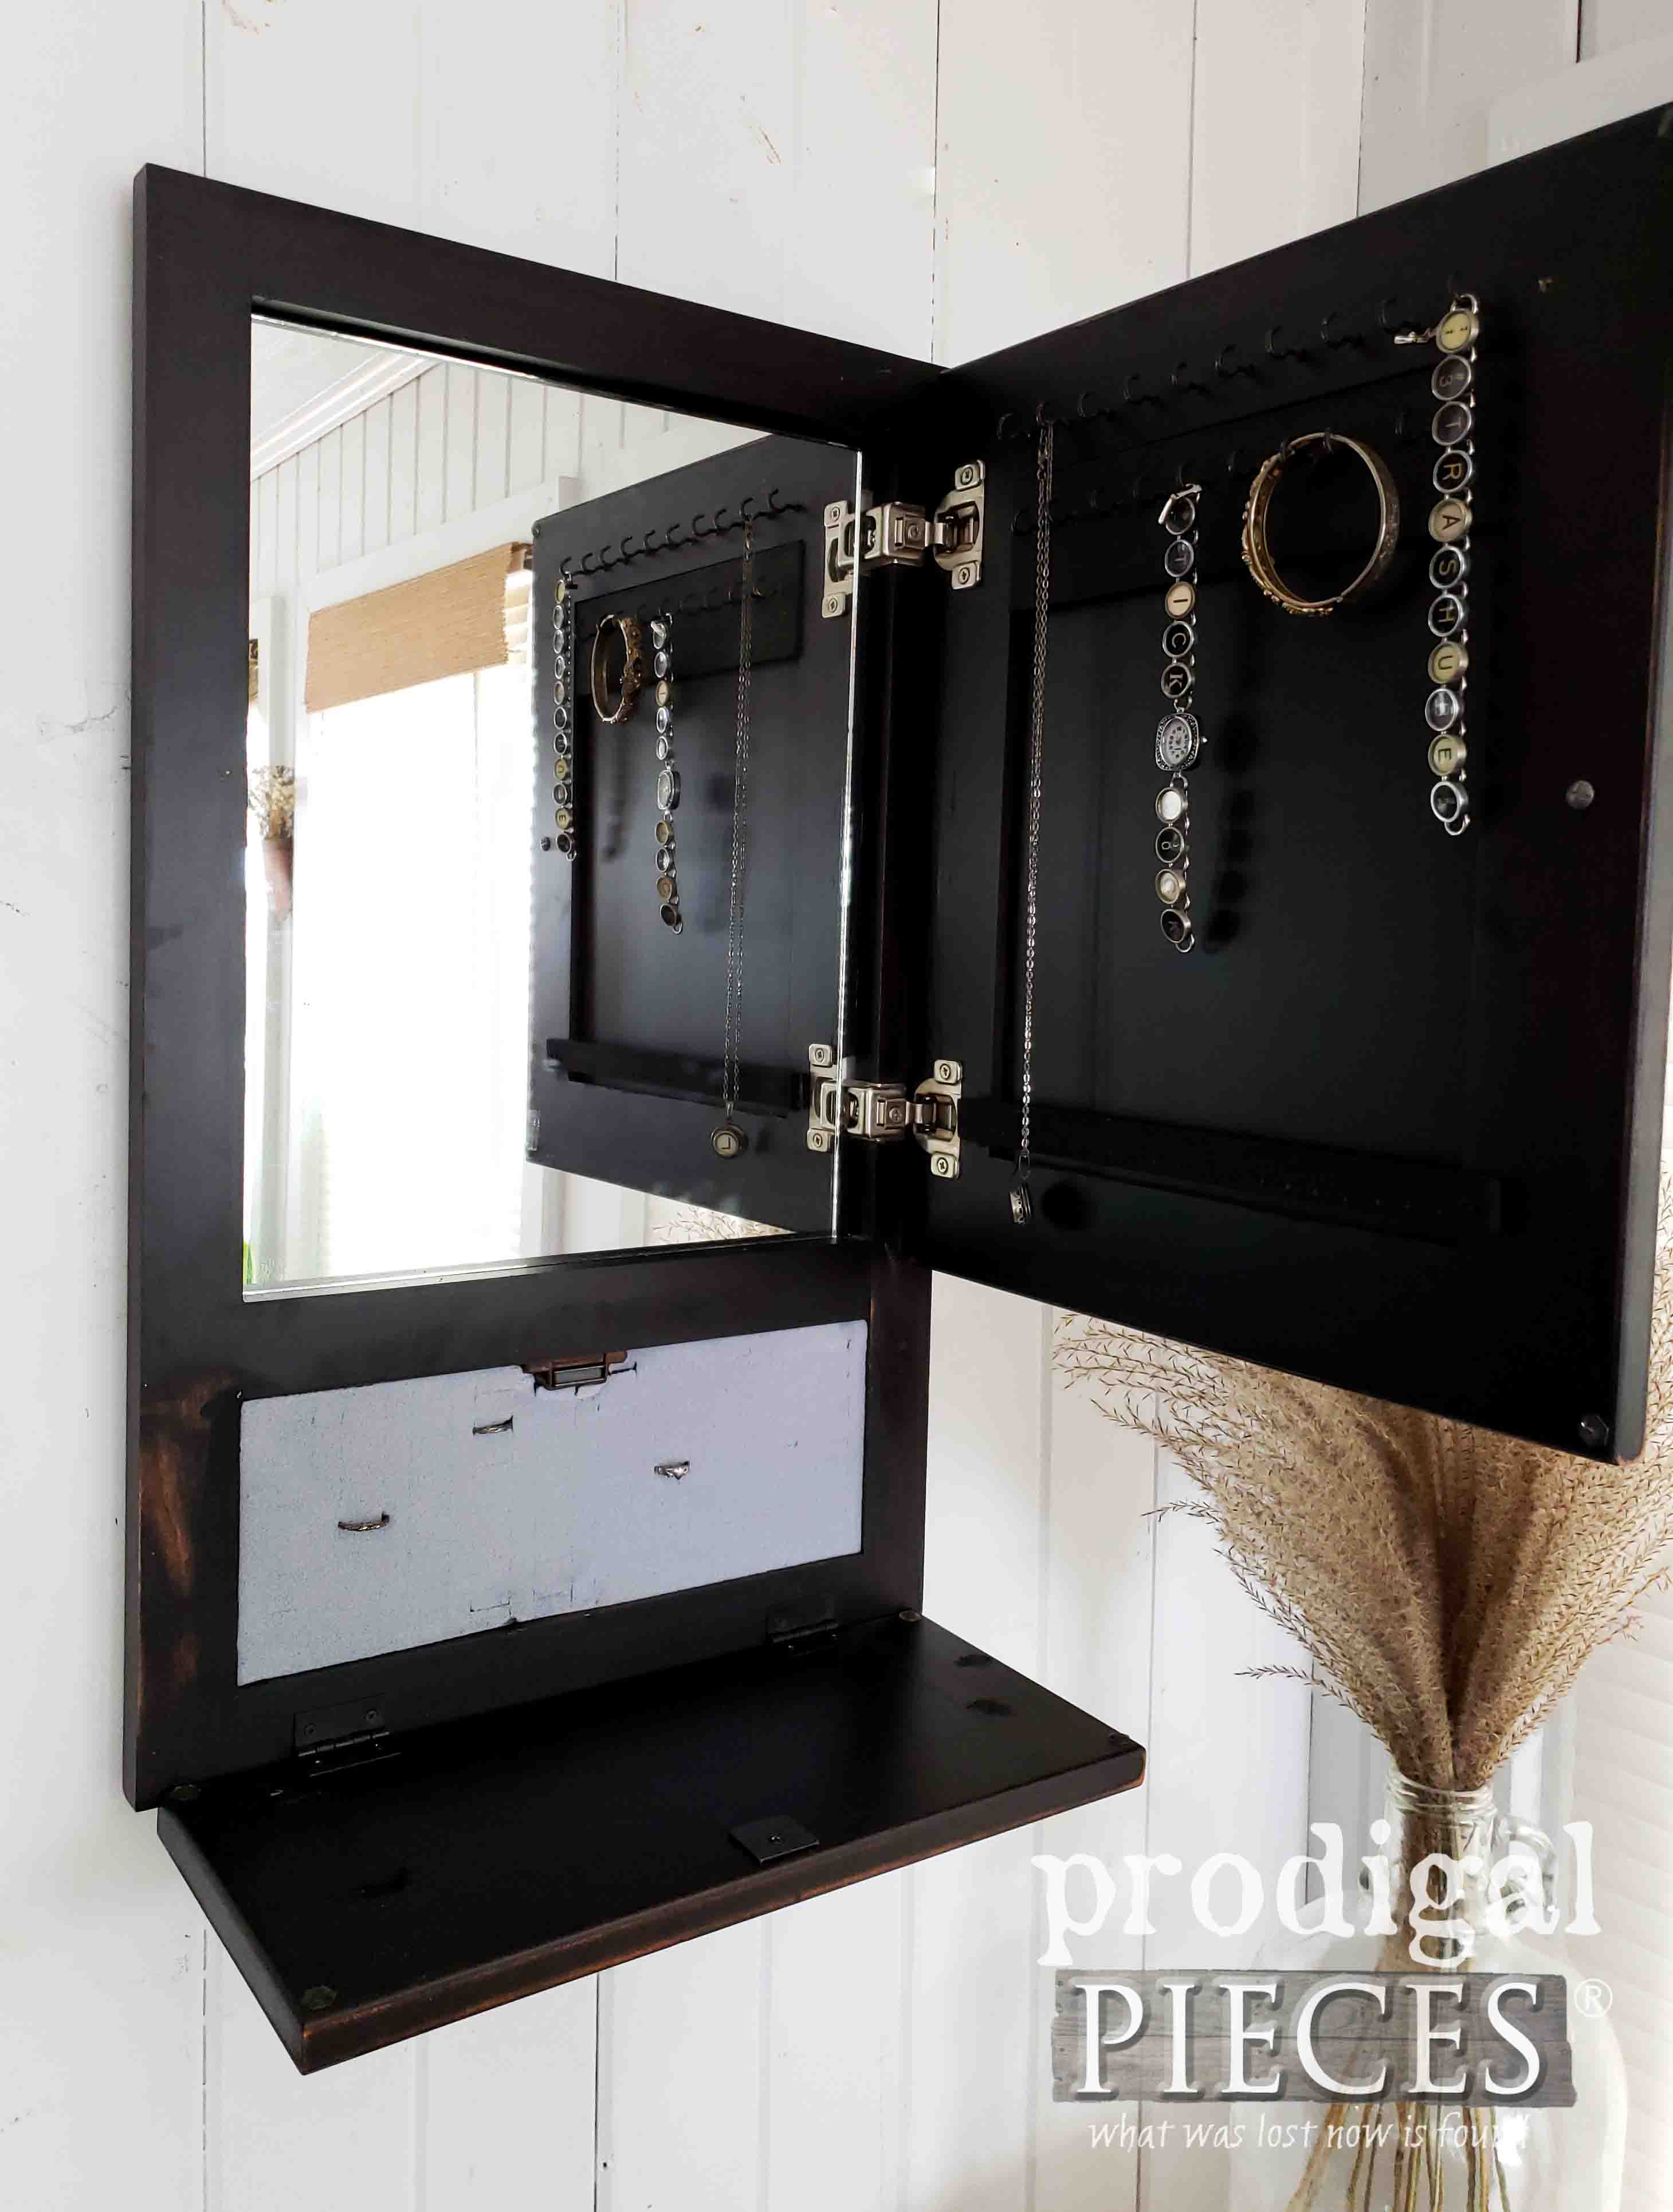
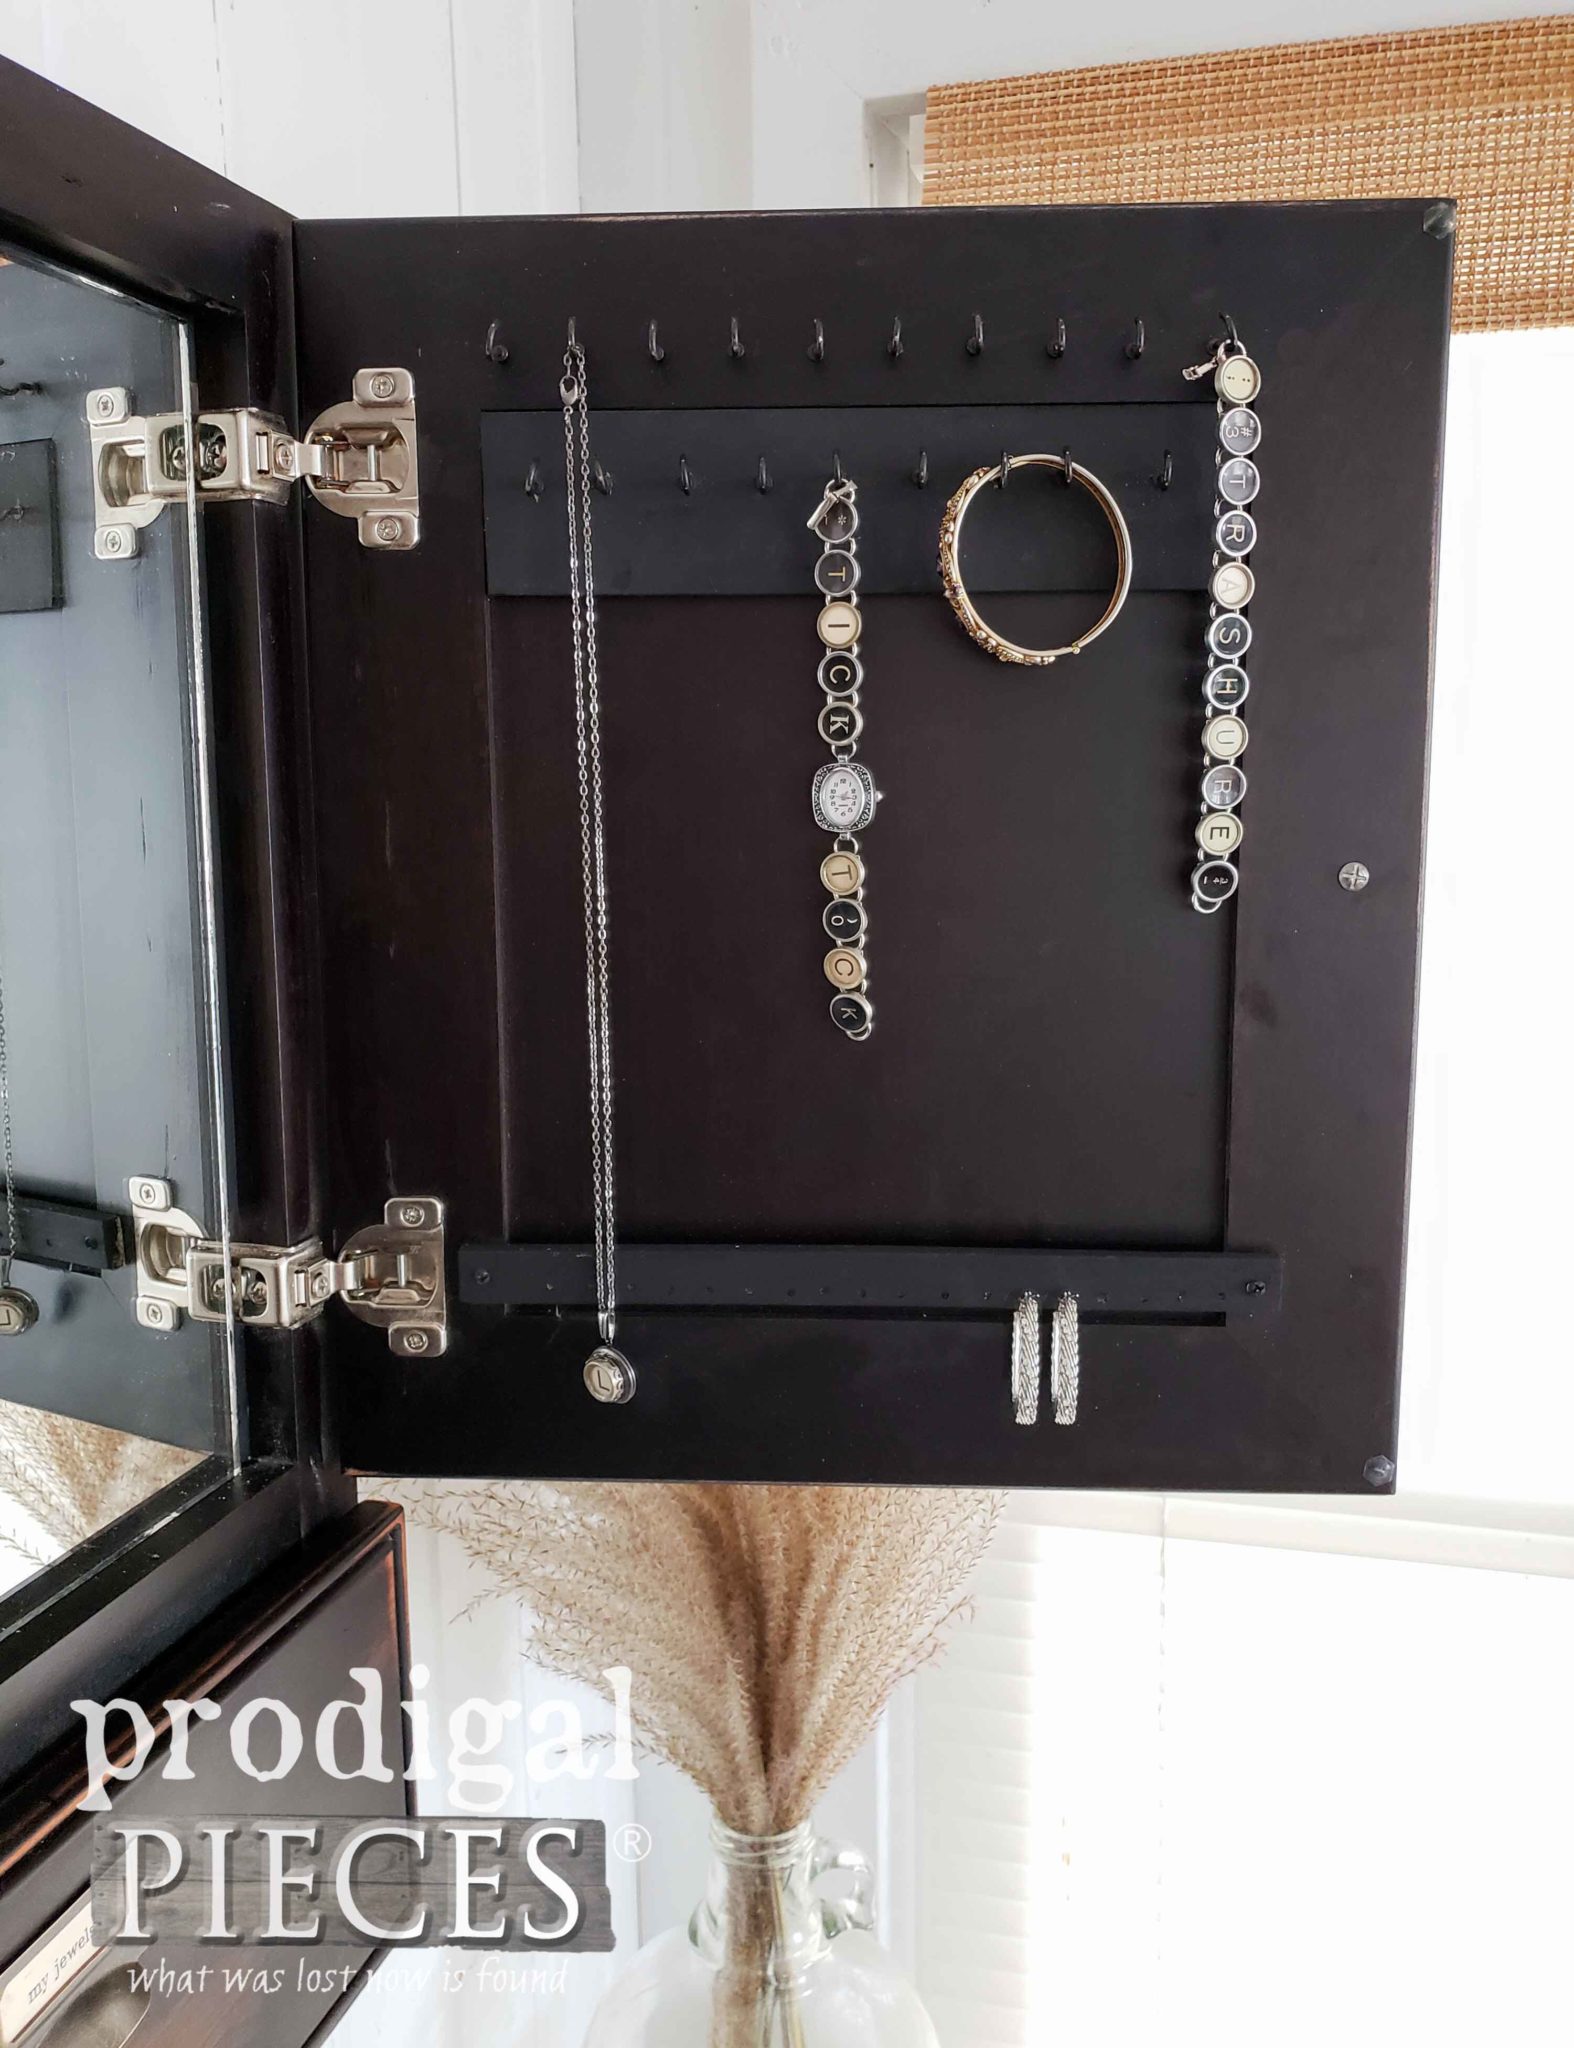
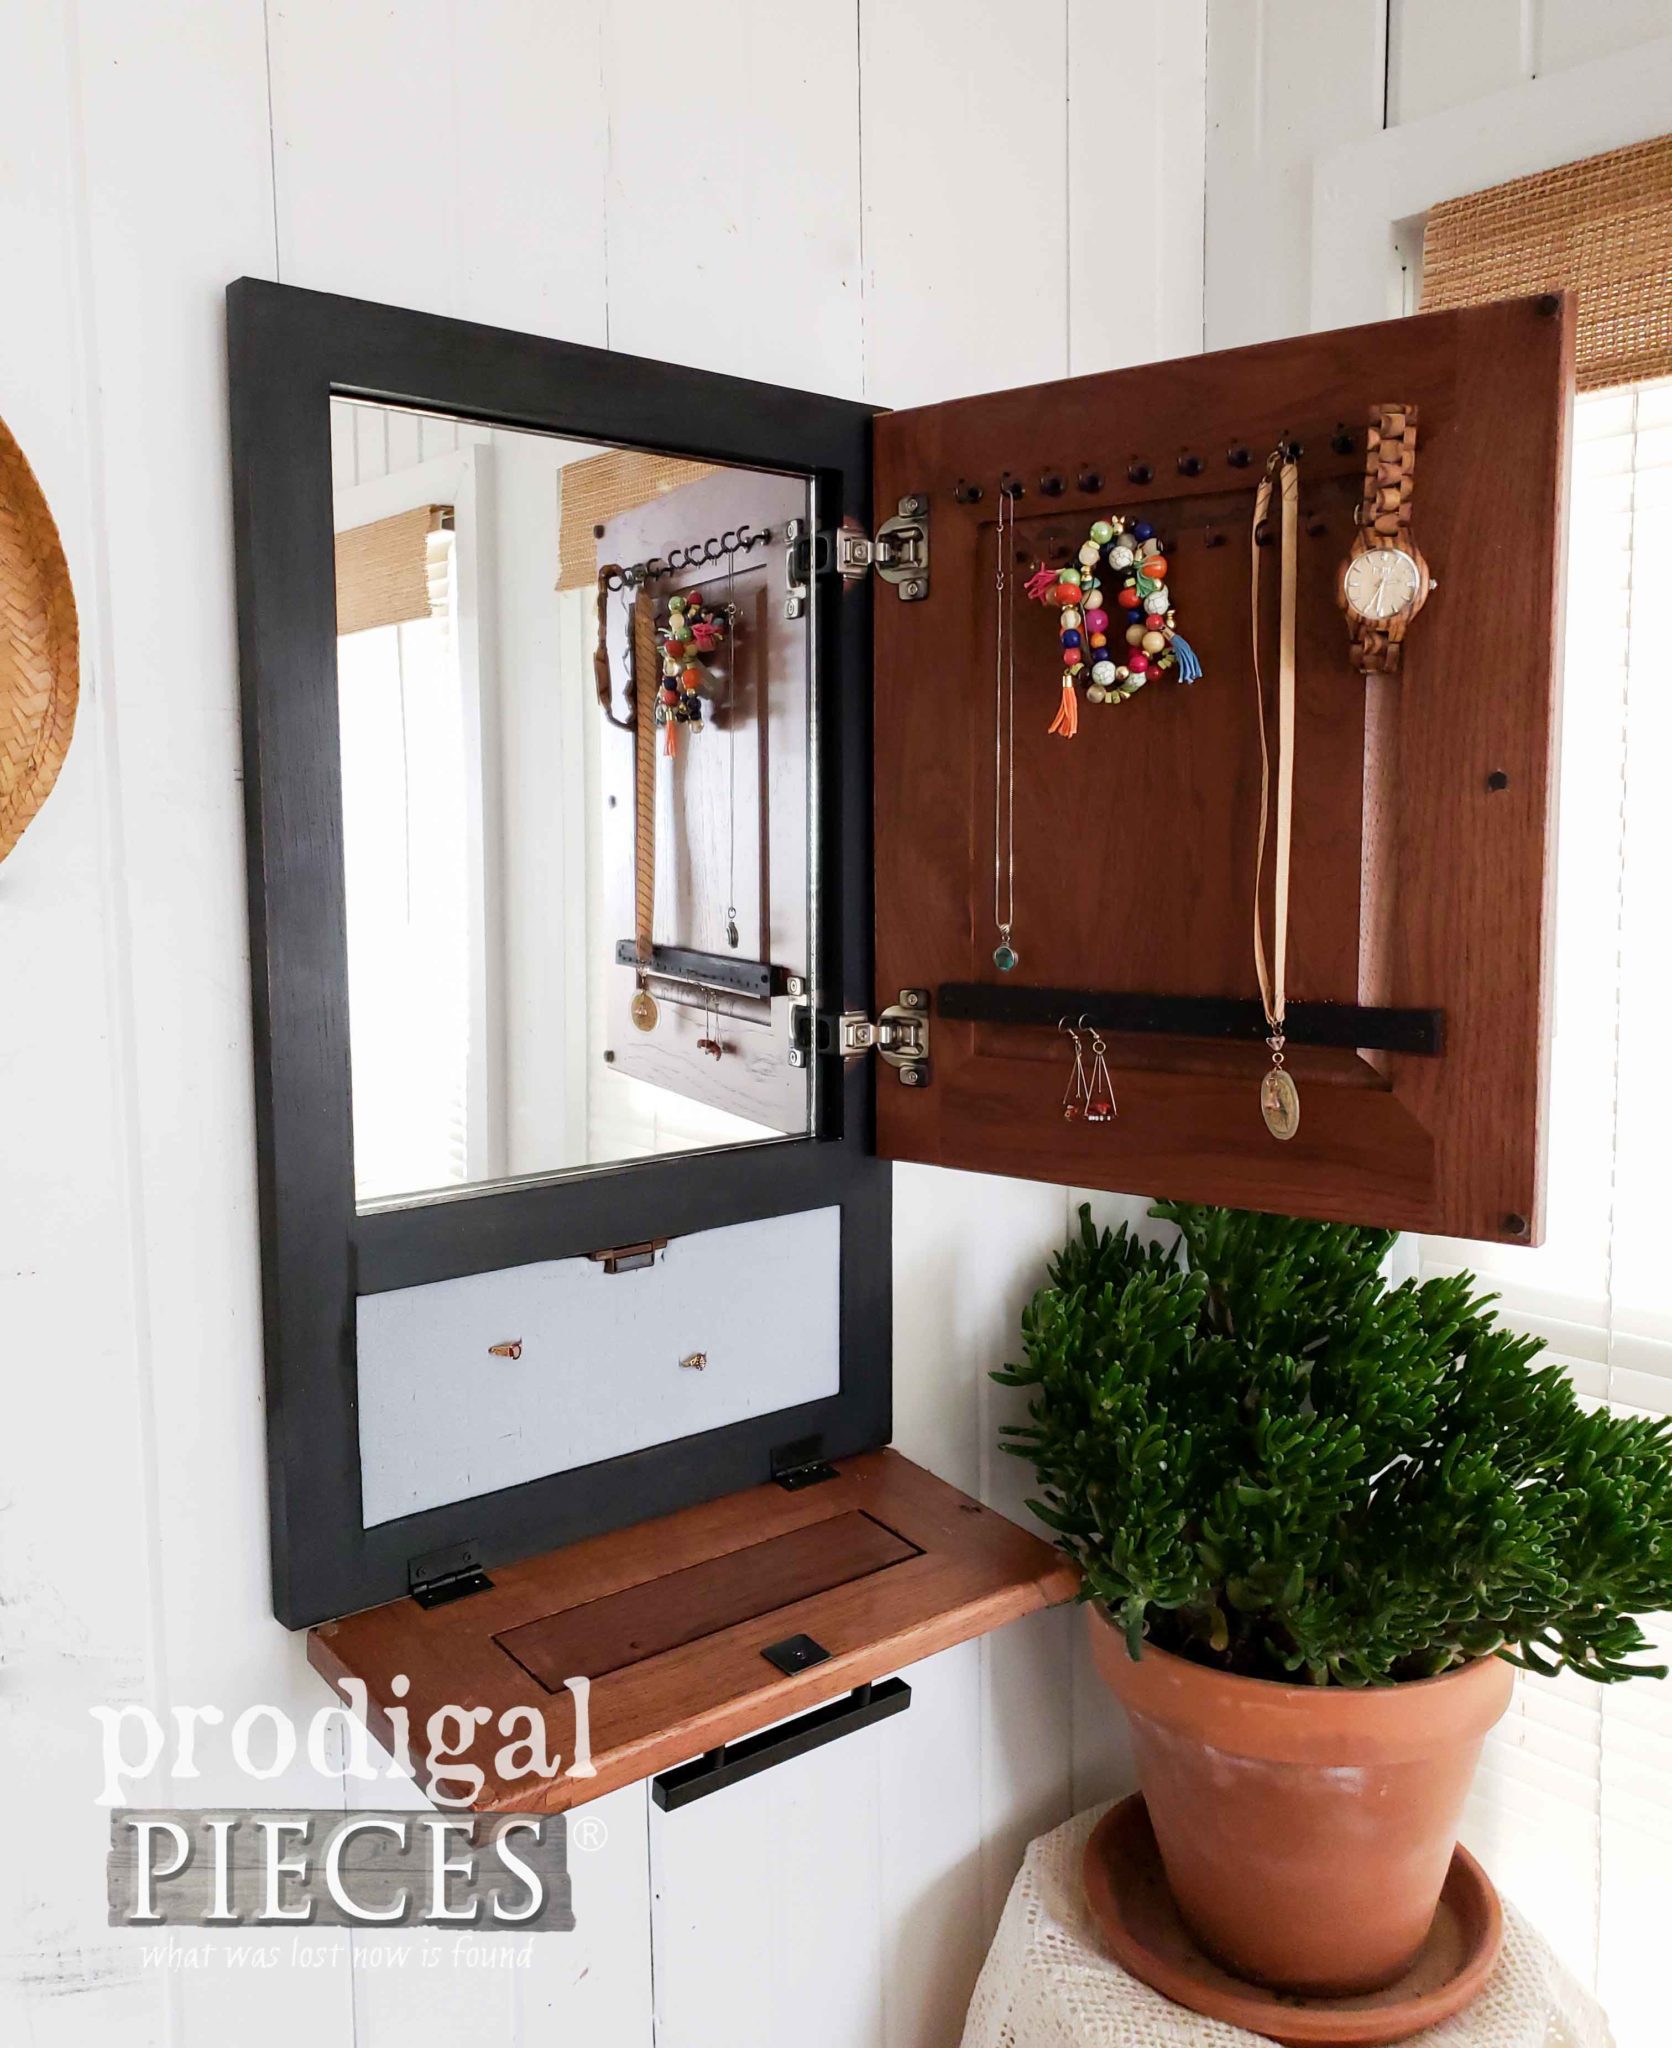
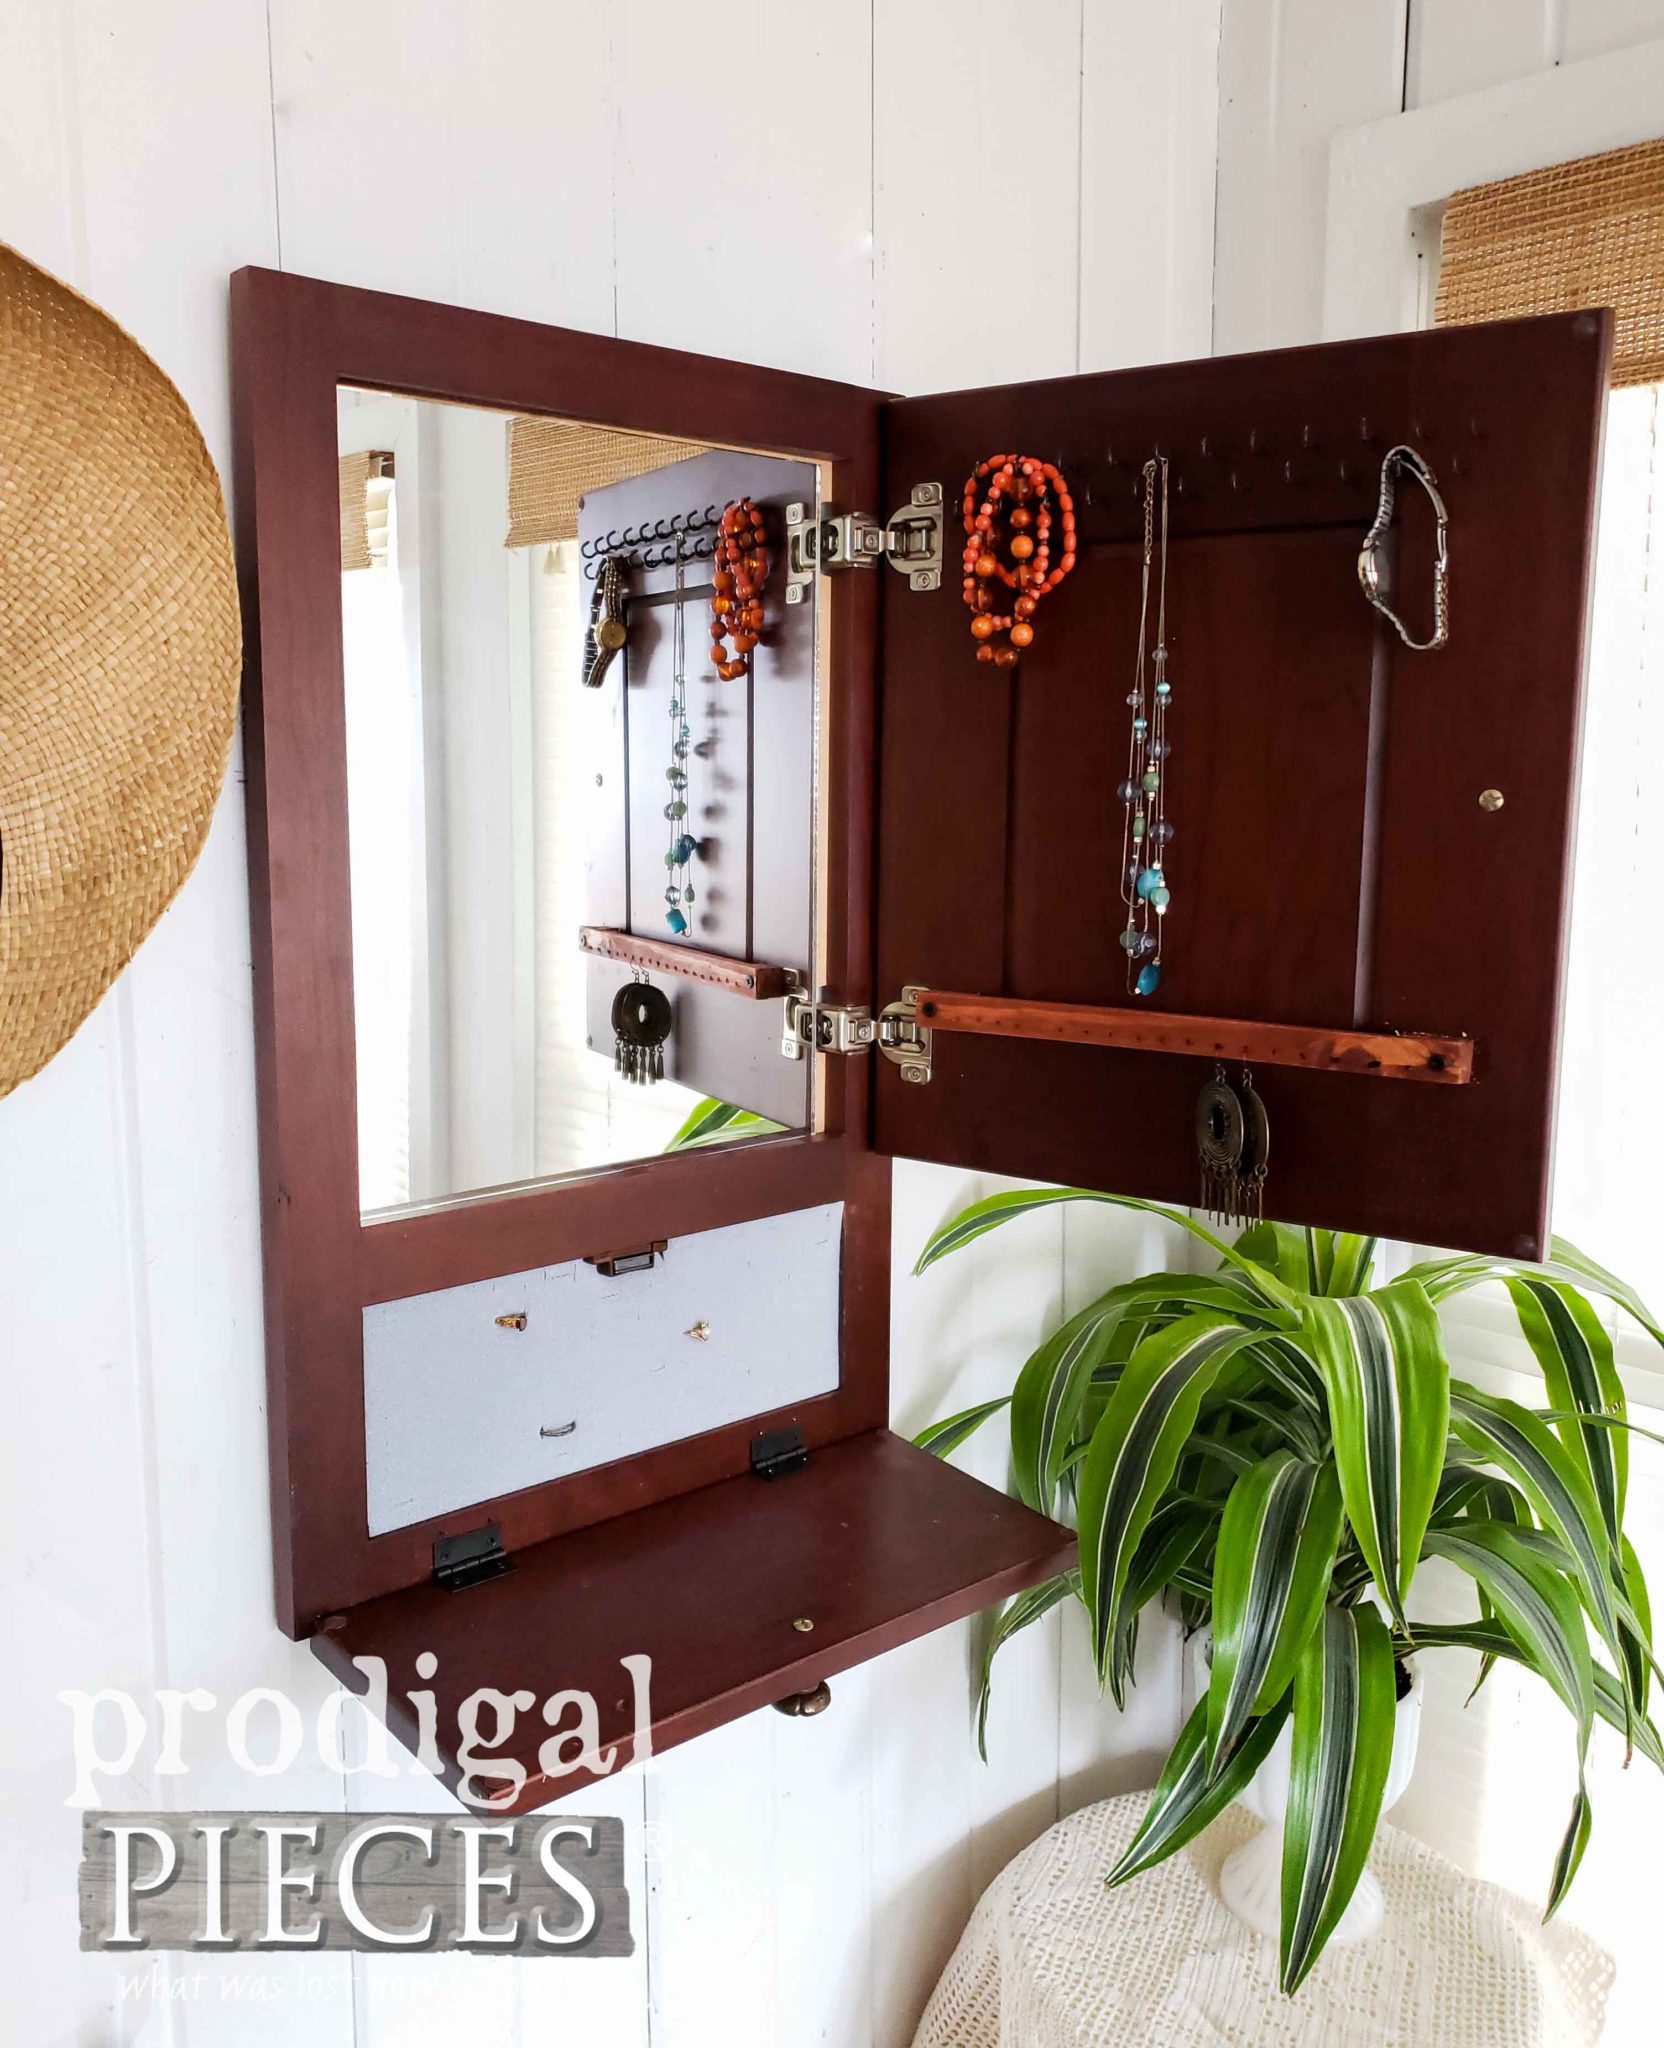
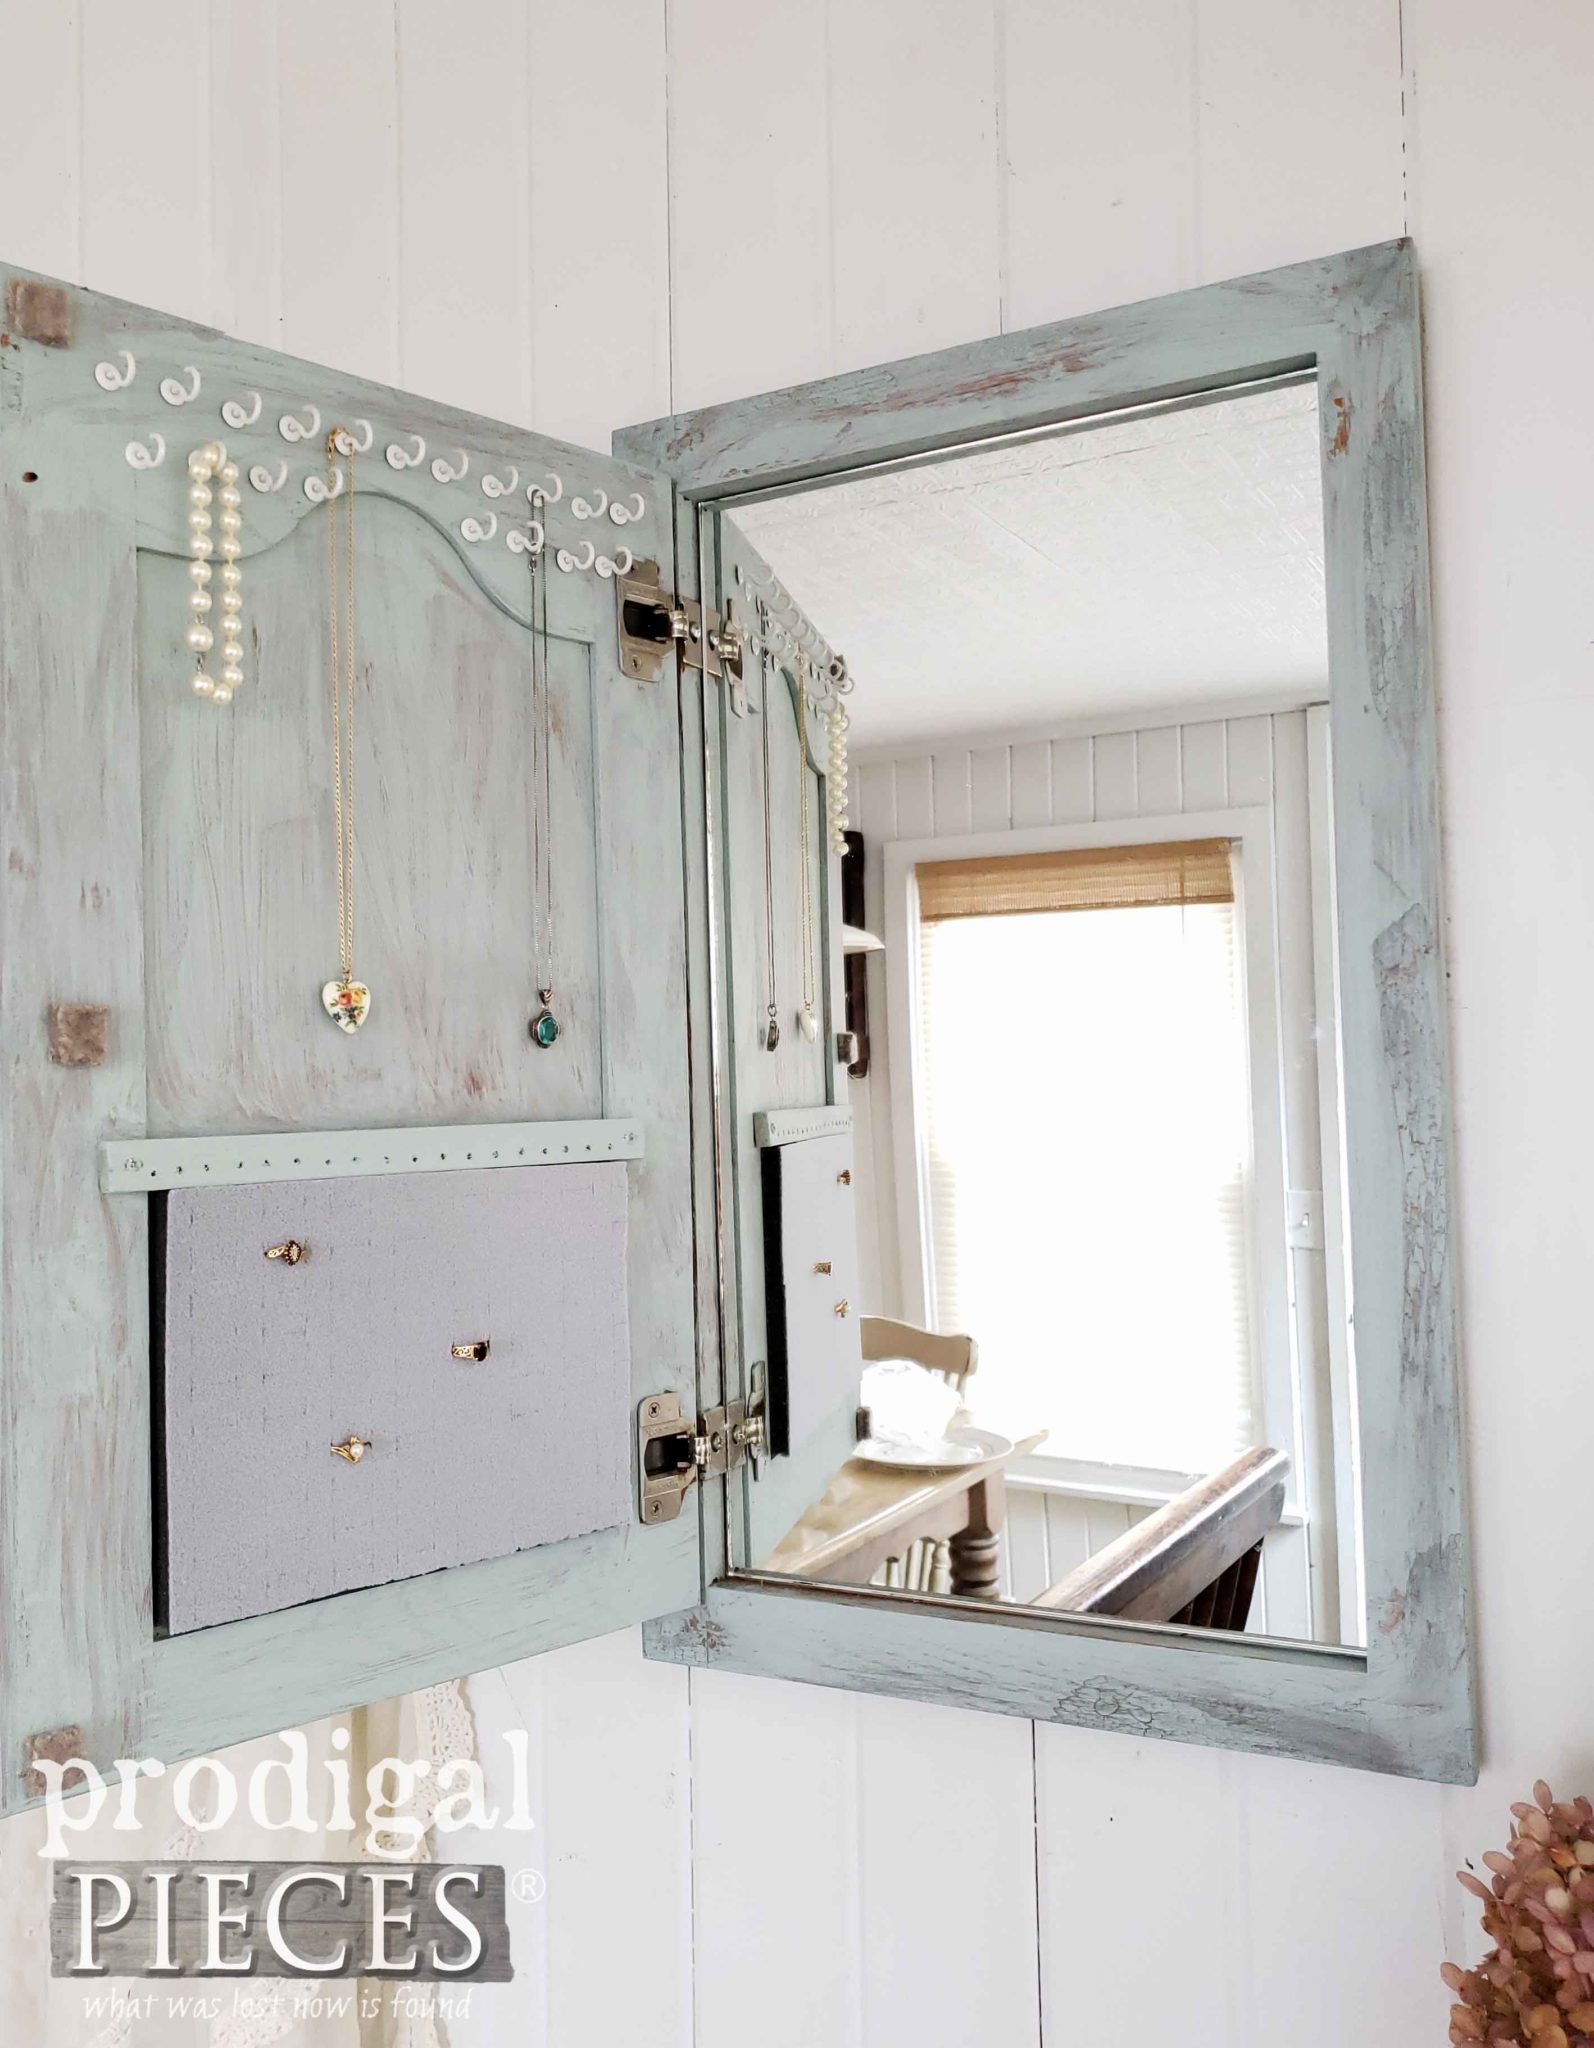
There’s much fun on the outside with the vintage graphic, new glass knobs, and dimension added with wax. However, on the inside, there is a whole different party going on. I had a glass shop cut mirrors for each one (I won’t go into what a PAIN that was. ugh) We’ve got cup hooks for necklaces, bracelets, watches…whatever you want to string up. Then, I added a strip for earrings. Down in the bottom is a magnetic closure tucking away your rings. I simply got these ring holders and cut them to size, and glued them in. Easy!
I had to giggle while staging this because David over in the corner kept making me think I had dropped something! hahaha!!
For the next cupboards, I’m going to show you a before and after, but they are pretty much the same, except for the last one. You’ll see why in a minute.
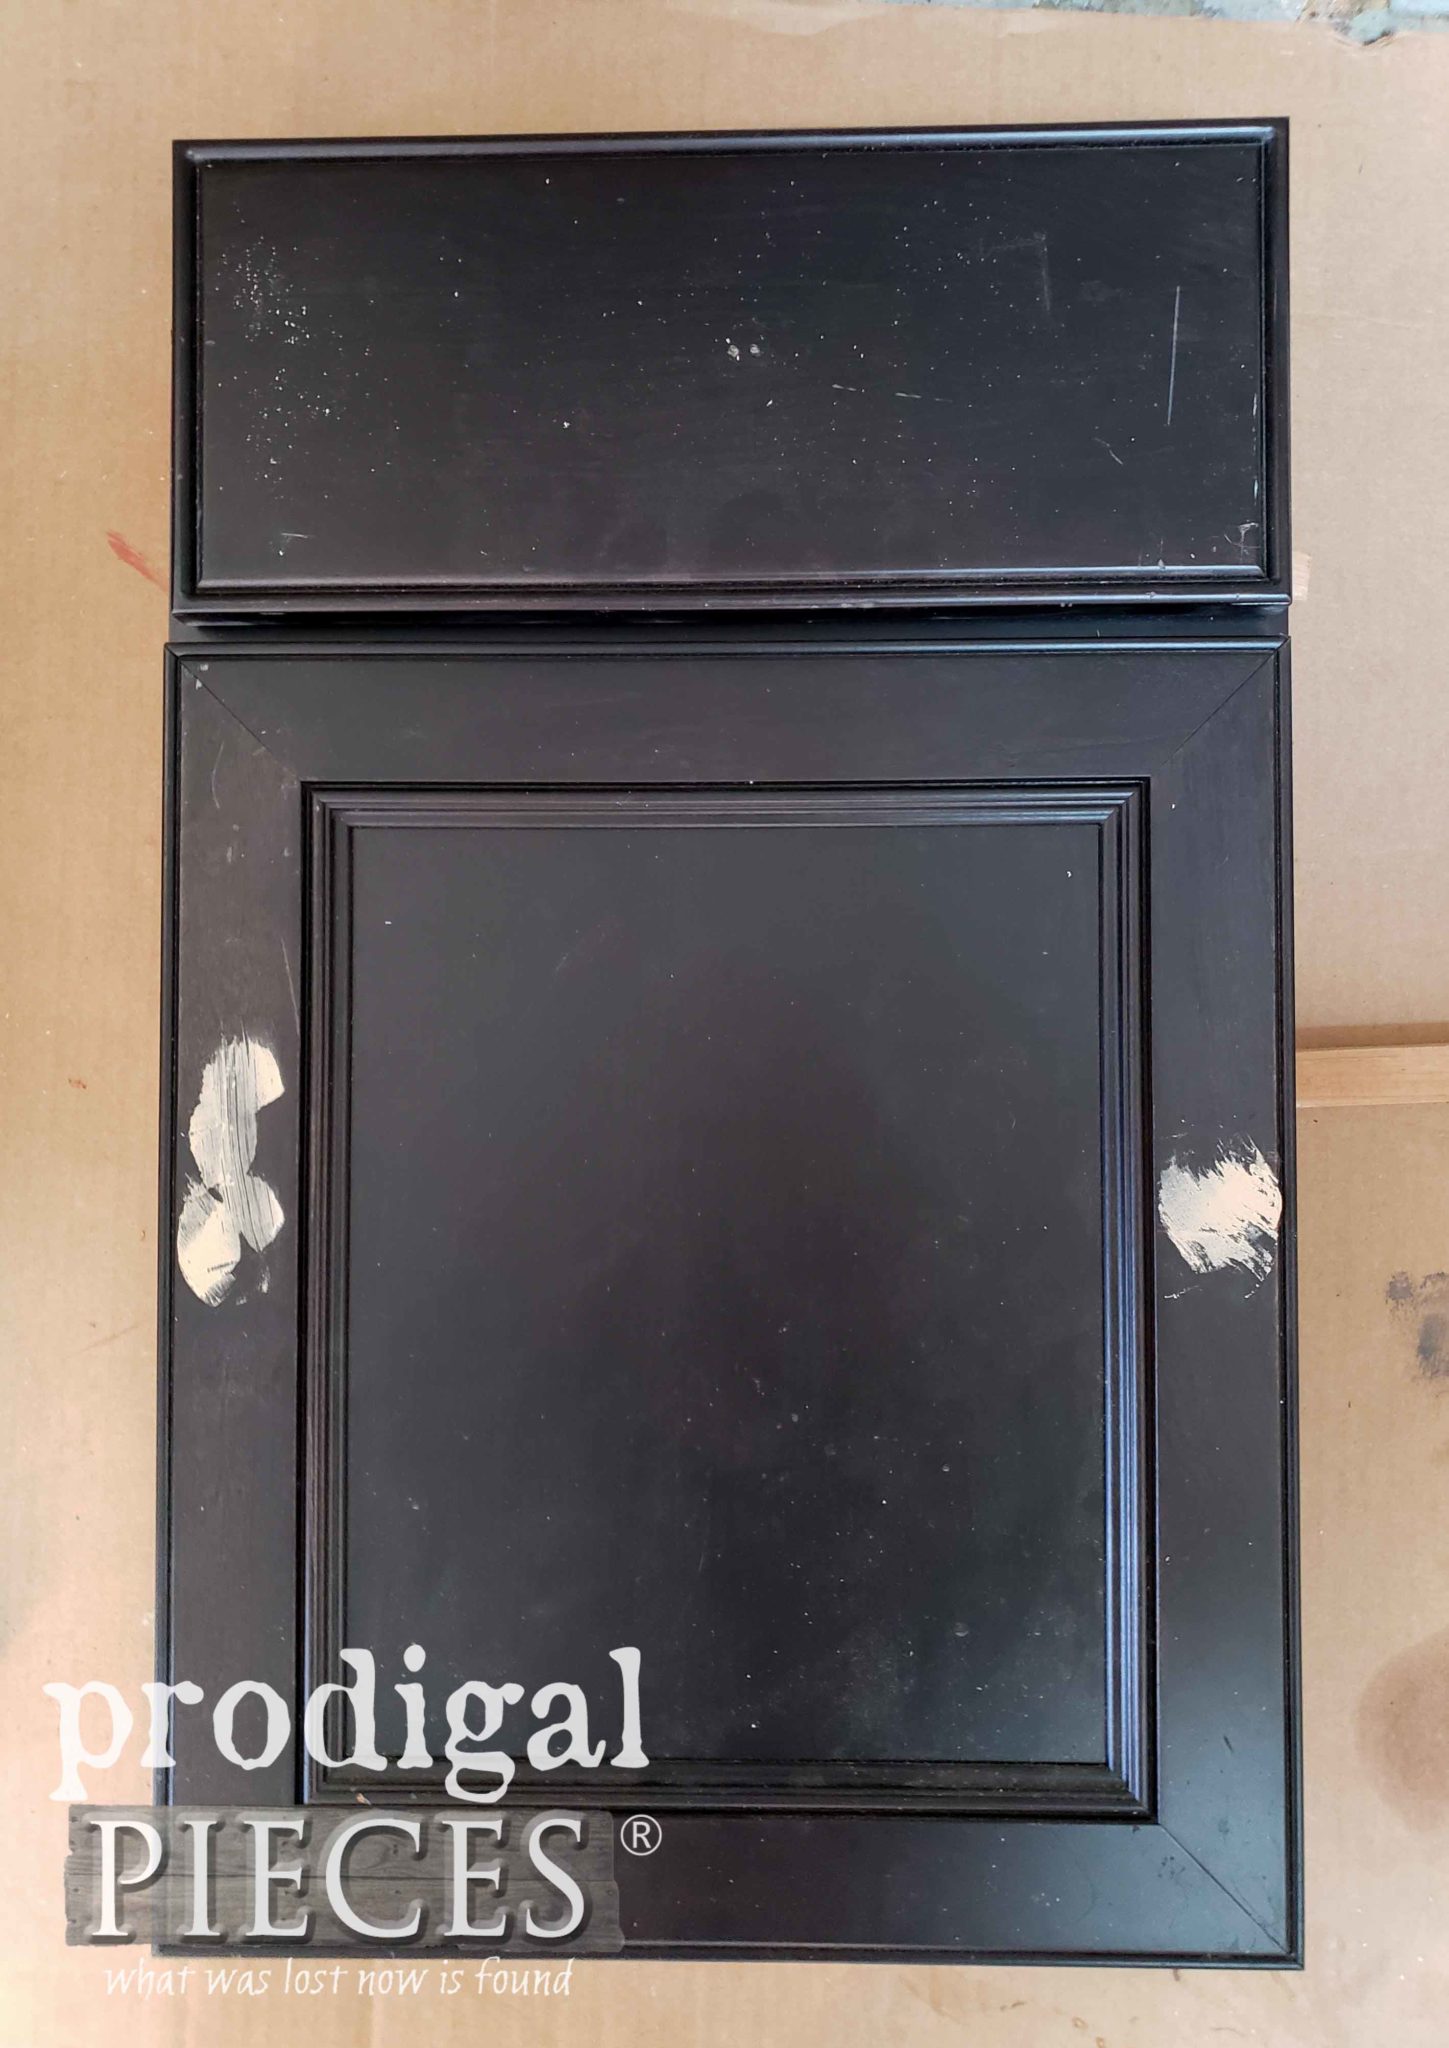
As a stark contrast, I worked on the black cupboard sample next.
This one had a bunch of wear to the surface finish. To go with the flow, I grabbed my sander and gave it even more wear. Makes sense, right?
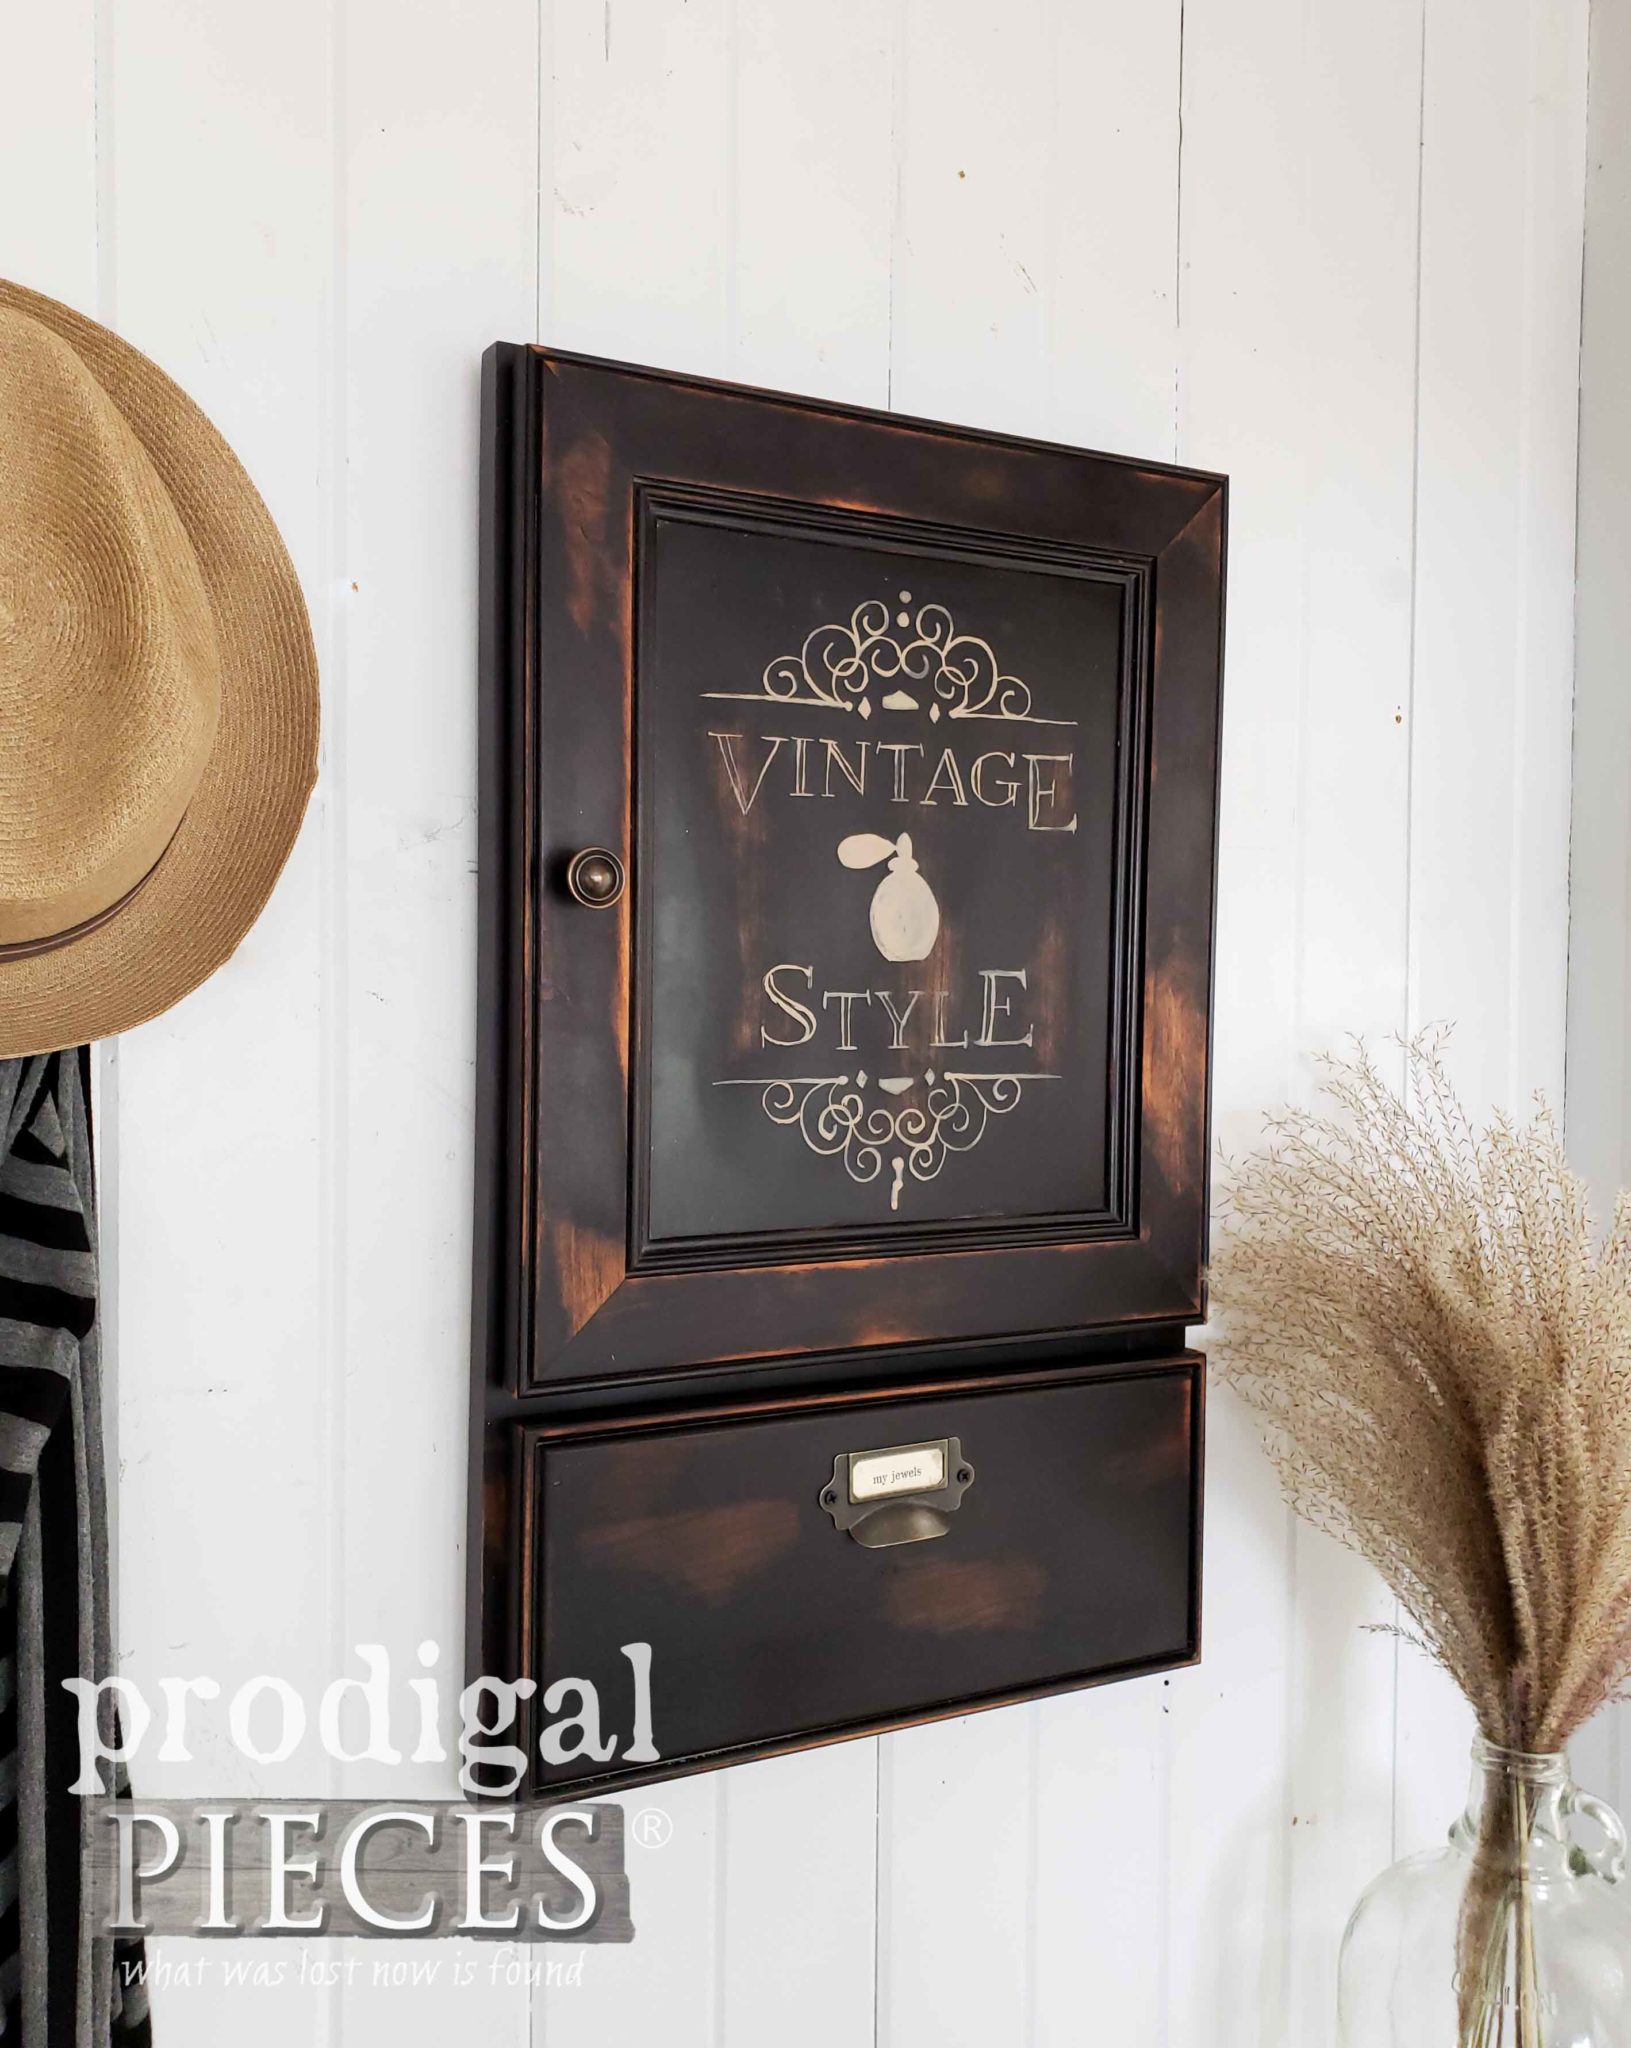
With this one I had fun adding a vintage brass pull to the door and bin pull to the ring case. Inside is pretty much the same as the one before, but still fun to see.
NEXT CUPBOARD
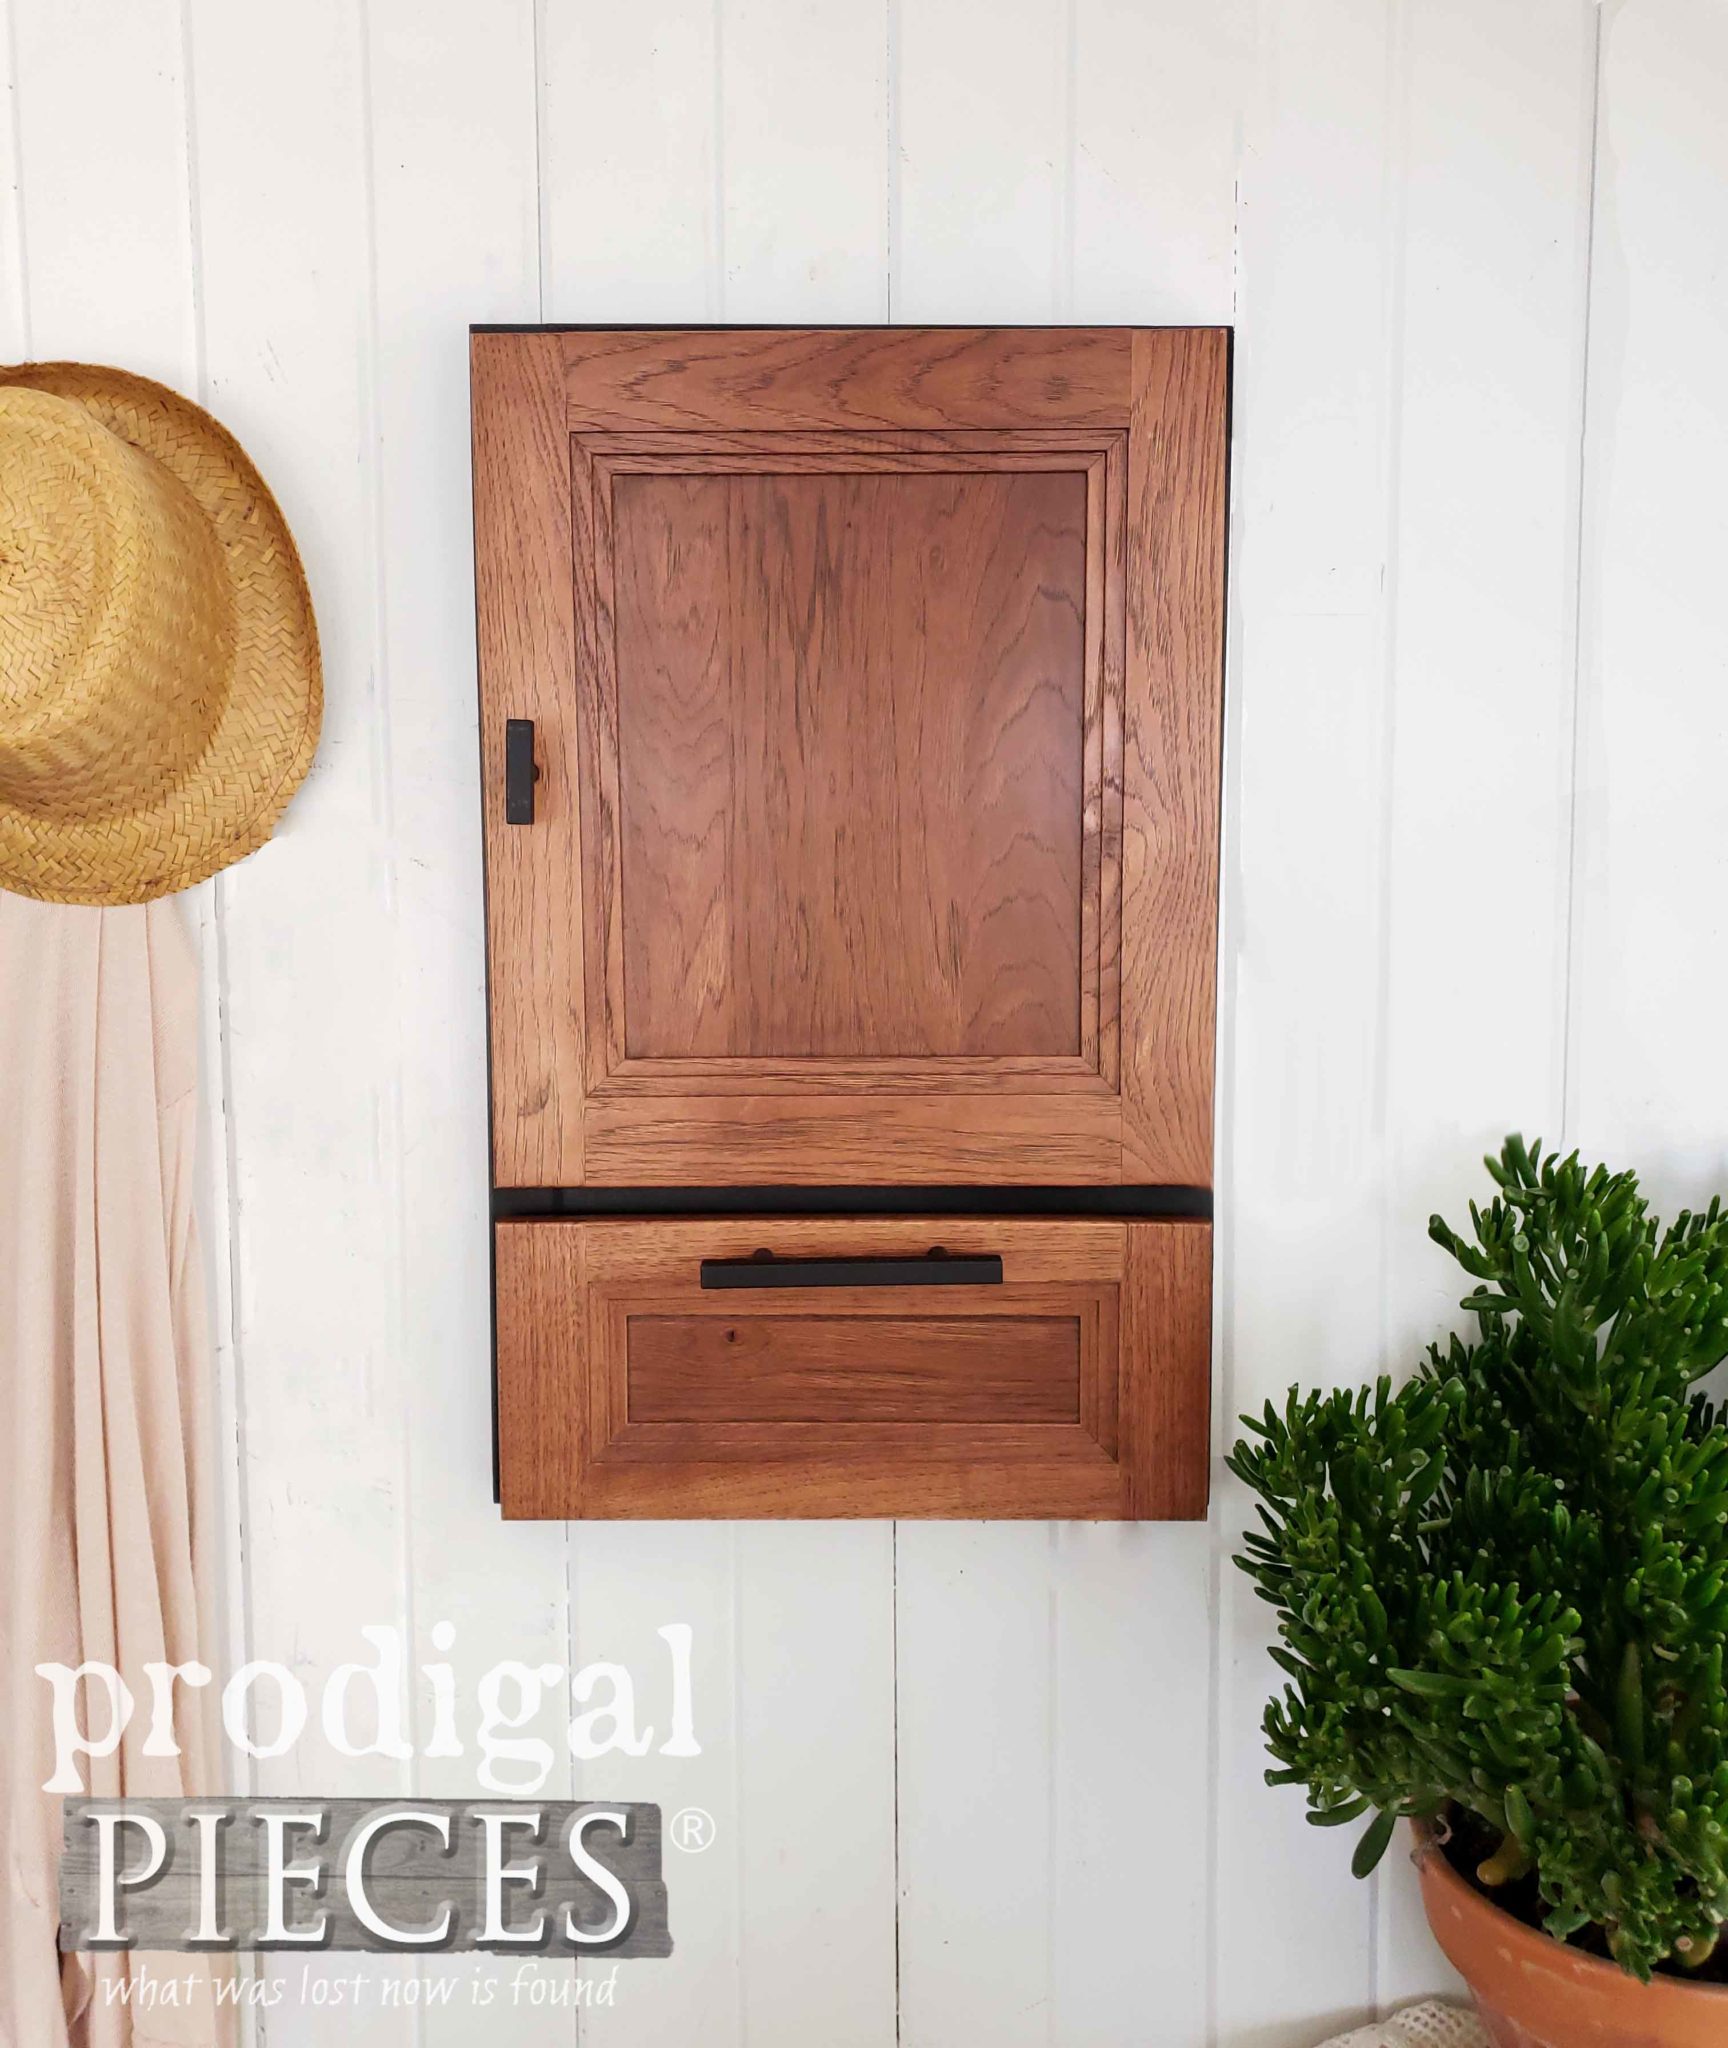
Second, I kept it simple as I felt the wood really deserved to be center stage on this cupboard set.
The frame had the most wear, so I took the doors off and spray painted it black. I refreshed the doors by rubbing them down with hemp oil. Then, I added a set of the same black pulls I used on my Art Deco buffet and we’re good to go.
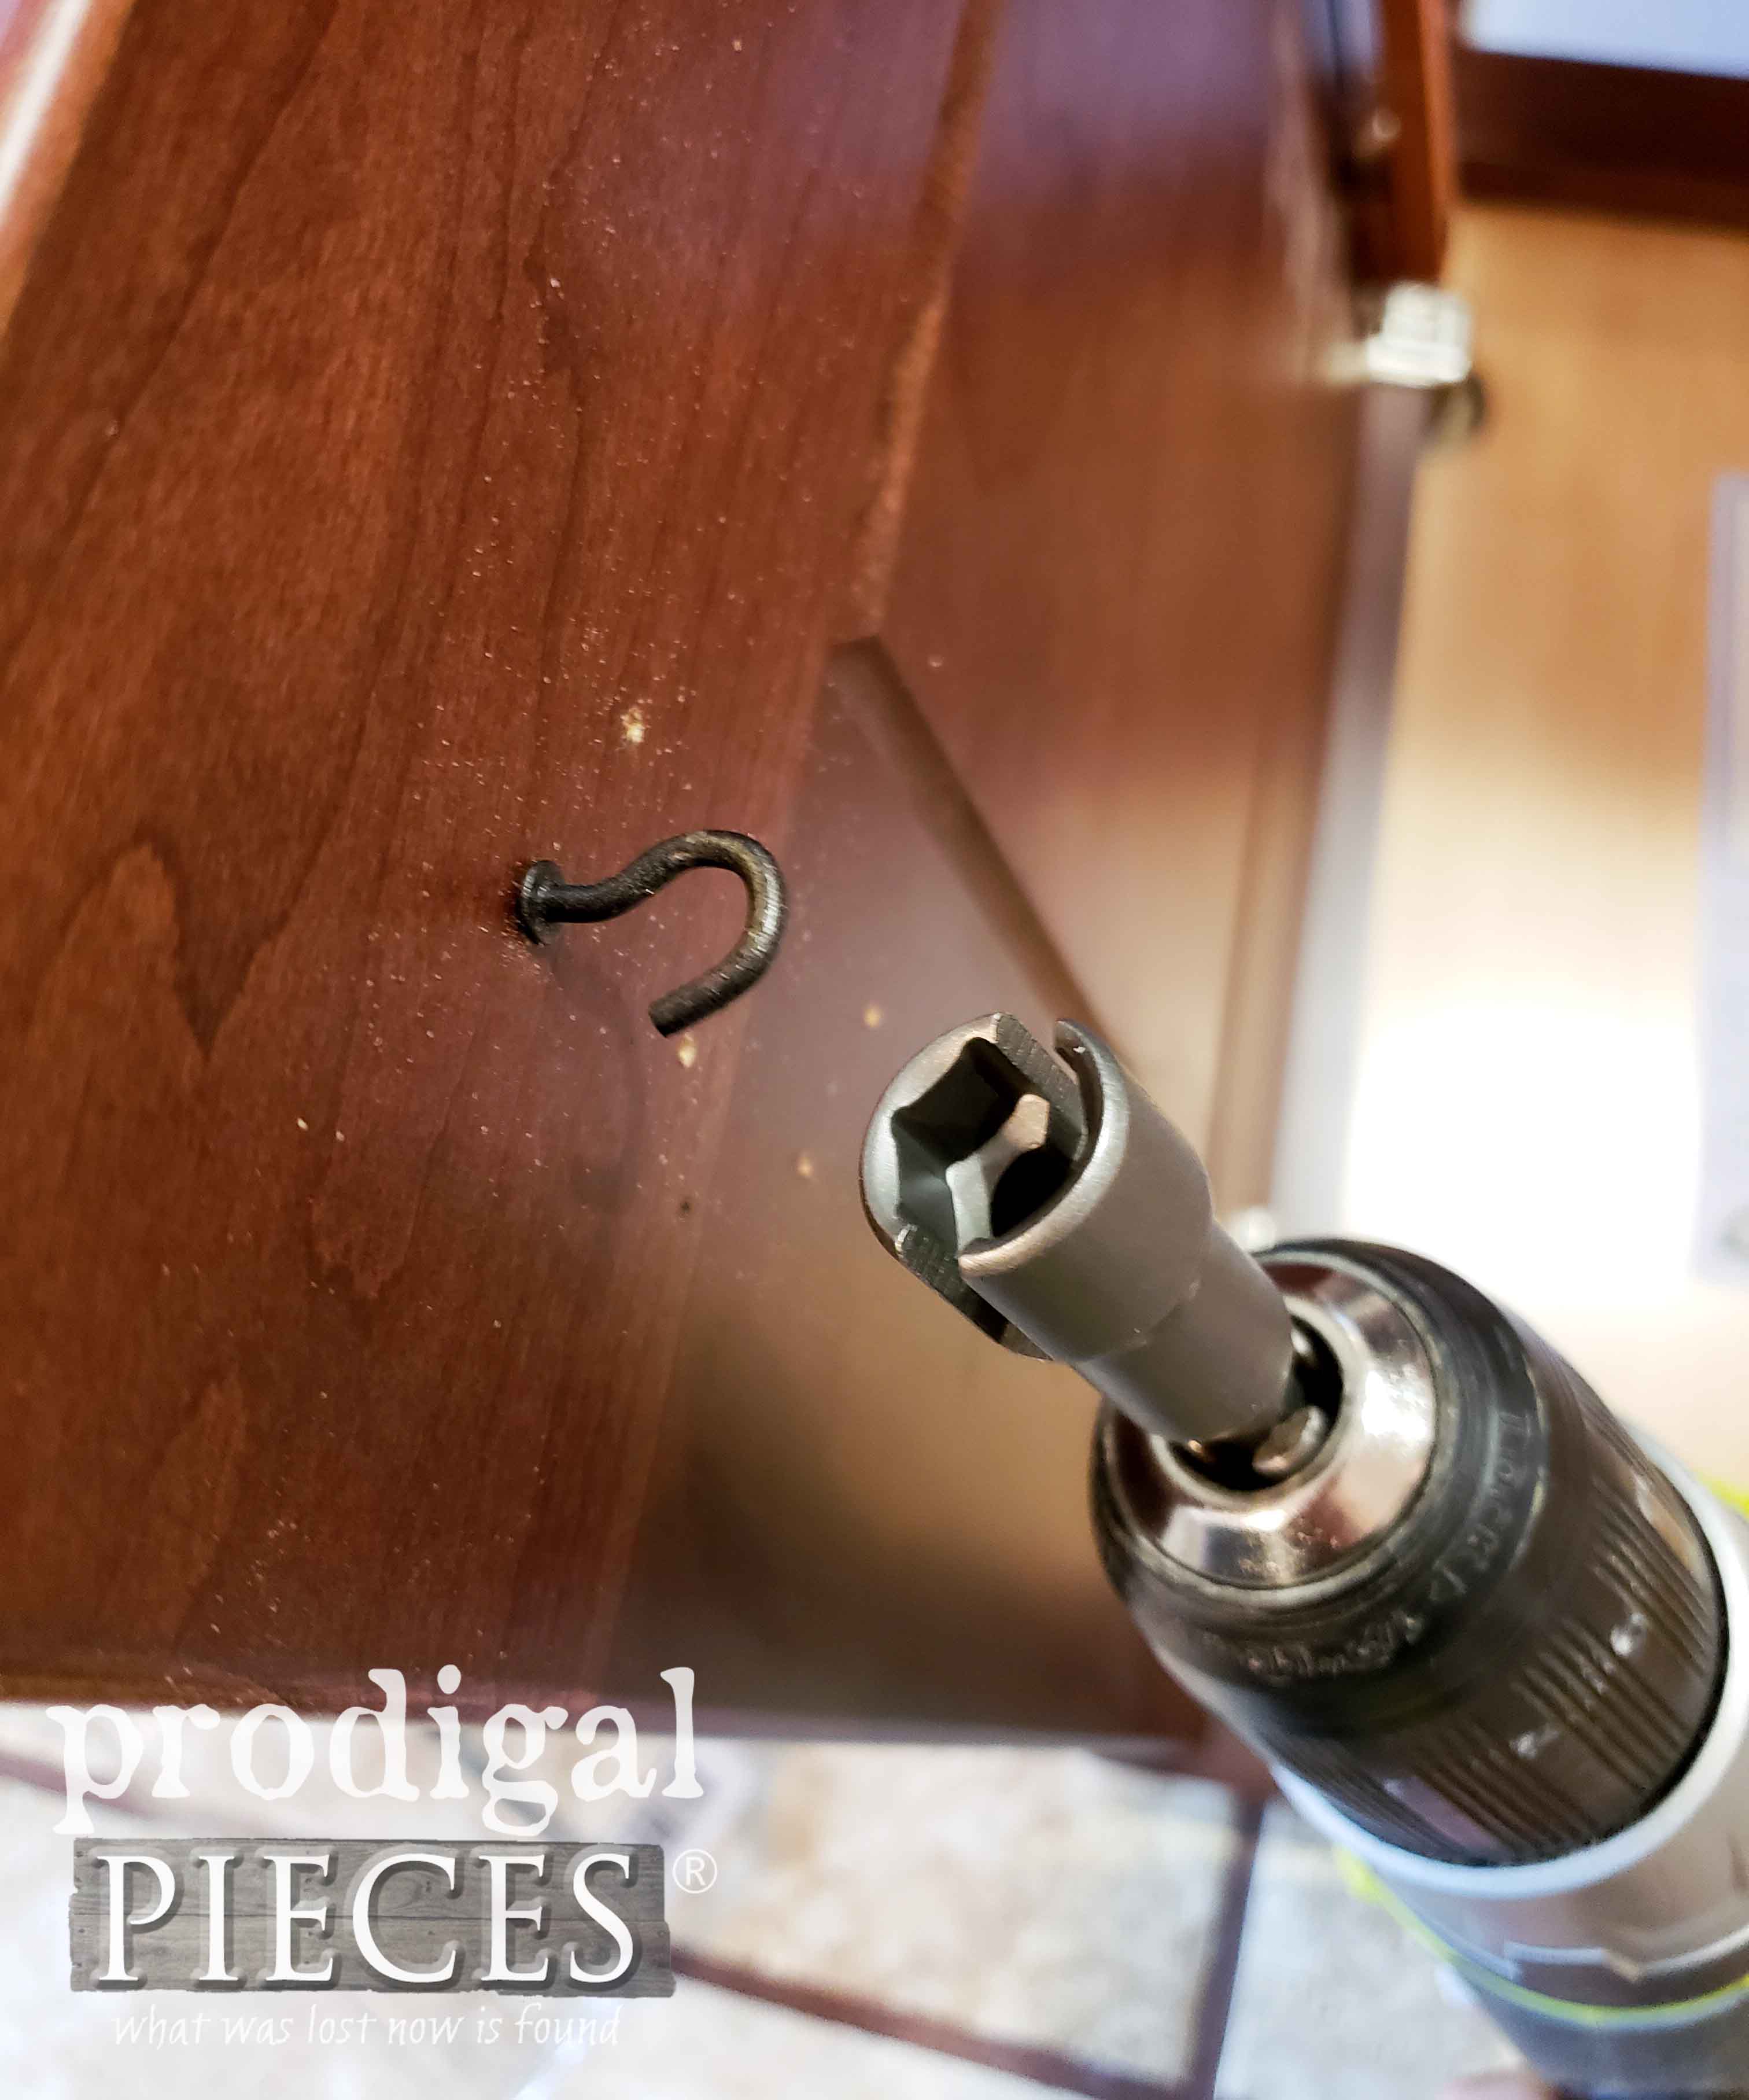
I did want to tell you that if I had put in all those cup hooks by hand, I wouldn’t be able to type this post. Seriously!! I found this handy wing nut driver that allowed me to drive them all in my pre-drilled holes.
ANOTHER CABINET
Third, this cherry cupboard also had much wear to the drawer front and frame of the door.
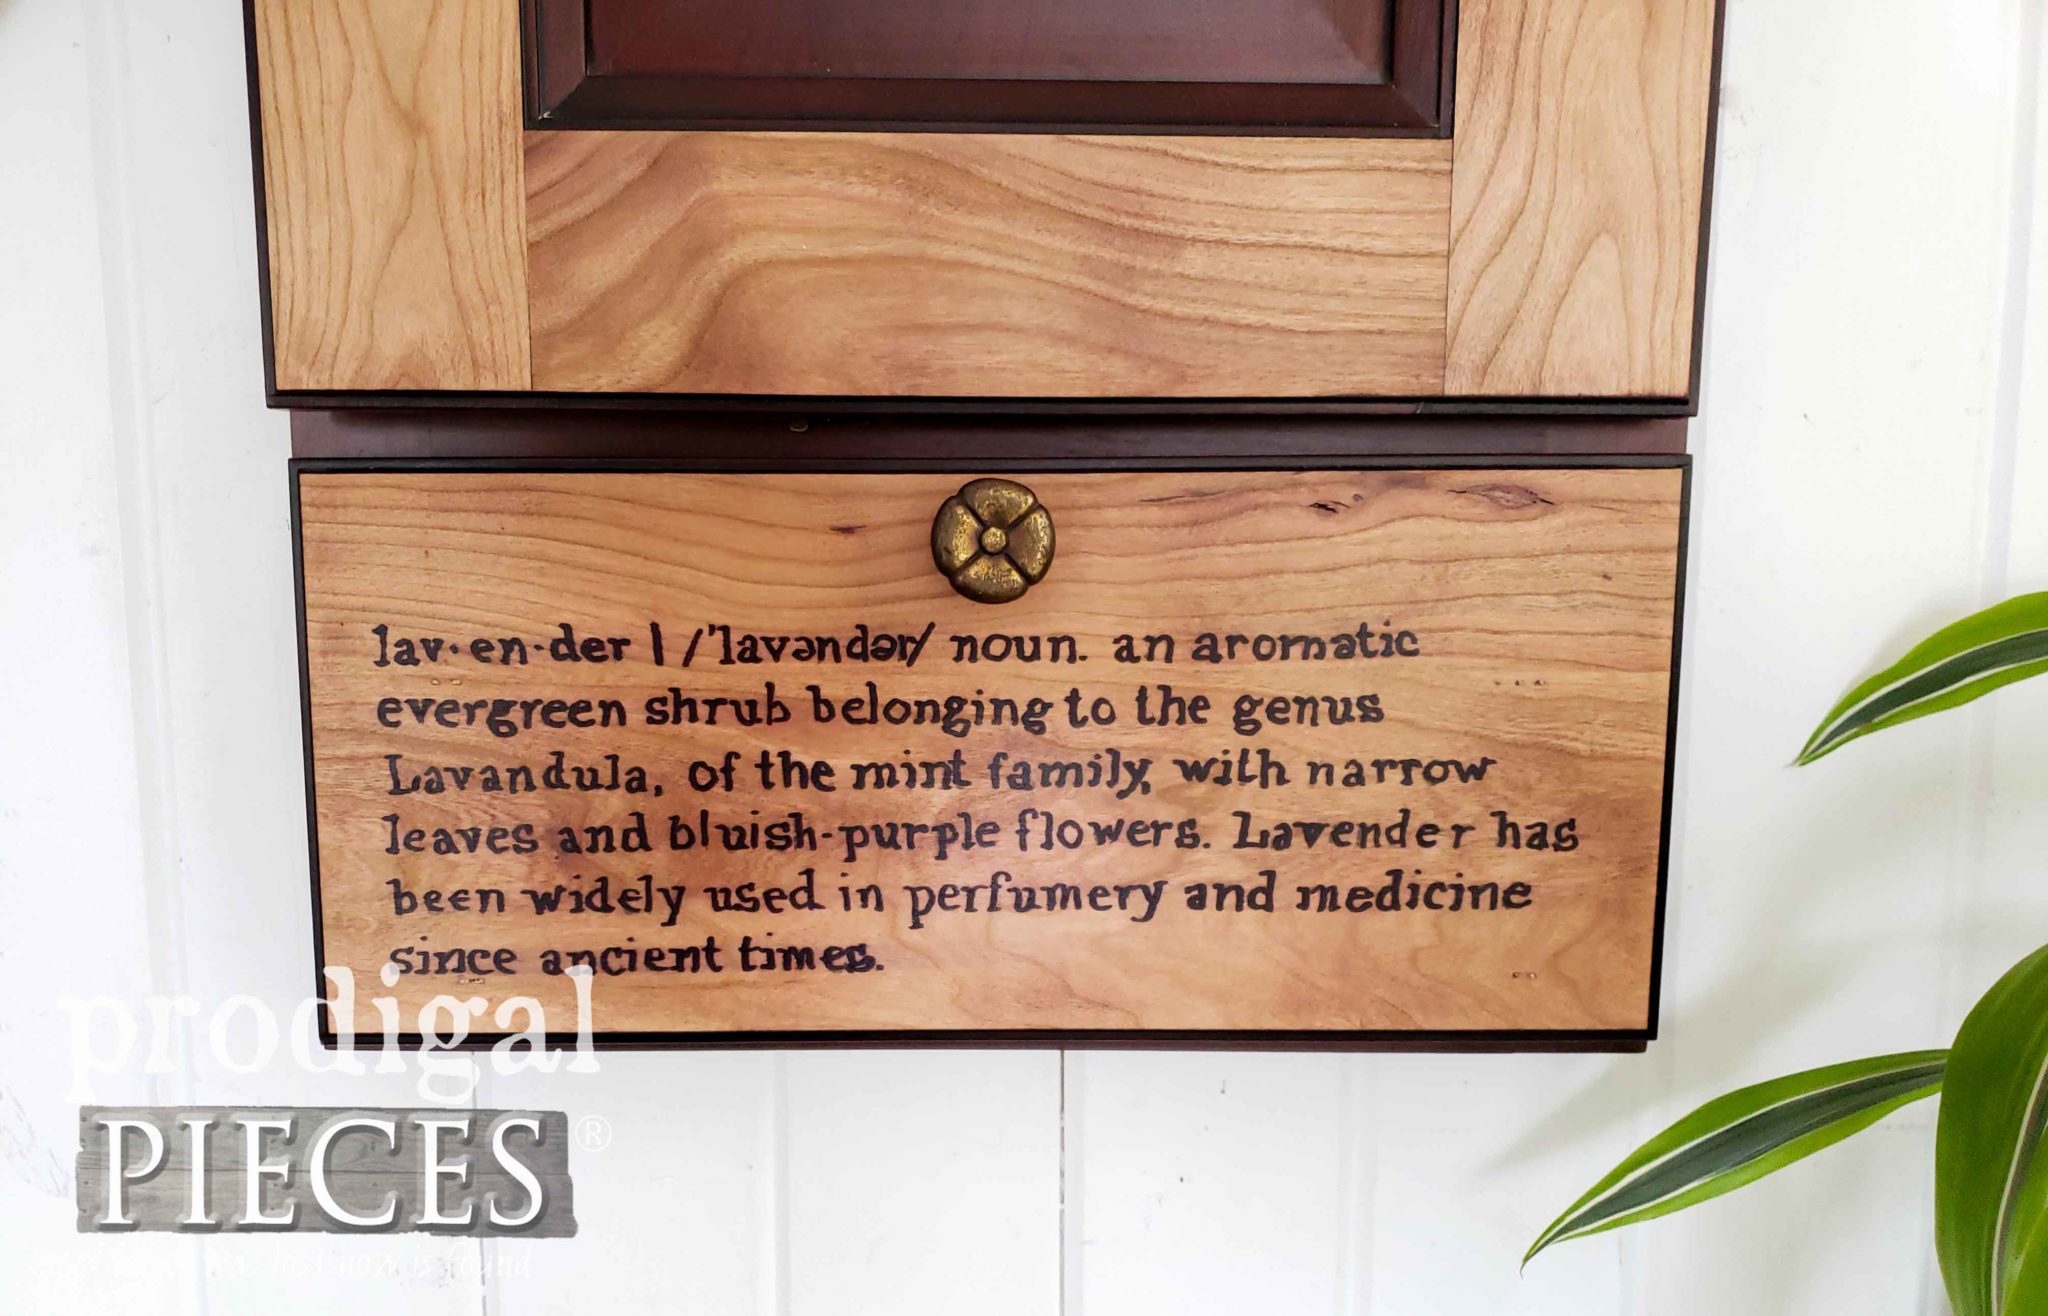
Since I couldn’t bear to cover up the wood, I sanded them down and had some fun giving it a French country vibe. I decoupaged a vintage lavender graphic on the center panel, and used my transfer method to add the lavender definition. In addition, I used a pair of solid brass pulls from my stash to keep the vintage vibe.
Also, the interior is much like the others with mirror and oodles of storage. So fun to see these recreated, isn’t it?
LAST UP
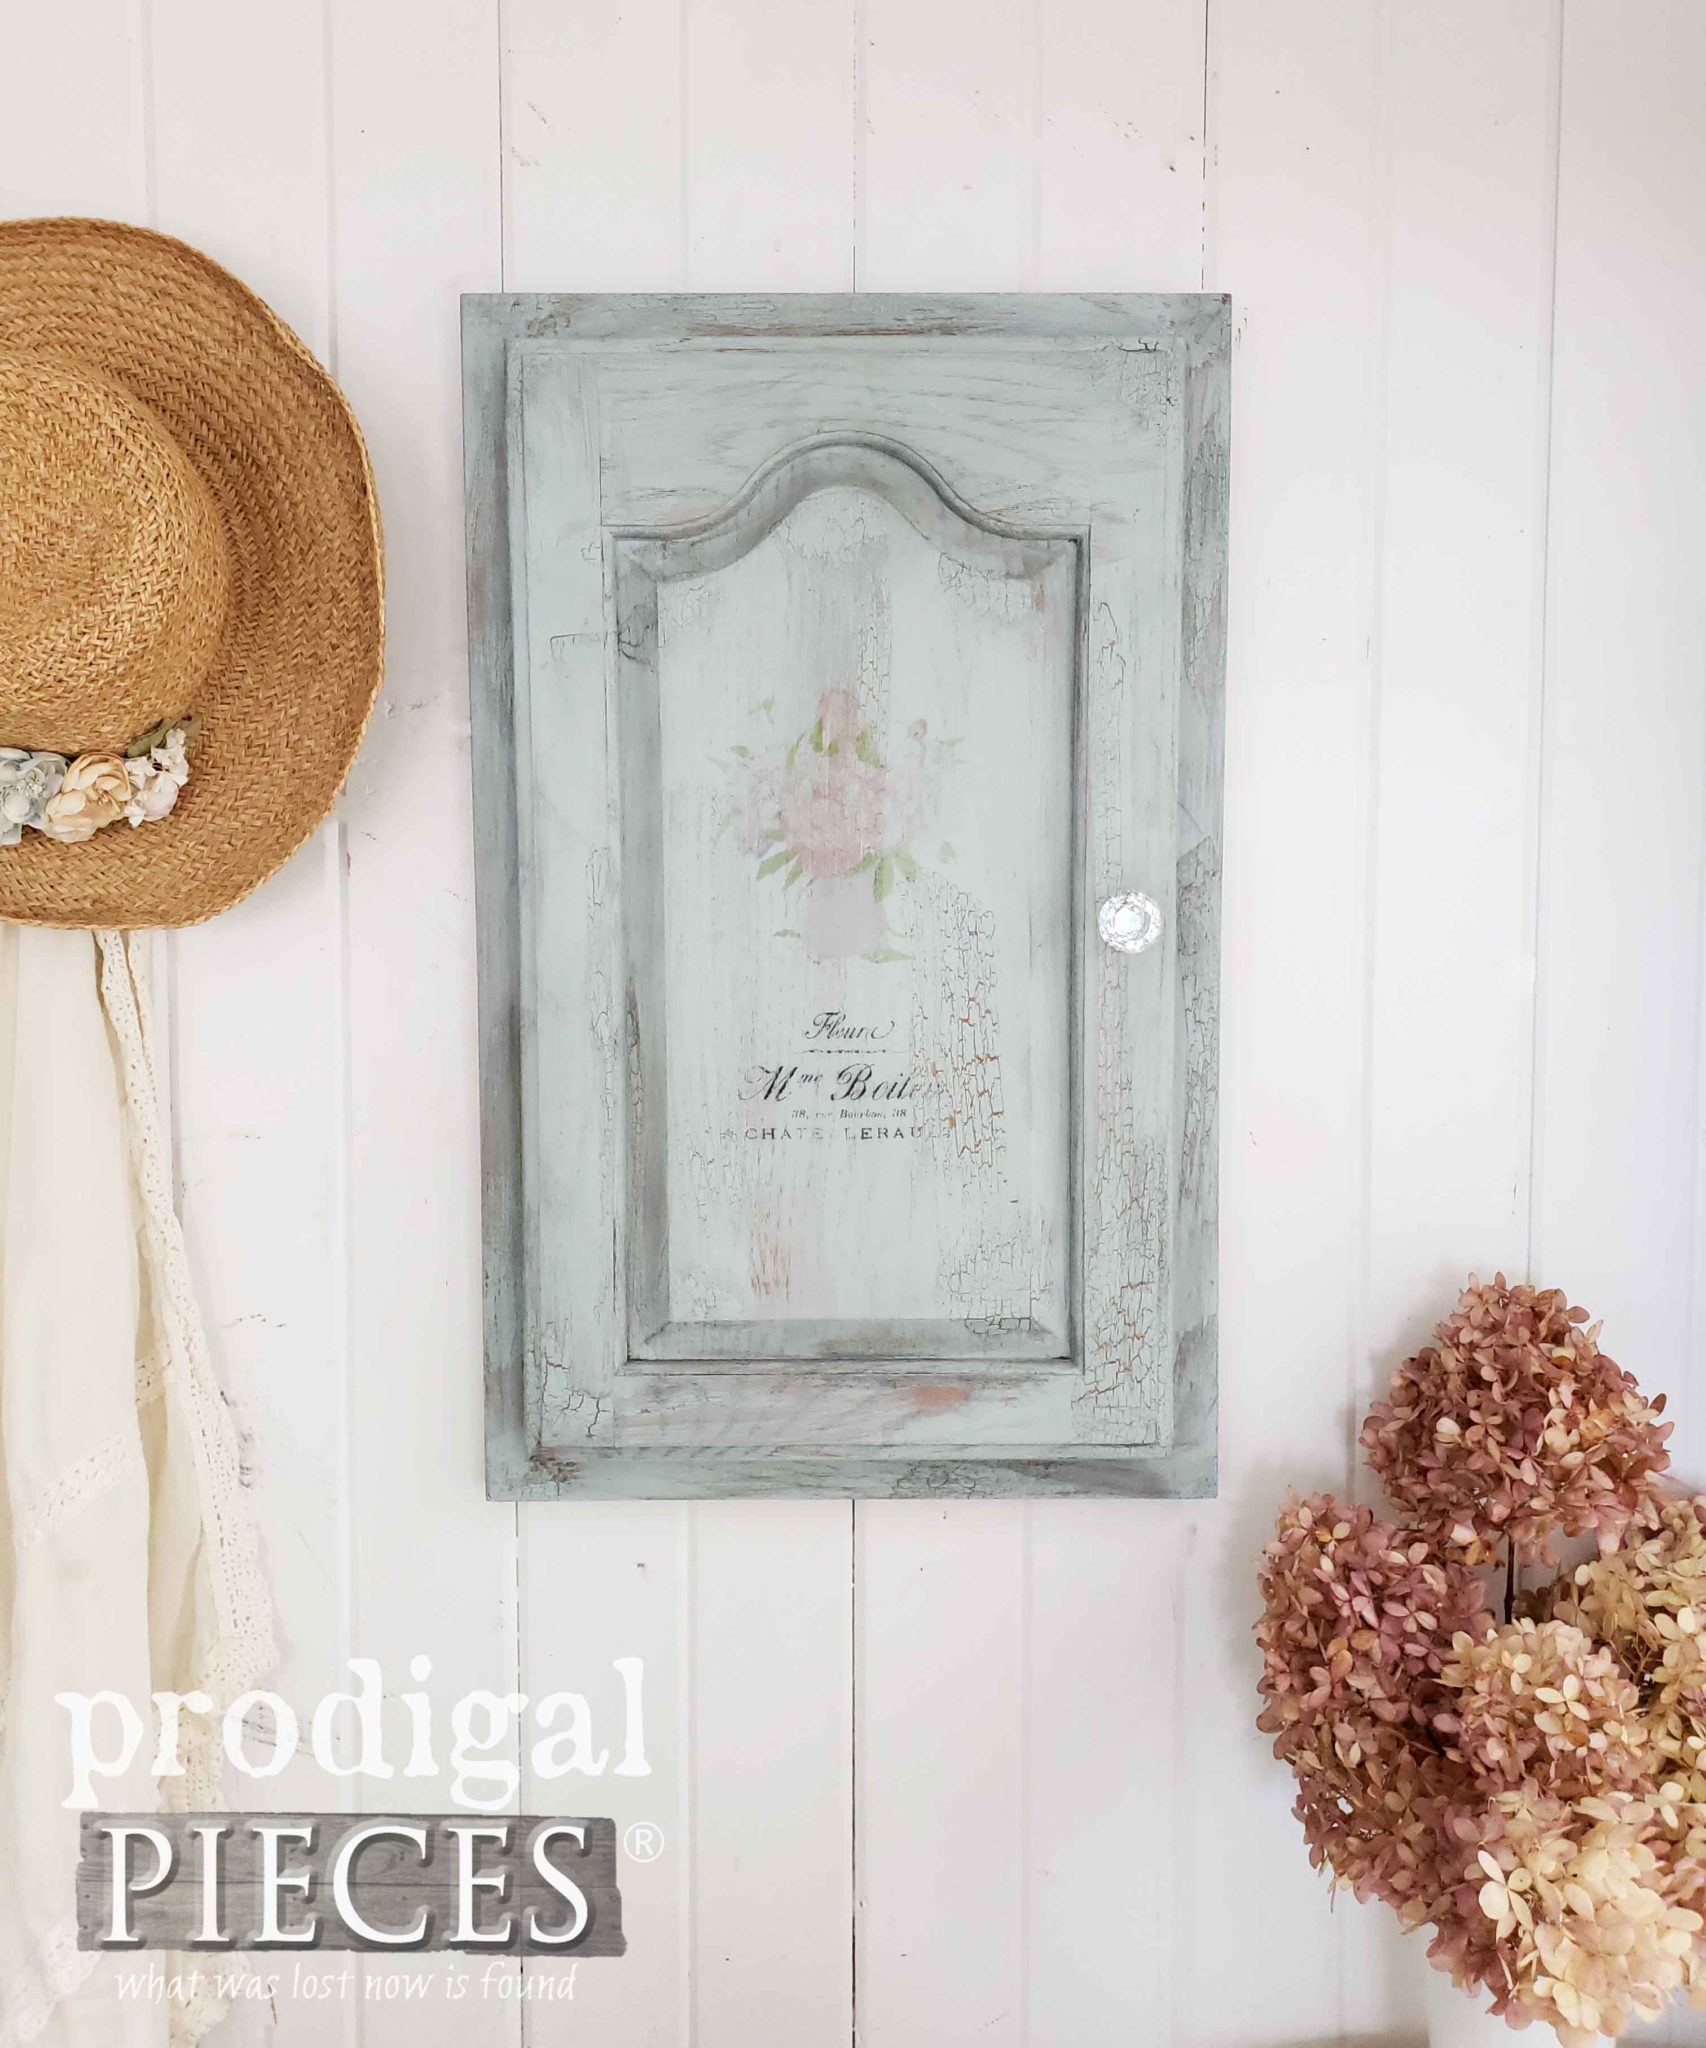
Last, but not least, for my repurposed cupboard door project is my oddball cupboard sample. This one was a door only and really was a pretty classic cathedral design.
While the oak is gorgeous, I wanted to a bit more of an aged paint effect. First, I applied my crackle the same as you’ve seen me use in all these other crackle posts. Then, I used my Vintage paint and my Fan Brush to give it a coat of paint. Once that cured, I added another transfer of flowers and a different French typography label. Last, I used Gray Wax to give it even more depth and texture.
My heart beats faster at the sight of the crackle!
Inside this repurposed cupboard door cabinet is similar to the others, with the exception of a larger mirror and different sized ring holder.
Not only was this fun to create, but I’m eager to see where they all end up. Each repurposed cupboard door cabinet is available in my online shop and will make a great gift for that someone special (or even a gift to self…tee hee!)
Do pin and share this repurposed cupboard door project. You’ll want to save it for later and inspire others too!
UP NEXT
To get these DIY tips & tricks in your inbox, be sure to sign up for my newsletter. Time to see what my Trash to Treasure ladies have for you below!
Take a look at these fantastic Trash to Treasure projects:
More projects like my repurposed cupboard door jewelry cabinet:








Oh my goodness Larissa every one is better than the firs!! Who knew you could remove the plastic??? Beautiful job! Pinning.
You are the sweetest, Susan! I was crazy to take this on in such a short time, but thought it would be a fun challenge. Gotta love that, right?! 😀
What fun to show the different ways to finish the doors into a jewelry cabinet.
Thanks! Once I had the idea, I couldn’t wait to do each one differently. Fun!
What a really cute idea! Congrats on the stash! Lol!
Thanks, Heather! Fun for me to do, but no room. haha!
They are all so pretty, something for everyone! Thank you for all the great ideas.
You got what I was after. Made it fun! 😀
Ingenious, Larissa! I would never have thought of that! And all the different looks, awesome!
What software program do you use to make all your transfers? Thanks again for all your inspiration!
It was fun to rethink each one and make them unique. Glad you like it! I use PhotoShop Elements primarily.
Hi Larissa, you did a beautiful job on each and every one of those doors! Each is so unique! It’s also amazing you did all the doors differently in just a couple of days, that’s not so easy for me to change things up in such a short time. Way to go girl! I do have one question though, did the backing you used come with the doors or was that created to fit each door? The mirrors in them was also the bomb!
Thank you, Lisa! Yes, a glutton for punishment as working all 5 at the same time was crazy. Per my usual…haha. The backs were already there, but a hardboard backing or luan could be added too.
What a great idea! You are soooo resourceful and “repurposeful ”!
I’m so glad you think so! My husband wonders some times. haha!
You score the BEST freebies!! I love what you did with these! They will make perfect Christmas presents for some special people! XO
I couldn’t believe what she brought me! So fun and exciting to have fresh material. yay!!
Wow!! You never cease to amaze me!! These are awesome and wow, do you have stash!! lol 🙂 xo
awww…thanks! You aint’ kidding tho…time to get to work! 😀
You taught me something new today, Larissa. I never knew laminate could be removed so easily! Thank you for that and the hemp/wood shine tips.
Excellent! I’m glad to be of service. tee hee!
I love how these turned out, Larissa – I don’t know which is my favorite! Maybe the black one 😉
Thanks! That was a fun one to do.
Hi Larissa! I just received the blue jewelry cabinet and it is gorgeous! I love your work.
What a treat to hear. Thank you!!
Hi Larissa, I found this post on Pinterest because I have just found a ton of laminate drawers and looking for the best way to paint them. The laminate is in good shape so I don’t need to remove it but not sure how to prep it so paint will stick. These jewelry cabinets are the bomb! Happy Easter!
Sweet! You can use a Gripper primer as I’ve used in these posts. That should do the trick. If not, you can still remove the laminate and paint too.
I love how you gave the doors a new life. The dark door is my favorite. I sometimes use them as a substrate for my mosaics. Check it out https://www.etsy.com/listing/564267871/holiday-mosaic-bountiful
I love them all but the last one is so my style! Thanks for such a informative post!
You are a kindred spirit, Ceilia. Thank you!