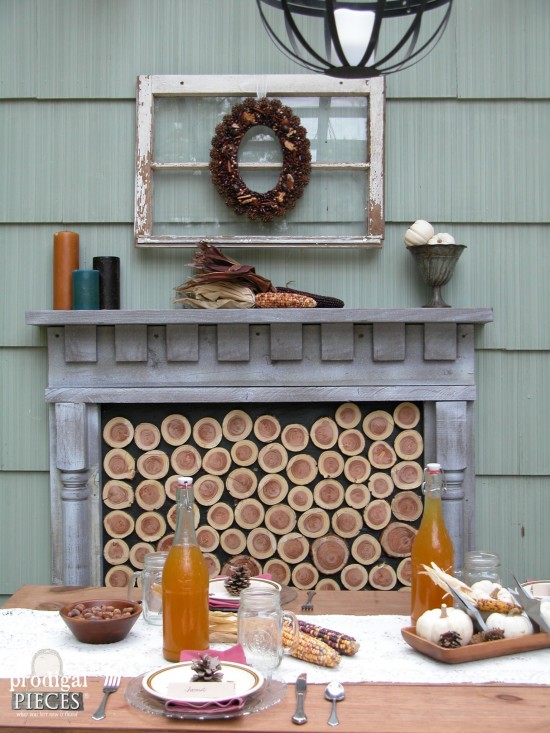
Last week, we revealed the fruits of our labor – our patio makeover. From top to bottom, everything was built or created by us, including our DIY faux fireplace.
Today, we’ve got the step-by-step tutorial for you to create your own custom fireplace. The best part is, this doesn’t have to be just for your outdoor project. Yay! Our DIY fireplace is a simple build that you can add indoors too.
*this project was sponsored by HomeRight (see full disclosure)
Our fireplace finished dimensions are 54¼” tall by 50″ wide, but you can adjust this to suit any space. First, let’s gather our materials. For an outdoor design, it would be best if you used pressure treated lumber for long-lasting effect, but do note that you will have to wait 2-3 weeks for it to season and be ready to hold a paint or stain. We did not use entirely pressure treated, and that’s okay because of the paint and poly we are using to protect it.
DIY TIME
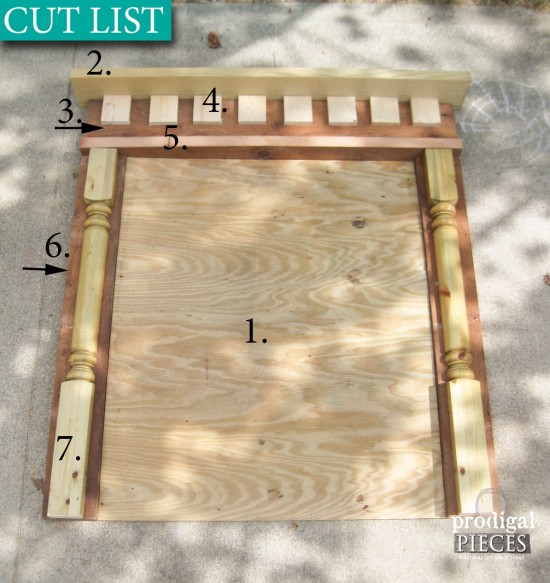
Here’s a layout of the lumber you’ll need: (remember that stores like Home Depot offer a cutting service for free)
- 1 – 36″ W x 44″ H plywood – cut from a 4′ x 8′ panel
- 1 – 50″ L x 6″ W – cut from a 2″ x 8″ board
- 8 – 3.5″ W x 4″ H – cut from a 1″ x 6″ board
- 1 – 47″ L x 6.75″ W – cut from a 2″ x 8″ board
- 1 – 47″ L x 3.25″ W – cut from a 2″ x 4″ board
- 2 – 47″L x 5.5″ W – cut from one 2″ x 6″ x 8′ board
- 1 – 44″L – 4″ x 4″ turned post – cut in half lengthwise (you can have variation here – use a standard 4″x 4″ with carved pieces added, use corbels instead, etc.)
- wood slices
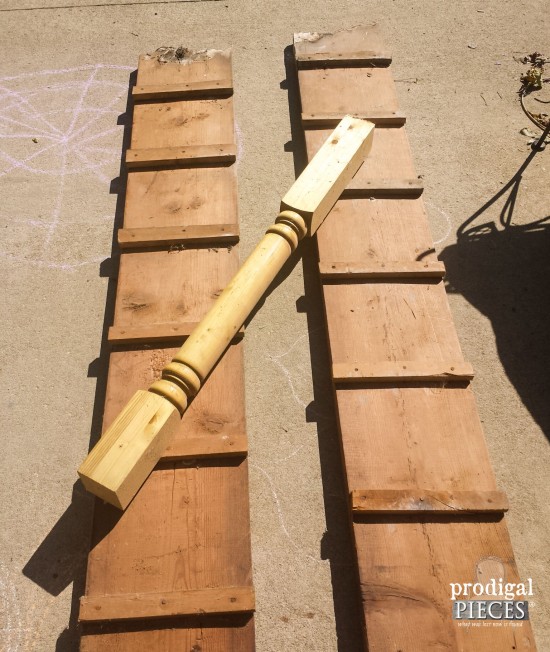
TIP: This project can be completely made with scrap lumber, so before heading out to the lumber store, first check around on Craigslist, Habitat ReStore, even curbside for scrap wood. I found our lumber curbside: a header that had rotted in half that took a bit of elbow grease to remove those strips, but hey, free ain’t always easy. Also, two turned posts that were stuck in concrete in 5 gallon buckets. We cut the posts out of the buckets and are using one today.
Tools and Other Materials:
- table saw and/or circular saw
- drill
- sander
- 150 grit sandpaper
- tape measure
- wood glue
- 1½, 2½, 3″ exterior screws
- paint of choice (I used black, dark brown, and white)
- polycrylic or other topcoat
- Homeright Rapid Clean Kit (optional, but oh so much easier to clean up!)
- nailer
- 1″ brad nails
- wood filler (if needed)
- 150 grit sandpaper (or similar)
- old candle or hard wax
- level
- safety goggles
- pencil
- builder’s square
STEP 1
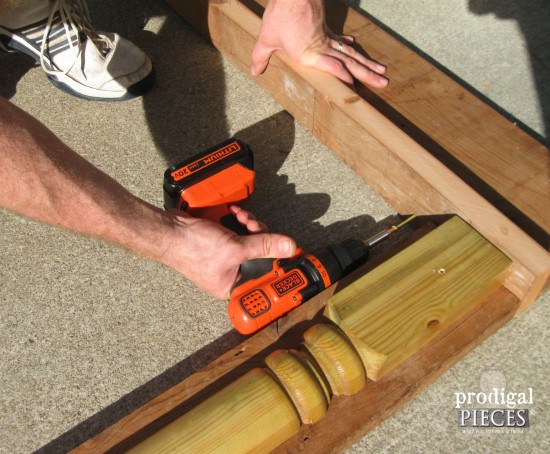
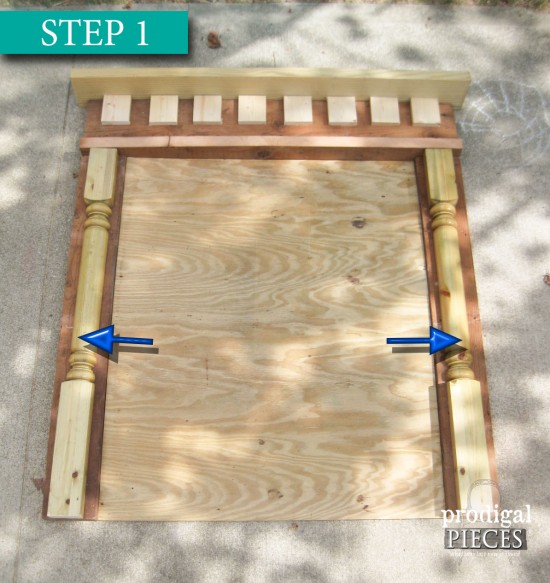
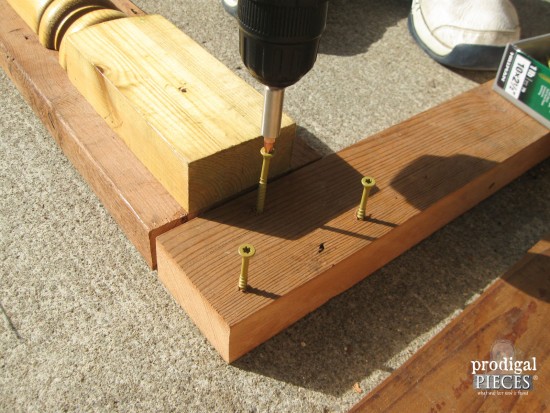
After you have your lumber cut, it’s time to assemble. First, you will be assembling the side posts, so grab your #6 and #7 pieces. We will be using the 2½” screws in these steps.
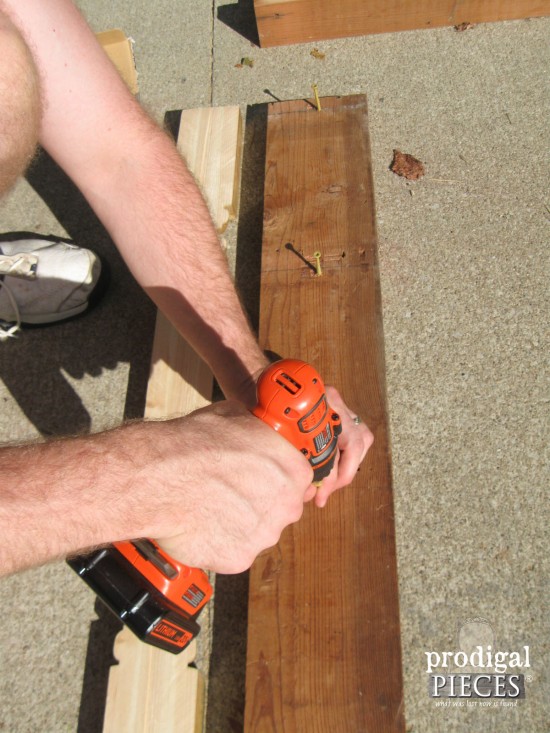
Pre-drill the screws into the back center of the #6 board, spacing them about 10-12″ apart.
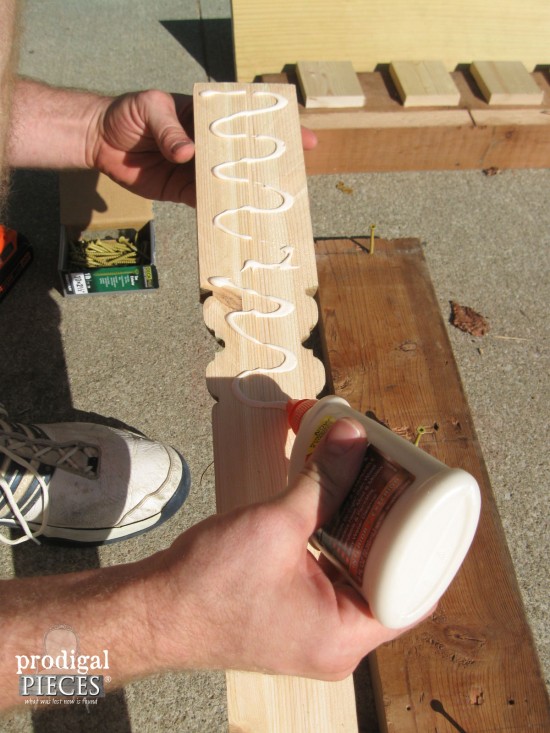
Run a good bead of glue on the back of your #7 turned post half.
Lay that glued #7 turned post face down on the ground. With your #6 board, mark 1 1/8″ in from each end. Now, lay your #6 board on top of the #7 turned post and line up your marks. Finish drilling in the screws you already started.
STEP 2
Time to attach your posts to the #5 board.
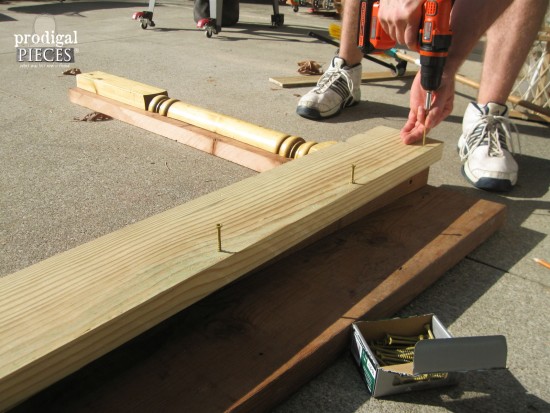
Grab your #5 board and pre-drill in a triangle pattern to the top side of the board (one screw to land in the center of the #7 turned post, and two to land into the #6 board).
Flip the #5 board over and line it up with your posts and secure together.
STEP 3
Next, you will attach the #3 board.
Pre-drill up through the bottom of the #5 board attached to the posts into your #3 board, spacing screws about 10″ apart.
STEP 4
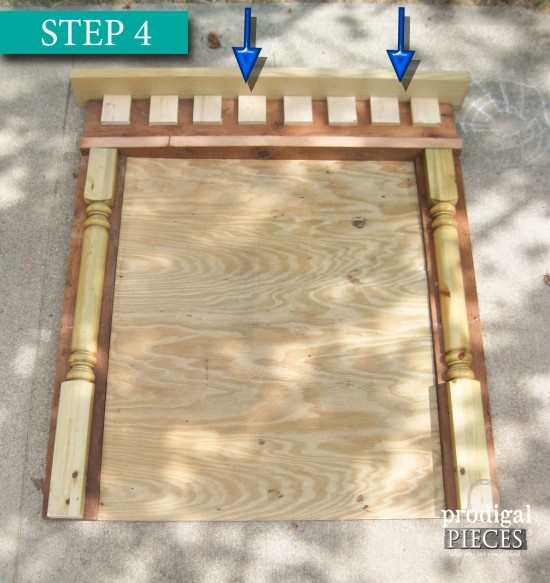
Now it’s time to add the top mantel piece, so grab your #2 board.
Pre-drill your screws down into the top of #2 board, spacing about 12″ apart and along the back edge, approximately ½” in. Then line up, and attach by finishing off the screws down through the #2 board and into the #3 board that has already been attached to the mantel.
STEP 5
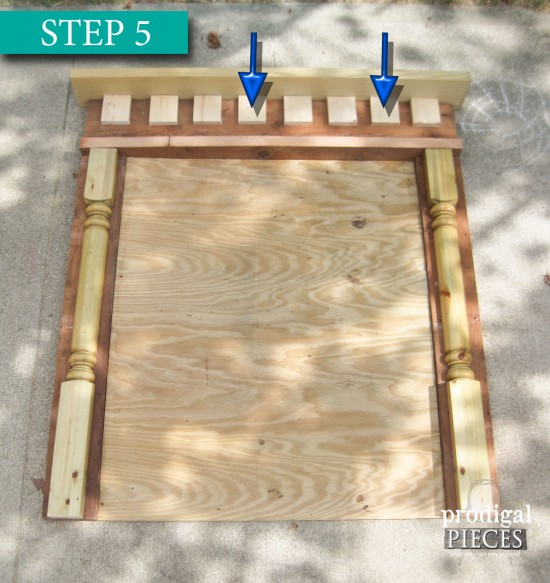
For this last step, you will need your #4 pieces, builders square, pencil, and tape measure.
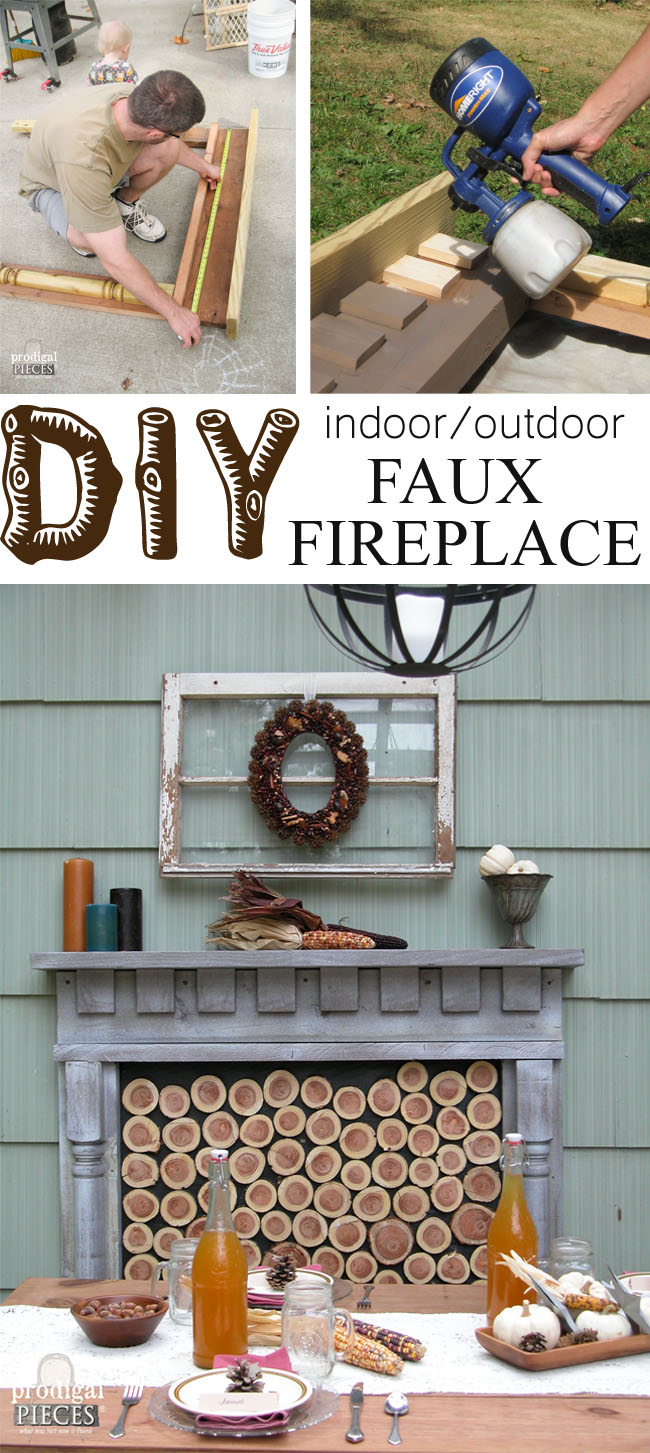
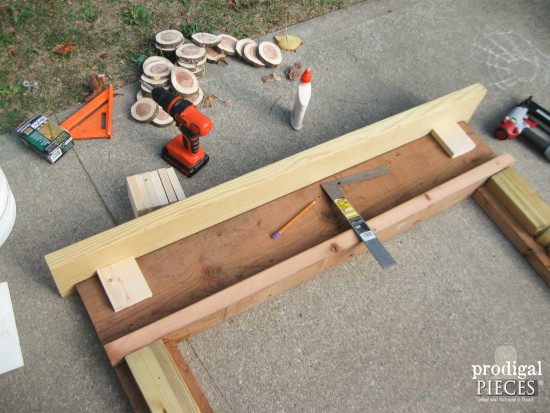
Starting at one end, measure 2″ in and then go to the opposite end and do the same. (love our little helper?)
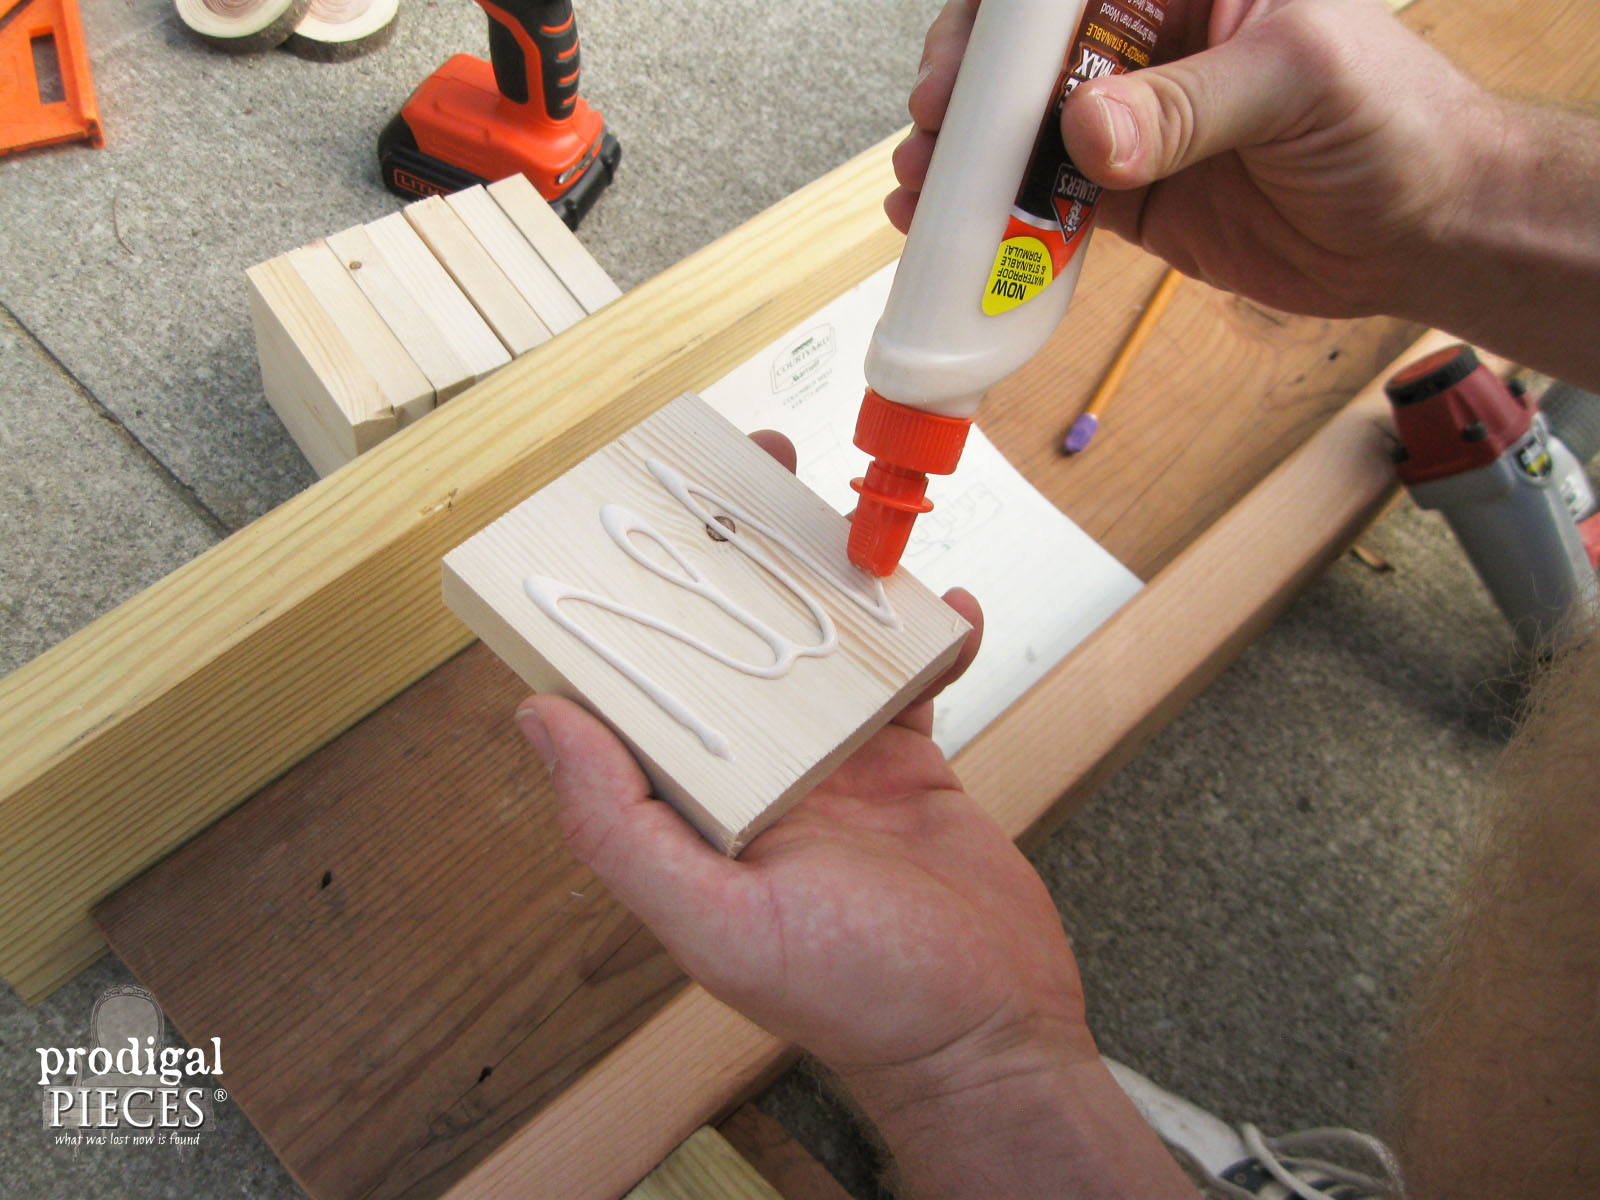
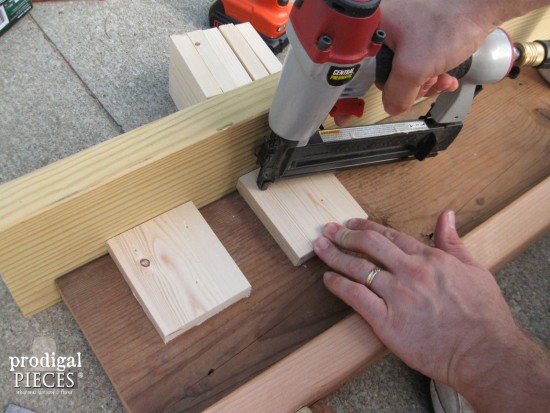
It’ll be easier to line up the set if you first attach the end pieces. Using your wood glue, put a bead and then nail flush to the top mantel board.
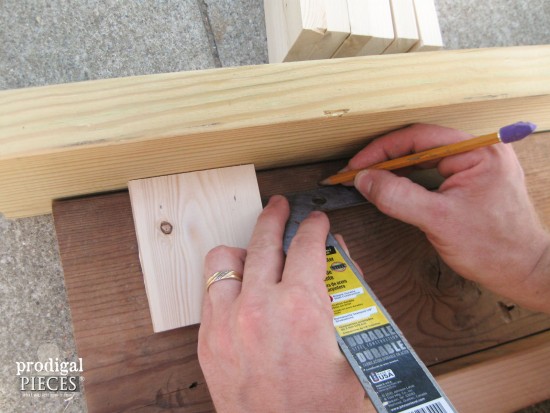
Once the first two pieces are attached, using your builders square, measure 2 1/8″ in and mark.
Attach your piece in the same method as the first two. Continue until all #4 pieces are placed on the face of the mantel.
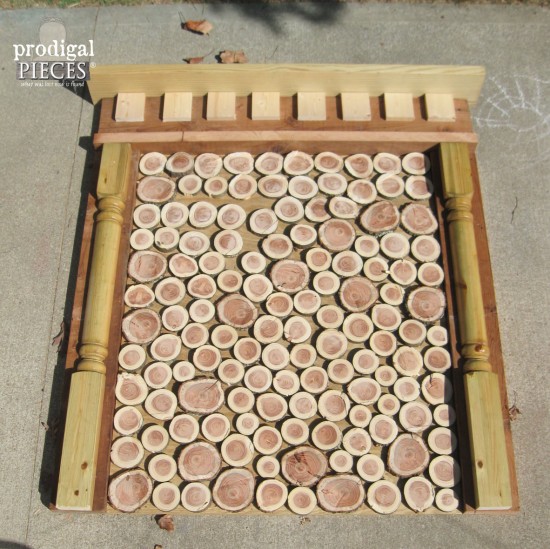
Here’s a look at a rough layout…I have no idea how many slices we cut, but we did use locust with the cool grain. ♥
PAINT TIME
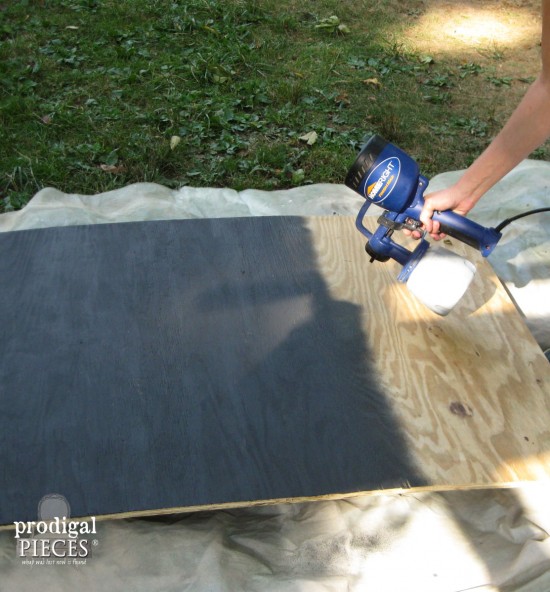
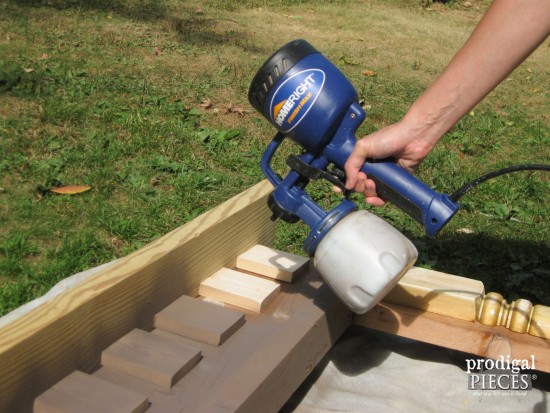
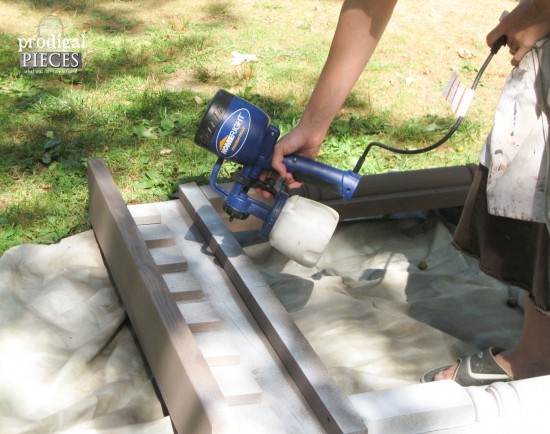
Next, we’re going to paint our plywood piece with our black paint. I can’t stress enough how much easier this whole project is with the HomeRight Finish Max and Rapid Clean Kit. Seriously, it cuts the time in half, if not more so. The cost will pay off in so many projects like I’ve used in my table makeover, my highchair redo, and our patio makeover. Proof is in the puddin’!
So go ahead a paint a coat of black paint (can be exterior, interior, in a flat, eggshell or satin). Then, add another coat after an hour or so.
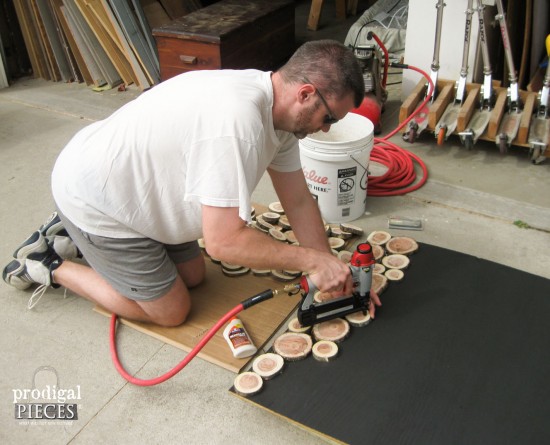
After the second coat has cured, you’ll start to add your wood slices. Same method as the mantel – glue and then nail. (my nailer is another tool I will never be without. tsk)
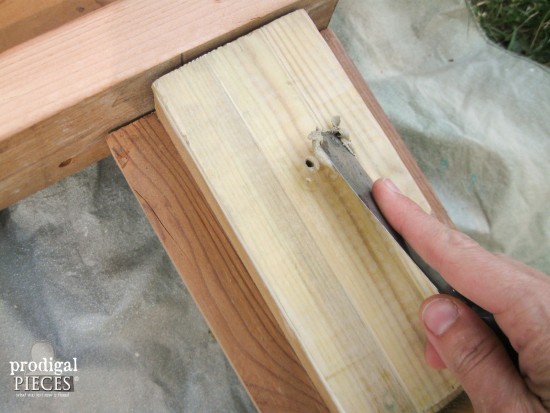
Now we’re ready to paint our mantel. I had a few holes from our reclaimed wood I wanted filled. Use your wood filler to cover any spots you want hidden. I leave a few here and there for character.
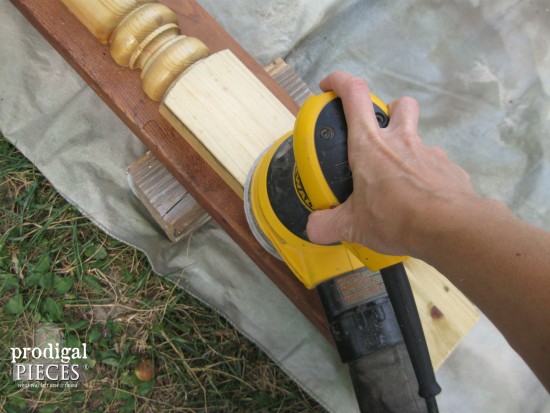
Let the filler harden and then sand smooth.
LAYERS
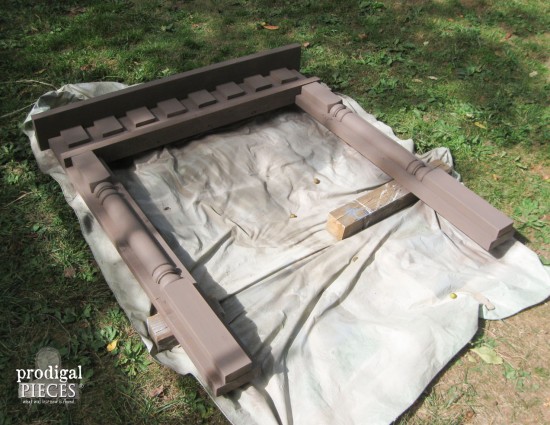
For my DIY faux fireplace, I wanted to create layers so I did my first coat with a dark taupe colored paint found in the seconds section of the store. If you’re planning to stain, this is where you would do that step.
Here it is with the first coat…
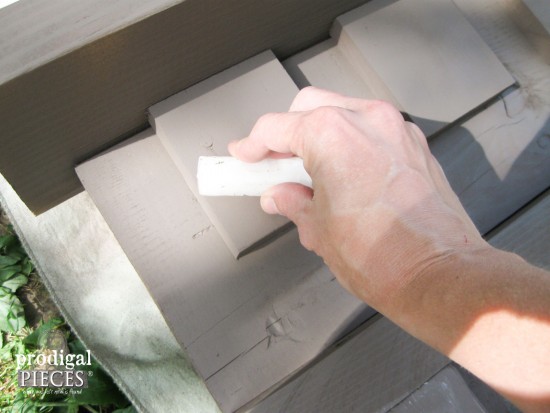
Since this color is almost identical to my shutters, I wanted to create an aged look. With the old candle or wax, rub the spots where you want the bottom layer to peek through. I hit the corners and places where normal wear would occur.
With the white paint, I did one quick coat, allowing it to speckle the taupe. That’s the beauty of creating an aged look…there’s room for variability. I began at one side and did not aim for the side surfaces so that the fronts of the facade were the focal point. Go ahead and paint your second coat.
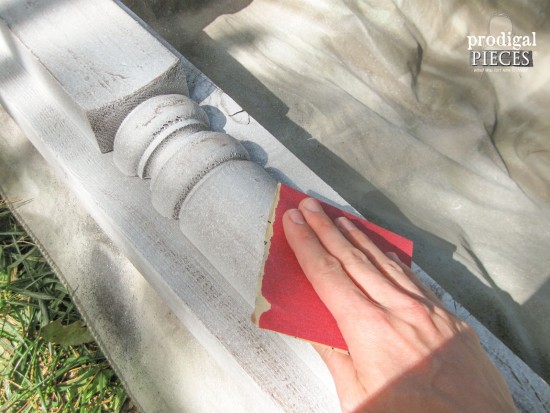
After your second coat has cured for an hour or so. Grab your sandpaper and lightly distress where you waxed.
POLY
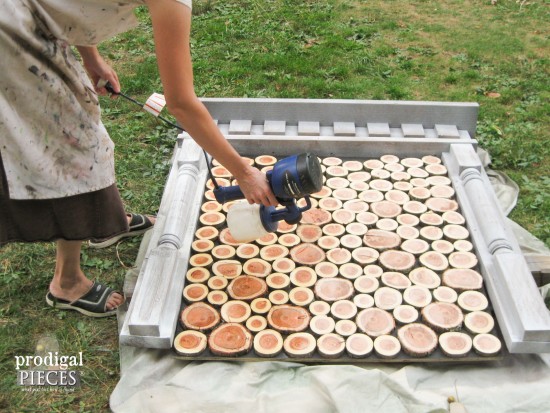
Go get your wood slice plywood and place it into your painted mantel on the ground. It’s time to do your poly topcoat. Why not do it all at once, right? Give your entire fireplace a nice even coat of poly and let cure. See the richness of the grain coming out in the wood. I love it! (For an indoor fireplace, you may skip this step if you used an eggshell or satin paint on the mantel, but would suggest it for the wood slice plywood.)
You can do as many coats as you’d like, but I think two is sufficient. Let cure and then it’s time to hang.
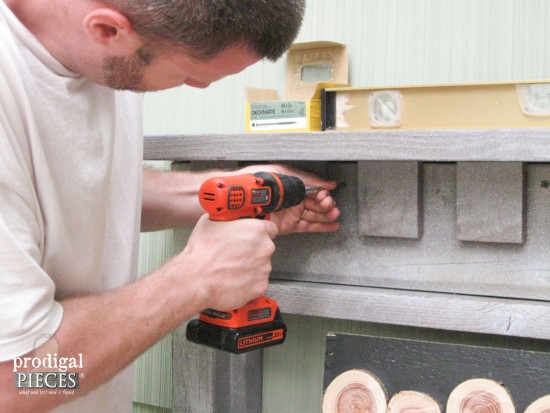
For an indoor DIY faux fireplace, you will want to find the studs and try to hit as many as you can. Since our fireplace was outdoors, we attached it directly to the wall. First, level and attach your mantel with 3″ screws. To achieve a more finished look, you can counter sink your screws and add wood plugs to hide where they’re attached. I didn’t mind seeing them in our outdoor fireplace, so we left them as is.
We also added screws to the side boards at the bottom on both sides of the turned post.
THE REVEAL
Next, attach your wood slice plywood with 1 ½” screws. Step back and you’re done!! Yay!!
I hope you’ve enjoyed this project and certainly welcome your questions should you have any. Stay tuned for next week when I show you how to make the shipping crate table also featured in our patio makeover and includes a giveaway!
We’d love it if you’d pin and share today’s DIY faux fireplace project so others can build their own too! ♥
To get these DIY tips & tricks in your inbox, be sure to sign up for my FREE newsletter. Until next time!







you never cease to amaze me! looks great AND do-able!
Thank you, Gwen! We really want to share how easy it can be to create your own unique decor. Thanks for the love!
A beautiful fireplace, a really great tutorial, even I can understand it (and I am seriously challenged in woodwork) and a lovely little helper. I think you are complete. It turned out better than fantastic..
Wonderful, Mary! Making your house your home shouuldn’t be a hard task and that’s why we tried to keep it simple. Thank you for your compliments!
I can’t wait to give it a go. I’ve seen many other faux fireplaces and have shied away from attempting them. Yours looks so easy and the tutorial is absolutely “paint by number” which makes it doable for me…..I’ve never built one thing, aside from the columns in my parents condo and that really doesn’t count because my dad helped with that. I will be doing this on my own. Wish me luck!
That’s so wonderful to hear, Debbie! We tried to keep it simple and totally doable. 🙂 Let us know how it goes!
Larissa this is just gorgeous! What a great look for your outdoor space!
Thank you, Jill! That blank wall just kept begging to be decorated. hee hee.
you are amazing !!!! (as is that hubby of yours!) I’m over the moon with this project! Thinking of where I can do one! ox
Thank you so much, Robin! We are enjoying it daily.
Oh Larissa! This is simple amazing. I think even I could make this. I always have a fireplace mantel plan in my head, but, it was NEVER this easy. Thanks for inspiring me. I am excited to try this very soon!
Thank you, Meegan! Yes, you awesome DIYer, you could make this. I look forward to see what you do with it!
Great tutorial Larissa! I admired your faux fireplace when I saw your patio reveal. Nice to see how it was constructed. Such a great idea indoors and out, but especially unexpected on an outdoor patio. Love it!
That’s me…unexpected. hee hee. 🙂 Thank you, Marie. I’m so glad we can enjoy our space and share our nuttyness.
Larissa, you guys did a fabulous job with this faux fireplace! And the steps are laid out so clearly. The entire patio is so inviting but this part really adds a unique and special feature. (and your helper is so adorable!) 🙂
Thank you so much, Jen! It was a last minute thought on how to make use of our stash, and I’m so glad hubby agreed. 😉
Such a great tutorial for a wonderfully clever idea. I love that it’s indoor-outdoor and that you and your sweet husband worked on it together 🙂
Two heads are better than one, right? 😀 Yes, it’s fun to work together. Thanks for the compliment!
Ohmygoodness! I love this! You really made this easy to understand. I can’t wait to try it out (I desperately want a mantle to decorate!)
That’s awesome to hear, Corinna! I completely understand your desire to decorate a mantel. I was head-over-heels when we installed our interior one and now I have an outdoor one too! 😀 I’d love to see what you do with it!
Pretty darn cute ! So detailed and a great tutorial also. Pinning, i love your blog <3
Yay! That’s awesome to hear, Diena. I hope you have fun with it!
a header that had rotted in half that took a bit of elbow grease to remove those strips, but hey, free ain’t always easy. Also, two turned posts that were stuck in concrete in 5 gallon buckets. We cut the posts out of the buckets and are using one today.
That’s awesome!