Since my husband and I recently just wrapped up my patio makeover with mytutorial for a faux fireplace, we thought it would be fun to jump in on the action for the One Board Challenge being sponsored by a wonderful group of 17 bloggers and Ryobi Tools. Deal is, you have to take a 1″ x 8″ x 8′ board of any species and create your own project for a chance to win $1,000 in tools. Yeah baby!
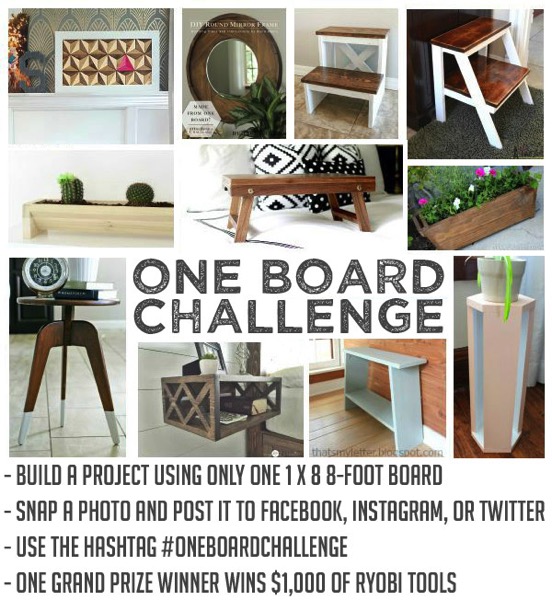
Here’s what we came up with…

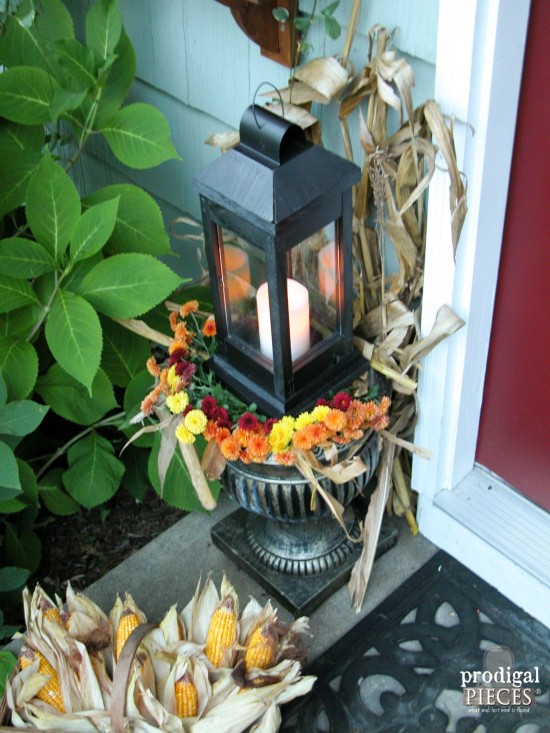
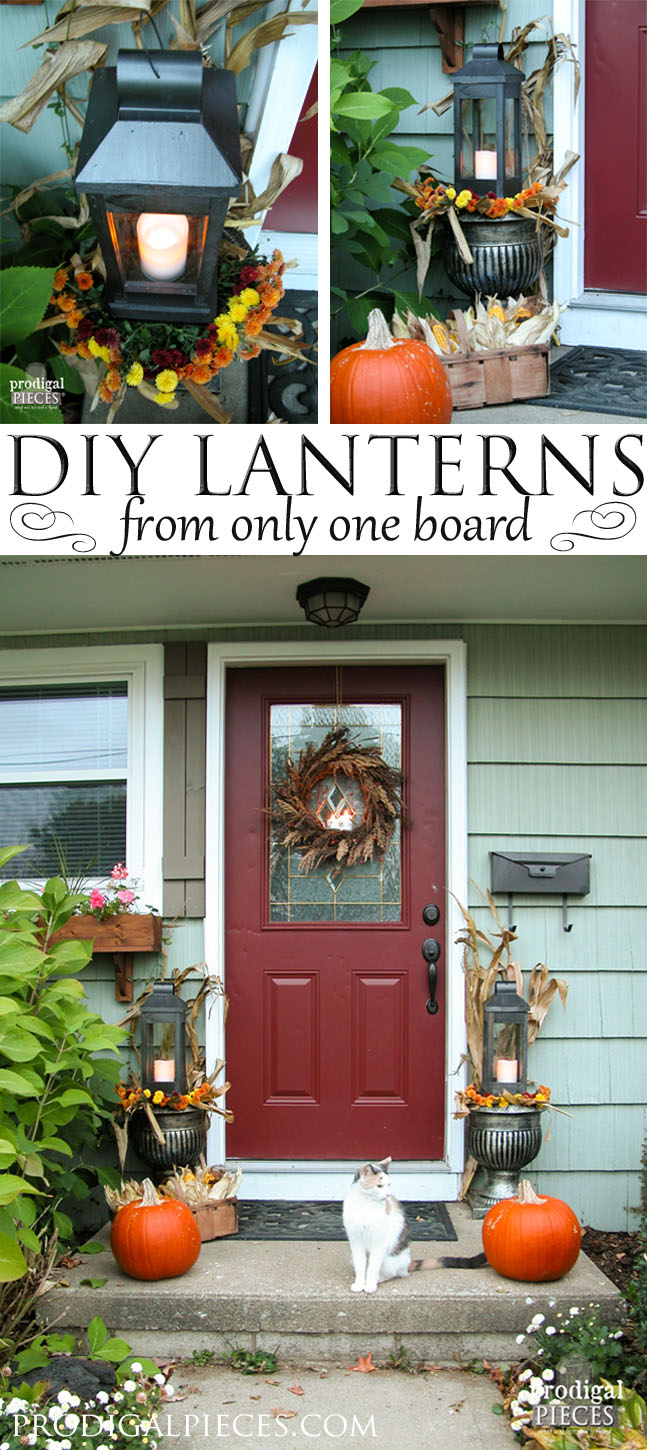
…two rustic lanterns made from an $8 pine board with minimal waste. Whatcha think?

We thought instead of just entering and sharing our project on social media (which we’re supposed to do using #oneboardchallenge – come support us!), it would be great to show you how we built them too.

So head to the nearest lumber store and grab your board and get ready to build!!
DIY TIME
Take a look at the layout of your cut list: (note: this is the layout for ONE lantern – you will be making two, so double these pieces)

What you’ll need for one lantern: (cut two sets of this layout)
- 4 – 6 ¼” x 2 ¼” mitred and beveled pieces
- 1 – 7 ¼” square
- 1 – 3″ square
- 2 – 6 ¼” squares
- 4 – ¾” x 12″ posts (this is where you can adjust the cut for varied heights)
- 8 – 4 ¼” x ¾” x 1 11/16″
Tools and other materials:
- table saw
- miter saw
- wood glue
- nail gun
- 5/8″ and 1 ¼” nails
- drill
- ¼” and 3/32″ drill bits
- tin snips
- wire hanger – or similar gauge wire
- Dremel or wire cutters
- needlenose pliers
- safety goggles
- ear plugs
- scrap of flashing or pliable metal sheeting
- sandpaper
- paint of choice
- 2 – 1 ¾” x 3/8″ hinges
- 8 – 4 ½” x 9″ 1 ply glass panels cut by a hardware store (this is enough for both lanterns – DO NOT DOUBLE)
The finished dimensions of our lantern shown are 7 ¼” W x 18″ H with wiggles room to make these shorter as well so you can create an arrangement of varied heights. Have fun with it!
DIY STEPS
As with any project with power tools, please use caution and practice safety. First, cut all your pieces and lay them out as shown above. Here are some tips on getting those #1 pieces accurate:
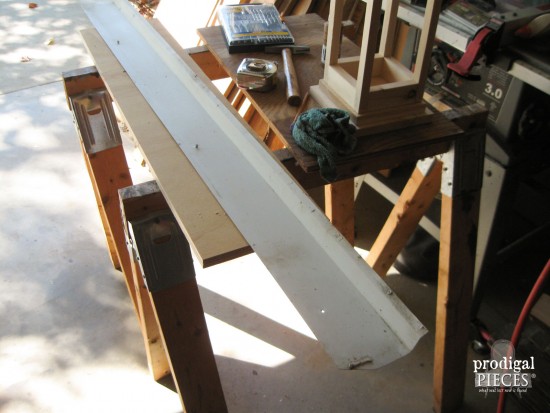
- For 8 pieces (enough for two lantern tops), you should cut a 24″ long piece off of the 1″ x 8″, then rip that piece to a width of 6 ¼”.
- The next step is to set the blade angle on your table saw to 45° for the long-edge miter cuts. (You may or may not be able to do this on a miter saw. Our saw would not allow a cut wider than 5″). Each piece will have a mitered edge facing each other, similar to a V-shape, i.e., not parallel. The width of the wider face will be 2 ¼”- this is the outside face of the “peak”. Run the piece through the table saw making a cut on one side, and then rotate your board to cut 2 ¼” from the outer edge to make a “V”. Do this until you have 8 identical pieces, 6 ¼” long by 2 ¼” wide (at the wider edge).


-
STEP 3


The last step is tricky and will be easiest using a compound miter saw. Set the “bevel angle” of the blade (the tilt of the blade from vertical) to 30 degrees, and the “miter angle” (the horizontal angle of the blade compared to a 90 degree cross-cut) to 35.3°. Cut one end off each of your 8 pieces, then re-set your miter angle to 35.3° on the other end of the saw, and cut the opposite ends. Be sure not to take any extra material off when you cut – the bottom edge of your “peak” should still be as close to 6 ¼” as possible.
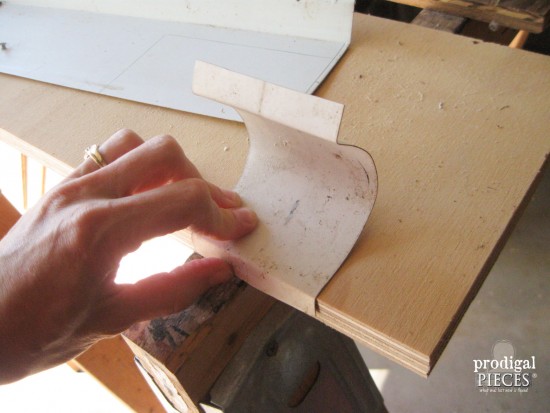
After cutting your #5 and #6 pieces, you will need to set your table saw at 1/8″ depth and run a groove down two adjacent faces of the #5 pieces and on one outer edge of the #6 pieces. Let me show you what it should look like (see below):
First we add glue to all joining surface as we assemble.
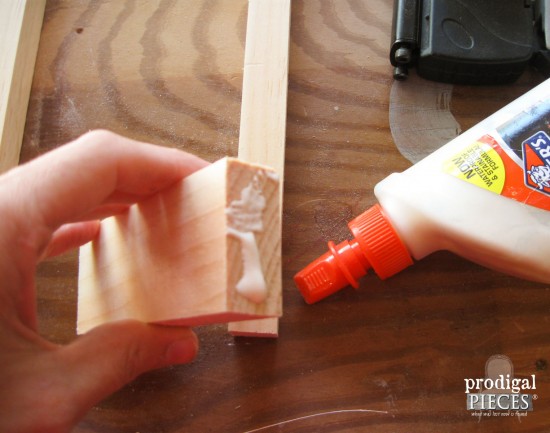
With your nail gun and 1 ¼” nails, you’re going to assemble the #5 rails to the #6 cross-pieces. Do you see how the two posts have grooves run on two of the faces and the cross-piece has a groove on one side? These are for our glass panes to slide into.

Also, note that you want to only assemble one end of the side pieces because you want to be able to get the glass in.

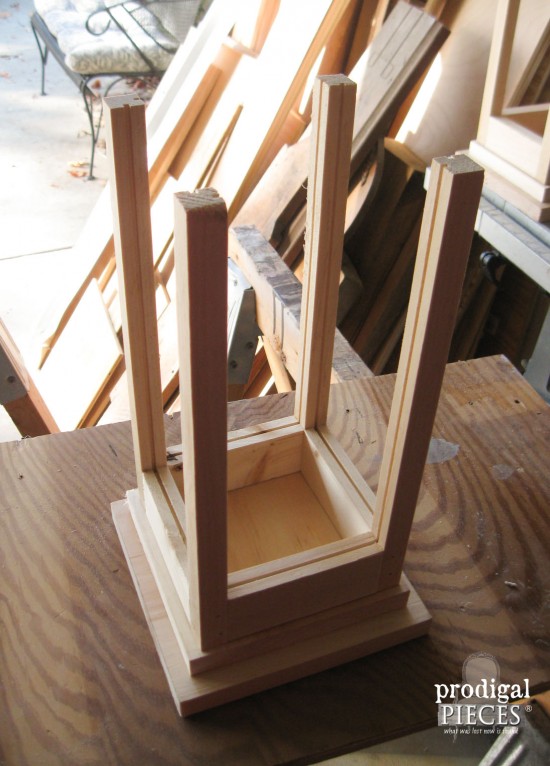
Assemble two of the sides and they should look like these:

Next, lay one of your sides with grooved posts facing up. Glue and place two more cross-pieces as shown:

Then, lay the second side set on top of the glued pieces with grooves facing down and nail.
NEXT STEPS
Now you’re going to attach one of the #4 squares to the bottom of your lantern. Glue and nail around the perimeter, making sure to aim for the center of the cross-pieces.


For added dimension, you are going to attach another square to the base. Grab your #2 square, add glue and nail on. Here is what you lantern should look like now.
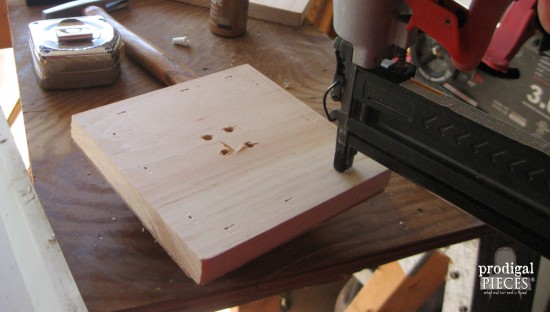
Now for the top. Grab your #3 and your other #4 square. Using your drill and the 3/32″ bit, make four holes in each around center. These are to allow a candle to vent. Set aside your #4 square for now.

WRAP-IT-UP
Next, you’ll need your #1 pieces and your #3 square. Using your 5/8″ nails, attach the #1 pieces to look like this. I found it easier to attach one side, then head to the opposing side and attach. Nail at the top edges and corners.

Now you’ll need the other #4 square because you’re going to attach it to the top you just built. Add glue and nail around the perimeter using your 1 ¼” nails.

For this next step I used a scrap piece of flashing I had lying around, but you can use whatever you like, as long as it is a flexible sheet of metal.
Cut 2 pieces measuring 3″ x 6″ using tin snips.

METAL WORKS
You want to create a domed top, so in order to do that, you will need some sort of cylinder to wrap the metal around, like a tube of caulk, a jar, or a rolling pin. Squeeze it until it holds its shape.

Next is to create tabs on either end that will allow you to attach it to the top of the lantern. Using a hard edge of a board or table, bend the ends of the metal about a half-inch until it forms a 90 (ish) degree angle.
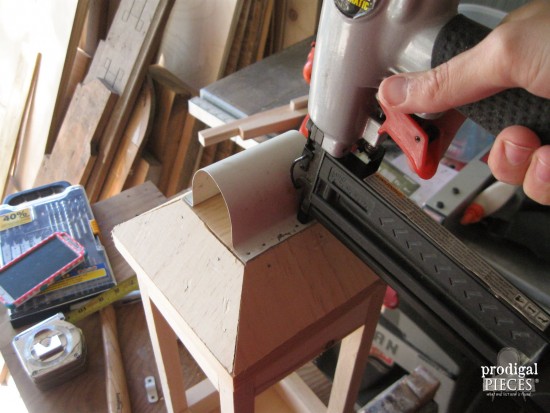
Now you will nail the metal to the top of the lantern you just made using the 5/8″ nails.
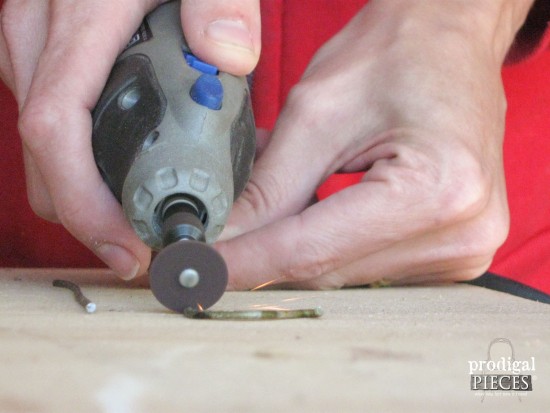
Using your old wire hanger and a Dremel (one of my favorite tools) or wire cutters, cut two pieces of wire measuring 6″ long.
Take your wire and bend it over a tube of caulk (or whatever you used earlier) to get a domed effect. Then, take your needlenose pliers and bend the ends of the wire like this:
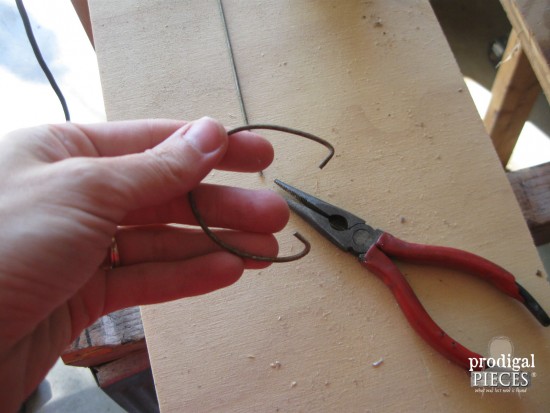
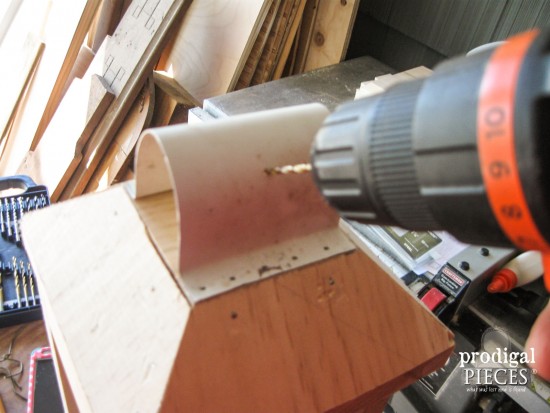
Now you have your handle for the top of the lantern. In order to attach it, you will need your drill with the ¼” bit. Drill holes on opposing sides centers, making sure to resist your pressure with your hand – be careful! (Sorry for the fuzzy pic, it’s hard to demonstrate and snap!)
PAINT TIME
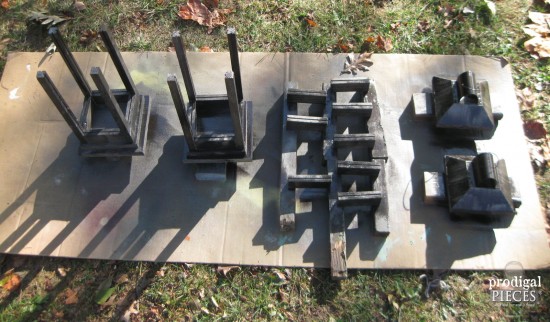
Insert your hook, and give your lantern a light sanding, removing and burrs and rough edges. Now it’s time to paint. Yay!! I set my pieces up on scrap wood to get a better coat and prevent it from sticking to the cardboard.

One of my favorite metallic paints for a rustic feel is Rust-Oleum’s Oil Rubbed Bronze. If you’ll notice, I have already painted our overhead light, mailbox, and door handle with this paint on our front door entry. I told you I love it! 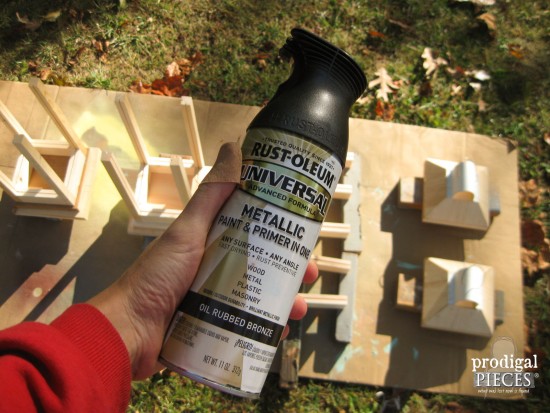 You can use any paint you choose, so feel free to go light and bright!
Apple two coats on both sides, letting them cure in between, and then you’re ready to assemble.
Same as before you will be adding your #6 pieces to the upright, but this time, insert your glass panel and then nail to the #5 posts to the last four #6 cross-pieces. You can touch up the nail heads with a bit of paint if you’d like.
ASSEMBLY
To attach the hinges to the lantern base, just pre-drill the holes to prevent splitting. Then, using a bit of chalk, place the lantern top on the base and mark where the hinges would lie. Next, pre-drill the lantern top and attach to base.

Now you’re ready to decorate! I’ve used LED flameless candles in mine, but am planning on filling with whatever suits the season – gourds for Thanksgiving, bulbs for Christmas, etc. (note: I do not recommend using a lit candle taller than 6″ for safety reasons.) Also, you could also glue in a candlestick holder into the bottom for tapered candles too. Have fun with it!

Likewise, I made more of these without glass panes too for my interior. So really, this is a very versatile plan. I’d love to see what you do with it!

In addition, if you’ve enjoyed our contribution to this competition, I’d love it if you’d show some love by pinning.
Thank you!! ♥
Before you go, be sure to sign up for my FREE newsletter. Until next time!

Also, more projects like my DIY lanterns:


You guys are insanely talented. And here I was expecting a shelf…
ahahahaha…that made me laugh out loud, Mary! 😀 We’re so glad you’re impressed.
Love the lanterns! They look awesome on your porch!!
Thanks, Sherry! Since our little pine trees died, something else had to go there and I’ve always adored lanterns.
Those are AWESOME lanterns, Larissa! I have no doubt you will be a strong competitor to win those tools! I am so glad you provided this awesome tutorial too because come Christmas, my porch is going to have these filled with mini white lights! Good Luck girl!
That’s awesome to hear, Marie. Thanks! The competition ends with a random drawing, so it’s anybody’s game. We’re hoping we’re that anybody! 😉
These lanterns are super awesome!!! I’m very impressed with the project!! Hope you win the challenge!!!
Yay! Thank you so much, Keri! I’m happy we can enter, but also happy to have some lanterns and can make more too. 🙂
Great idea. And very versatile.
Thank you, Debra!
Oh my goodness, girl! Is there anything you can’t do??? You definitely deserve to win! Pinned…good luck!! ?
Well…I can’t translate Arabic, Hebrew, and Greek like my hubby can. 😉 Just teasing. Thank you so much for your support, Christy!
Seriously? I thought these were metal when I first saw the Pin! Oh, my goodness… I would’ve done good just to get the pieces cut out, much less assembled to look anything like a lantern! Kudos to you!! And Happy Fall!
tee hee hee… 😀 Thank you Sondra! It was a fun challenge and we’re stoked to be able to create something we’ve wanted for ourselves. I’m so glad you stopped by!
Seriously ? Martha would be hard pressed! And two no less… I’m such a Larissa wannabe!
hee hee hee. 😉 You made my day, Karen! Thank you.
Hi Larissa, I am so glad I found you. I am always thankful to find another Christian Blogger. I was so excited to look at some of your Post, you are very talented. I love the Lanterns, that was a great tutorial. I always look at lanterns in the store, and they are very expensive, and only half the size of yours. Love it! I am also a Christian Blogger, I started my Blog because I love Crafting and Repurposing everything too. But, you know what, I find I have so much to say and be thankful for I haven’t even found time to do that, Yet! I love to write, and I love God, who is a big part of my Blog. I would love for you to stop by and check things out I would really value your opinion. Meanwhile, keep up the good work, I will be back for more. God Bless, Donna
I’m so happy you’re here! There is much to be thankful for…even having the ability to blog is a blessing. It’s wonderful to hear you are praising our Lord and doing it so as to inspire. Thank you for stopping by and I’m headed your way. 🙂
Impressive! Creative use of one board.
Thanks! When I was laying it all out, I couldn’t believe how easy it was coming to me and that it all fit with little waste. So fun!
Wow, they are beautiful! But I still don’t know exactly how am I going to make mine, you know, my boards are a lot thinner than yours. Of course I’m thinking in a smaller lantern, but well, your tutorial is an excellent guide, so I know I will figure out how to do this. Thank you for sharing this!
That’s the spirit, Karla! 😀 I’m excited you are willing to try. It’s fun!
Do you have a video showing how to make these?
No, I don’t. 😉
I absolutely love these what size sheet of wood and type do I need to buy please ? x
Thank you, Angie. I have all the details in my post…”1″ x 8″ x 8′ board of any species” 🙂
Beautiful project!!
I am trying to make the lantern but am struggling with the roof measurements and angles. Ads keep poping in and out. Do you have a downloadable version commercial free?
Thanks
Ian
Thank you, Ian. 🙂 The roof is the toughest part, for sure. I do not have a downloadable pattern, but make sure you’ve cleaned your device for cookies, etc, as those may be the issue you’re having. Feel free to email with questions.