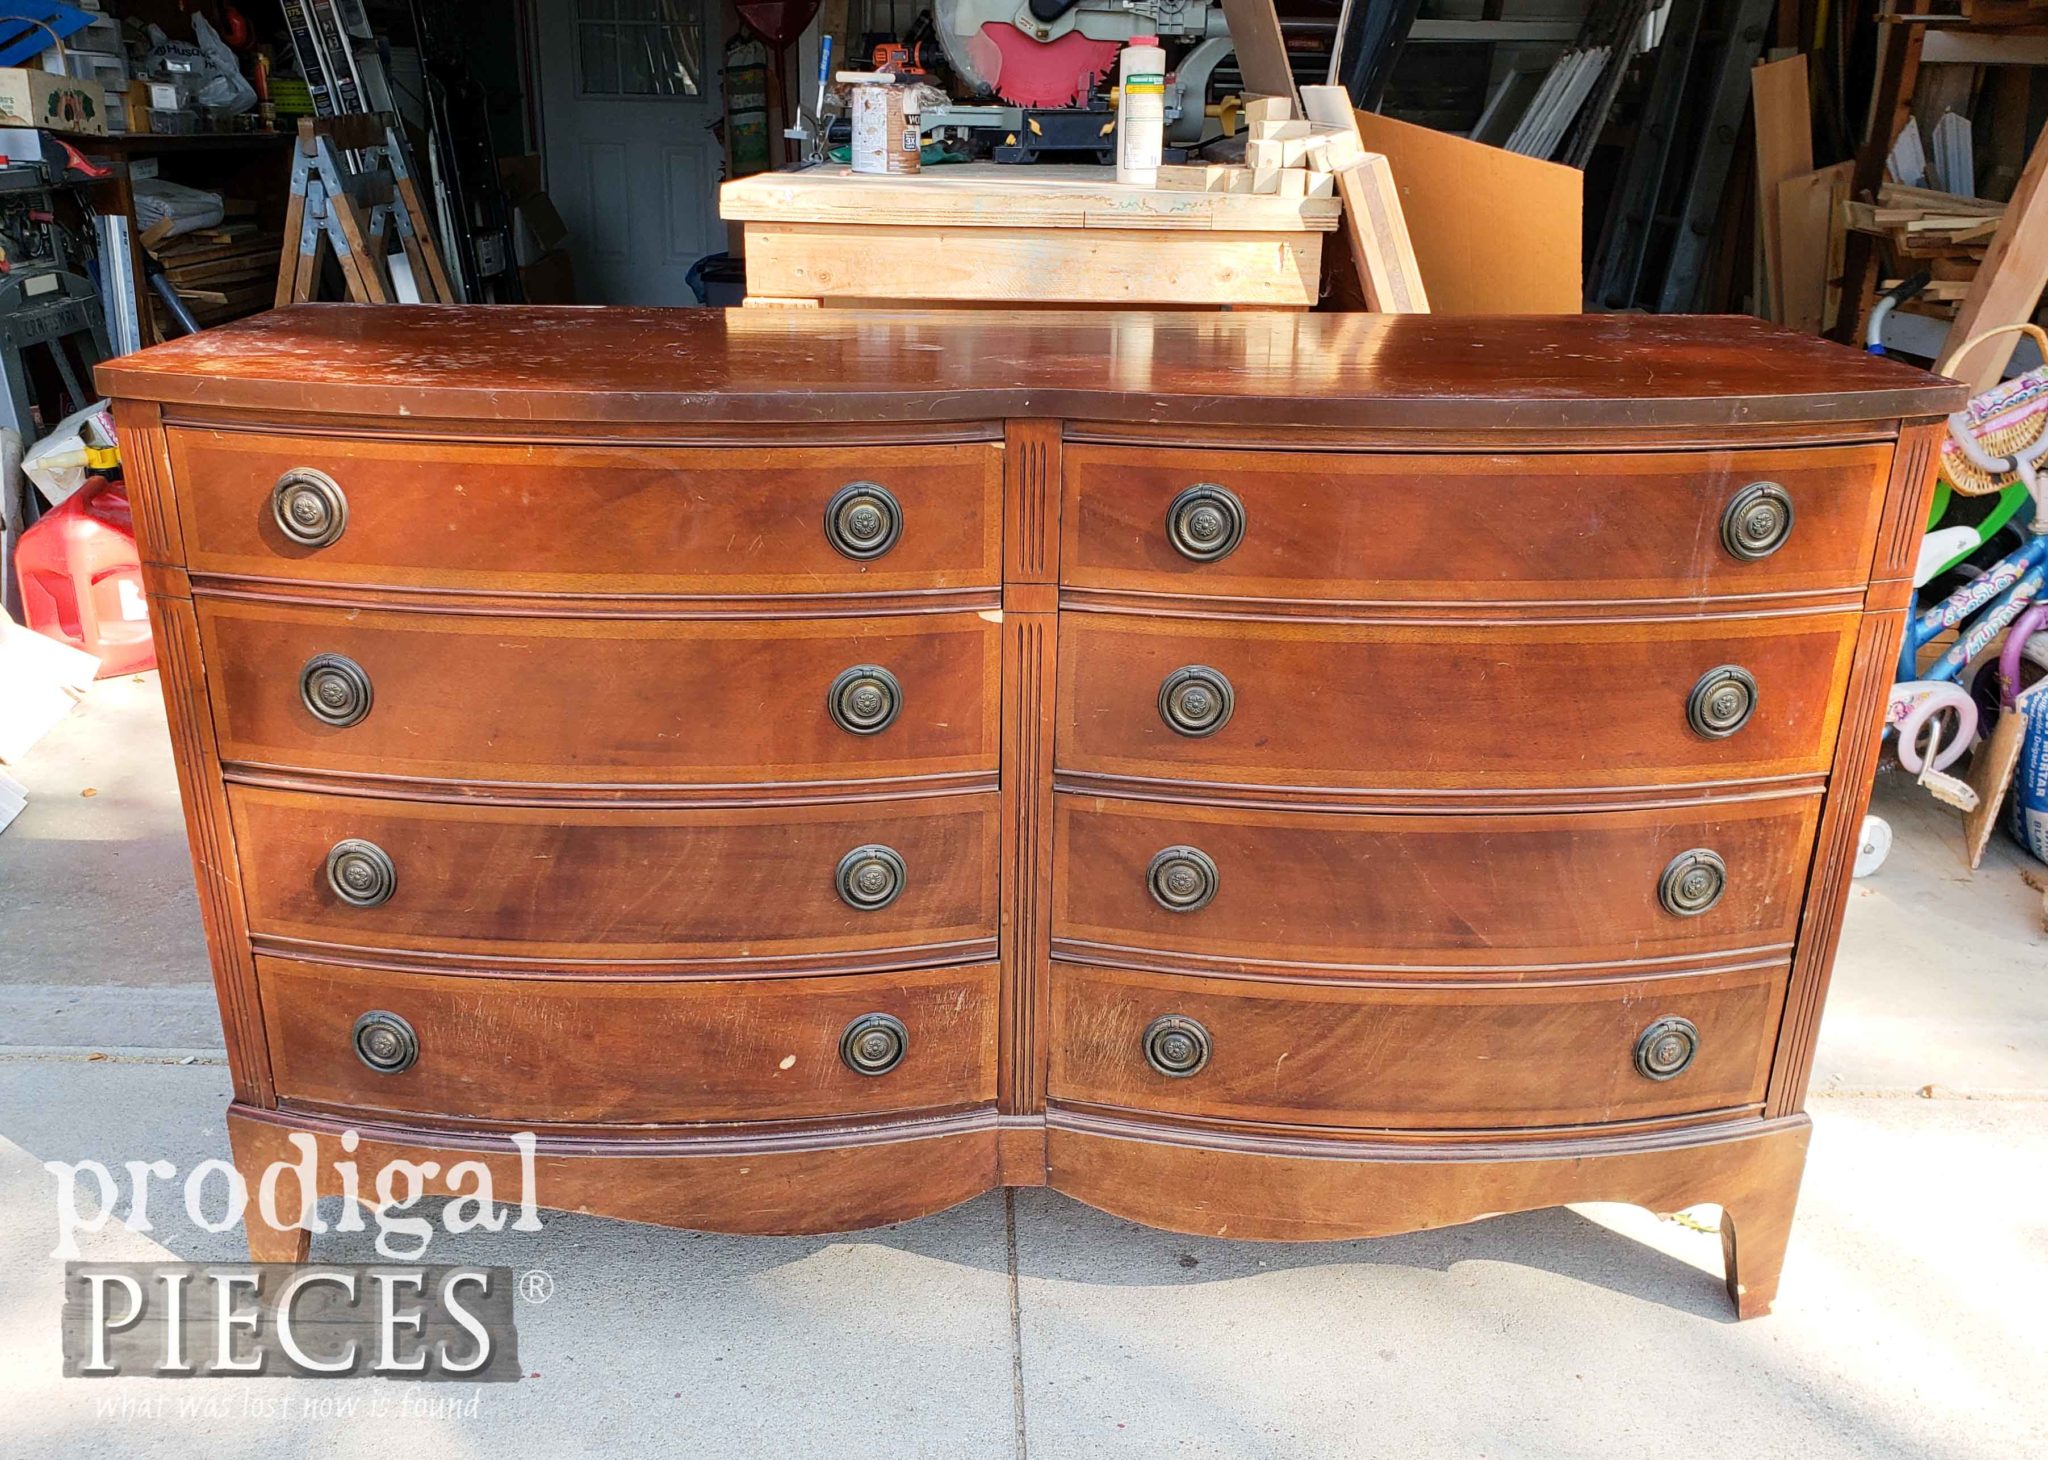
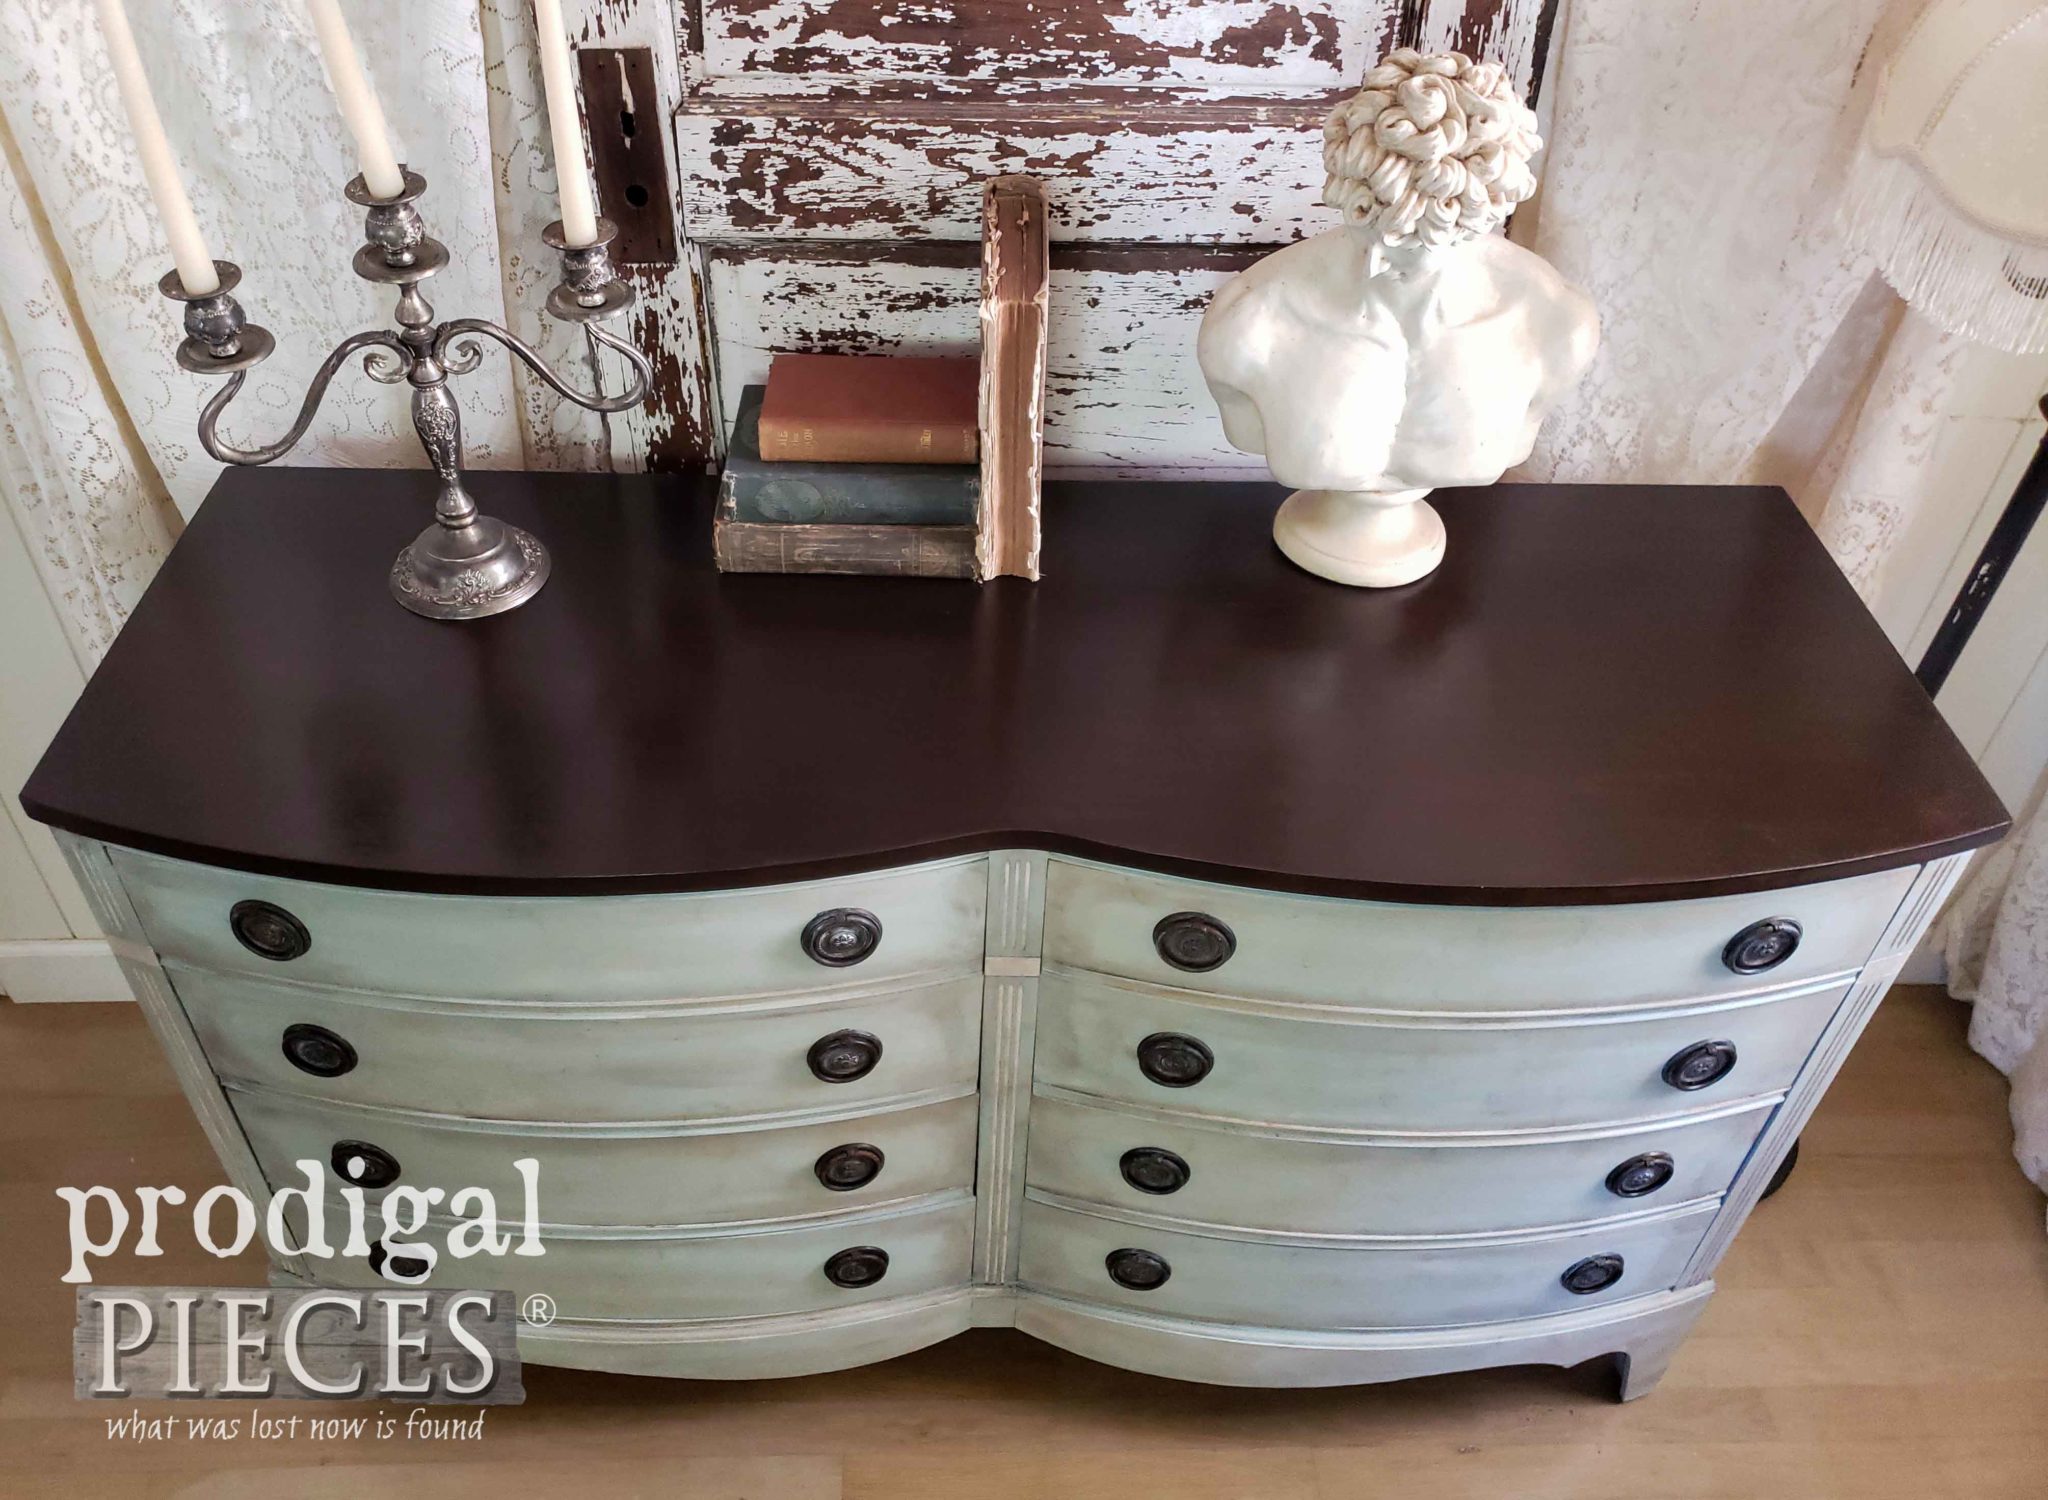
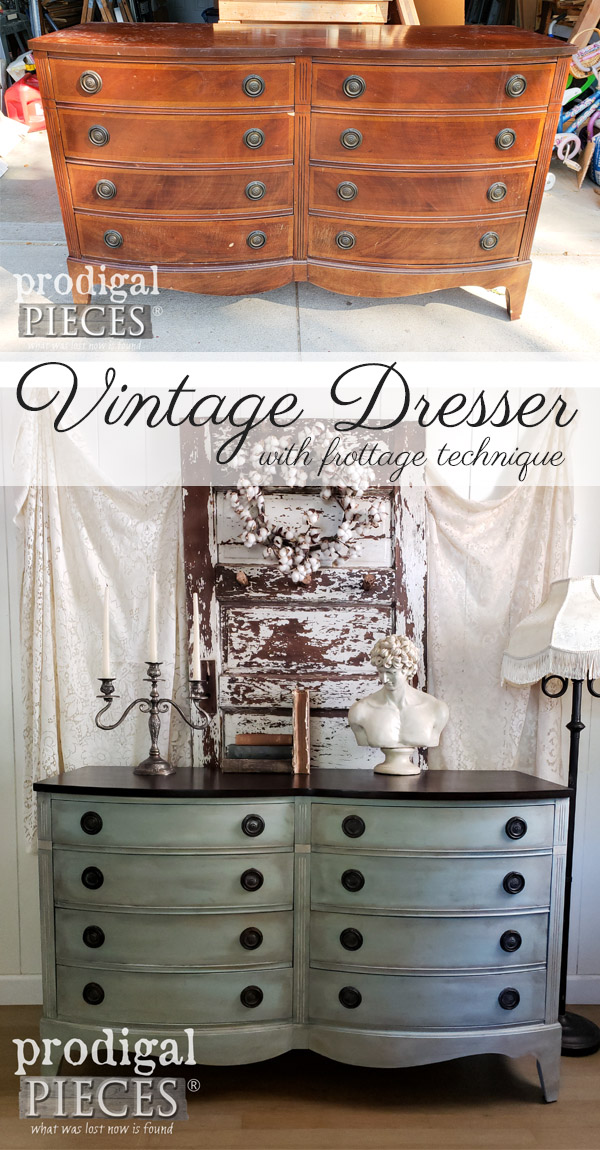
Are you in the mood for a furniture makeover? I am! Funny thing how the internet works. It studies your behaviors and throws ads up that it thinks you will be interested in. Well, it worked this time. I spied this for sale in a local market only because an ad popped up and I was hooked. I mean, just look at that beautiful bow front! sigh… Now it’s time for not only a makeover of this vintage Dixie dresser, but also some fun for you too.
The unique lines of this piece is what caught my attention. I’m such a long time fan of this era because they are built to last. However, this vintage Dixie dresser had some damage errors that needed fixed. Almost all the drawers had missing veneer and what looked like cat scratches. In addition, the legs and skirt had missing veneer, and the top had wear, but looked repairable. {{happy dance!!}}
The bonuses are that all the drawer pulls are present, the drawers open fairly easily, minimal damage, and no stink (HUGE bonus).
DIY TIME
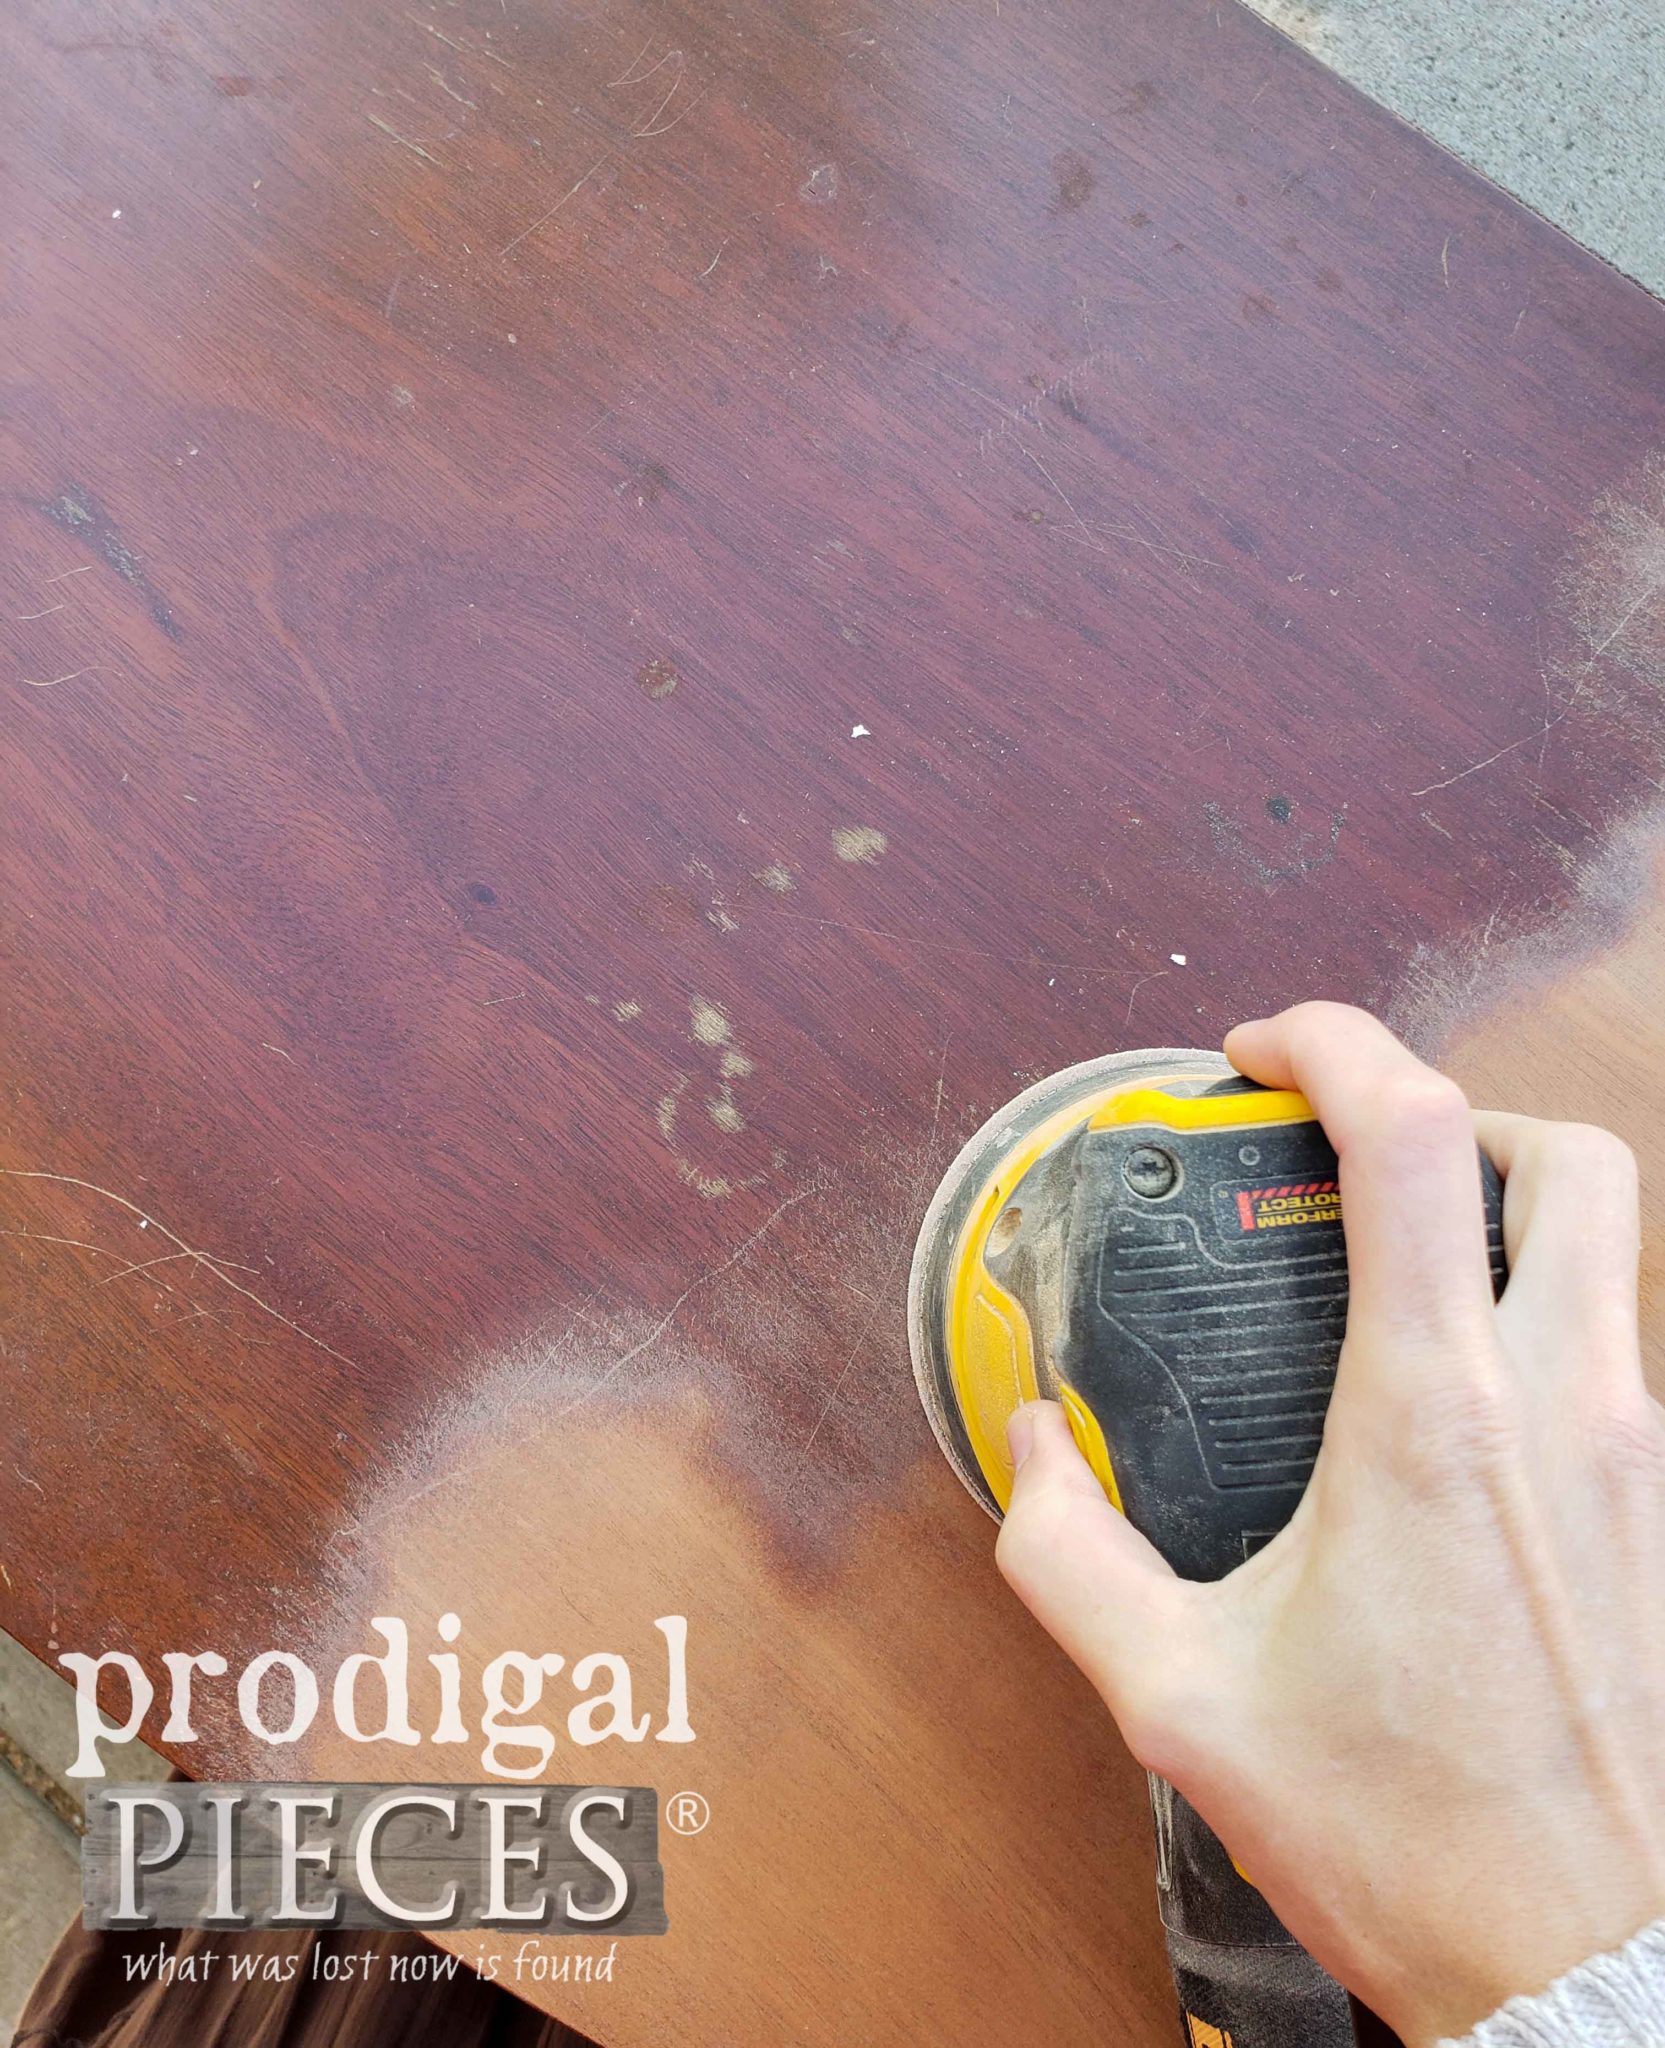
First, to get this makeover party going, I break out my sander and hope that the veneer behaves. There were some deep gouges I wasn’t sure about. I’m sure hoping I can save it!
This is where patience and a slow, steady hand pays off. So exciting to see that all the wear came out and I was able to give it a fresh new stain. {{second happy dance!!}} I chose to use a favorite of mine called Java Gel. Just one coat is all it took and it’s got the rich deep tone just like I used on my curbside find dining set.
POLY COAT
Once the stain cured, I apply several coats of a satin poly. Applying the poly now allows it to be protected while I paint the base cabinet.
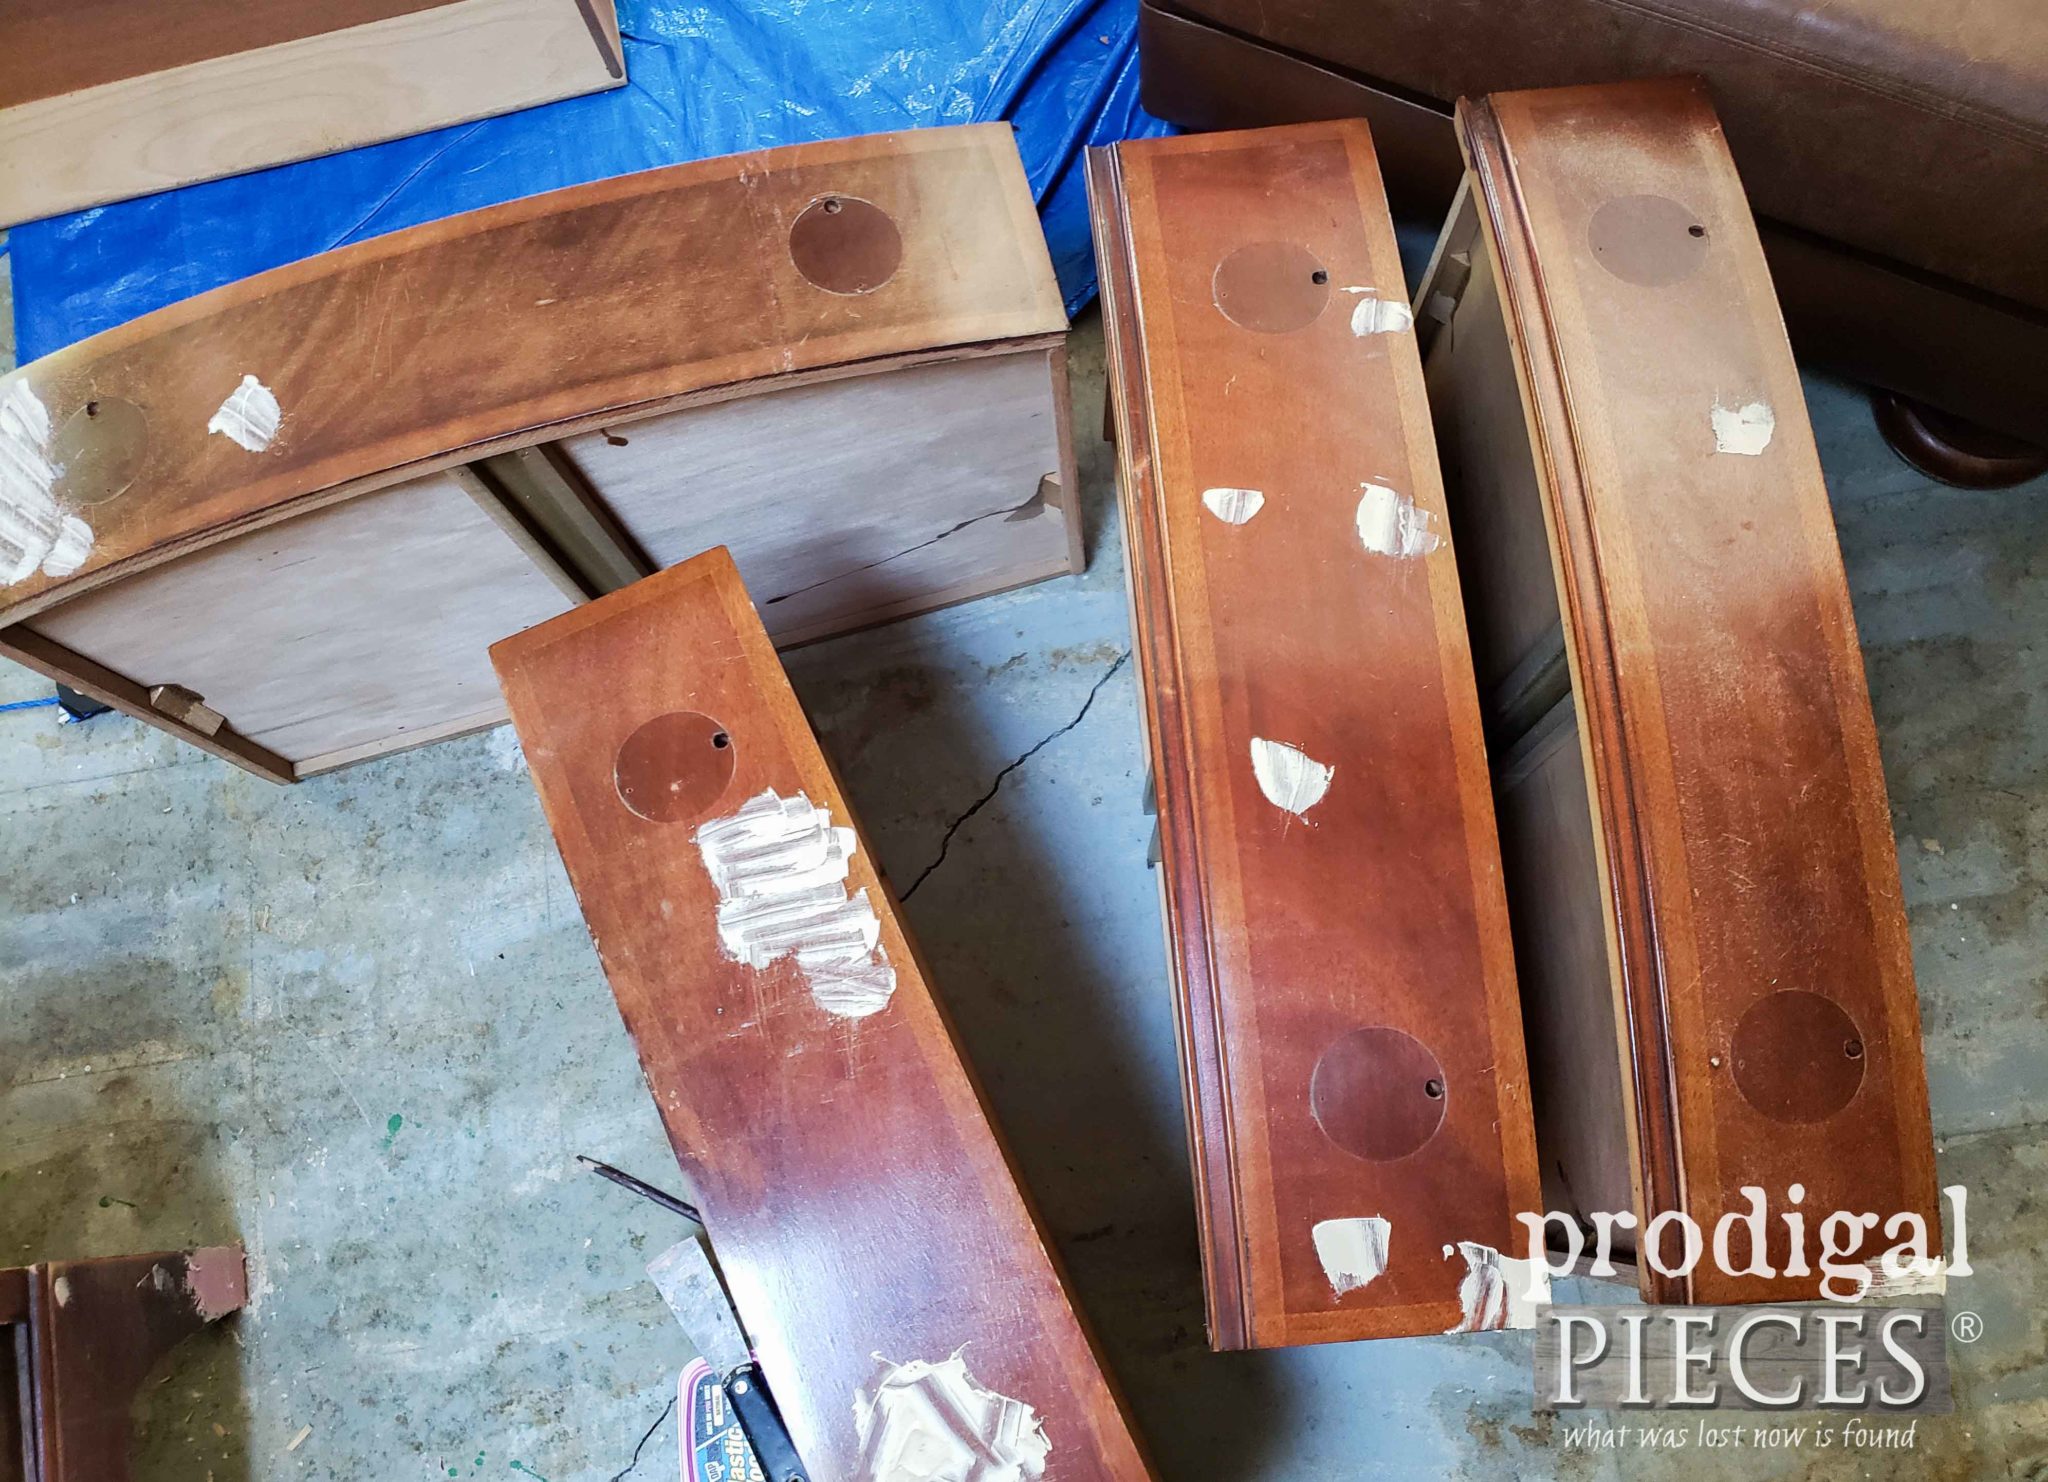
Next, I set about to work on the dresser cabinet and drawers while each coat of poly was curing. My wood filler came out to play and seriously looked like my project had been attacked. haha! Actually, it had been… by a cat. tsk.
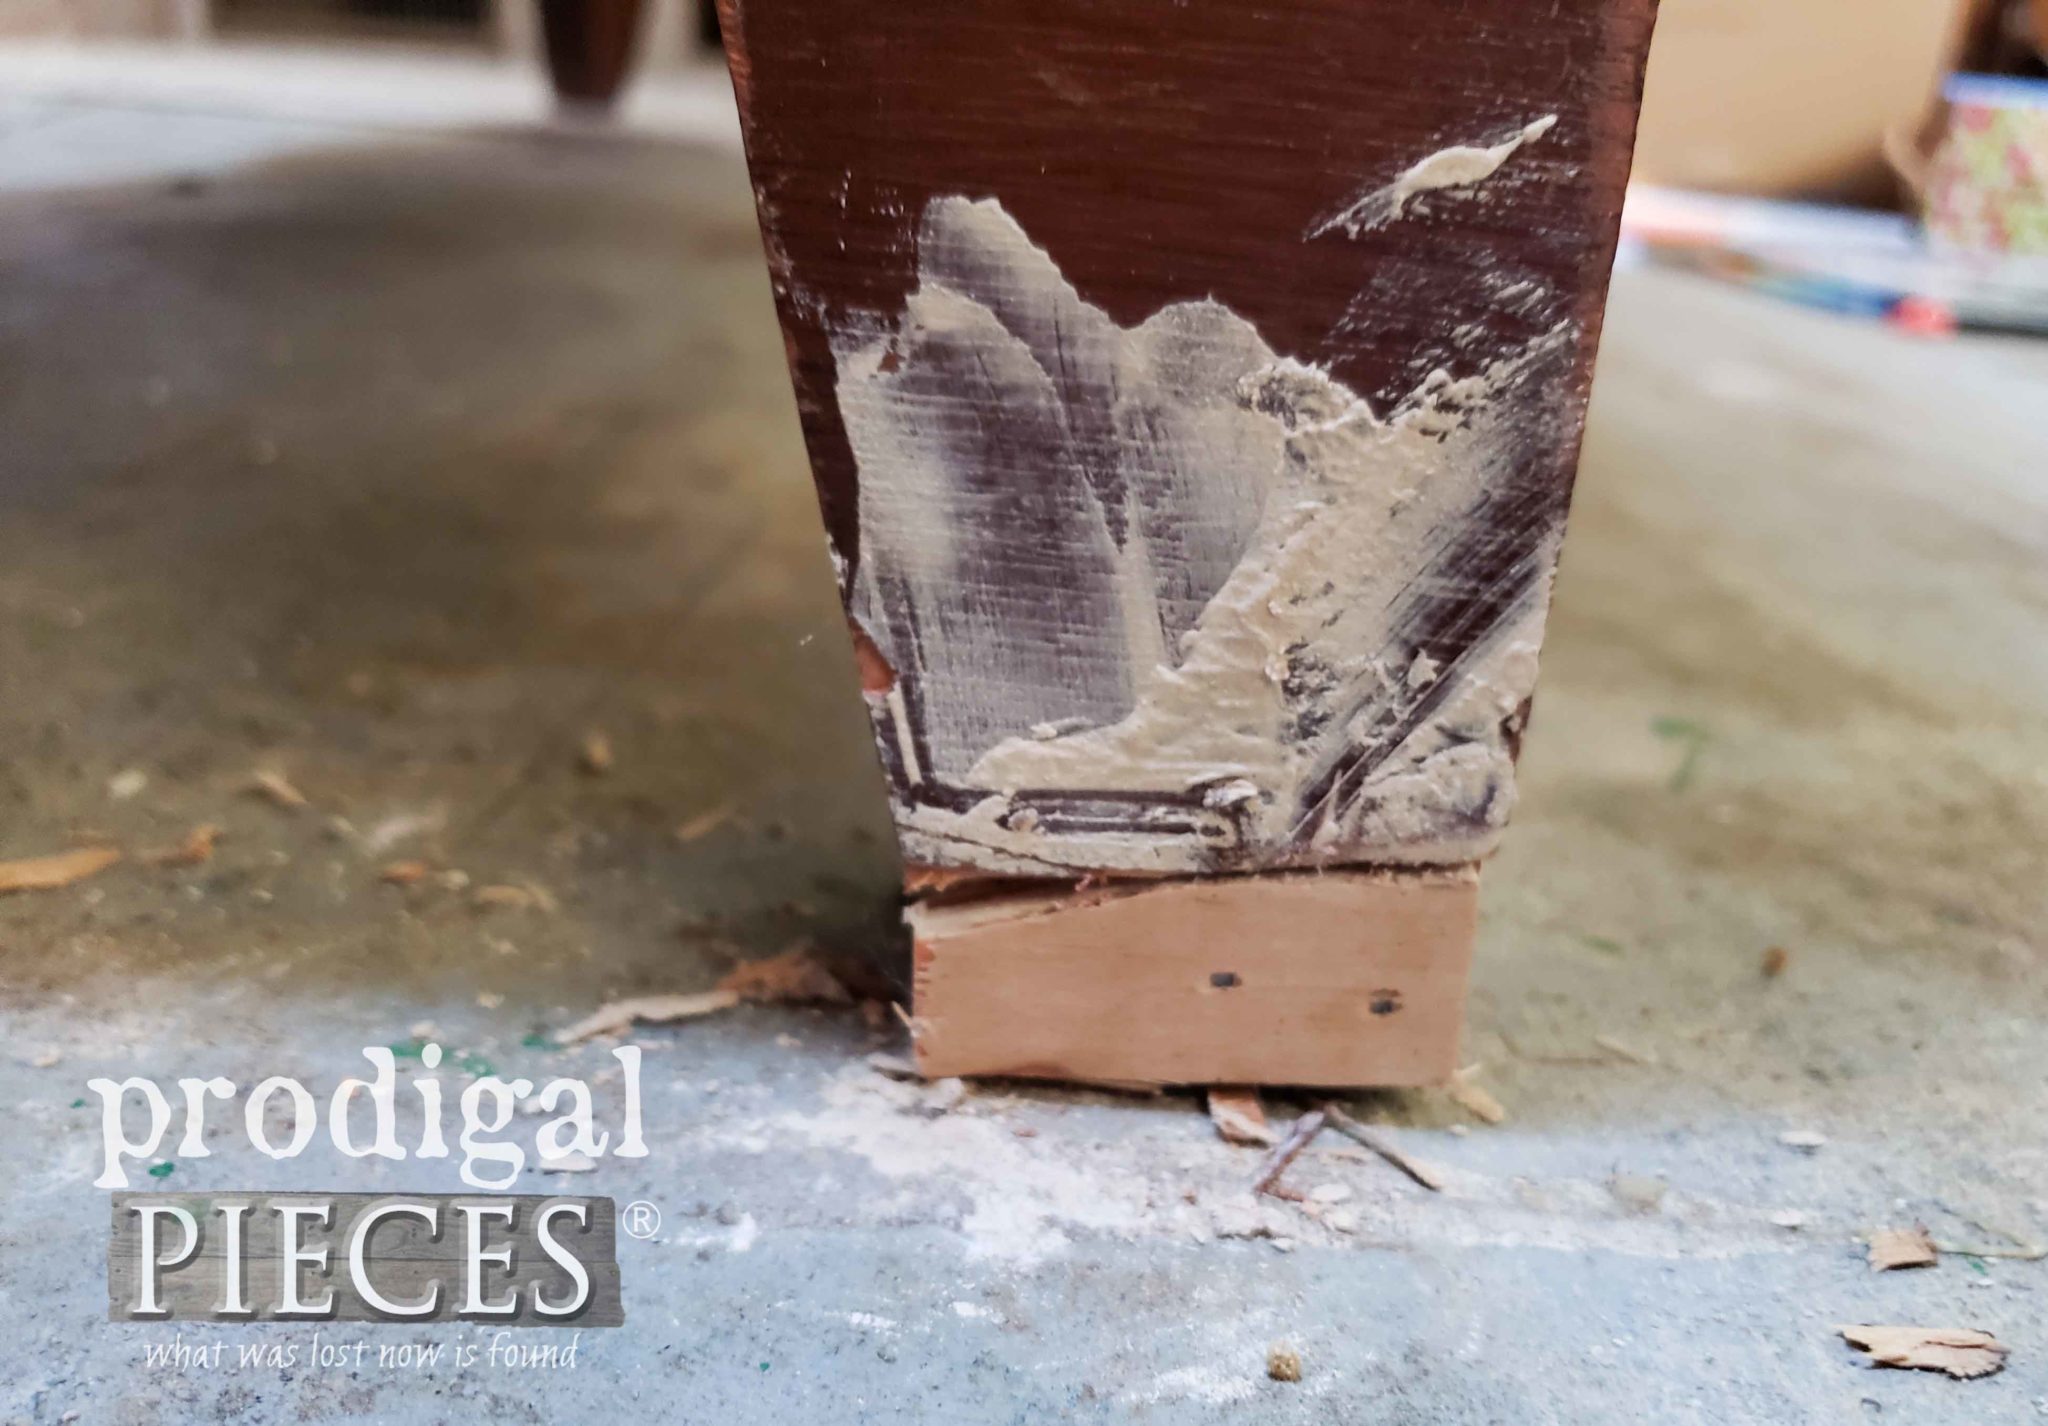
In addition, it was necessary to rebuild a bit of the feet and front skirt to get them worthy of a new look too. I gotta say that real wood veneer sure is beautiful, but man it does not hold up well if not taken care of.
PRIME TIME
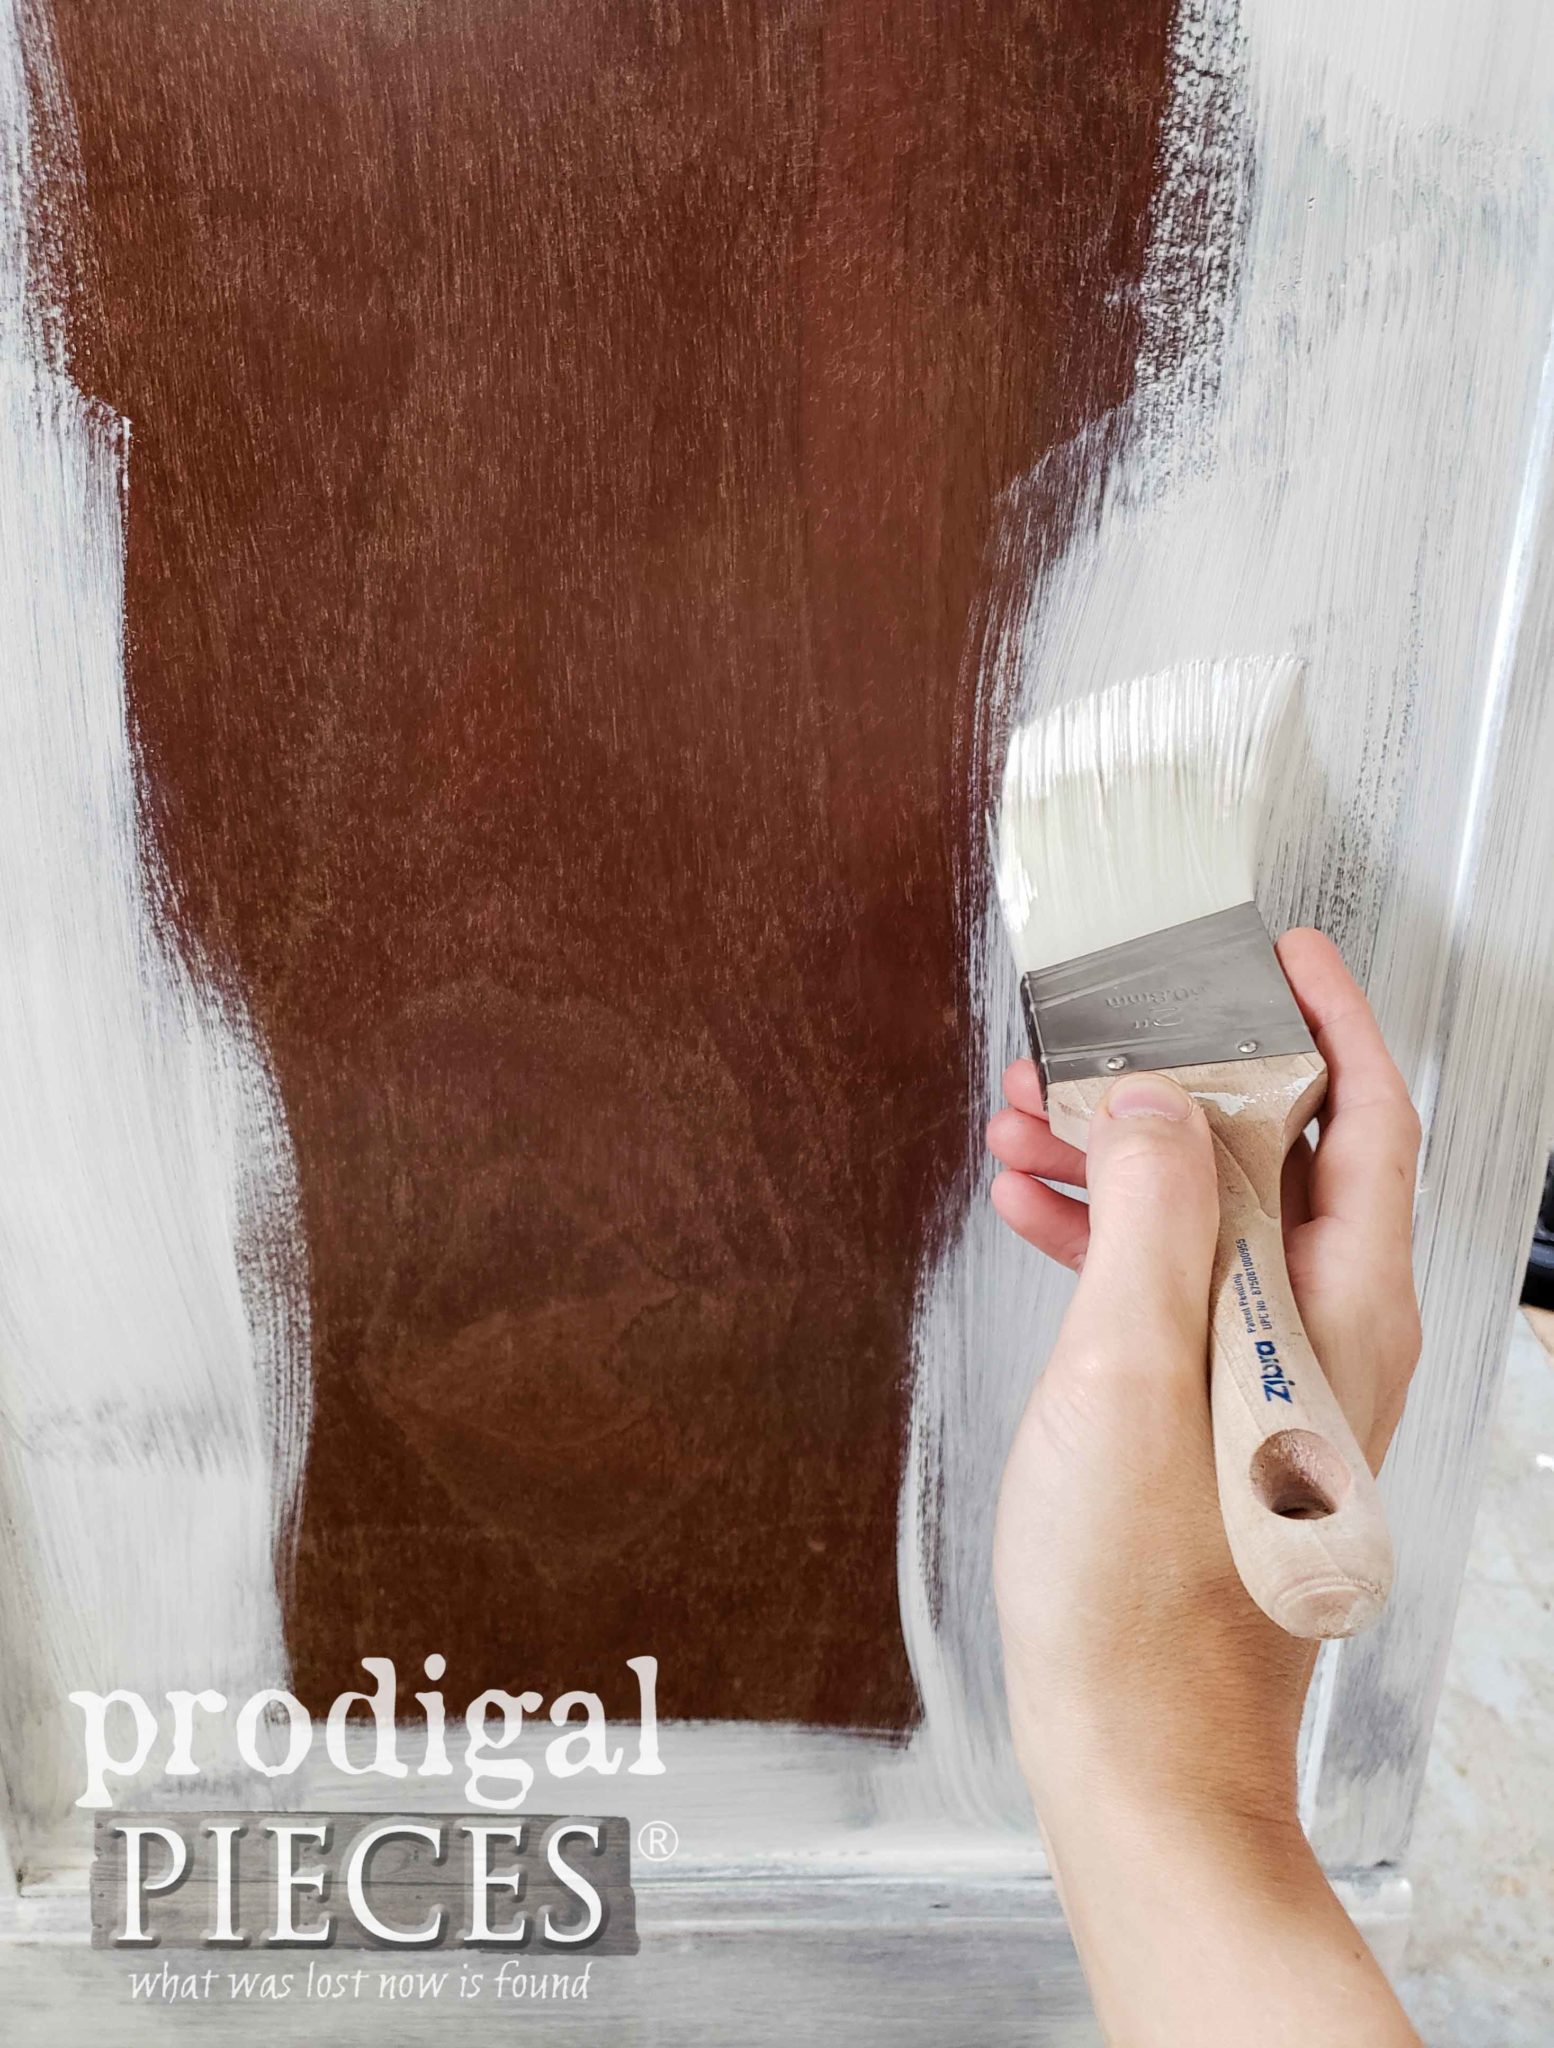
Then, using I chose to apply a coat of Kilz primer because this mahogany finish would most certainly bleed through.
Once that cured, I began to start the painting fun. My goal was to create a time-worn effect using a frottage technique. Back in 1925 a man named Max Ernst was inspired by the time-worn wear see in the floor boards of ancient homes (a man after my own heart – read more HERE).
PRETTY PAINT
For the base, I’m applying two coats of Vintage. Love this color!
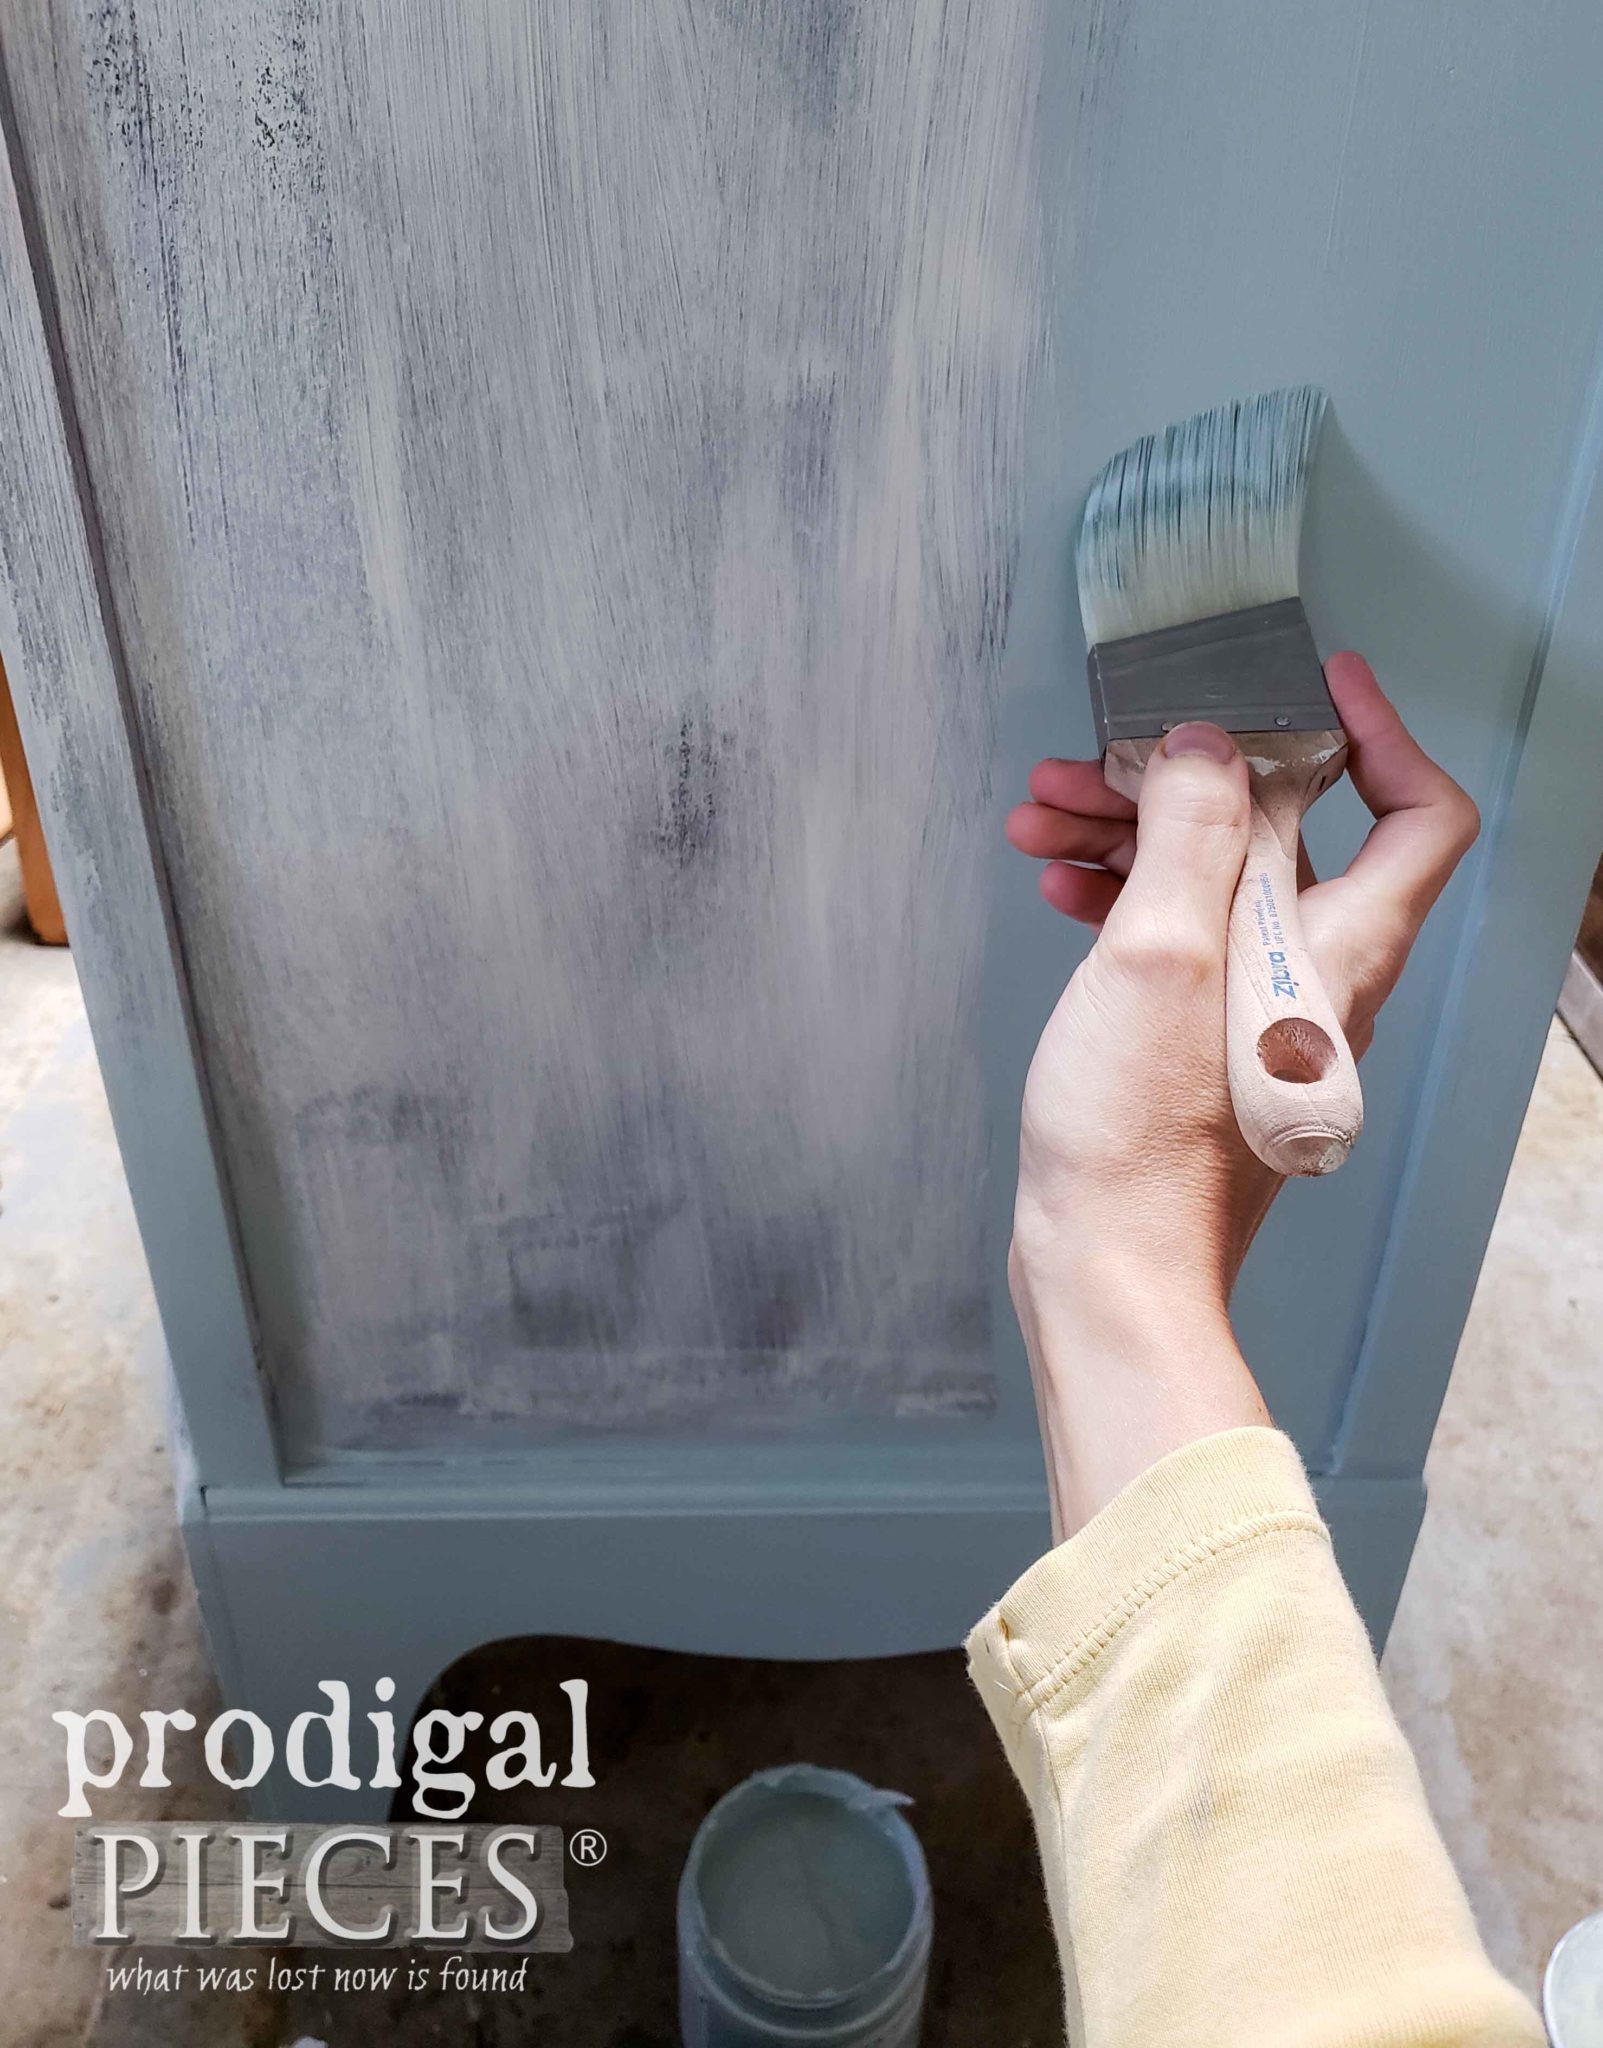
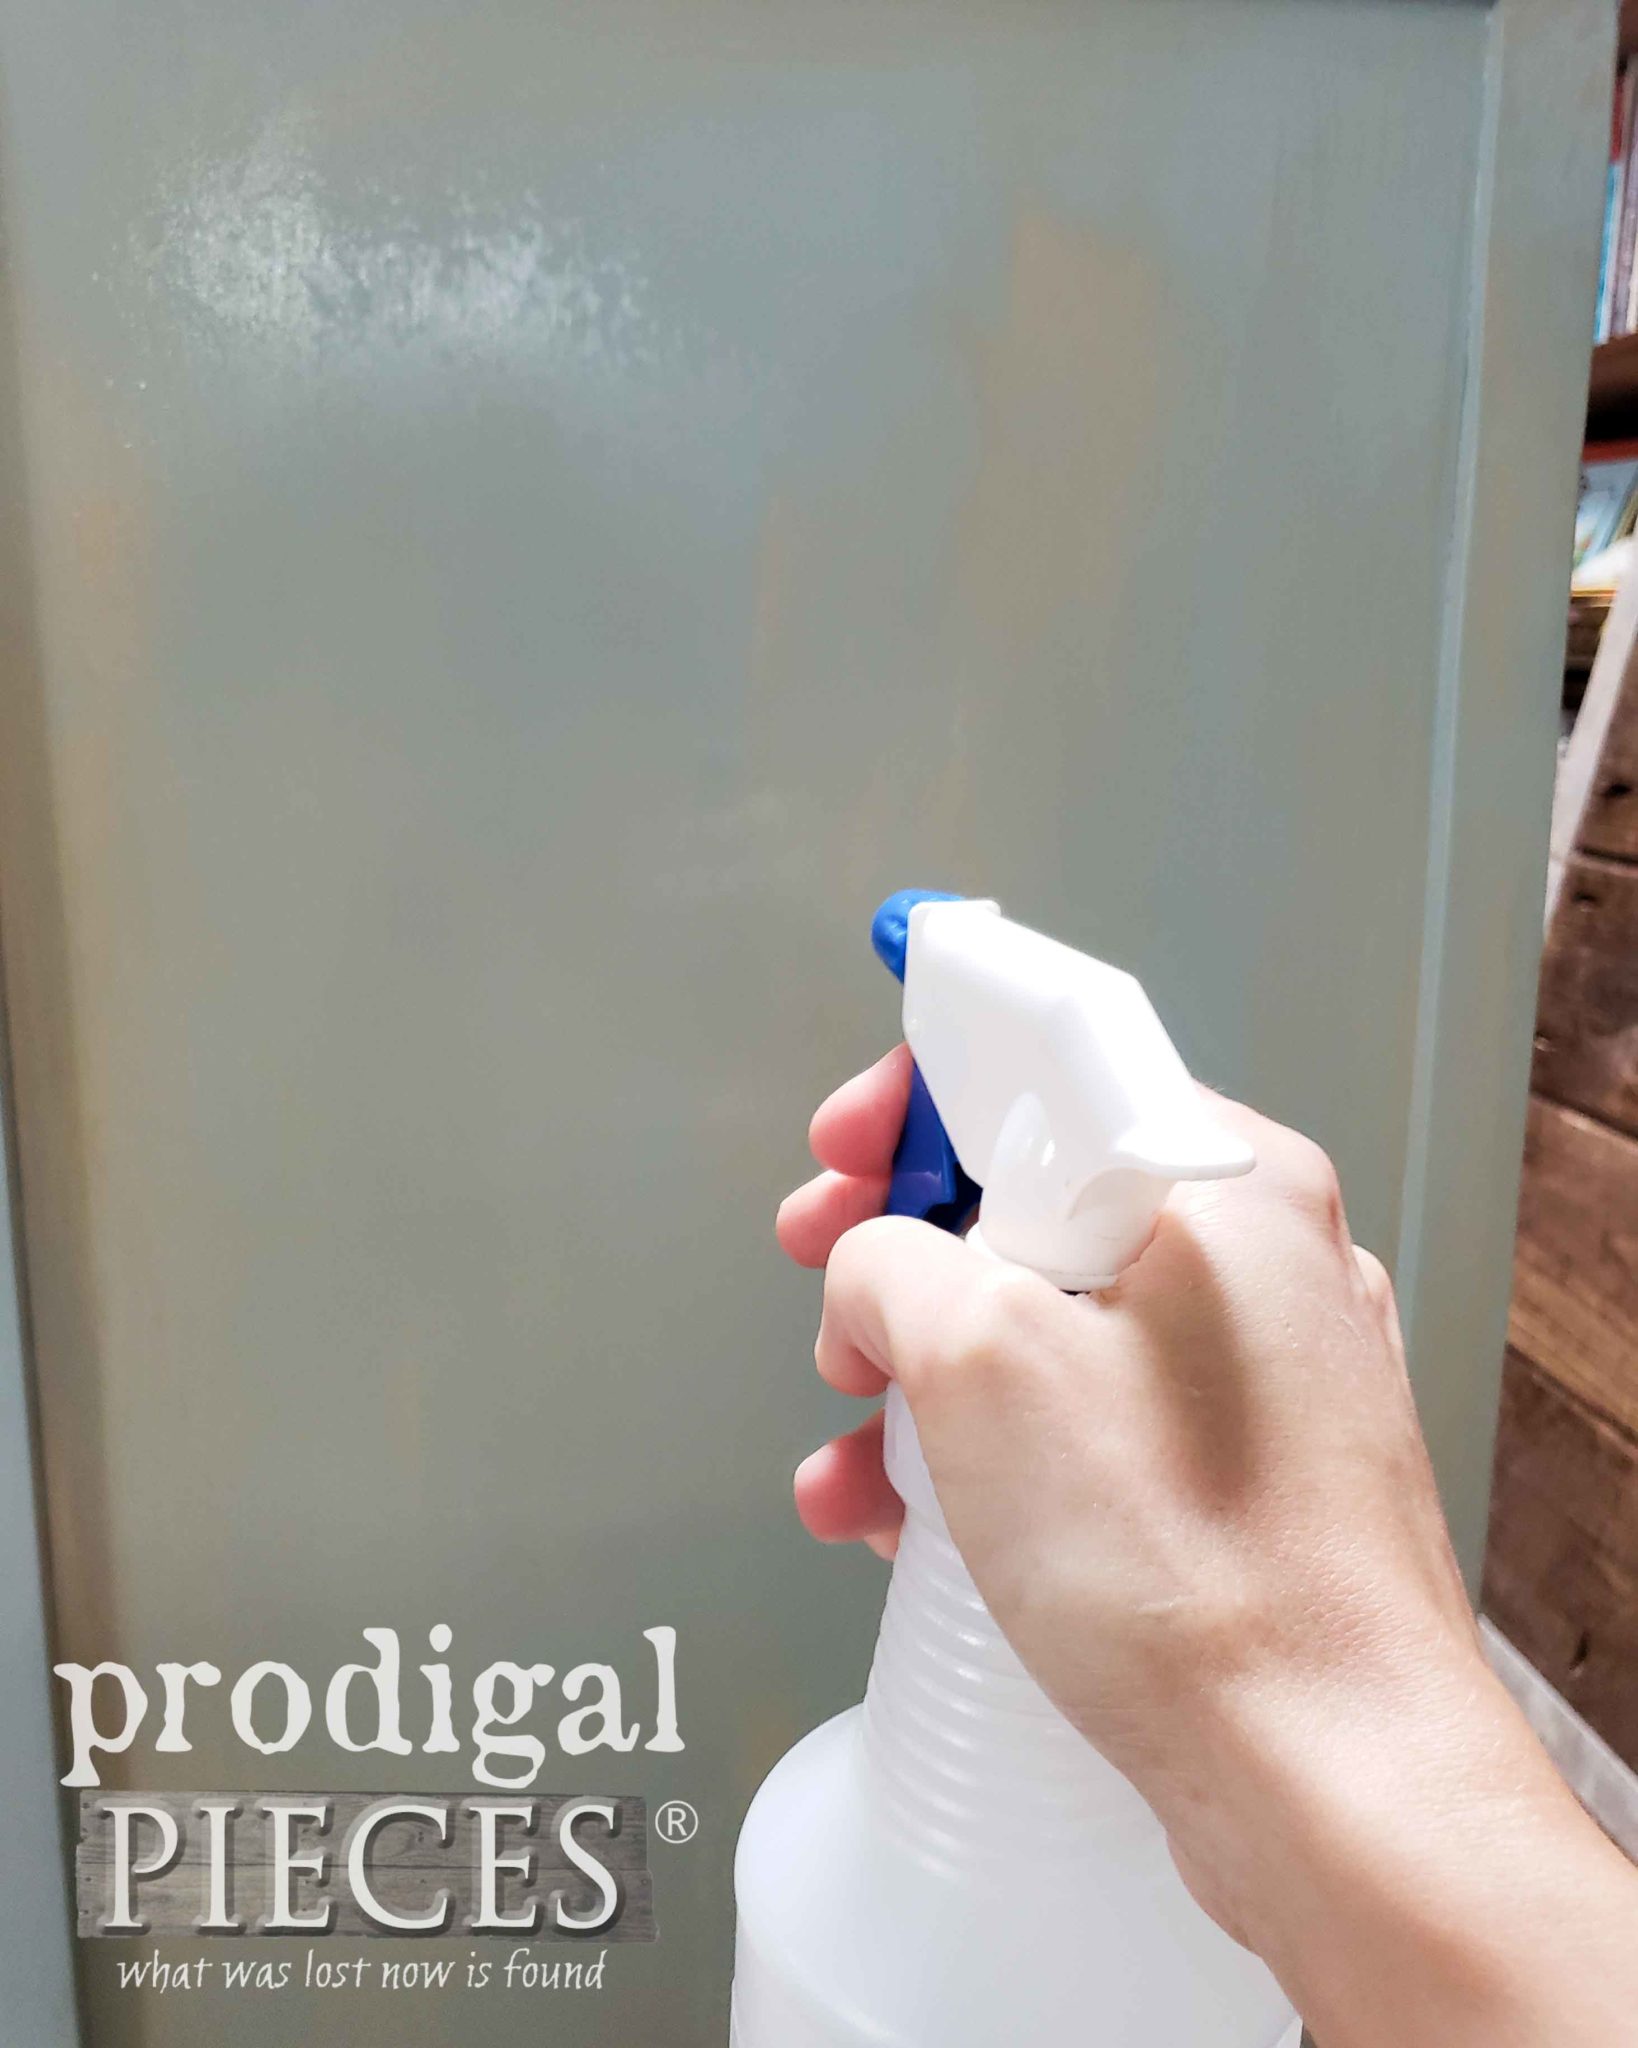
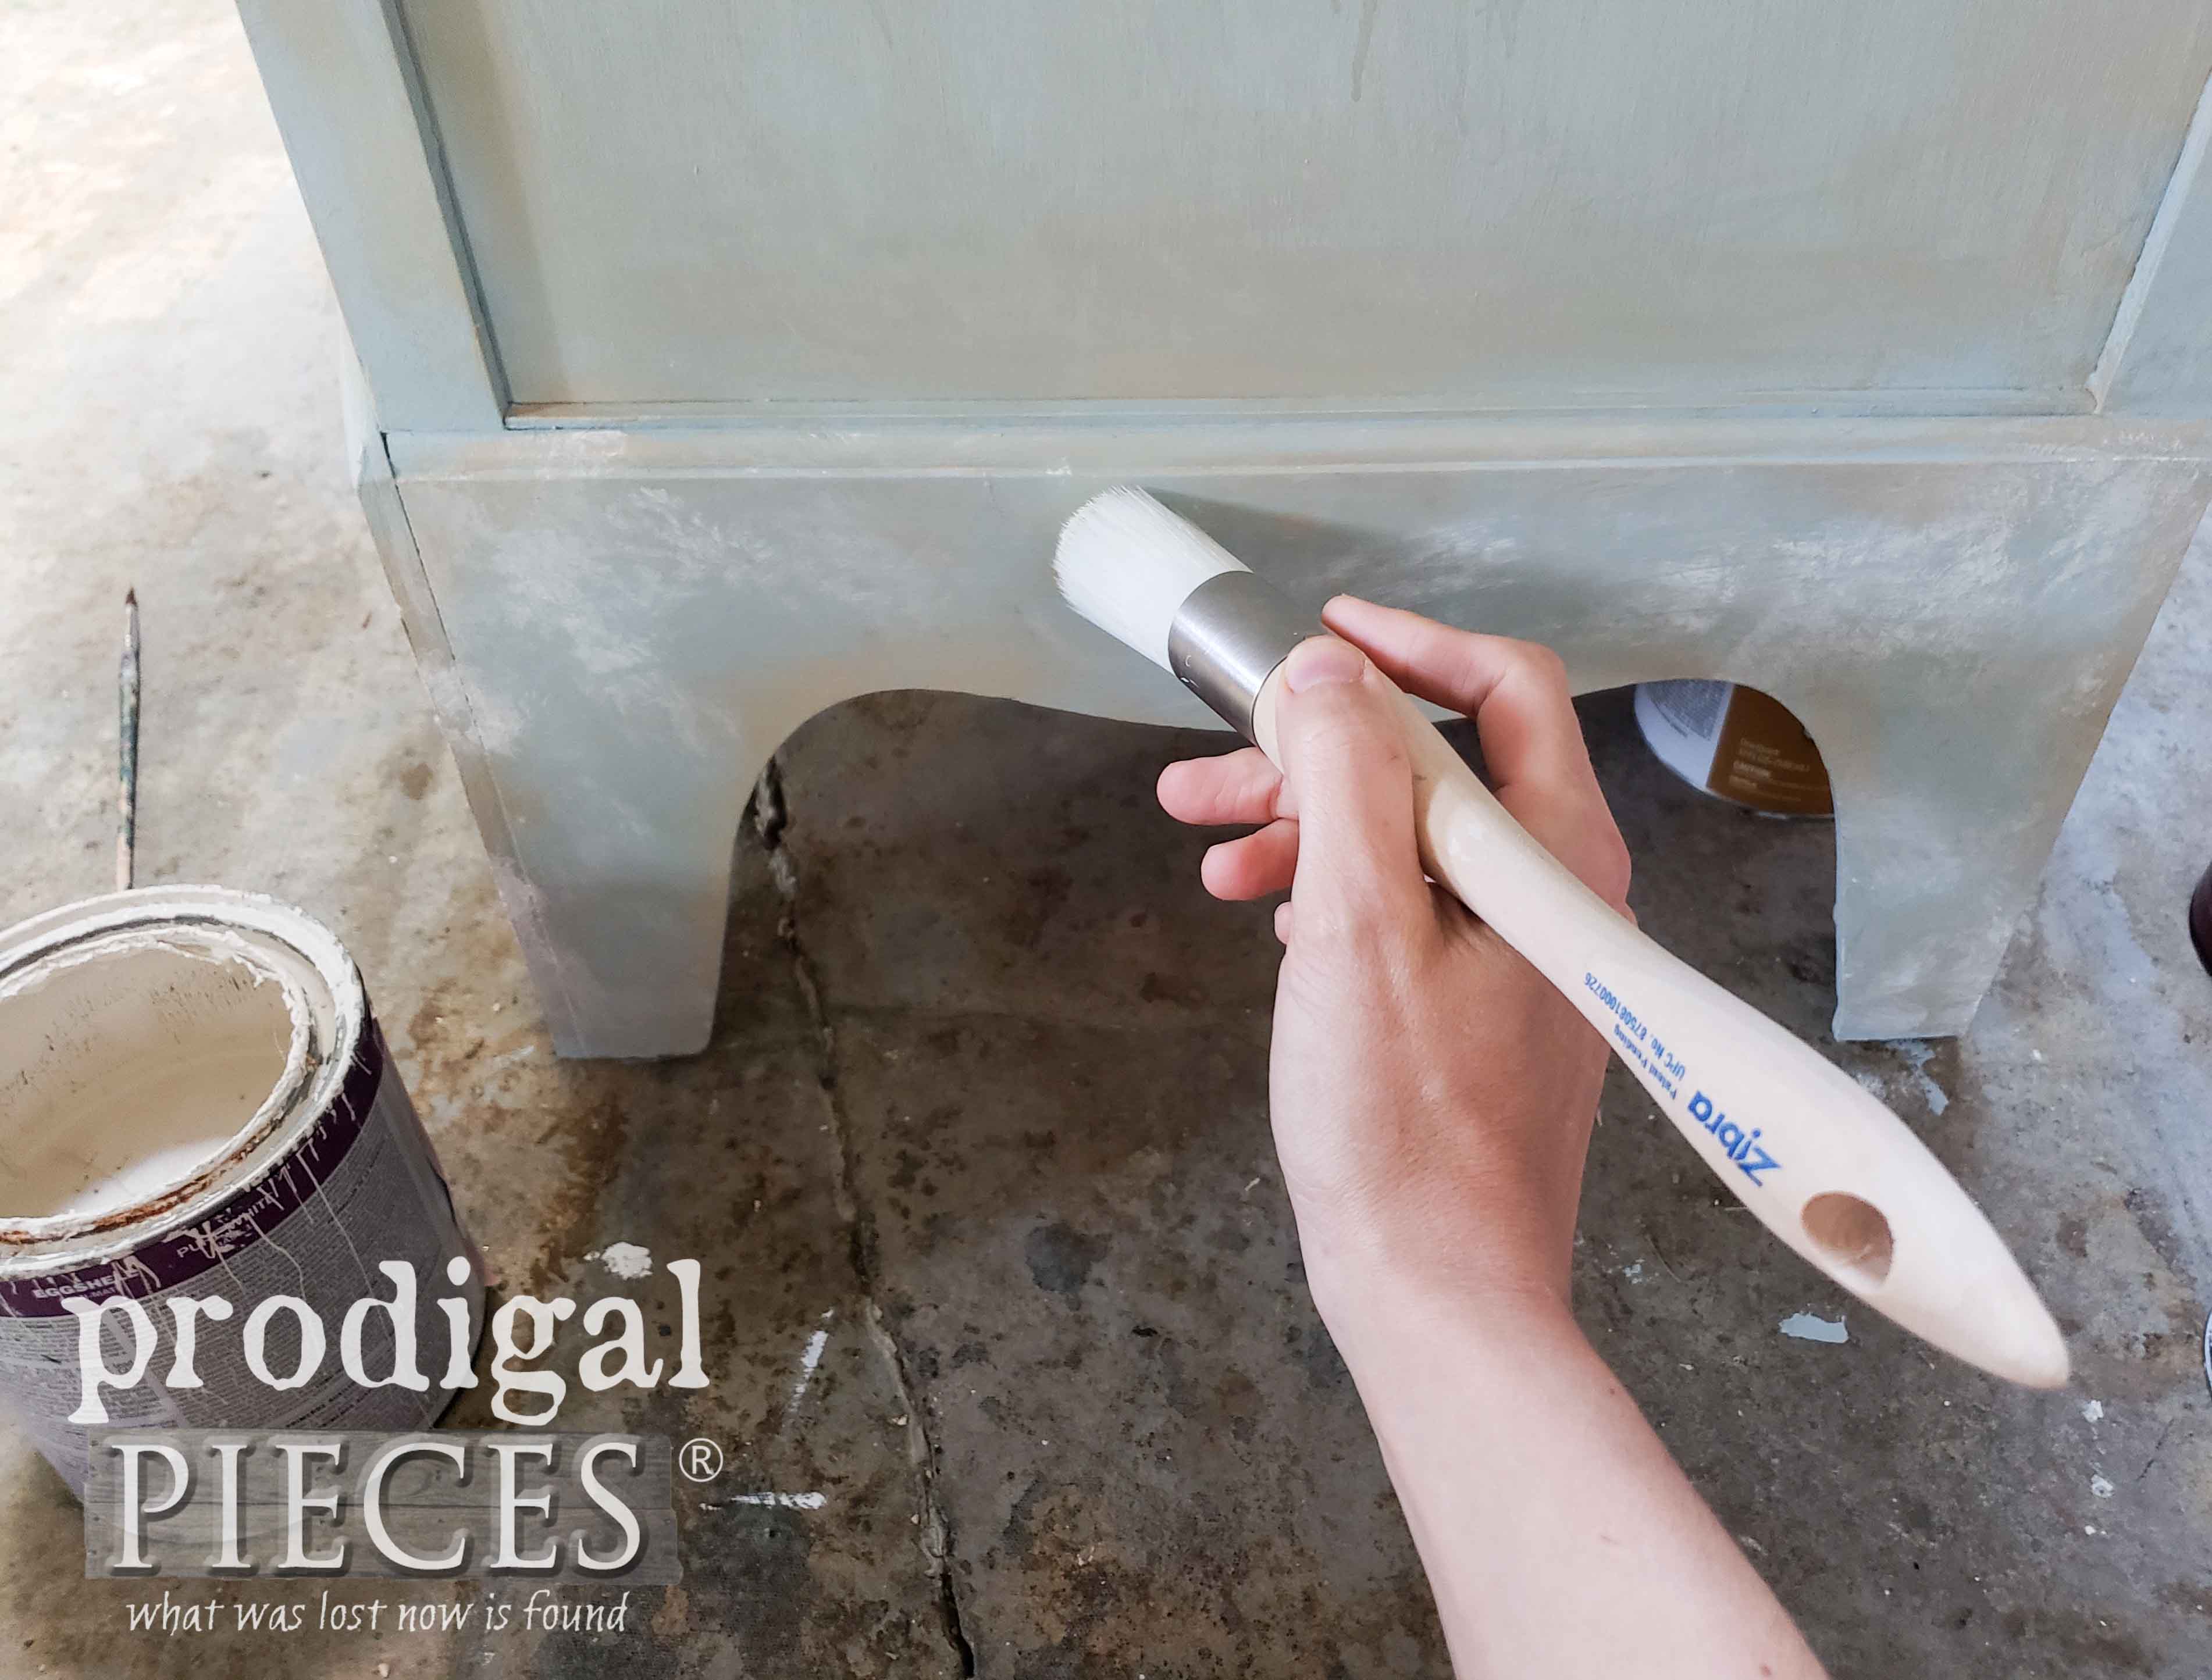
Next, the fun gets even more funky. tee hee! I am using a beige color to create a blended look just like I did in this other vintage dresser. First, I lightly spray the surface with water, then randomly brush on my color in vertical strokes.
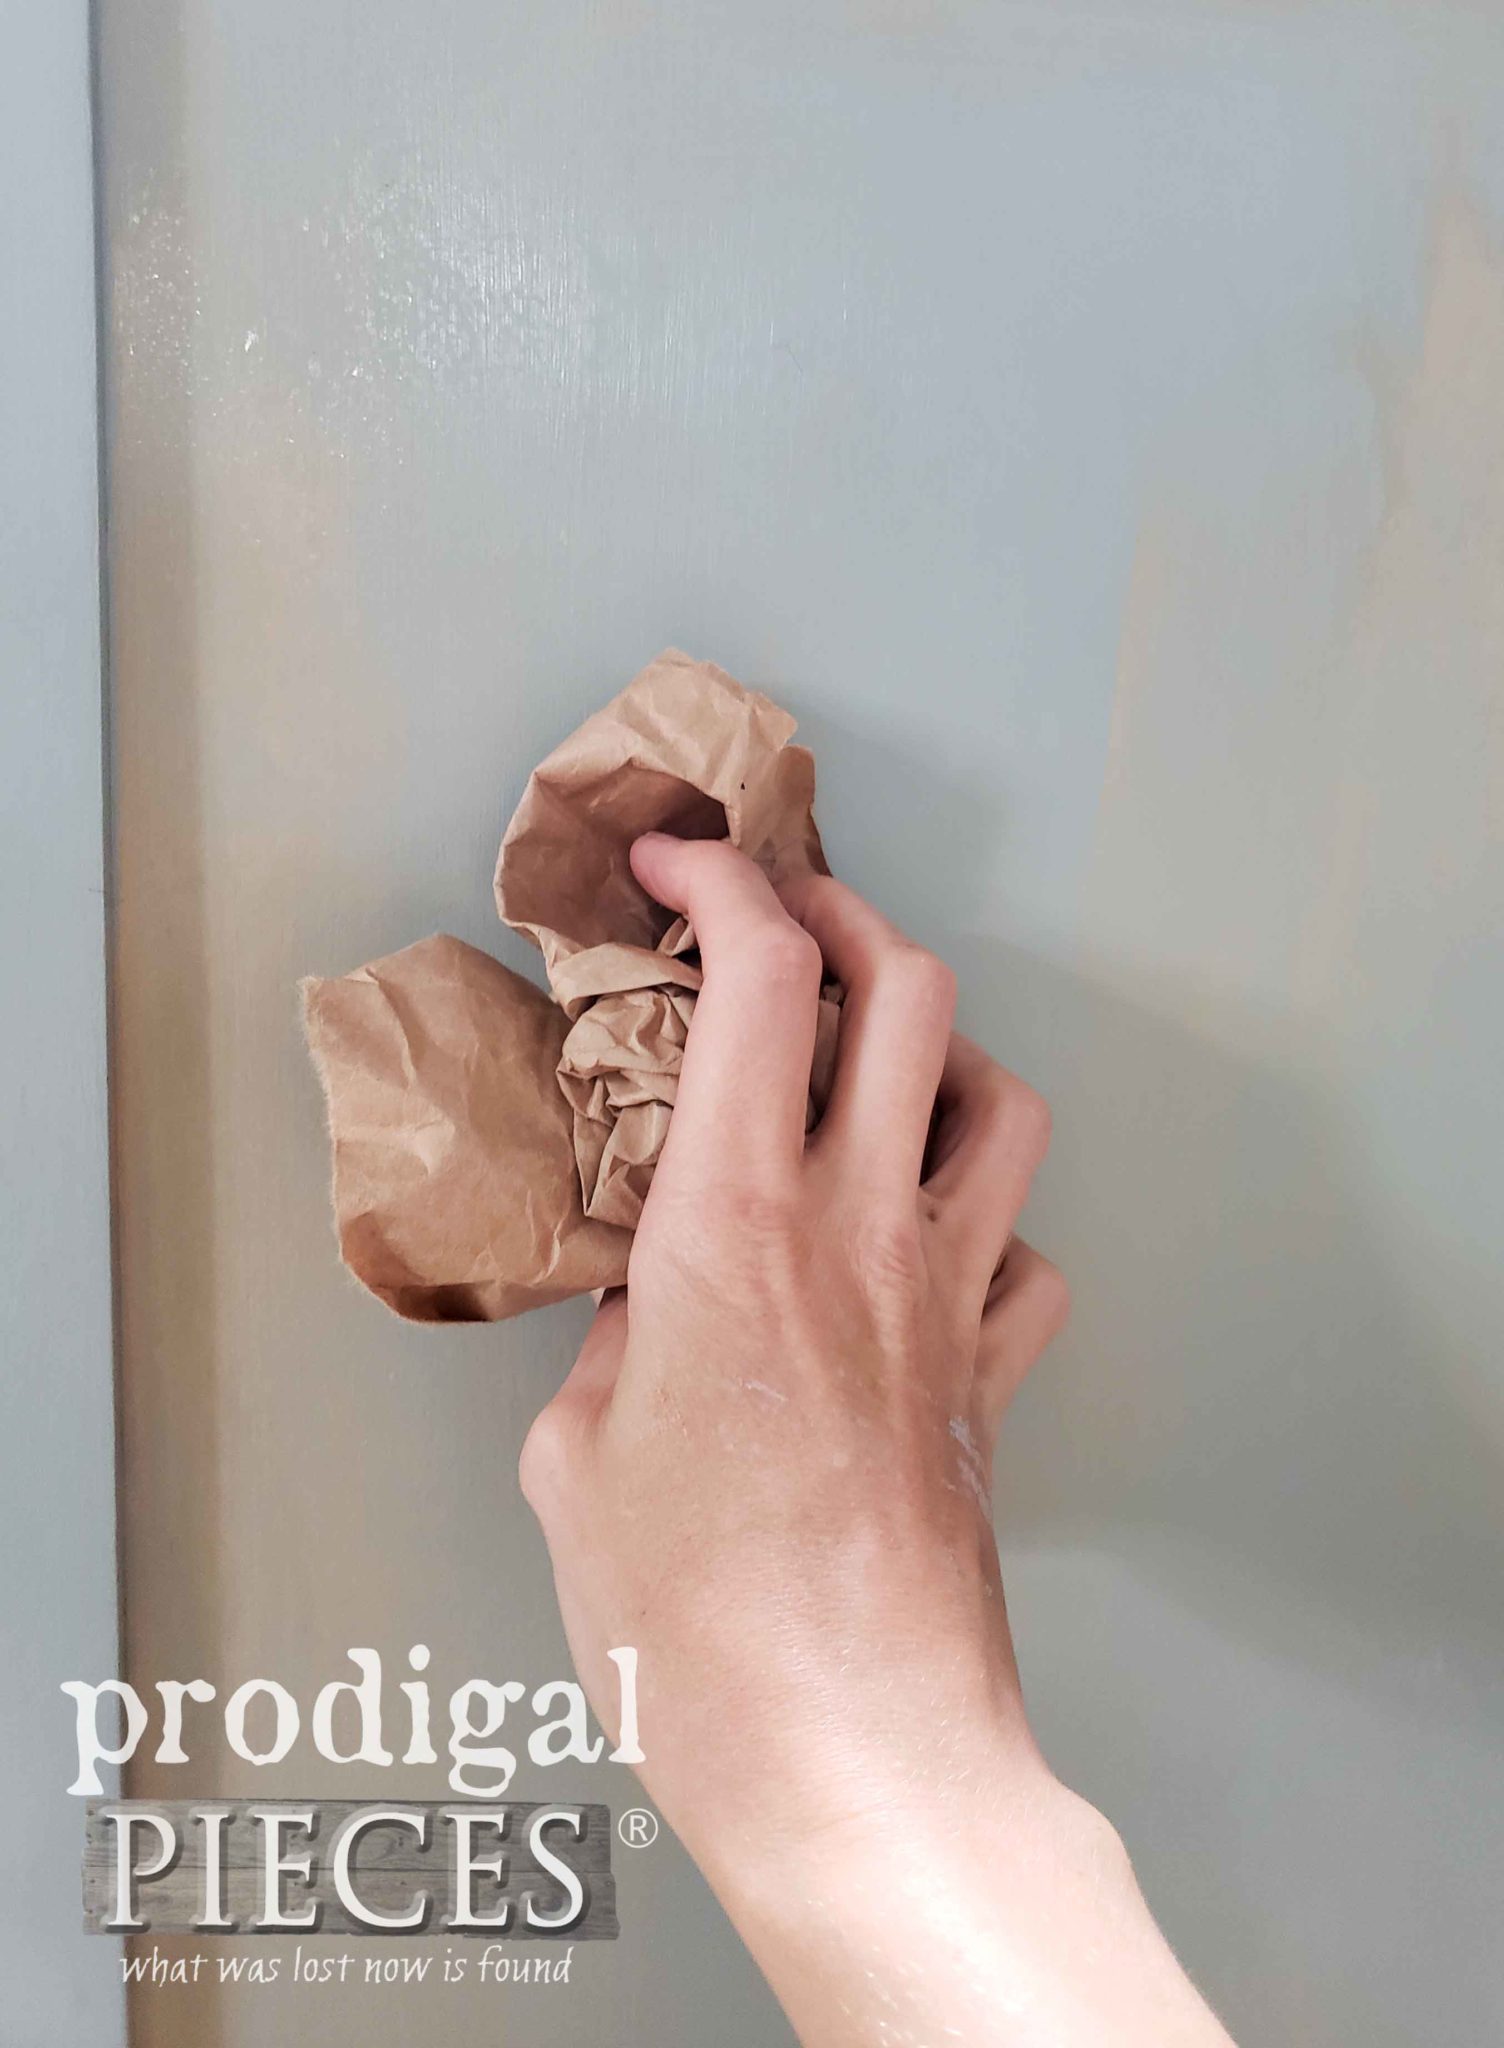
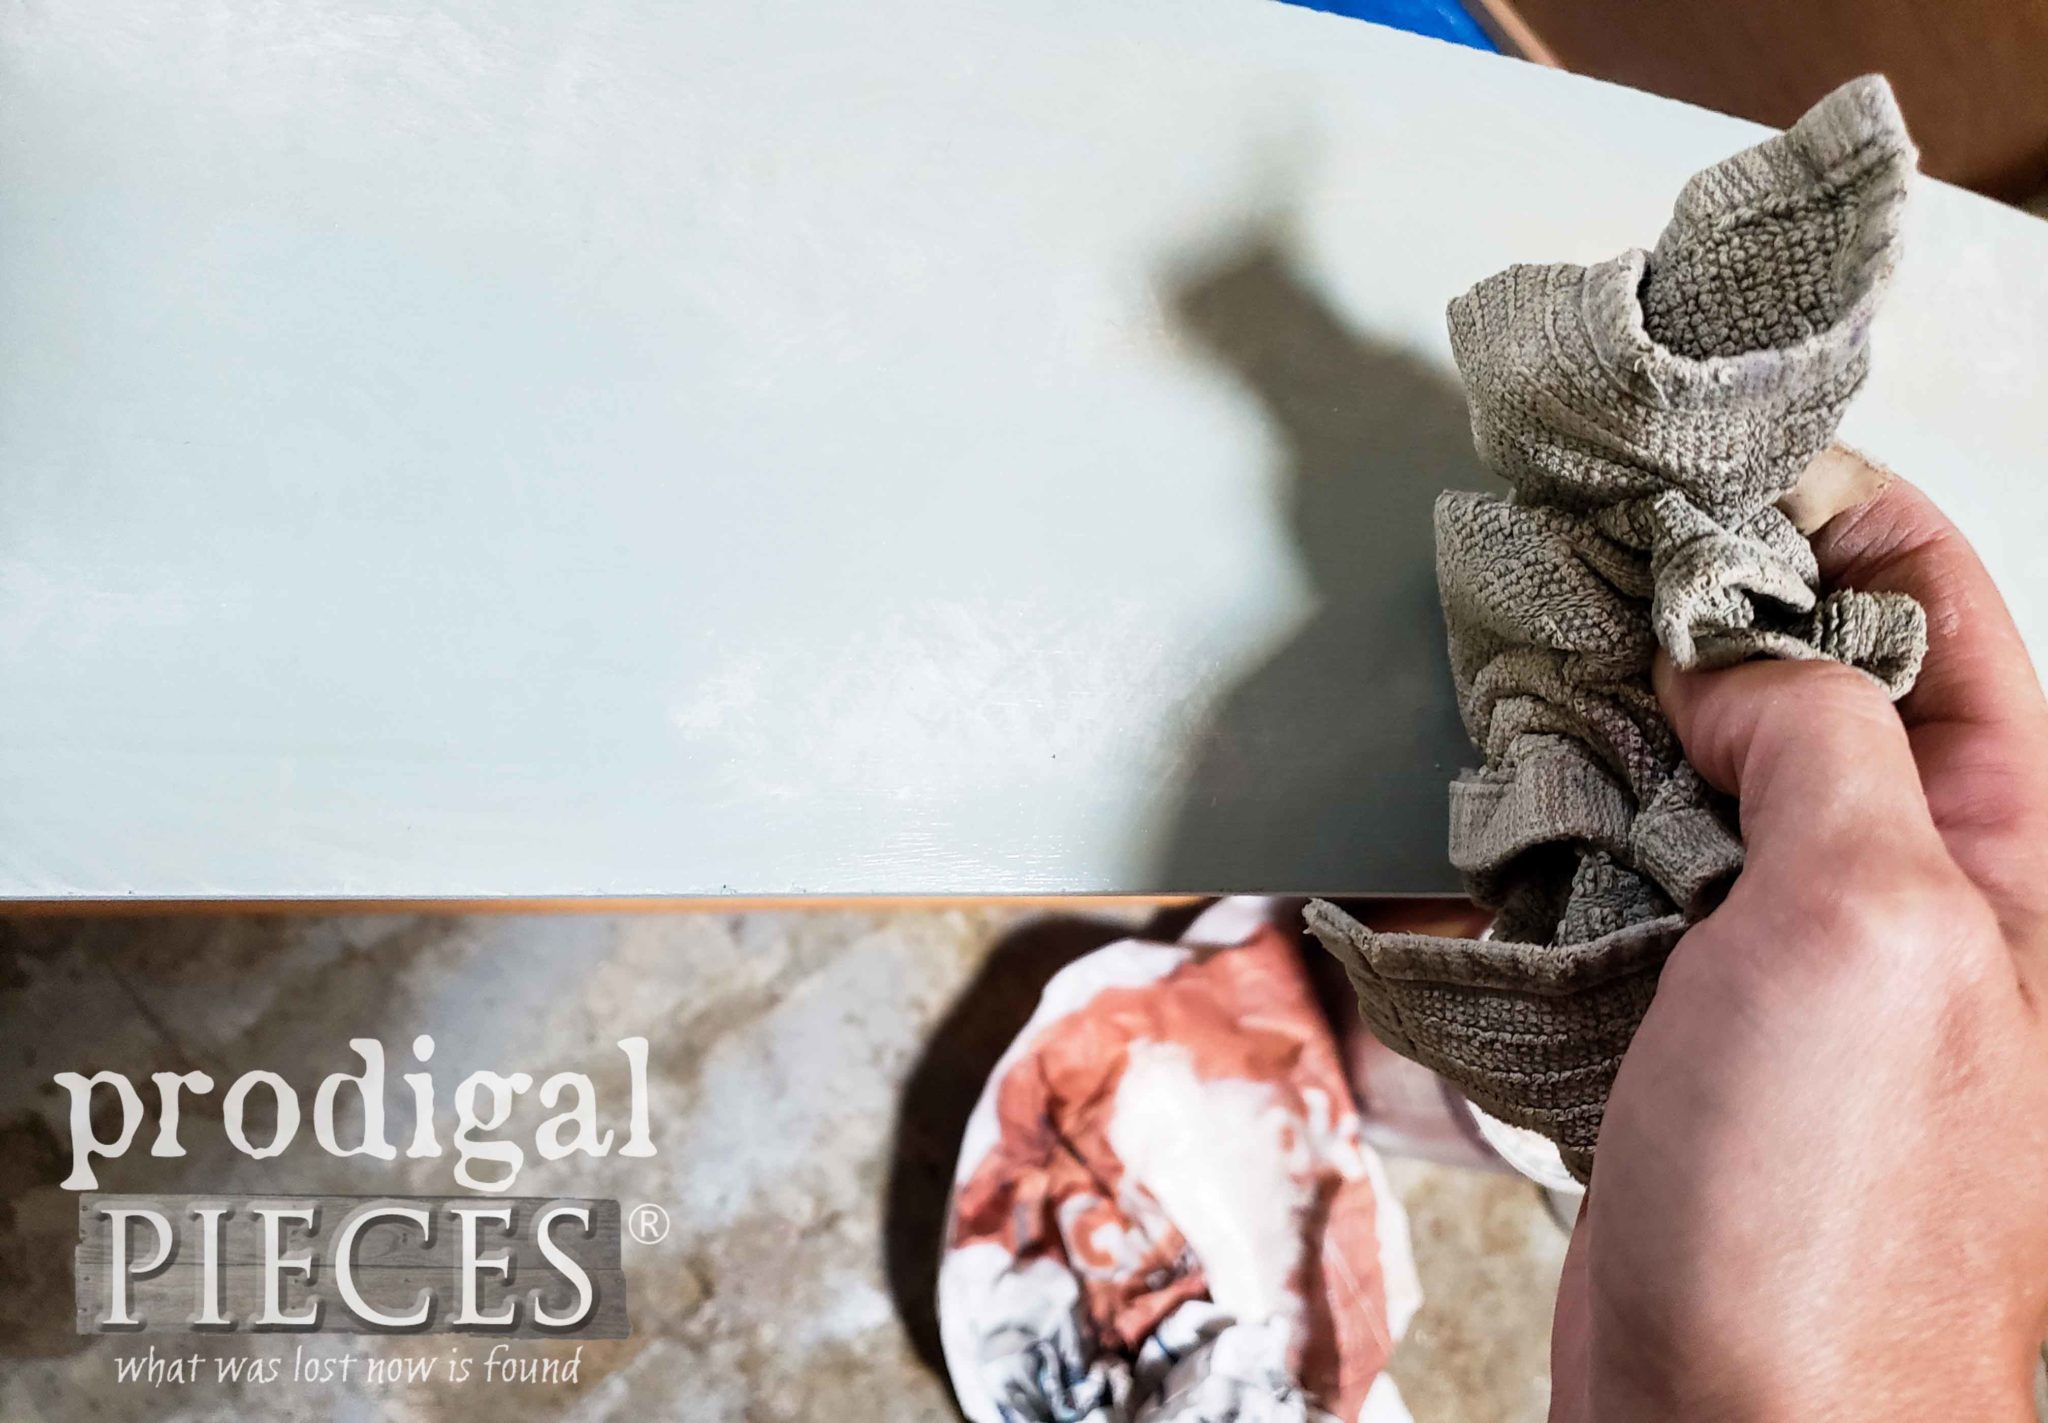
While the paint is still wet, I use crumpled paper to press and rub it into the paint and create a textured look.
After working all the cabinet and drawer with this color, I let it cure and begin applying the next coat. This time, however, I switched to an antique white paint so I can swirl my layers.
TEXTURE
For added texture, I used a crumpled rag to pounce and rub that layer of paint while the antique white layer was curing.
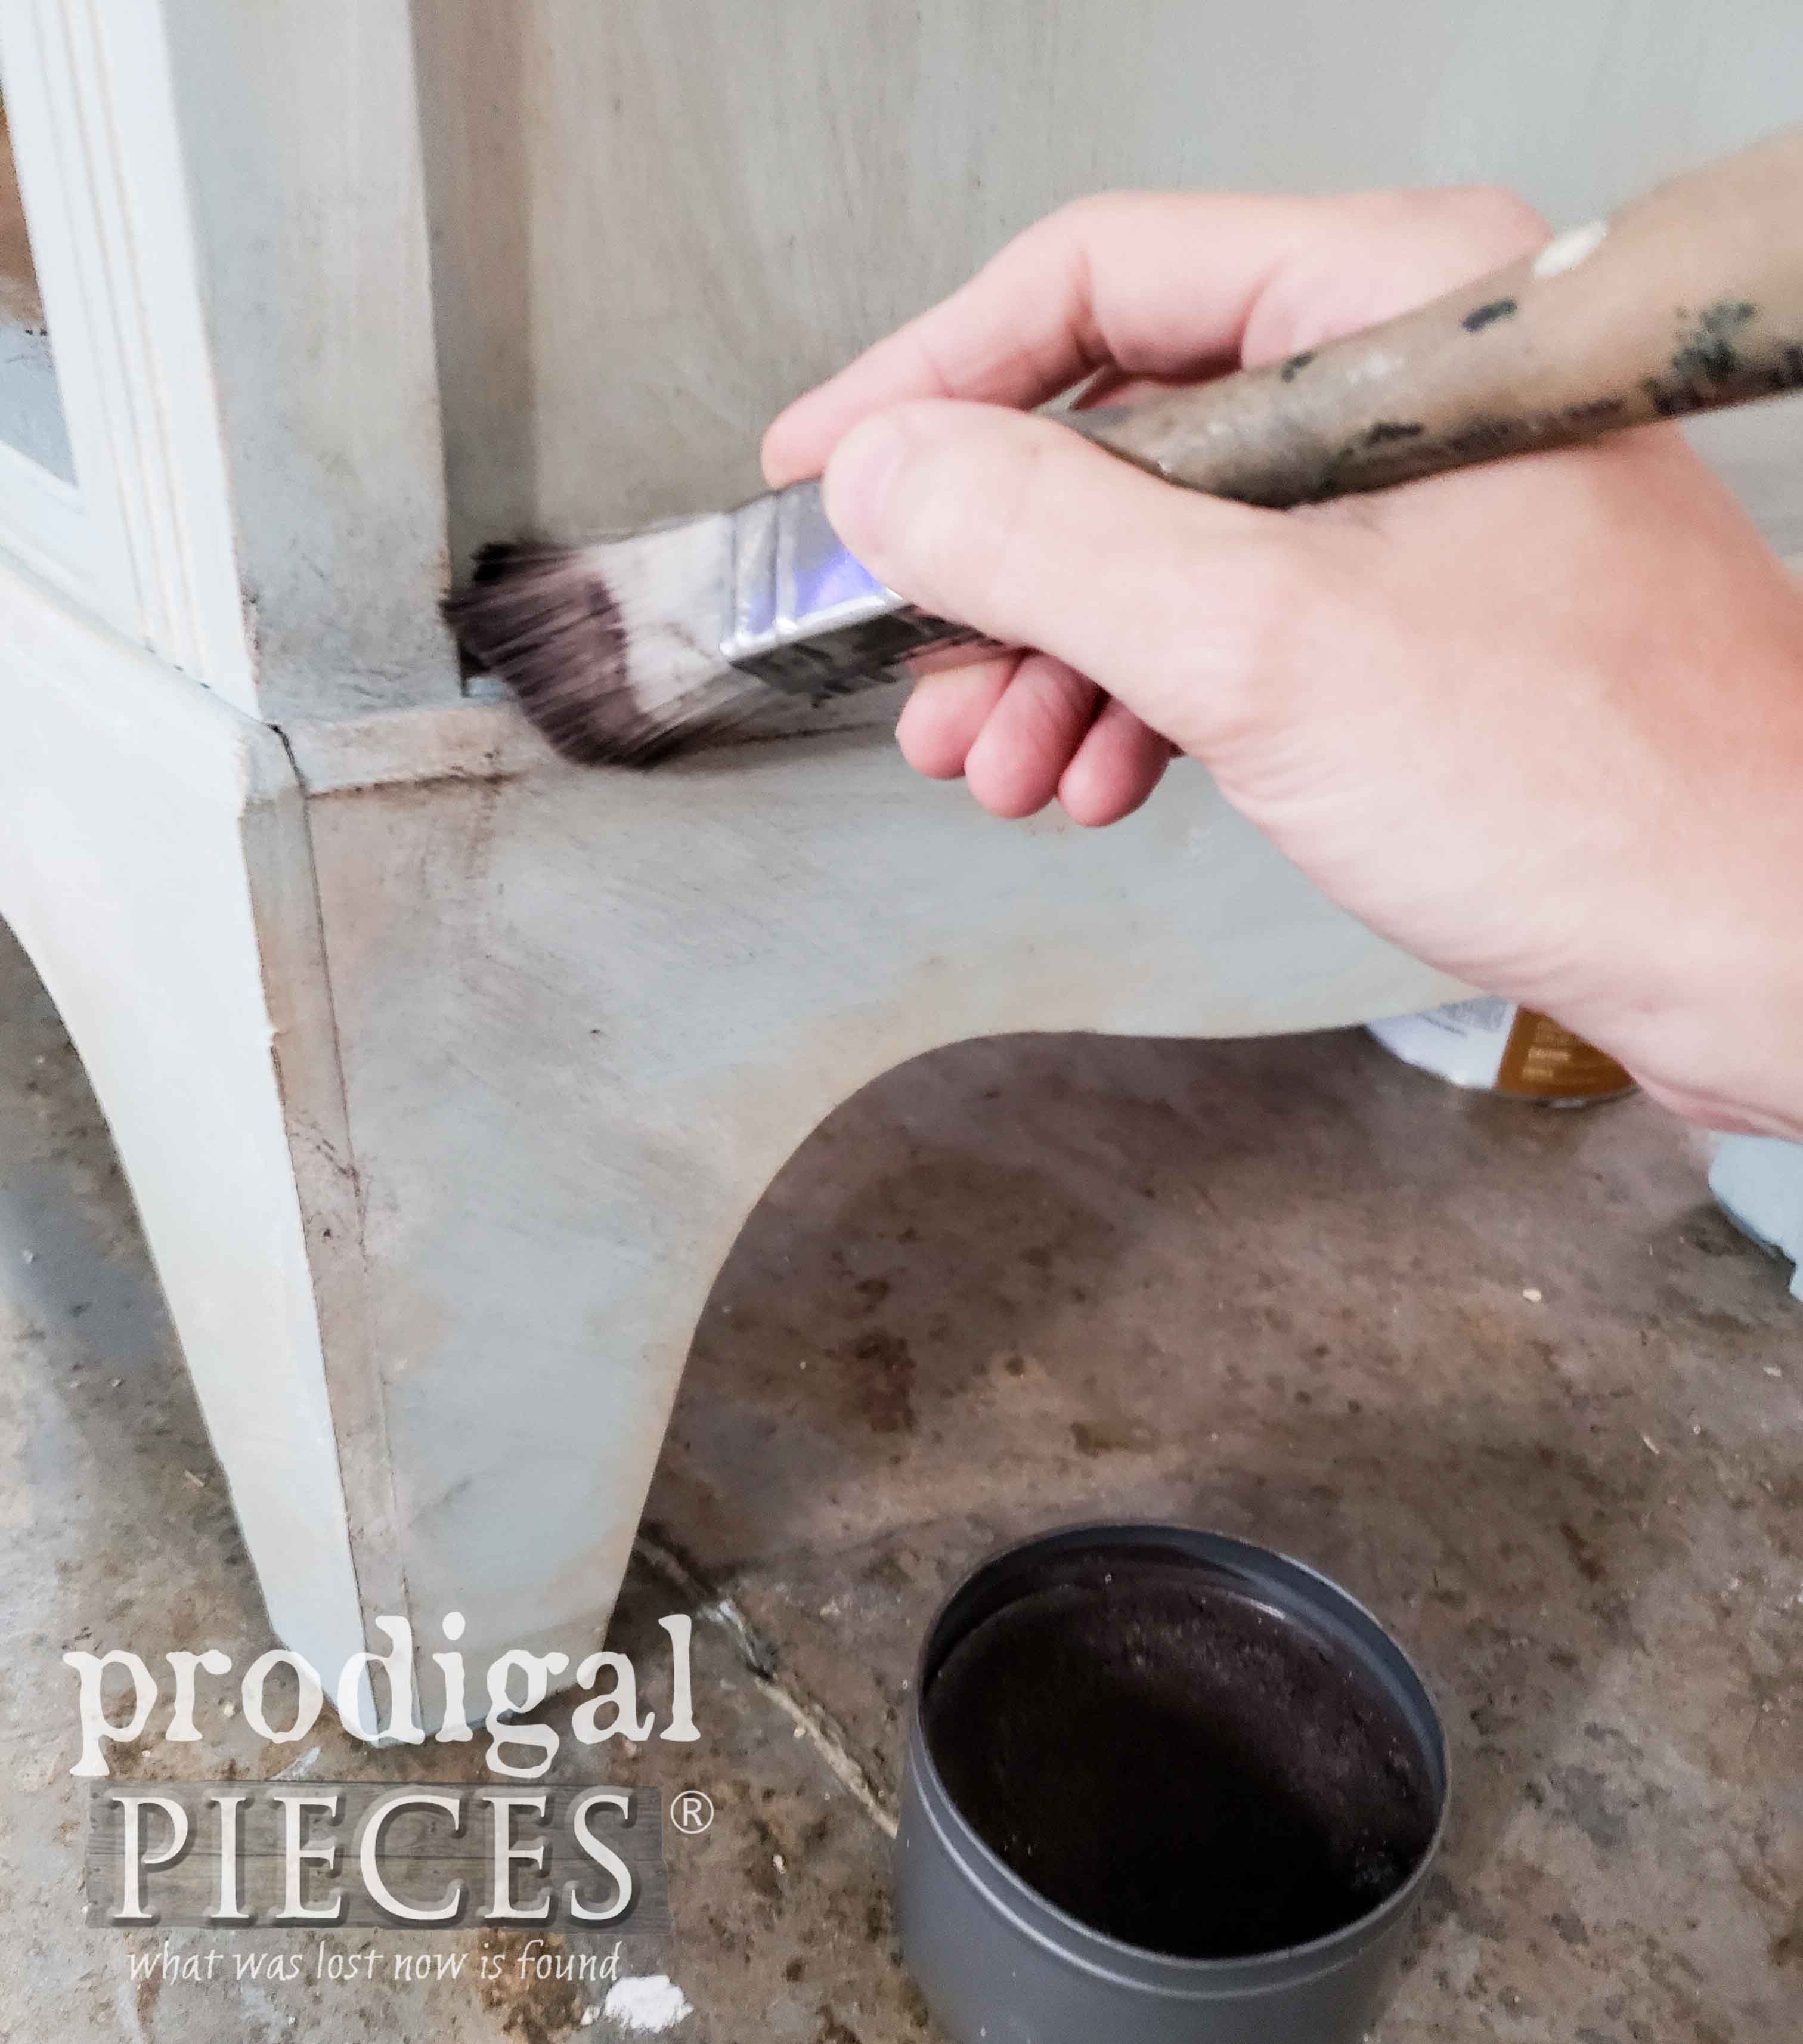
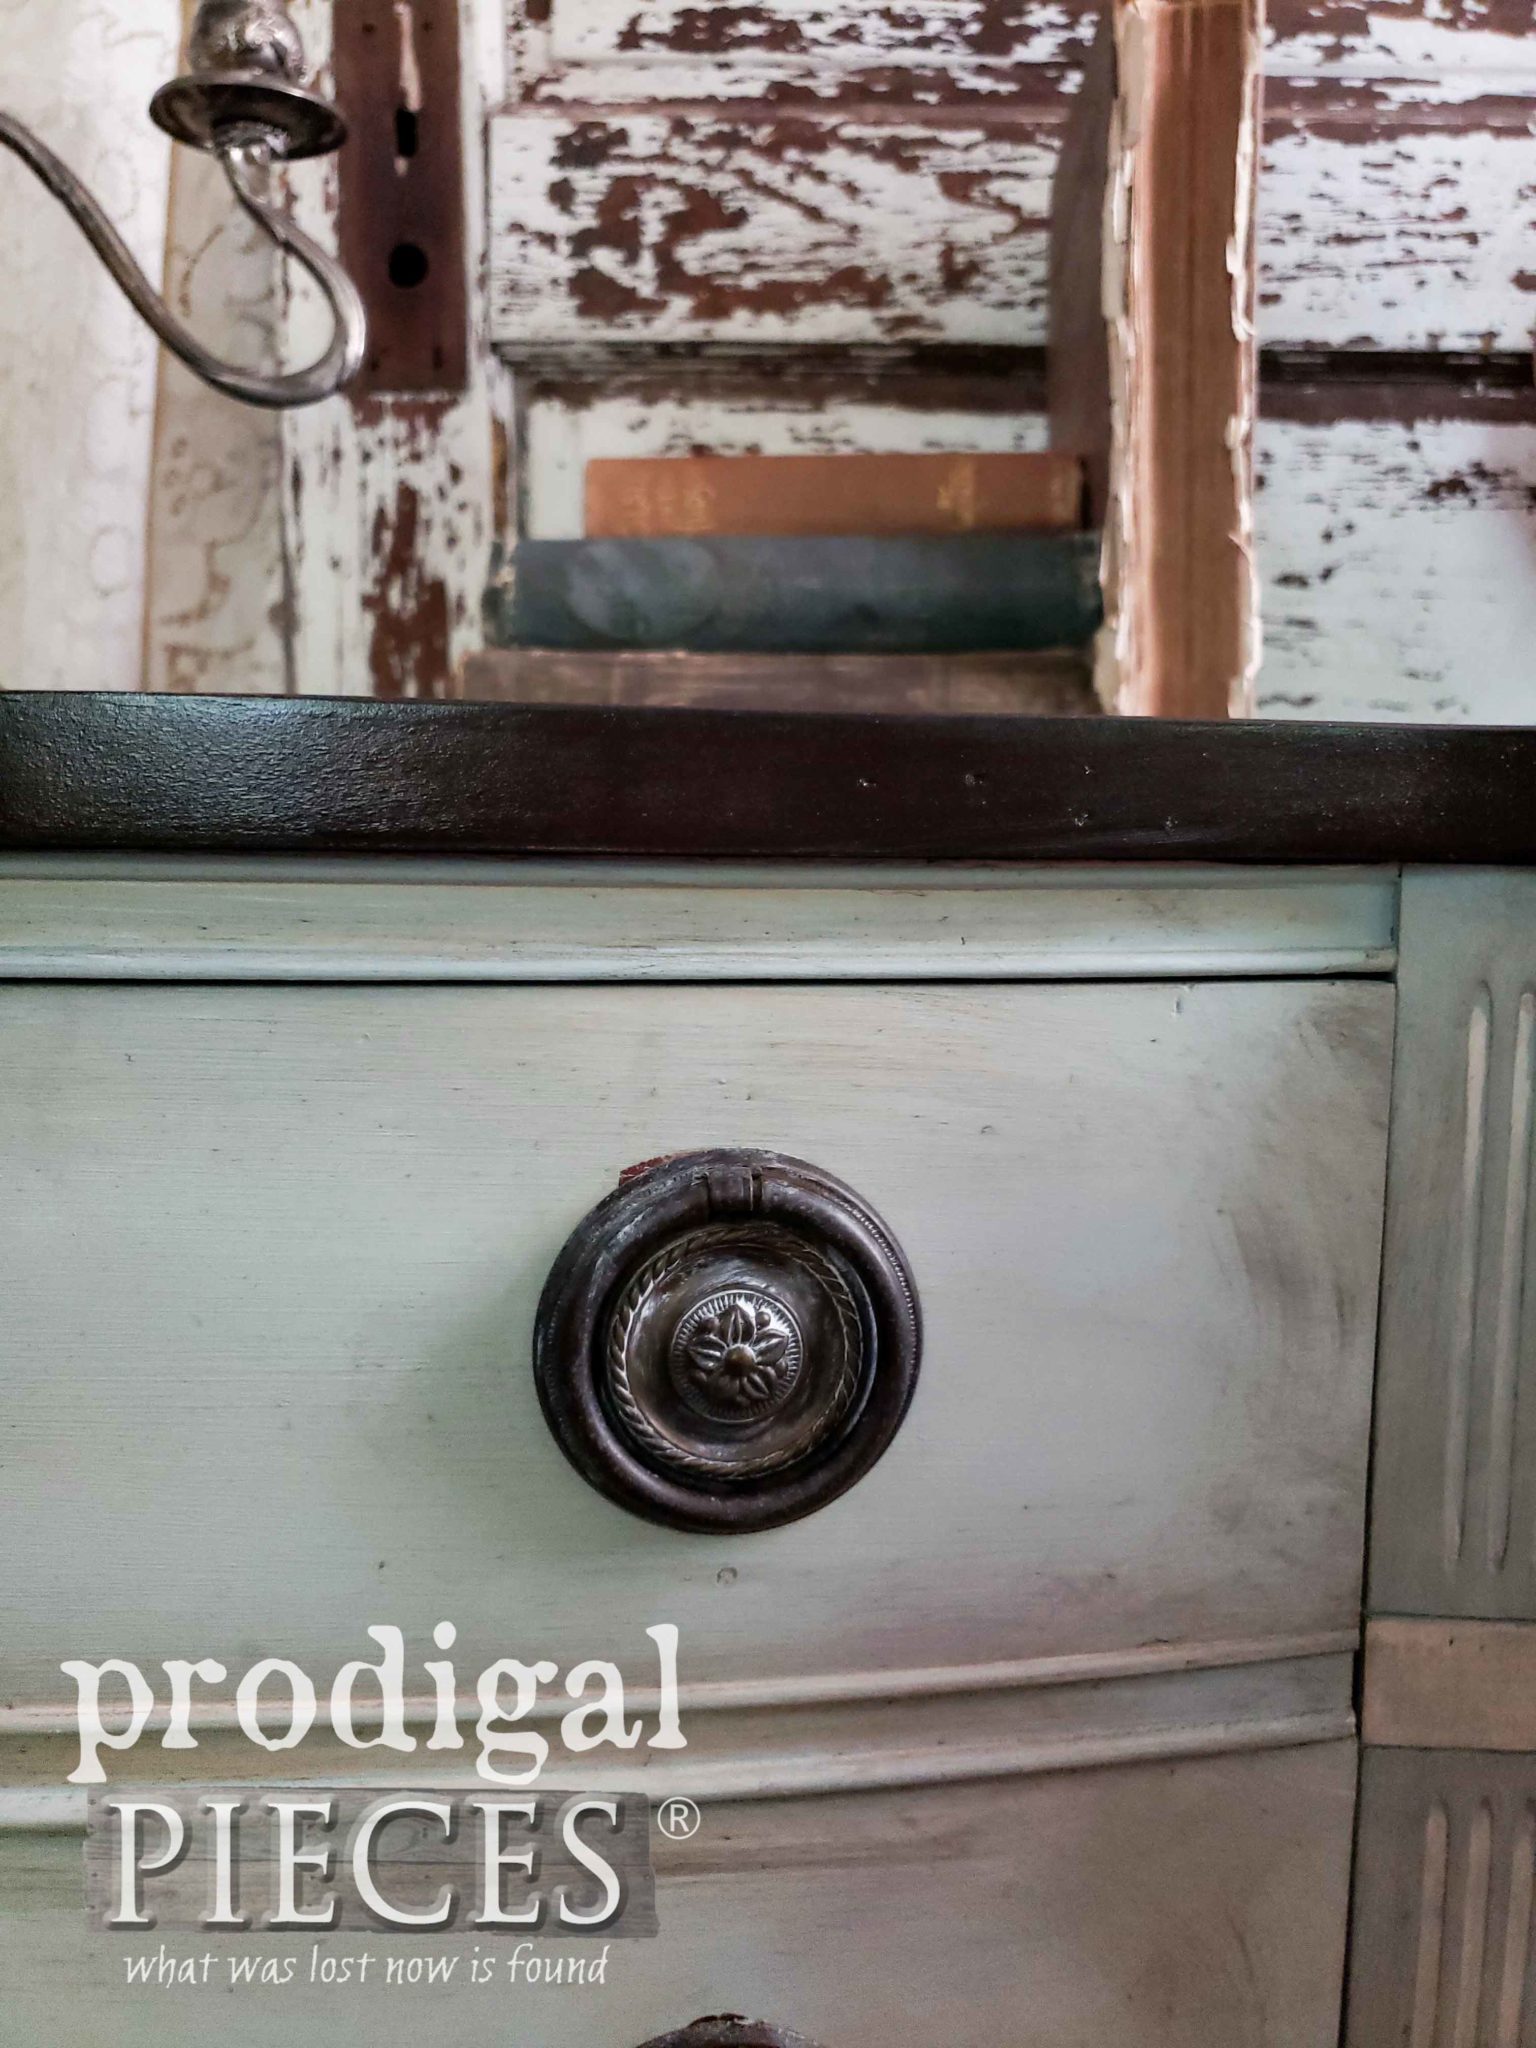
Last, but not least, I add brown wax to the cabinet and drawers. This deepens the texture I created and really brings out the lines of this piece. Bonus of this brush is the angled tip that allows me to really get the wax in the deep lines and accent just how I like.
THE REVEAL
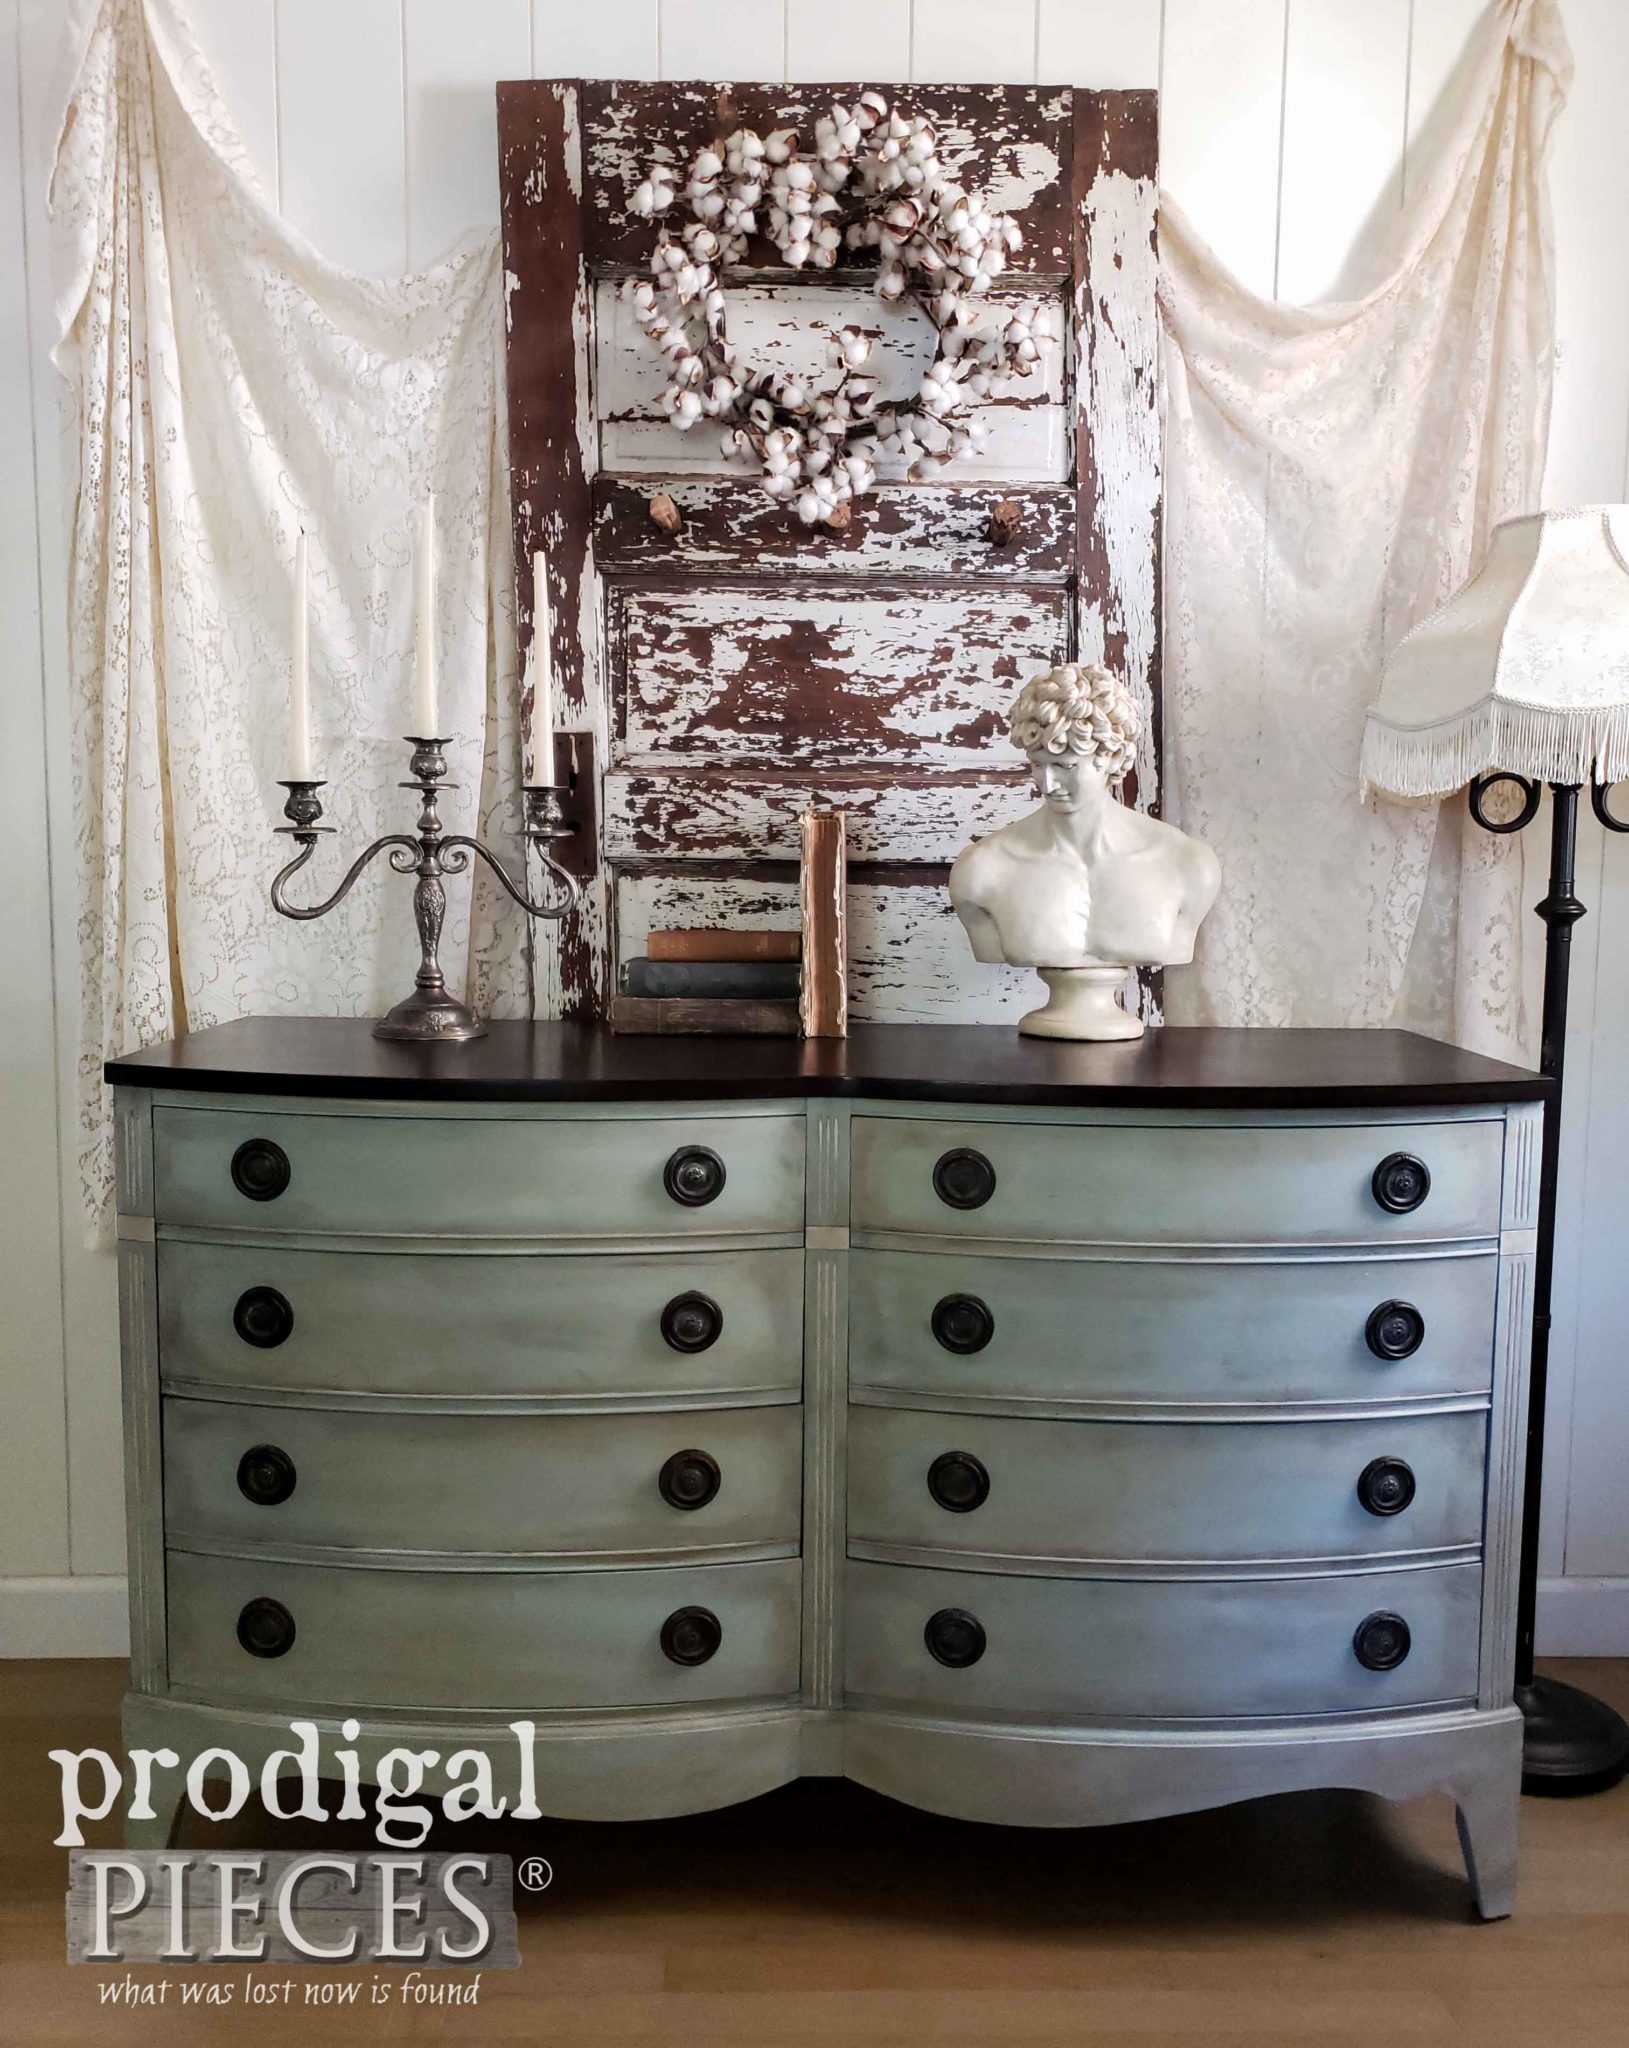
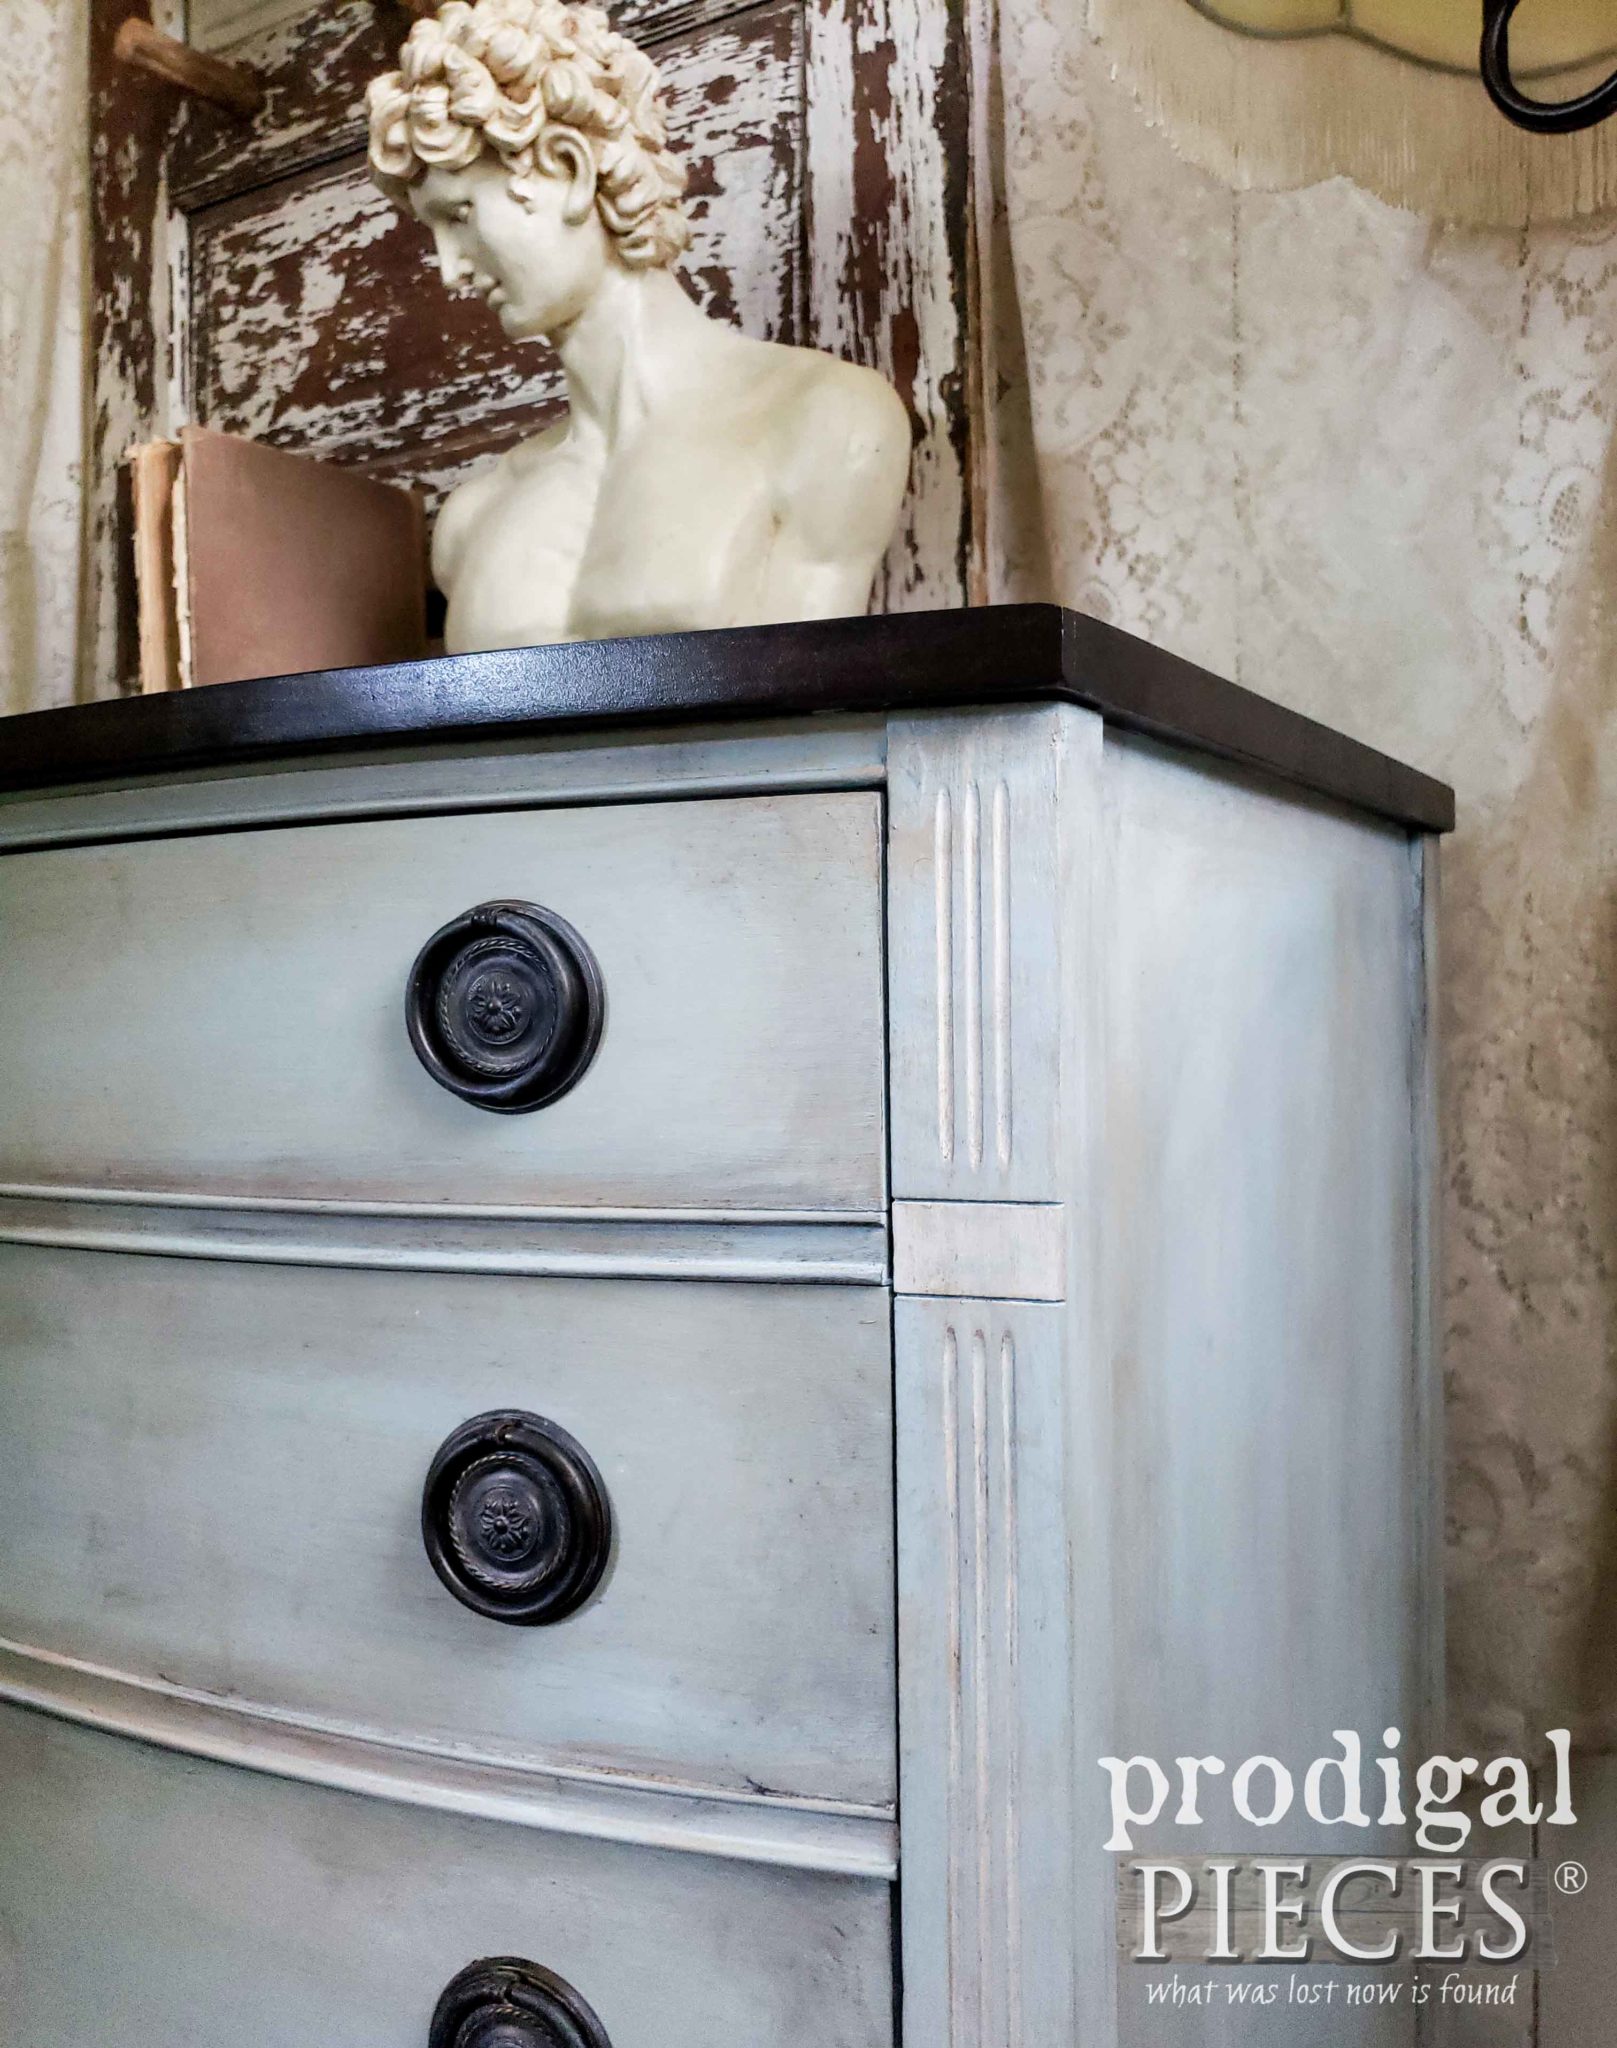
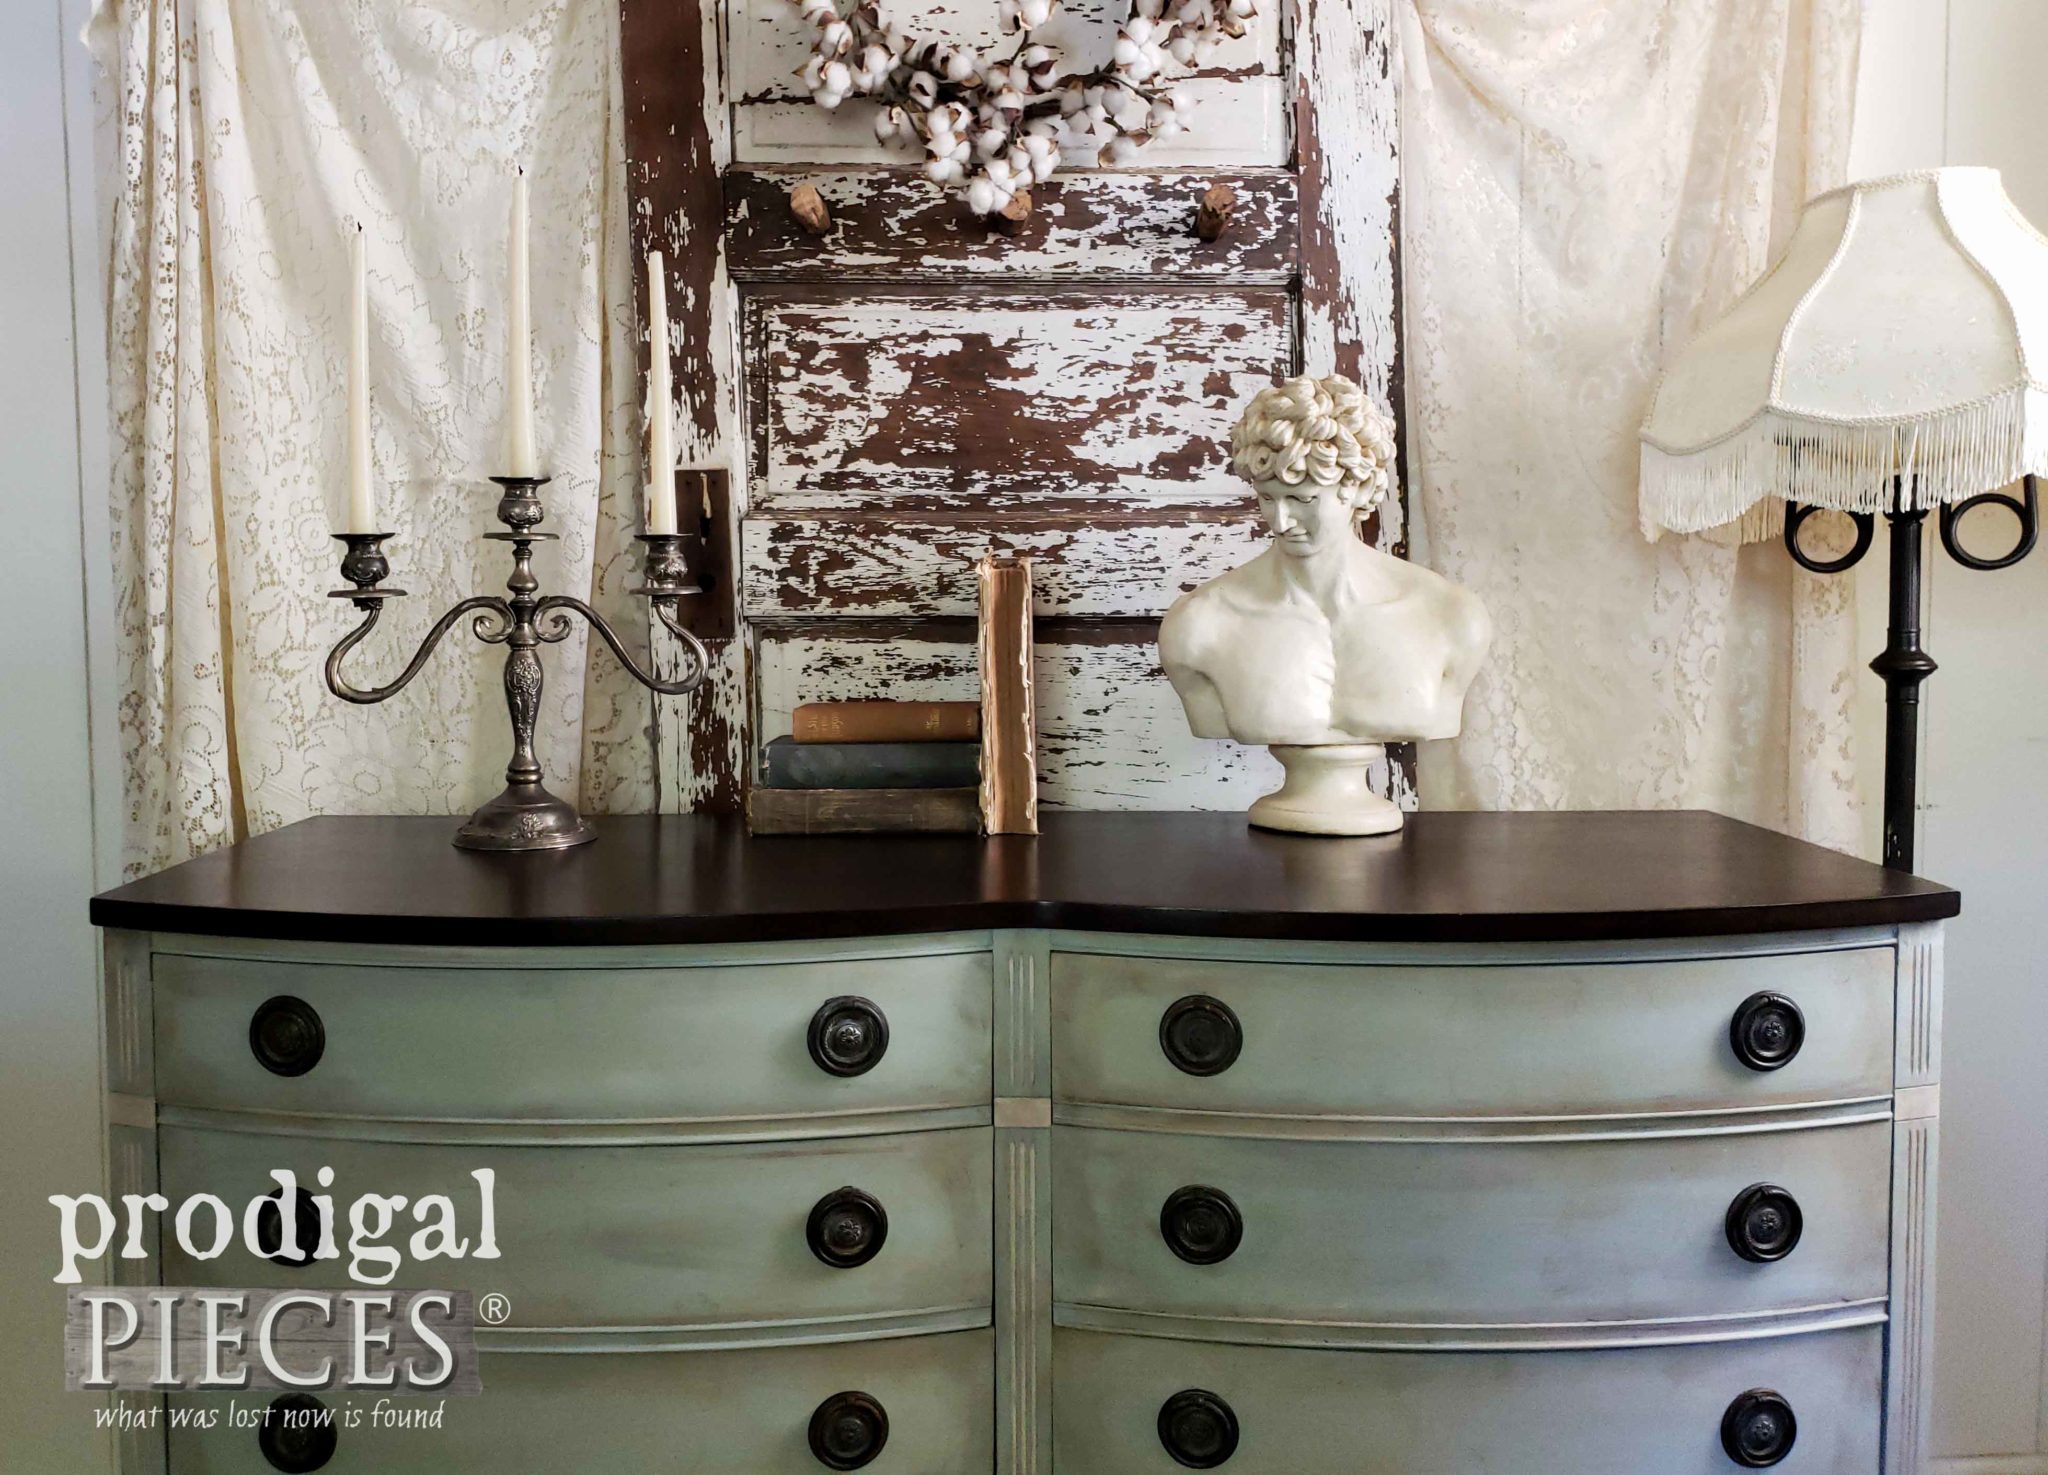
Finally, are you eady to see it all come together? Take a peek at this vintage Dixie dresser fixed and ready to go.
I’m completely smitten with the way this came out and can say that my favorite part is the top. That dark stain sure does wonders to revive old wood. Isn’t this combo is striking? Also, the dark stain helps tie in the dark patina on the drawer pulls too.
Likewise, since the drawer pulls have a gorgeous patina as they were, I just add a touch of white wax to accent those beautiful embossed details. I love this kind of dresser that has varied sized drawers for plenty of storage.
As is the norm, my goal is to inspire you to give new techniques a try and have fun with DIY projects. The sky is the limit when you have the right tools and information, plus a willing spirit.
If you would like to own this dresser, you can find it available in my online store.
SHARE
In addition, pin and share this vintage Dixie dresser makeover with this frottage technique. Others need inspired too!
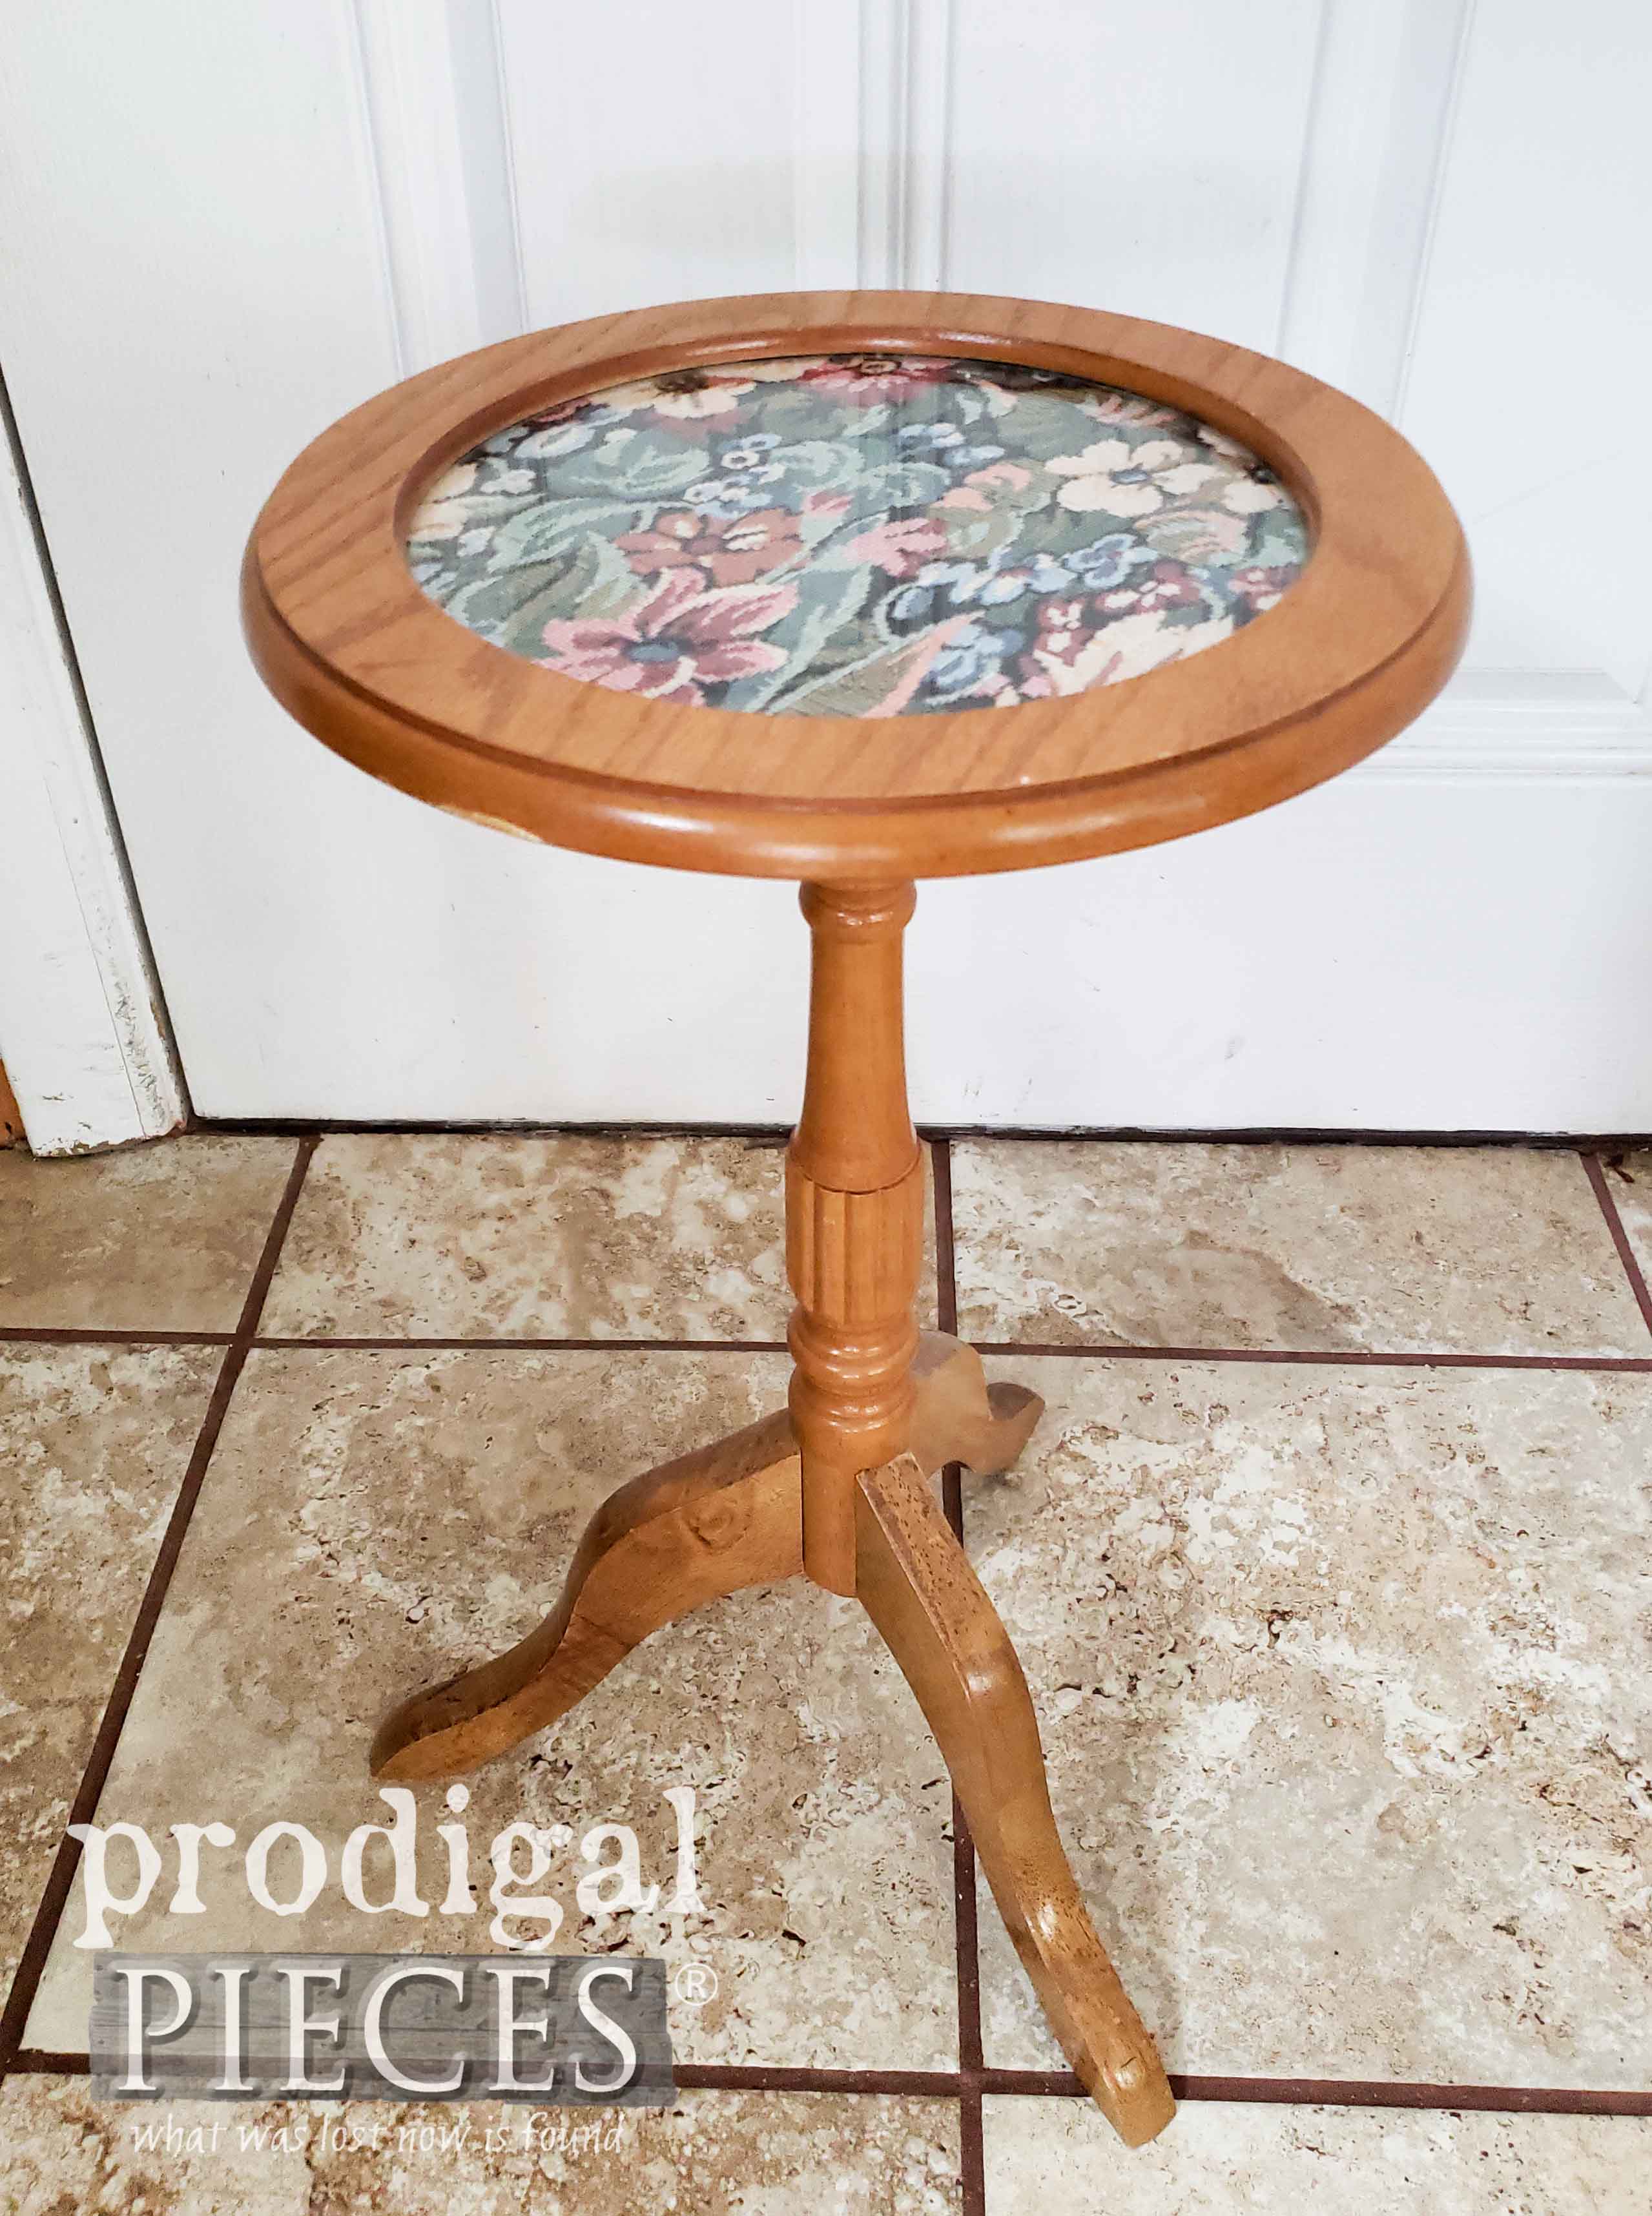
Up next, it’s Furniture Fixer Uppers time and this little cutie is going to look soooo different. See the after HERE.
To get these DIY tips & tricks in your inbox, be sure to sign up for my newsletter. Until next time!
Also, more furniture projects like this vintage Dixie dresser makeover:





Larissa, you give old worn out furniture new life every time! Beautiful job on this dresser.
I’m so glad you think so, Jennie. Thank you. 🙂
❤️❤️❤️your posts!!! Learn so much
You’ve made my day!
The dresser is gorgeous. The technique you used is very interesting. I will certainly be looking into it further.
Thank you, Debra. It sure add a story to a piece.
Nice job!
Thank you, Patty. 🙂
That is quite lovely. You have a gift for allowing a piece to be what it is.
Thank you, Lisa. Your words mean so much to me…really.
The dresser looks so much better!
Thank you! 😀
Love the color and technique you used on this dresser… it’s beautiful!
These brushes would work perfectly on the picture frames that have been collecting in my basement!
Thank you. It was fun to play with the technique. You will love these brushes! 😀
Growing up, my sister and i shared a dresser just like that and it came from myneighbors trash?
It sure is a fantastic space saver and storage. I might be keeping this for my girls. 🙂
Wowza! It is beautiful now, thanks for the great tutorial and inspiration!!
My absolute pleasure, Mary!
Beautiful!
Thanks so much, Deb!
Love this. I have a similar dresser in desperate need of some love. Thanks for the great tutorial.
Thanks! My pleasure to share, Gret.
Lovely! And I never would have thought to use tinted wax on drawer pulls…another neat tip I’m going to have to try now!
Thanks! I love using wax in oodles of ways. So fun for me!
I have some chairs that I need to paint and I’d love to try out these brushes!
You will love them for sure.
I love what you did to this dresser. Your projects always motivate me. I have a bookcase just waiting to be painted!
I’m delighted to hear it, Sally. I try!
The dresser looks beautiful! I love the way you blended the colors.
Thank you, Michele. I couldn’t wait to work on this piece.
Beautiful makeover, Larissa! I really love the dark stain top with the light painted dresser! Makes it pop! The brushes would make painting intricate details a lot easier! You are so talented!
That stain is wonderful to use and totally made better with the brushes. No strokes for the win! 😀 Thank you for the love, Kim.
first thing to paint with these amazing brushes is a pantry cabinet that once painted gets donated to the New Hope for Animals, they then sell it. Nice job on the dresser
Thank you. Sounds like fun!
Oh my goodness, that dresser is so beautiful! I too am drawn in to that style furniture. I love any old furniture that has curves or unusual details, because it reflects the skill of the artisans who created it. My father was a furniture maker and reupholsterer from Europe, and I inherited his love of woodworking from him!! You do such a wonderful job honoring the beauty of the pieces you create. Thank you for once again inspiring me!
You and me both, Judy. I couldn’t wait to get this dressed up and fixed. I felt sorry for it with all the cat scratches. My family was also the same history and makes it fun. Thank you!
What a beautiful piece of furniture! You have an amazing talent! Maybe one day I’ll give it a try.
aww…thank you so much for the “hug”! That means much. I hope you do!
it is absolutely stunning. Everything about it turned out so beautiful. I love the dark wood top with the painted dresser.
Excellent to hear! Thank you, Jolinda. 🙂
As always with your work, gorgeous!
It just makes my day to hear. Thank you!
Beautiful makeover & it’s in my favorite color!! Love the dark too with the light body. My favorite combination!
Mine too. Great minds think alike! 😀 Thank you.
Gorgeous piece!
Thank you, Christine!
Wow! This is my all time favorite……..So Far! Brilliant!
Woot, Woot! 😀 I love that you said…so far. hahaha!!
Absolutely beautiful!
This piece is breathtaking, Larissa. I believe it’s one of my favorites that you’ve done. Of course, you’ll wind up doing another makeover that will be just as stunning. You never cease to amaze and inspire me! I have a couple of pieces that could use paint and I would love to try the blended paint technique. I started it on an end table but it looked like a hot mess. Thanks for the giveaway and the inspiration.
Wonderful! haha…you made me LOL!! Thank you for the smiles!
The finish on this dresser is absolutely dreamy!
I’m so glad to hear you think so. Thank you!
The dresser turned out great! That will be a beautiful addition in just the right home. I love bow fronts and curves, anything with lots of detail. Great job
Thank you, Julie. It will be shipping out tomorrow. Yay! 😀
Love the way this turned out
Thanks so much, Kim.
WOW! that dresser is gorgeous! I love the color and you are right, the top really sets off the color!
Happy dance! I’m so excited to have this done as I couldn’t wait to see my vision come to life. Thank you!
I love your work! Keep sharing.
Thank you! I will try, Lord willing. 🙂
Beautiful piece! Great job! ?
Thank you, Dale. 😀
Wow – love that dark stained top! I’ll have to remember the Java gel – I was going to catch up on my posts as I had some time, and saw this one had a giveaway – yay! Thanks for doing this. BTW, the Zibra brushes are divine!
Thanks! You will love it, Sue.
Loved the look of this dresser . I would also use the dark gel stain. It makes the piece look so rich. Your technique for painting the rest of it is interesting and I will have to try that. You always are amazing to see your ideas come to life.
It was fun to do, Mary. Thank you!
Love the look! I have a waterfall top cedar hope chest that was my mother-in-laws. The drawer is missing some veneer and it also needs a new bottom since the old one is loose and its really challenging to open the drawer. I’ve wanted to refinish it for years! One of these days I’ll decide on the look I want and actually get it done!
Thank you. You’ll love these brushes for sure.
WOW! That’s breathtaking. It’s even better than the dresser before that you painted that way. Love it.
That’s fantastic to hear. Thank you!
Larissa imagine my surprise when I saw what you did with the body of the dresser. I love this soft blue look and the whitewashed effect.
Gotta love that soft blue. 😉 Thanks so much, Mary.
Just beautiful! Got to get my hands on some of these Zibra brushes!
You will love them, Tammy! 😀
I absolutely love your work ! This dresser is one of your best works yet! I would love to win the brushes to try some of your ideas myself.
Thank you for saying so, Janet. I enjoyed it. 🙂
Oh my gosh, Larissa! This is so beautiful!
Every time I think “Now, This is my favorite piece that you’ve done” you do something else that becomes my new favorite!!
Those colors just play together so nicely it just glows with a beautiful light. Nice Job!
Those brushes would be so helpful as you have made me fall in love with them and I could certainly put them to good use 😉
tee hee! That’s so awesome to hear. Thank you! I can’t say enough about theses brushes. Perfect for all my DIY projects.
I am always inspired by your work, Larissa, and this dresser is no exception! It now will have a new life in a home that will make it shine as a centerpiece! I would use my Zibra brushes on a few old large picture frames that need updating.
You are so sweet to say so, Kathy. Thank you!
Seeing your work always gets my creative juices going. I’m in need of some quality brushes and would love to win a set of these!
That’s what I’m all about, so that is fantastic to hear. Thank you!
Firstly, this dresser looks AMAZING, thanks to your handiwork! I love it! My next painting project is still waiting for me… 2 end tables in my living room!
It was a fun project to do, Abby. Thank you for showing me some love. 🙂 I think we all have a “next project”…haha.
This dresser is beautiful. I always look forward to your posts to see your latest creation.
Thank you for the love, Marie. It makes my day. 🙂
Wow, another Prodigal Pieces masterpiece! I would love new Zibra brushes to paint an old gossip bench which is sitting in my garage.
Thank you, Doreen! 😀
I am enjoying reading your posts. You have amazing ideas!! I would probably paint an old frame I have with lovely detail but needs some tlc. Thank you!
Fantastic to hear. Thank you, Tracey.
That is a beautiful finish,Great job.
You are sweet to say so, Jean. Thank you.
This dresser is stunning! I shared the giveaway on Homeroad. I’d love to try the brushes! 🙂
Thanks, Susan! I sure hope you win. 😀
I have not seen a tutorial for this process before. Another beautiful piece.
I’m delighted to share. Thank you!
Larissa,
Oh my good goodness it is gorgeous..
aww…yay! happy dance over here! 😀
That makeover is lovely ! Thanks for showing us a great technique! I love those brushes too.
It’s a fun technique that gives you all sorts of options. I’m so glad you like it. 🙂
A new technique to try…yeah!
Yahoo! That’s the spirit! 😀
Gorgeous!!
I love the white wax on the handles!
Thanks for saying so, Lynzee. Little touches like that can make all the difference. 🙂
Larissa, as I mentioned, this piece needed to get into your hands! This painting technique and the colors you used on this piece are just gorgeous! Thank you for sharing your talents with us!!
You are just the sweetest, Kaycee. I was so excited to work on it and make my vision come to life. Thank you! 😀
Stunning! You’re amazing!! I love everything you do! So inspiring!!
I am sending you a big virtual HUG!! {{huuuuuuggggg}} 😀
I could use some good brushes.
I have an old computer cabinet unit that will be transforming to hold all my handheld power tools.
Thank You for this wonderful giveaway opportunity. You R an Inspiration to us all.
Beautiful piece. As your work usually is.
Thank you, Tamara.
Just beautiful! Love the color. I have been on a break from painting but this inspires me. I’ll use my new brushes for my comeback!
Thank you, Kathy. 🙂
Your work is always stunning! Appreciate how you share your different methods of achieving the finishes.
My pleasure to share, Carrie. Thank you.
Beautiful! I need to play around with wax someday. You do some cool things with it! I’ve go a chair that needs some love and paint… and maybe wax! : )
You can do it, Becky! 😀
Love seeing all the makeovers
Glad to hear it, Bobye. Thank you.
I purchased a whole set of these a while back, put them up somewhere and to this day still haven’t found them! I need them for some projects I have waiting and some day I might get them done! Love the colors you used on the dresser!
You are a hoot, Shirley!! 😀
I really love what you did for that dresser. First thing I would use the brushes for? My own dresser needs some love and those brushes would sure help.
Thanks! They sure are amazing brushes.
When I saw the first pictures of you painting in the post I thought ‘mmmm, I’m not sure I care for this color’, but after seeing the finished piece all I can say is WOW! So beautiful. I need the brushes so I can try this technique out on an ‘antique’ (meaning 1970s) dresser I have.
Tee hee! So glad you like it. Thank you.
It’s stunning!
Thank you so much, Betty!
Hi Larissa,
So to create texture you used a crumpled up paper bag on the first coat of Vintage, then you used a paper towel to dab at the second coat of antique white that was painted in swirls? I’m trying to get the steps down right to create this exact look on the exact dresser. I just love what you do.
Cheryl
Did you only use 1 coat of each color?
One primer, two Vintage, one beige, and one white. 🙂
Hi Cheryl! 🙂
After my primer and two coats of Vintage, I used a beige color to wash onto the Vintage and then used the brown paper bag to tamp it. After that, I used my Round Brush to add a white in swirling motions, then an old rag to lightly pounce that layer of white. Then, brown wax with my Square Brush to accent. Feel free to email with questions if you have more. Hope this helps and you have fun!